https://github.com/ddozzi/mixin-tutorial
https://github.com/ddozzi/mixin-tutorial
Last synced: about 1 year ago
JSON representation
- Host: GitHub
- URL: https://github.com/ddozzi/mixin-tutorial
- Owner: ddozzi
- Created: 2021-07-21T05:31:26.000Z (almost 5 years ago)
- Default Branch: main
- Last Pushed: 2021-08-29T22:07:50.000Z (almost 5 years ago)
- Last Synced: 2024-08-04T20:52:13.475Z (almost 2 years ago)
- Language: Java
- Size: 42 KB
- Stars: 8
- Watchers: 1
- Forks: 0
- Open Issues: 1
-
Metadata Files:
- Readme: README.md
Awesome Lists containing this project
README
### this tutorial is no longer being maintained!
### for a more up-to-date and in-depth tutorial, check out [my new tutorial!](https://ddozzi.gitbook.io/mixin-tutorial/how-to-make-a-mixin-client/)
### thanks for all the support!
# Mixin Tutorial - INTELLJI
I haven't seen any decent mixin tutorials, so here's one.
## Topics
- Setting up your first mixin project
- Creating your first mixin
## Setup
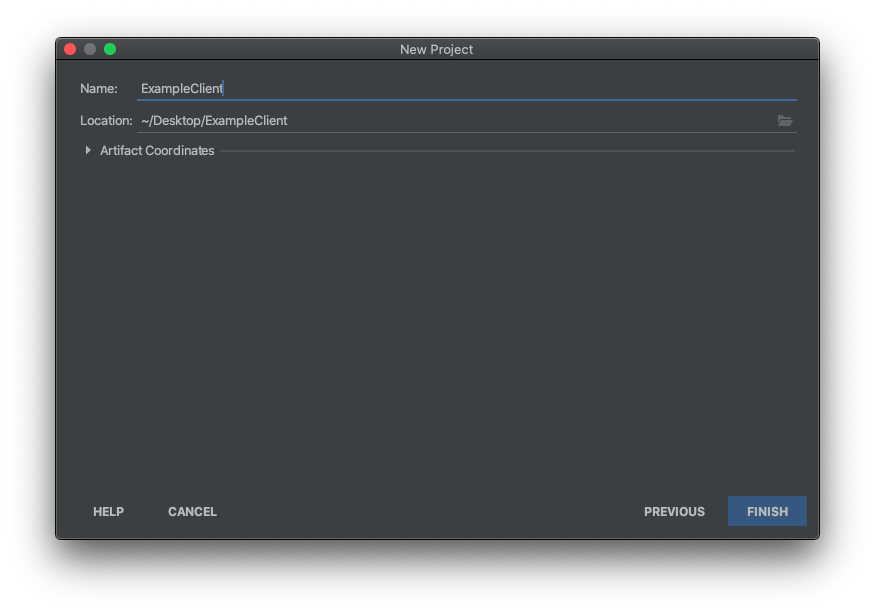
Create a new folder where ever you want your client to be.
Open up IntelliJ. Then click `New Project > Gradle > Next`. Set the `Location` to the folder you just created
Copy and paste the  into your `build.gradle`.
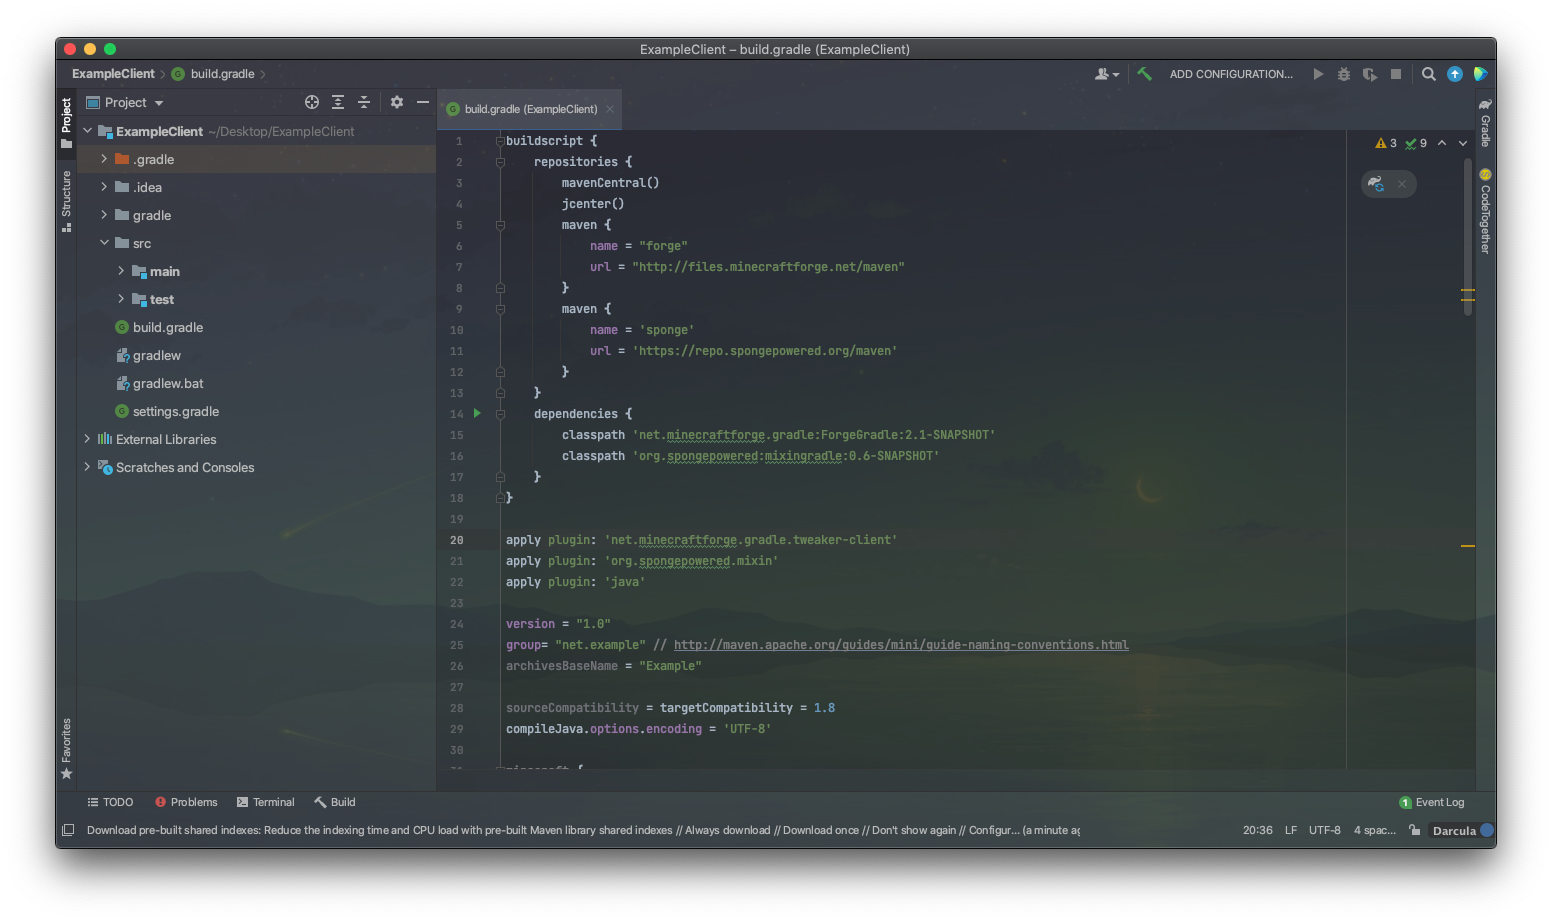
Then click the "Load Gradle Changes" Button on the top right.
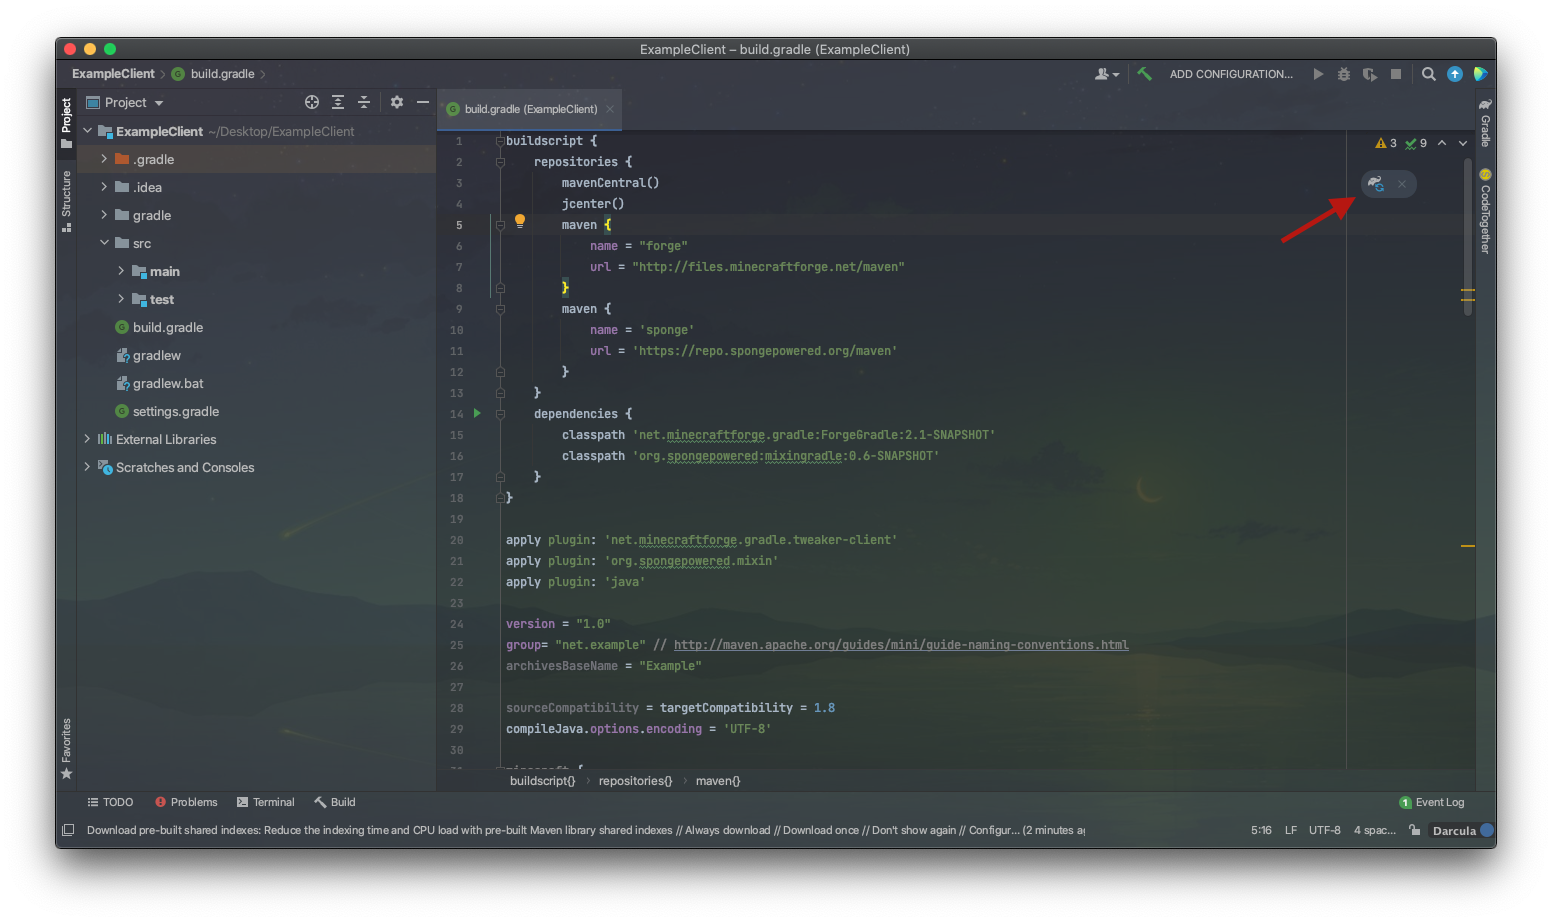
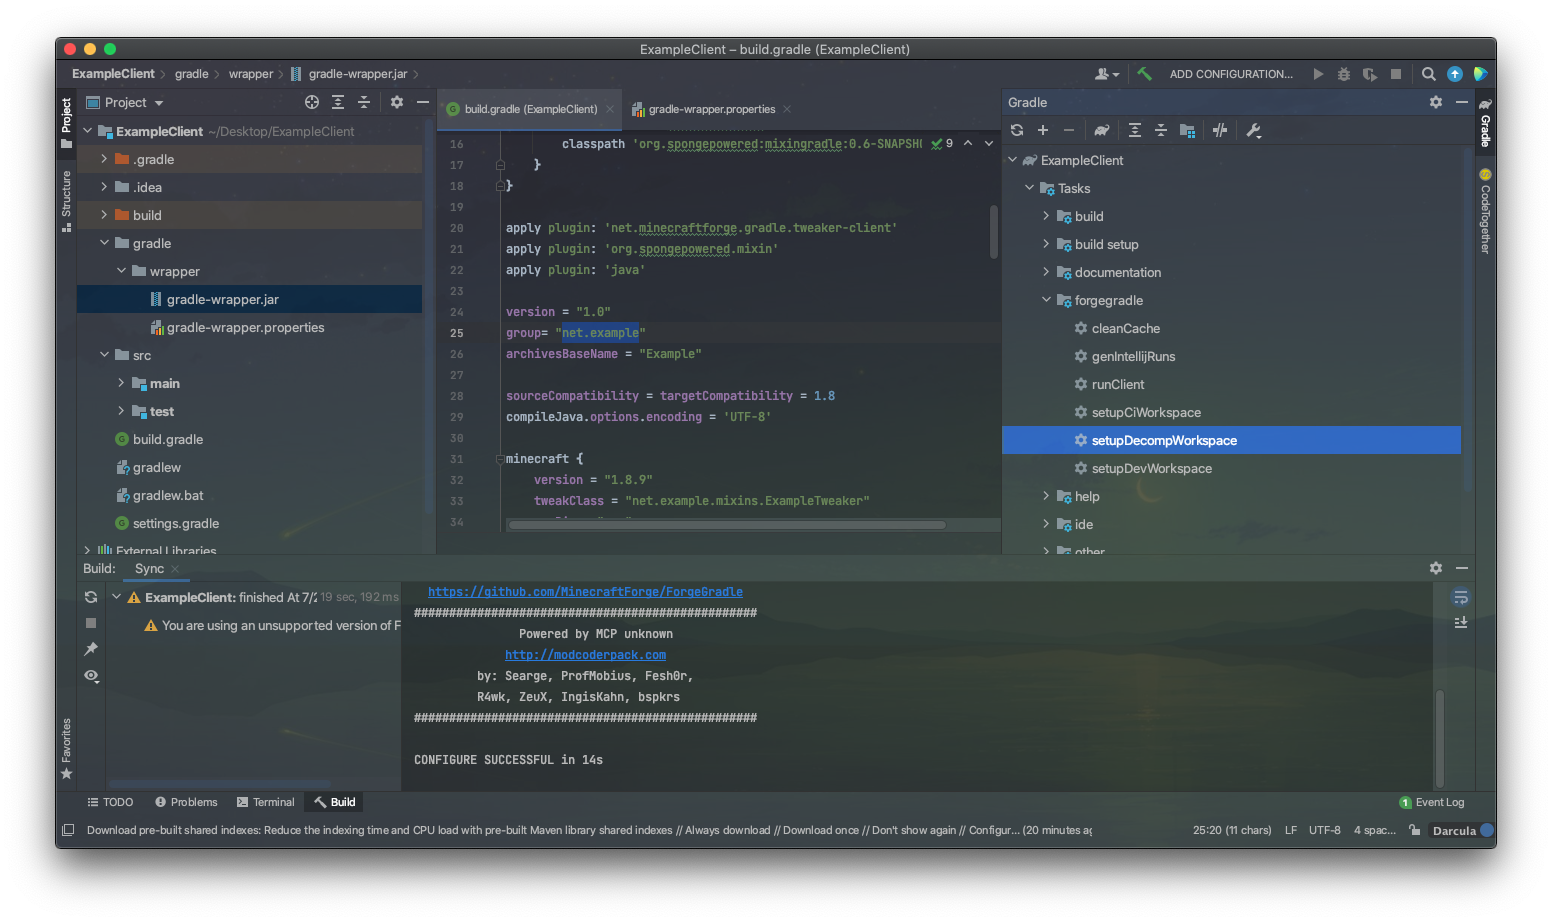
You might be noticing an error popping up in the bottom half, that's totally normal. It's because forgegradle doesn't support newer versions of gradle.

To fix this, go to `gradle > wrapper > gradle-wrapper.properties` then replace whatever version is currently there, with 4.7
https://user-images.githubusercontent.com/69029714/126439227-39686823-fe4f-49fe-bb84-0a86235286c0.mov
Now for the lengthy part. Replace all the "example" strings with your client name. Also replace the "net" packages with whatever fits you. An example is shown below.
**! This MUST be done for all instances. DO NOT CHANGE ANY OF THE "mixin" OR "mixins" strings !**
Once you are done, click the gradle button on the far right. Then click `Tasks > forgegradle > setupDecompWorkspace`. This will take some time.
Once that process is finished, click `Tasks > forgegradle > genIntellijRuns`

Click the button at the top then click `Minecraft Client` An example is shown below.
https://user-images.githubusercontent.com/69029714/126440150-9632bb22-8278-467e-ad86-425d15ffa2ec.mov
Click the same button again, then click `Edit Configurations`. You will see an error saying "Class 'GradleStart not found in module 'ExampleClient'".
To fix this, set the `Client` to `Client.main`.
https://user-images.githubusercontent.com/69029714/126440865-81519283-7a34-4d12-bf6f-ea14ba94192d.mov
Click Apply. The error should be gone now.
## Tweaker
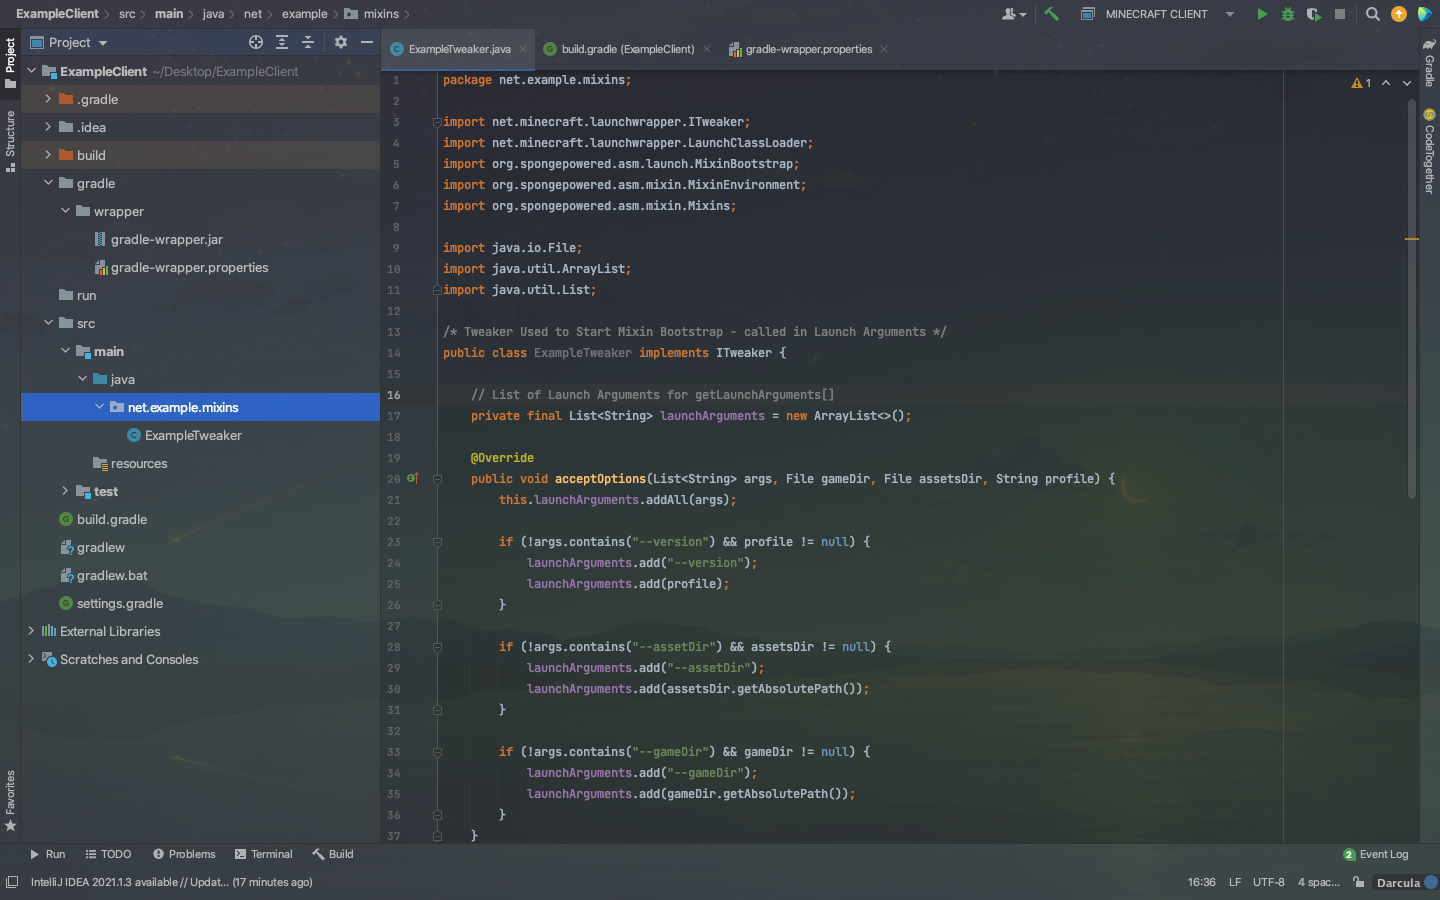
Create a new package in `src/main/java` with the package name you've set in your `build.gradle` in this case, it would be `net.example`
Create a new package named `mixins` inside the previous pacakge then create a new `java` file with whatever you named your tweaker. In this case, it's `ExampleTweaker`.
**Copy the code from this  to yours.**
Replace the `example` at `Mixins.addConfiguration("mixins.example.json");` (inside your tweaker) with your client name or whatever you named your package.
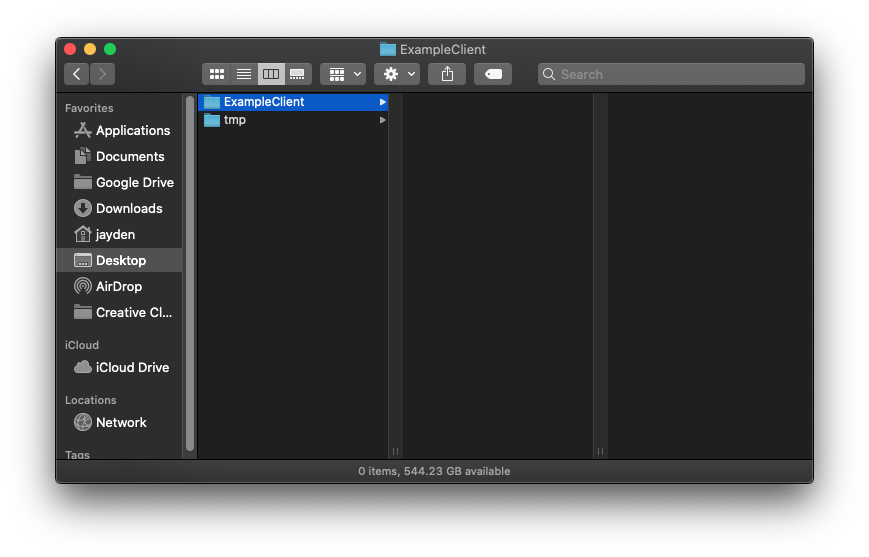
So far, your project should look something like this:
## Mixin Time!
Now it's time to make your first mixin!
Create a new file named whatever was inside your `Mixins.addConfiguration("mixins.example.json");` inside the resource folder.
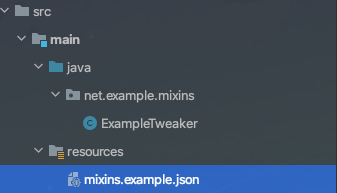
Then, copy the json from  into the json file you just created.
Ok, now it's time to create an actual mixin.
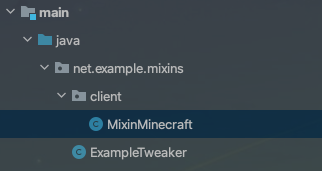
Create a package named `client` inside the package where your tweaker is located.
Then, inside that `client` package, create a java file named `MixinMinecraft`
then add this mixin code:
```java
@Mixin(Minecraft.class)
public class MixinMinecraft {
@Inject(method = "createDisplay", at = @At("RETURN"))
public void createDisplay(CallbackInfo callbackInfo) {
Display.setTitle("Example Client | 1.8.9");
}
}
```
Congrats! You've made a mixin client for 1.8.9! For more guidance, join the spongepowered  and check out this 
**Having issues? Feel free to contact me on discord (ddozzi#6190), the code is also available **