https://github.com/deniedaccesslife/arduinostrike
Program for controlling recoil in the game Counter-Strike 2 using an Arduino Leonardo.
https://github.com/deniedaccesslife/arduinostrike
ahk ahk-script antirecoil arduino arduino-leonardo arduino-sketch autohotkey counter-strike counter-strike-2 counter-strike-global-offensive cs2 cs2ahk leonardo macro macros rcs recoil recoil-control recoil-control-system recoil-macro
Last synced: 2 months ago
JSON representation
Program for controlling recoil in the game Counter-Strike 2 using an Arduino Leonardo.
- Host: GitHub
- URL: https://github.com/deniedaccesslife/arduinostrike
- Owner: DeniedAccessLife
- License: gpl-3.0
- Created: 2023-10-31T18:48:30.000Z (over 2 years ago)
- Default Branch: main
- Last Pushed: 2025-04-02T20:51:16.000Z (about 1 year ago)
- Last Synced: 2025-04-09T15:18:32.864Z (about 1 year ago)
- Topics: ahk, ahk-script, antirecoil, arduino, arduino-leonardo, arduino-sketch, autohotkey, counter-strike, counter-strike-2, counter-strike-global-offensive, cs2, cs2ahk, leonardo, macro, macros, rcs, recoil, recoil-control, recoil-control-system, recoil-macro
- Language: C++
- Homepage:
- Size: 62.4 MB
- Stars: 17
- Watchers: 5
- Forks: 3
- Open Issues: 3
-
Metadata Files:
- Readme: README.md
- License: LICENSE
Awesome Lists containing this project
README
# ArduinoStrike
**ArduinoStrike** is a program designed to control the recoil of weapons in **Counter-Strike 2** using **Arduino Leonardo** or any other compatible board. This tool simulates mouse movements for recoil control, implements rapid fire for semi-automatic weapons and adds bunny hop functionality. The software does not interact with the game client in any way, which makes it difficult to be detected by anti-cheat.
# Table of Contents
- [Introduction](#arduinostrike)
- [Key Features](#key-features)
- [Getting Started](#getting-started)
- [Requirements](#requirements)
- [Installation](#installation)
- [Configuration](#configuration)
- [View](#view)
- [Contributing](#contributing)
- [License](#license)
# Key Features
| Feature | Description |
|-------------------|--------------------------------------------------------------------------------|
| **Bhop** | Automatically jumps while holding spacebar, improving movement speed. |
| **ColorBot** | Detects color changes when aiming and fires instantly without delay. |
| **RapidFire** | Increases the fire rate of semi-automatic weapons for faster shooting. |
| **FastReload** | Speeds up reloading in certain situations, allowing faster combat readiness. |
| **AutoAccept** | Automatically accepts match requests when the button appears on the screen. |
| **RecoilControl** | Reduces recoil by simulating controlled mouse movements for better accuracy. |
## Additional Details
- **Note:** To enable the bhop feature, enter the command `bind mwheeldown +jump` in the game console.
- **Important:** ArduinoStrike does not require a **USB Host Shield** - the board connects to a PC via USB and works as an HID device.
# Getting Started
## Requirements
- **Software**: Arduino IDE or PlatformIO, Counter-Strike 2
- **Hardware**: Arduino Leonardo (or compatible board with native USB HID support)
## Installation
### Option 1: Using PlatformIO (Recommended)
1. **Clone the Repository**
```bash
git clone https://github.com/DeniedAccessLife/ArduinoStrike.git
cd ArduinoStrike
```
2. **Upload the Firmware**
- Navigate to the `PlatformIO` folder:
```bash
cd PlatformIO
```
- Run the `upload.bat` script for Windows.
- The script will automatically compile and upload the firmware to your connected Arduino board.
- Ensure the correct board and port are specified in the `platformio.ini` file.
3. **Adding Support for Custom HID-Compatible Boards**
- If you plan to use a custom board with HID emulation, update the `platformio.ini` file located in the `PlatformIO` folder with the appropriate configurations for your board.
- Modify the `upload.bat` script in the same folder to support additional options.
-----------------------------------------------------------------------------------------------------------------------------------------------------------------------------
### Option 2: Using Arduino IDE
1. **Clone the Repository**
```bash
git clone https://github.com/DeniedAccessLife/ArduinoStrike.git
cd ArduinoStrike
```
2. **Locate the Sketch File**
- The sketch file is located in the `PlatformIO/src` folder as `ArduinoStrike.cpp`.
3. **Convert the Sketch for Arduino IDE**
- Rename `ArduinoStrike.cpp` to `ArduinoStrike.ino`.
- Create a new folder named `ArduinoStrike` in the `Arduino` projects directory on your system.
- Move the renamed file into the newly created `ArduinoStrike` folder.
4. **Open the Project in Arduino IDE**
- Launch the Arduino IDE and open the newly created `ArduinoStrike.ino` file.
5. **Connect and Configure Arduino**
- Connect your Arduino board to your computer.
- In the Arduino IDE, select the appropriate **Board** (e.g., `Arduino Leonardo`) and **Port**.
6. **Upload the Firmware**
- Click the **Upload** button to flash the firmware onto your board.
# Configuration
On first launch, an interactive setup wizard will guide you through feature selection, sensitivity settings, and key bindings. Your preferences will be saved in `Config.json`.
## Feature Selection
You will be asked whether to enable the following features:
| Feature | Description | Options |
|--------------|-------------|---------|
| **Bunny Hop** | Auto-jumps while holding spacebar for better movement. | `Y` (enable) / `N` (disable) |
| **Rapid Fire** | Increases the fire rate of semi-automatic weapons. | `Y` (enable) / `N` (disable) |
| **Fast Reload** | Reduces reload time for faster weapon switching. | `Y` (enable) / `N` (disable) |
## Parameter Settings
You will set the following parameters:
| Setting | Description | Range | Example |
|--------------------|-------------|--------|---------|
| **Sensitivity** | Controls general mouse movement speed. | `1` (slow) to `8` (fast) | `8` |
| **Zoom Sensitivity** | Adjusts sensitivity when aiming down sights. | `0.01` (low) to `3.00` (high) | `1.00` |
| **ColorBot Threshold** | Determines color variation tolerance for ColorBot activation. Lower values are stricter. | `0` (exact match) to `20` (high tolerance) | `20` |
## Key Bindings
You can assign keys to specific actions. Press the desired key when prompted, or `ESC` to disable the hotkey.
| Action | Description | Type |
|--------|-------------|------|
| **Recoil Control Confirmation** | Confirms activation of recoil control while held. | **Hold** |
| **ColorBot** | Activates ColorBot only while the key is held down. | **Hold** |
| **AutoAccept** | Toggles automatic match acceptance on/off. | **Toggle** |
| **Weapons** | Assign keys for different weapons (UMP-45, M4A1-S, M4A4, etc.). | **Press** |
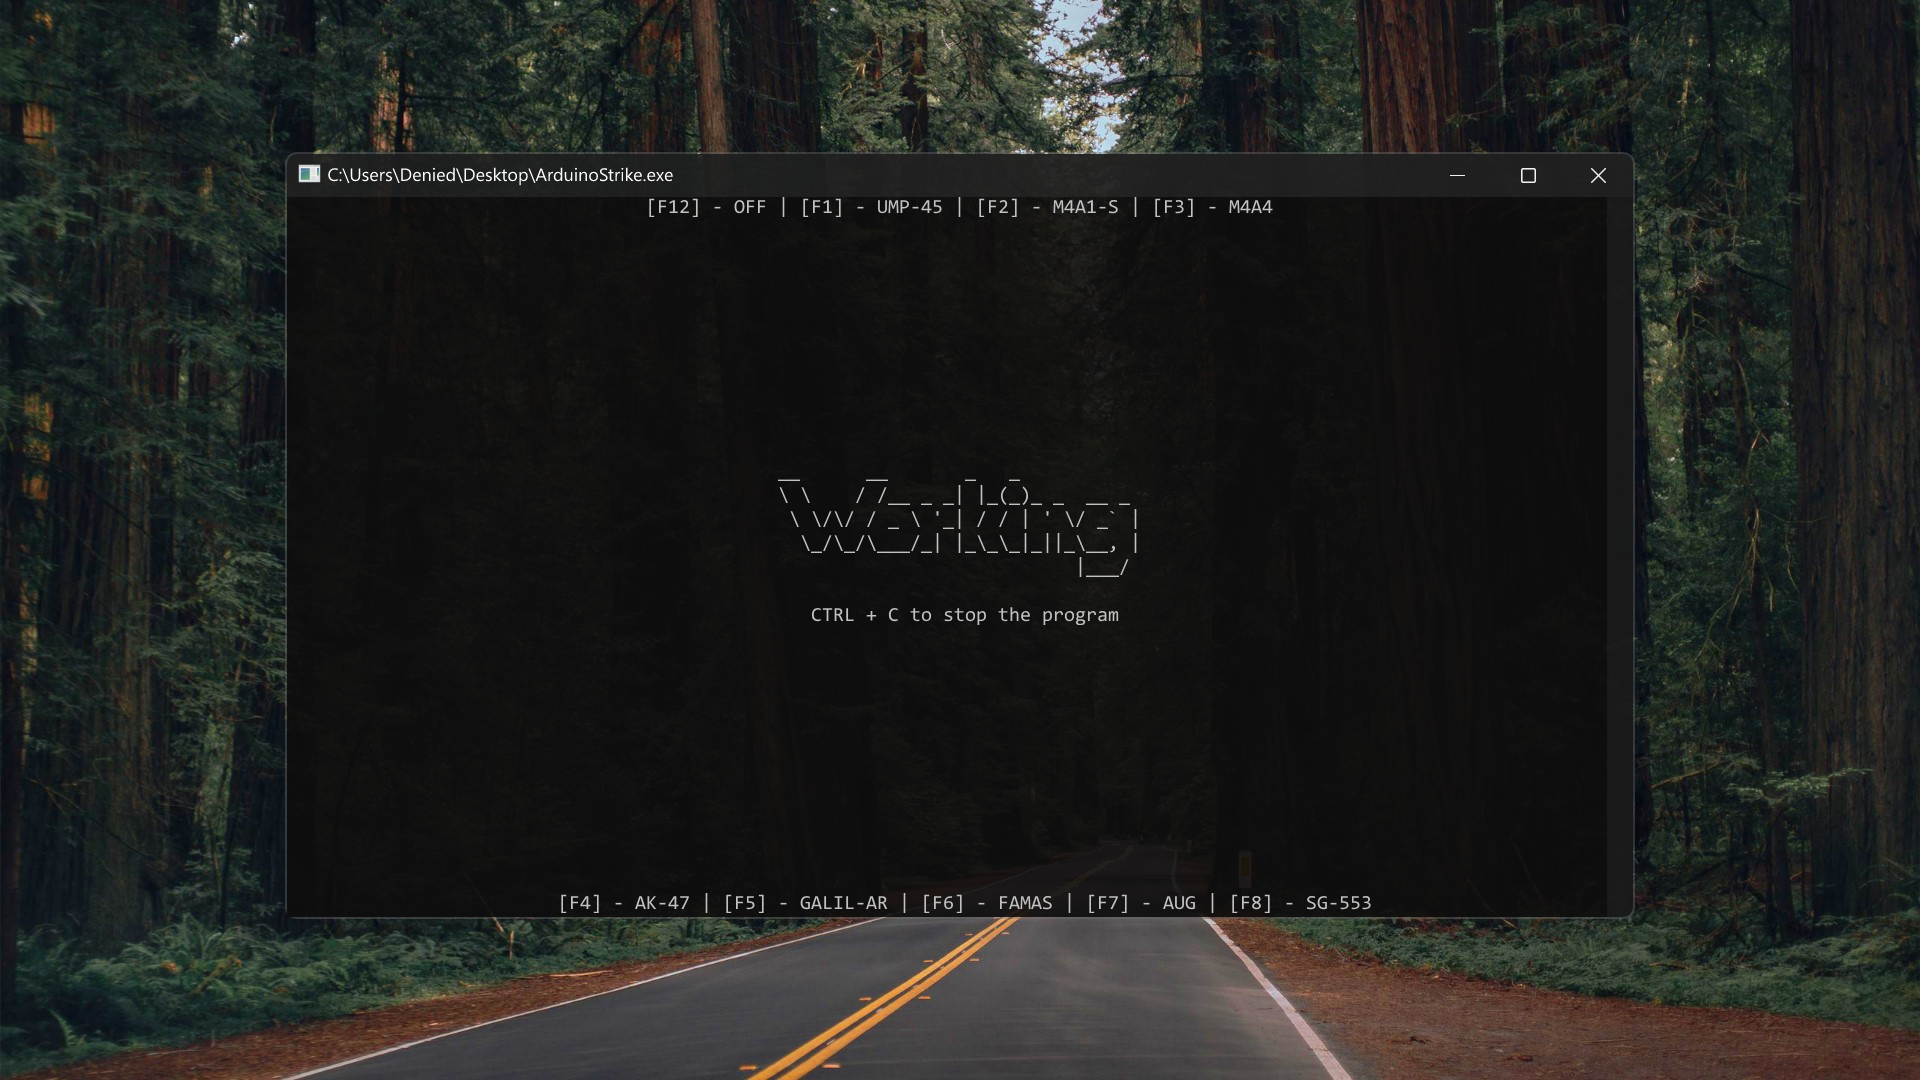
# View
Window of the program.
# Contributing
If you want to contribute to this project:
- Request enhancements
- Report bugs and errors
- Create issues and pull requests
- Spread the word about this project
Please read [CONTRIBUTING](CONTRIBUTING.md) for details on our code of conduct and the process for submitting pull requests.
# License
This project is licensed under the GNU License - see the [LICENSE](LICENSE) file for details.