https://github.com/dev-ruby/discordrainbowrole
Discord Role Color Changer
https://github.com/dev-ruby/discordrainbowrole
discord discord-bot discord-py discordbot
Last synced: 3 months ago
JSON representation
Discord Role Color Changer
- Host: GitHub
- URL: https://github.com/dev-ruby/discordrainbowrole
- Owner: dev-ruby
- License: gpl-3.0
- Created: 2023-03-14T12:03:30.000Z (over 3 years ago)
- Default Branch: main
- Last Pushed: 2023-03-15T08:27:31.000Z (over 3 years ago)
- Last Synced: 2025-10-05T09:57:28.522Z (9 months ago)
- Topics: discord, discord-bot, discord-py, discordbot
- Language: Python
- Homepage:
- Size: 11.3 MB
- Stars: 0
- Watchers: 1
- Forks: 0
- Open Issues: 0
-
Metadata Files:
- Readme: README.md
- License: LICENSE
Awesome Lists containing this project
README
# DiscordRainbowRole


DiscordRainbowRole은 디스코드 서버 내 역할의 색깔을 바꾸는 봇입니다.
[다운로드 1.0.0v](https://github.com/dev-ruby/DiscordRainbowRole/releases/tag/1.0.0)
# 사용법
## 목차
[1. 봇 생성](#1-봇-생성)
[2. 역할 ID 복사하기](#2-역할-id-복사하기)
[3. Config.json 수정](#3-configjson-수정)
## 1. 봇 생성
[디스코드 개발자 포탈](https://discord.com/developers/applications) 로 이동해 새 어플리케이션을 생성합니다.
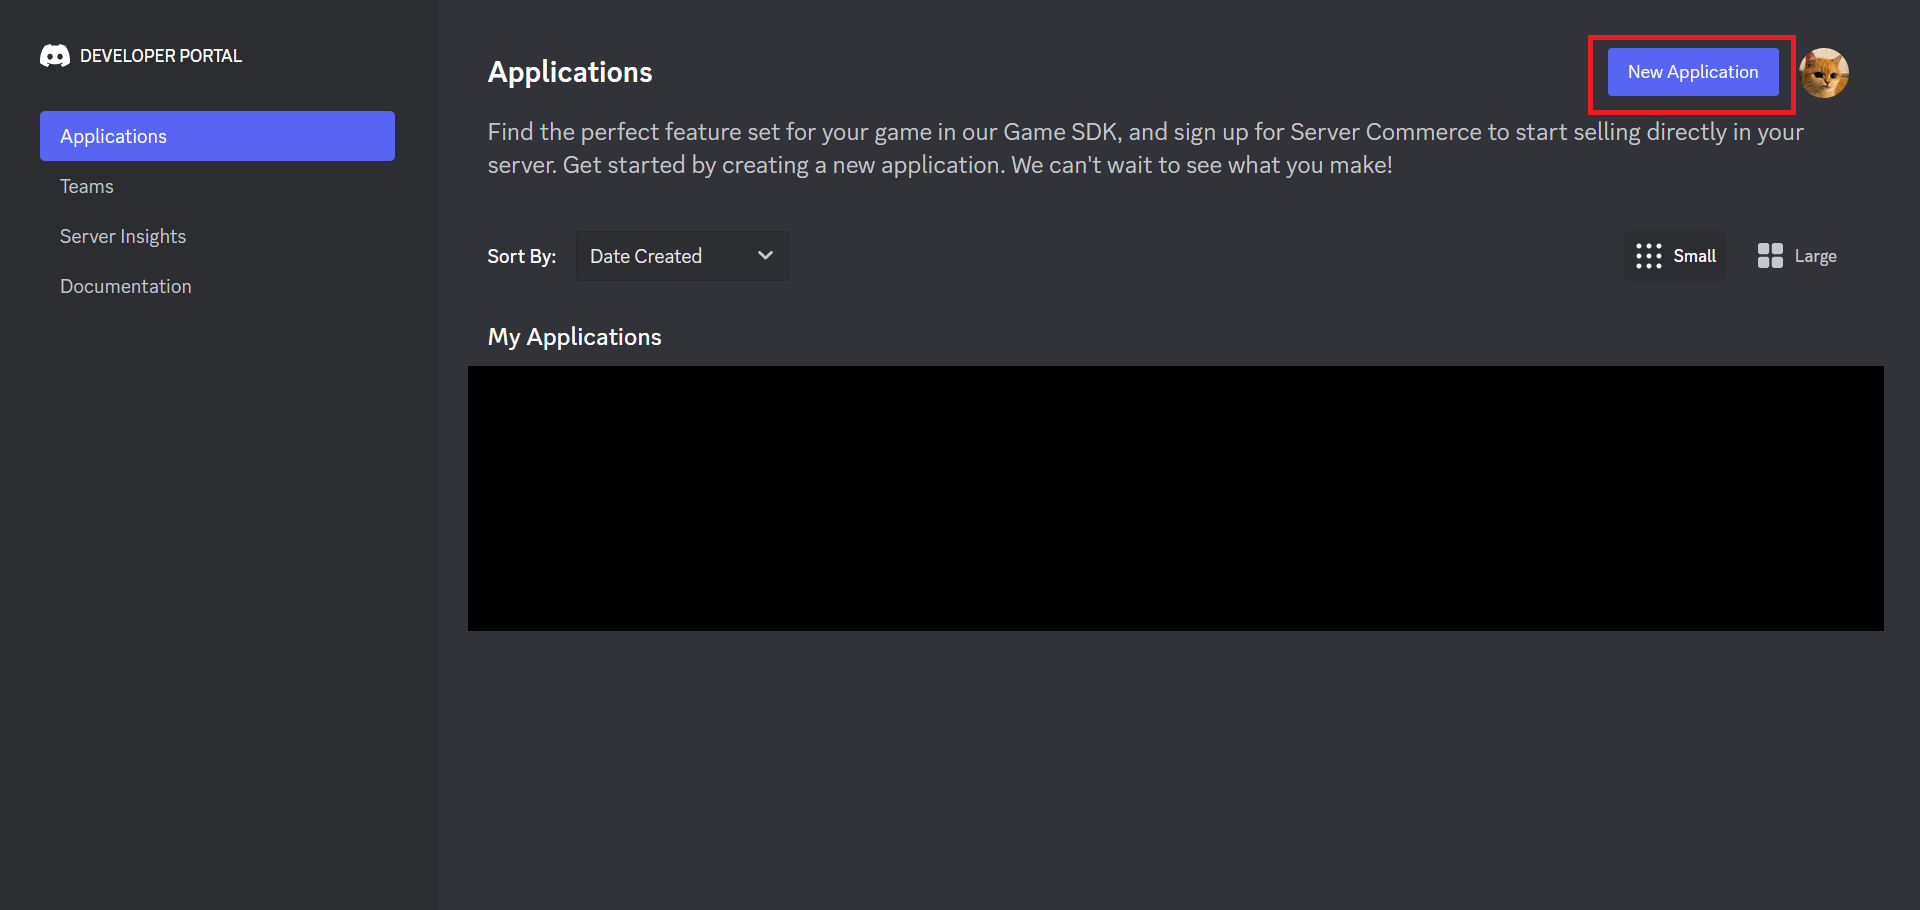
앱 이름은 상관 없고, 이용약관 동의에 체크합니다

어플리케이션이 만들어진 모습입니다.
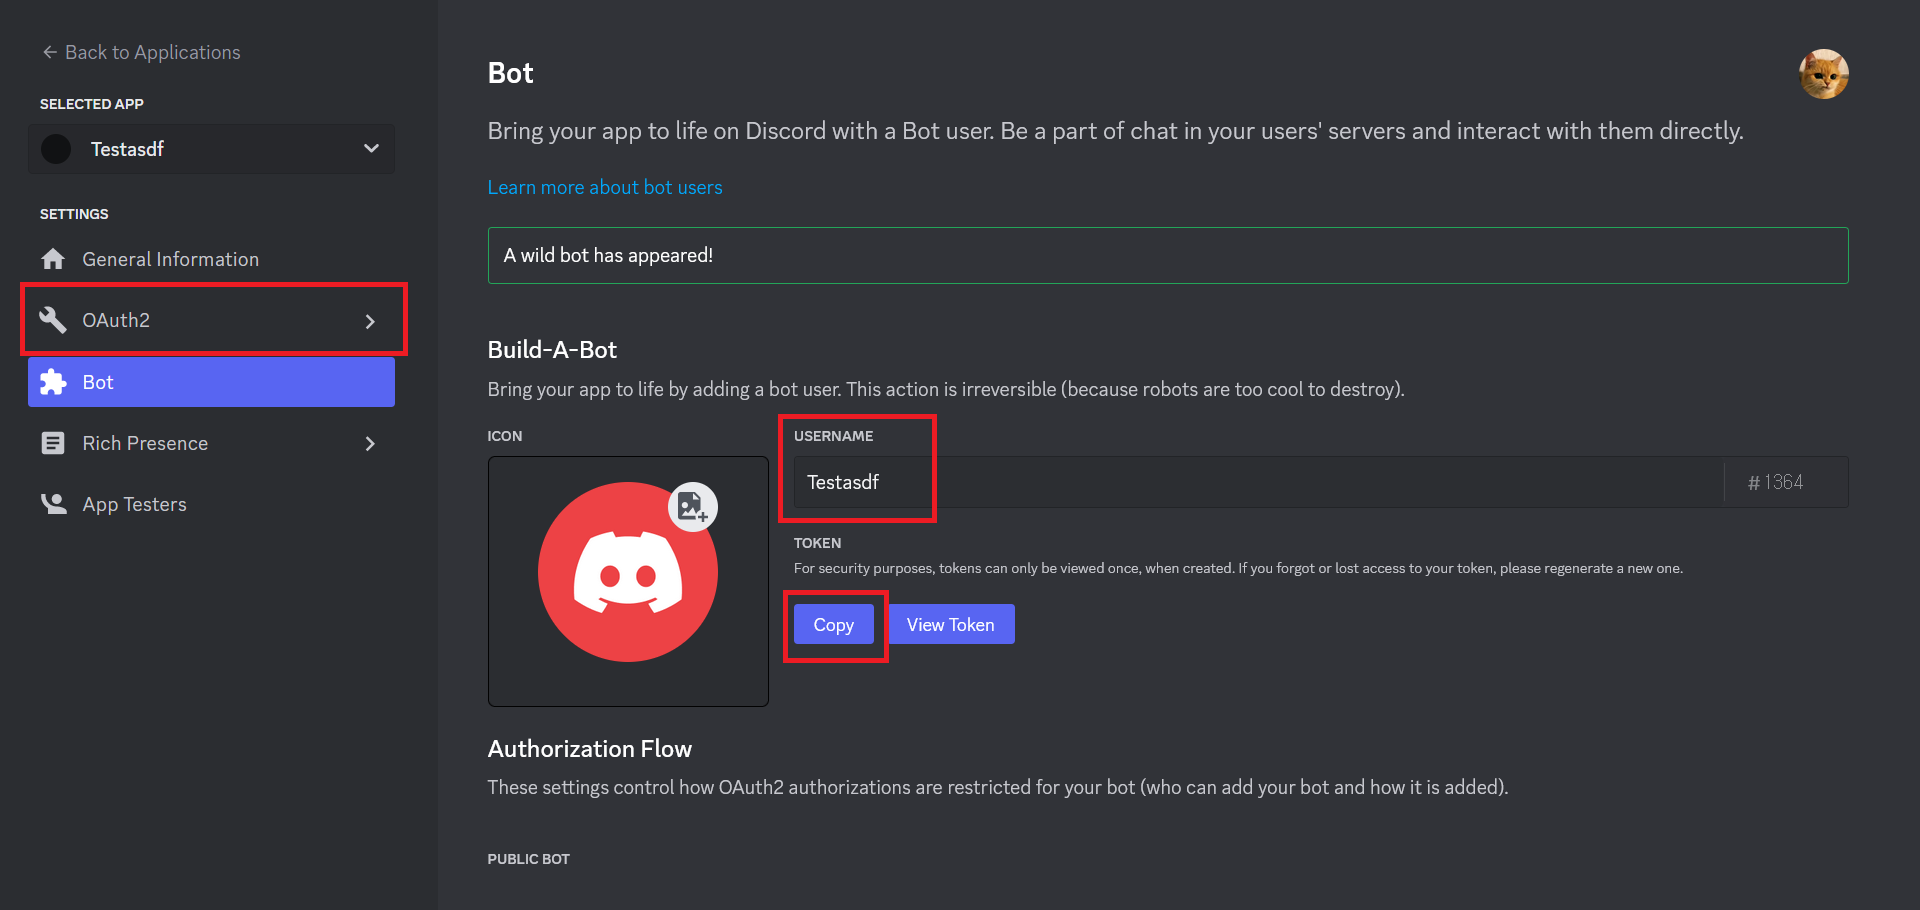
좌측의 Bot 탭으로 이동합니다.
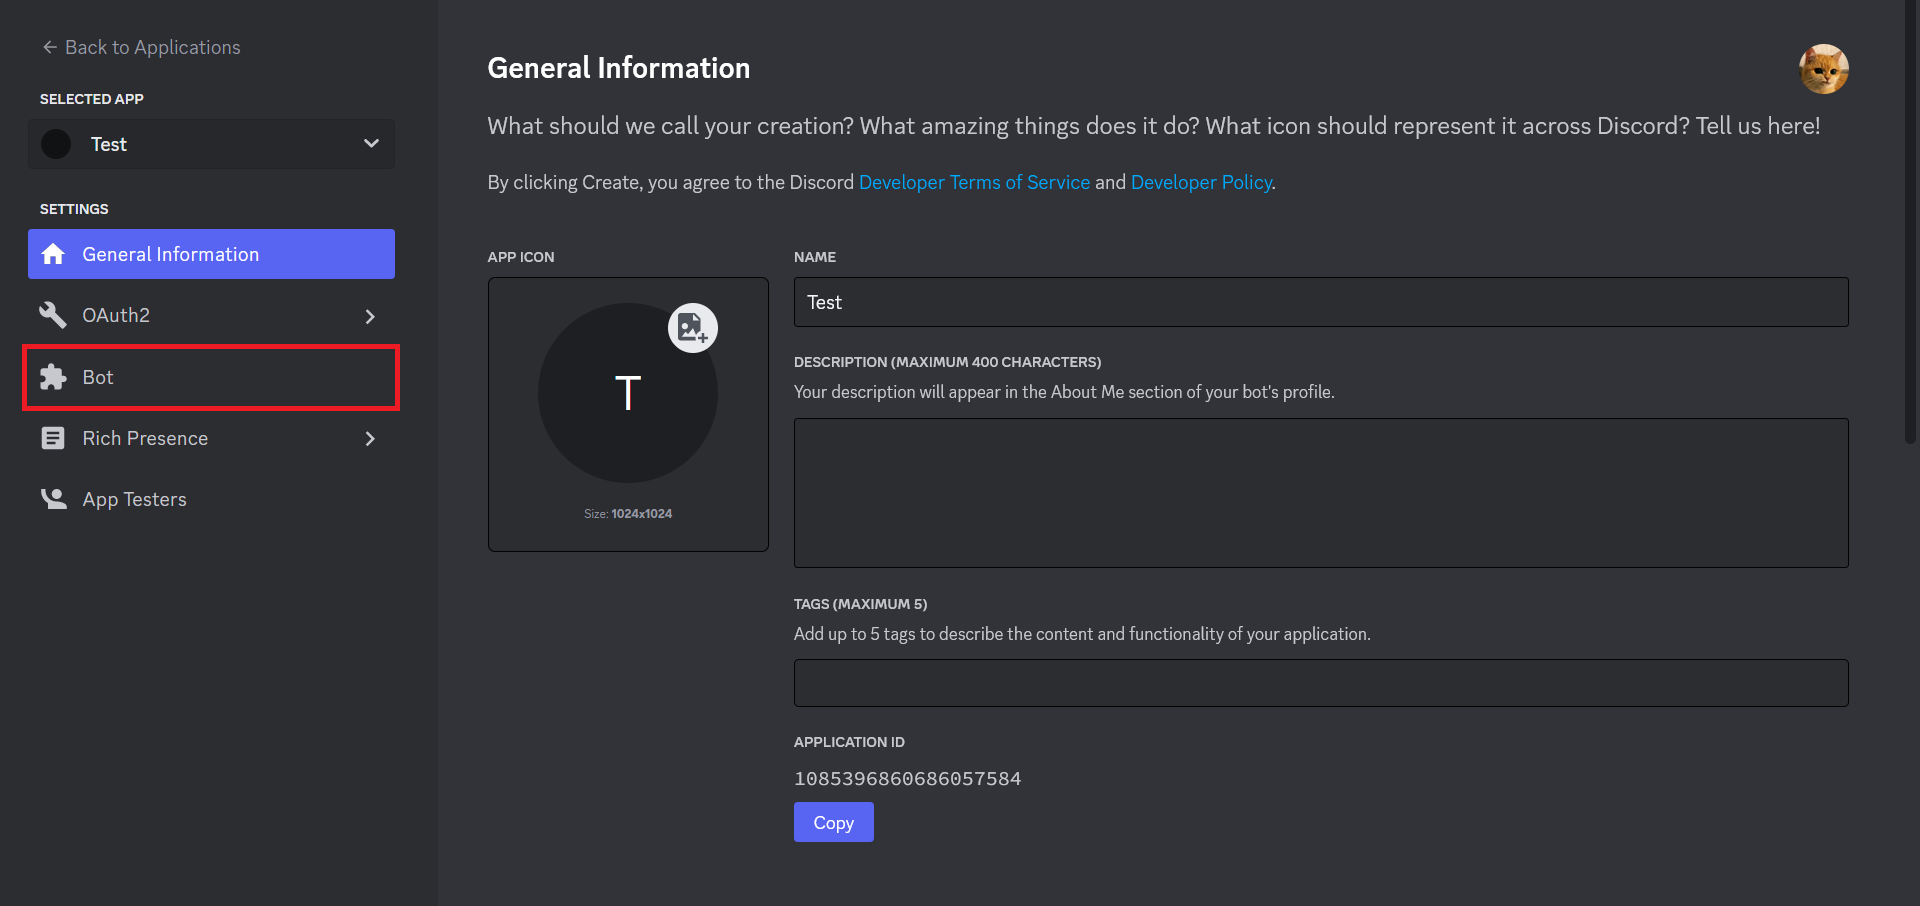
Add Bot 버튼을 눌러 봇을 생성합니다.
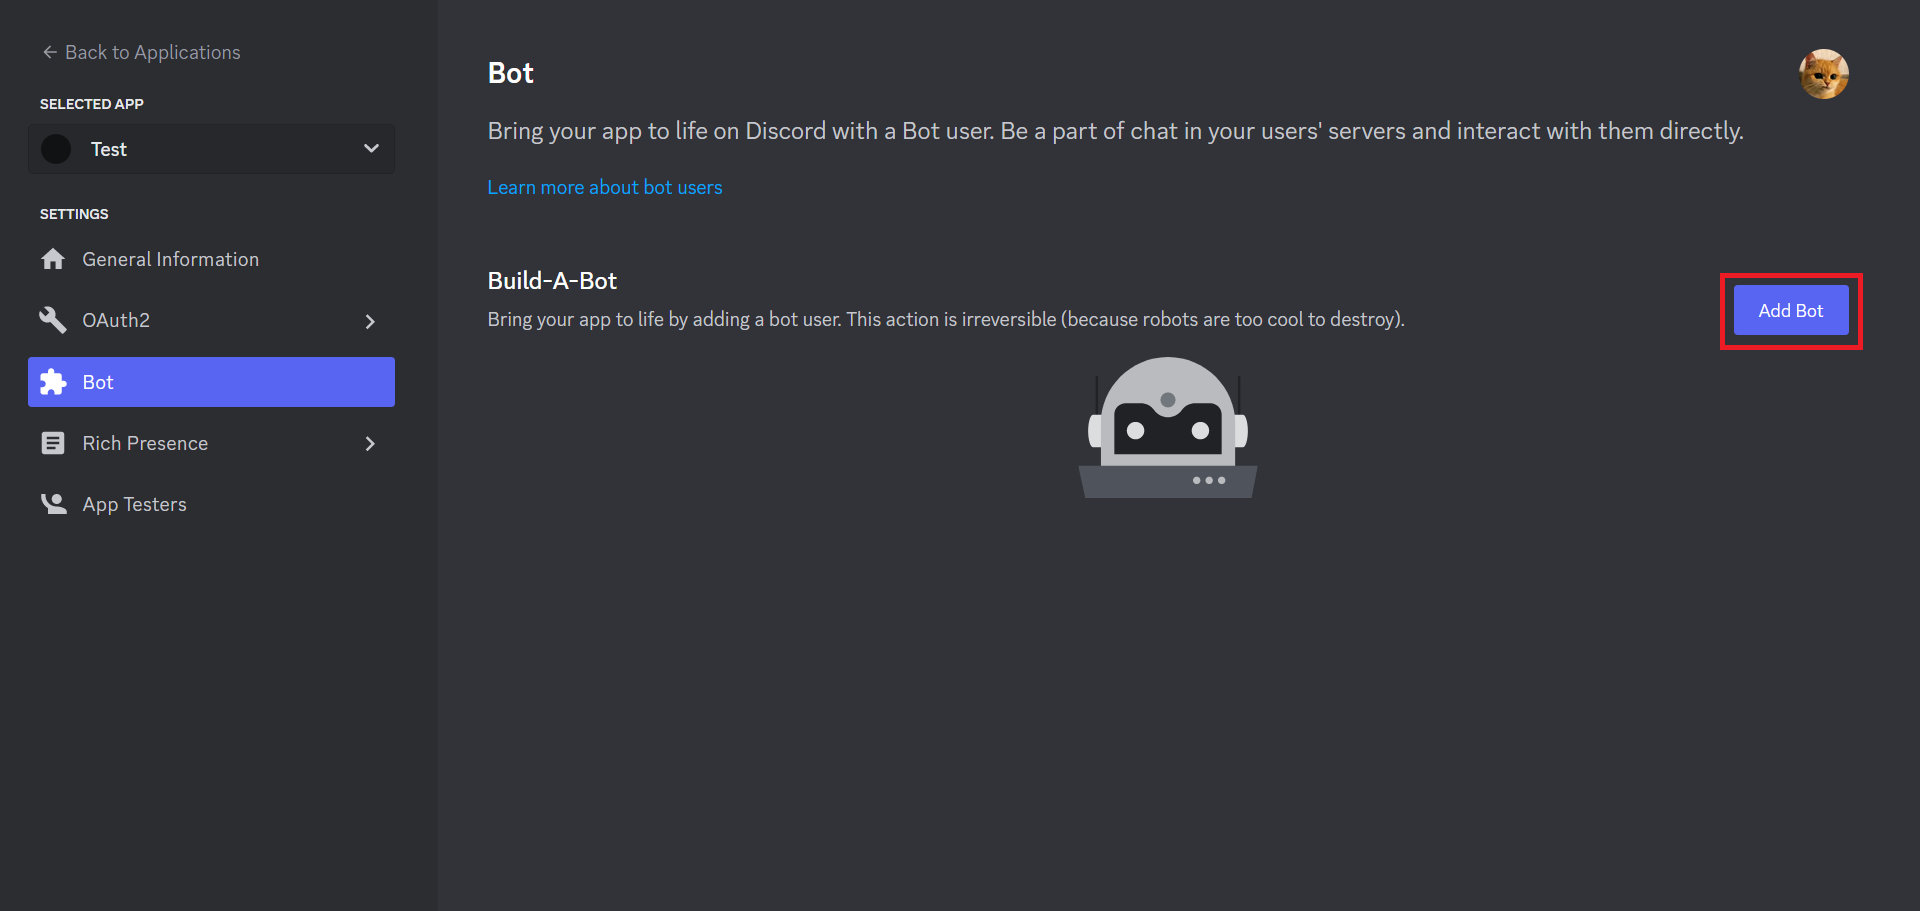
이곳에서 봇의 이름을 설정할 수 있습니다.
봇의 토큰을 복사해줍니다.
좌측의 OAuth2 탭으로 이동합니다.
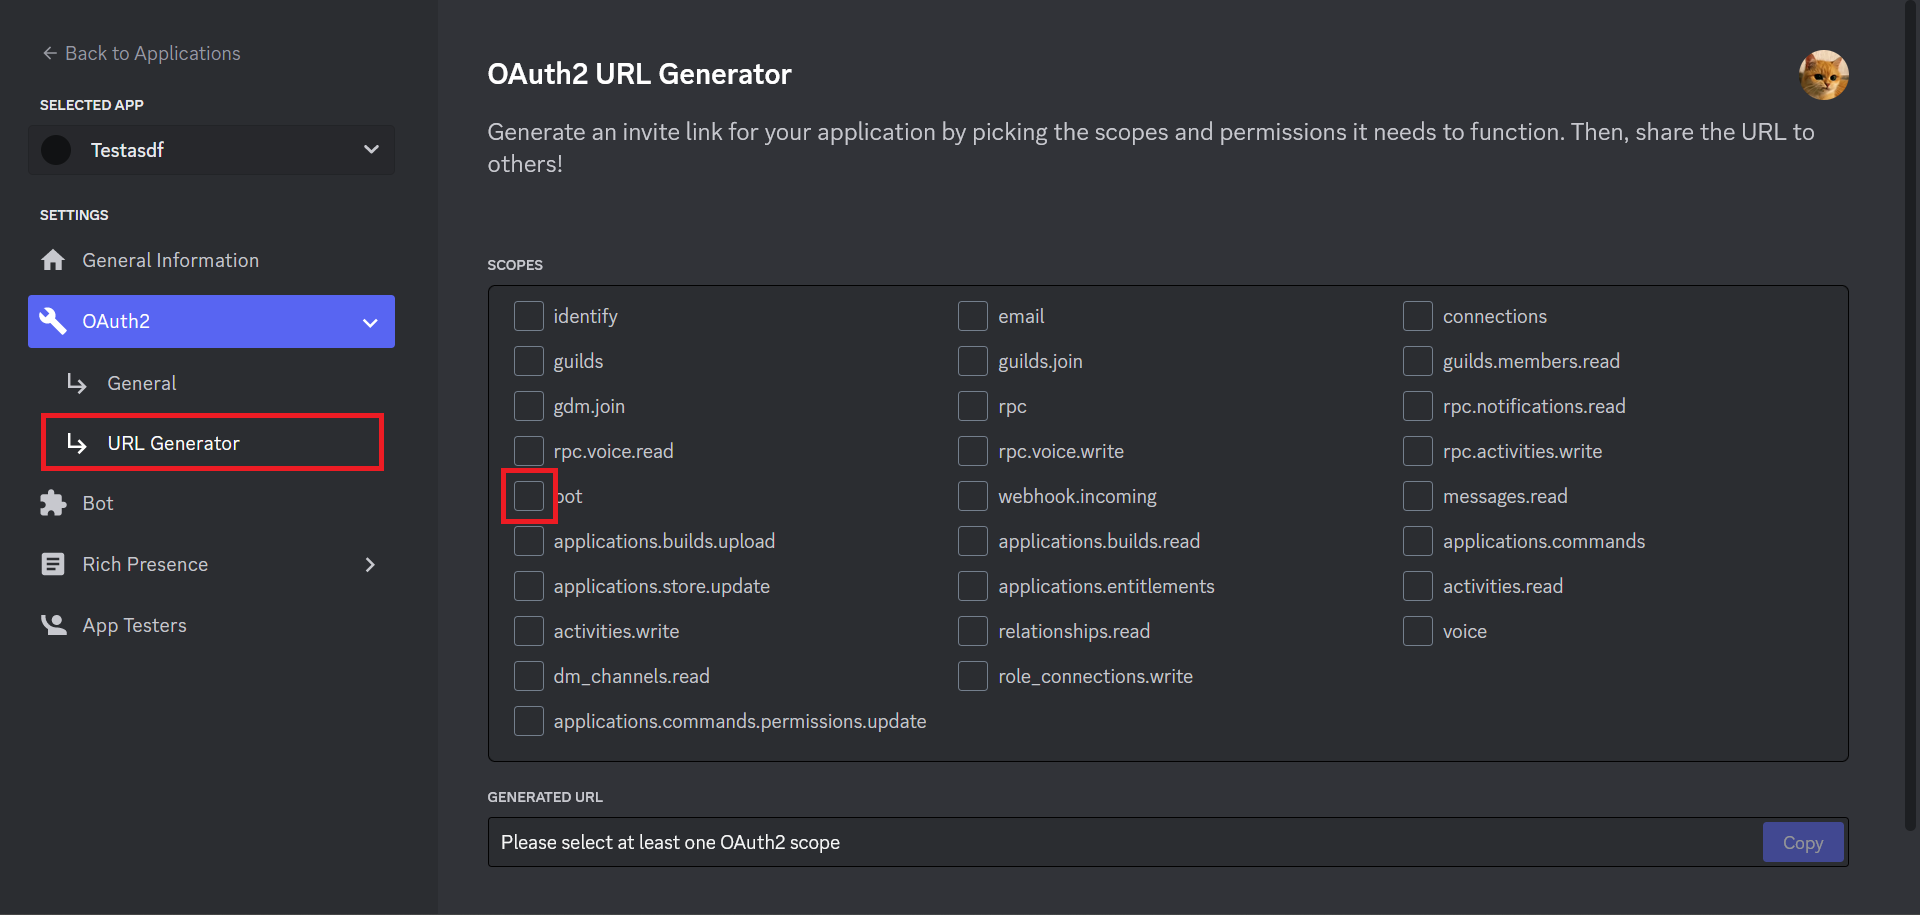
URL Generator 탭으로 이동하고, SCOPES 탭의 bot을 체크합니다.
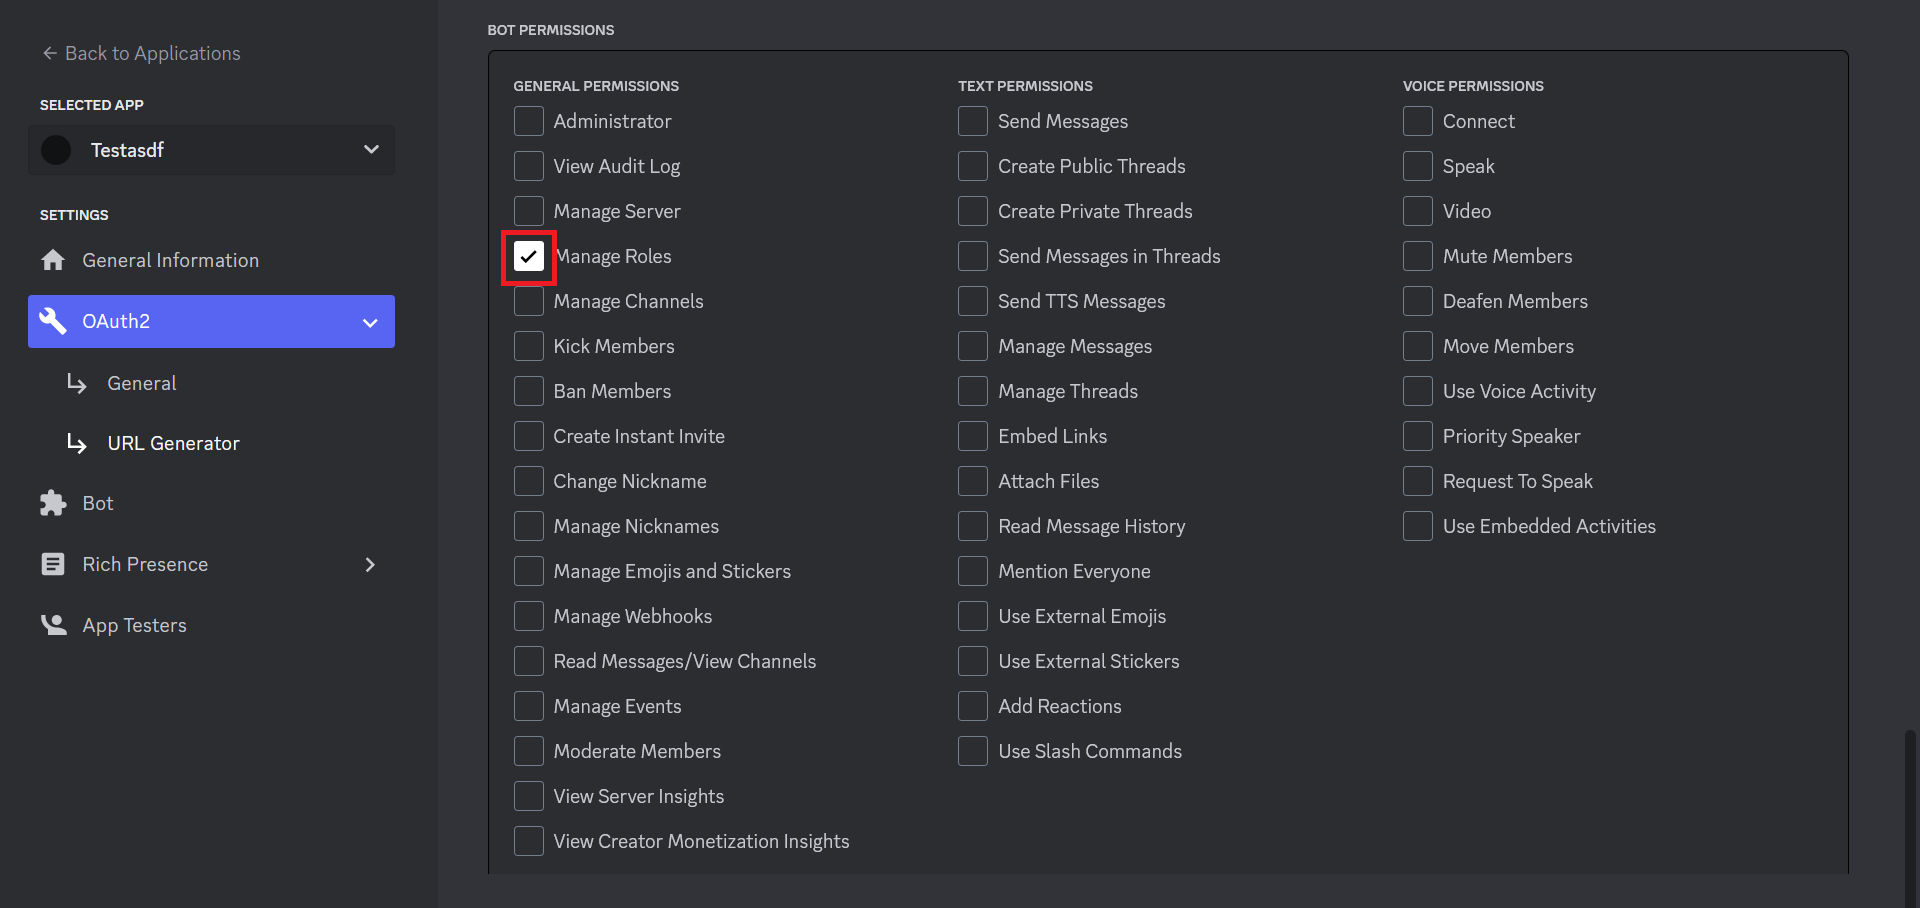
BOT PERMISSIONS에서 Manage Roles를 체크하고 아래의 GENERATED URL 탭에서 초대 링크를 복사하고 초대해줍니다.
## 2. 역할 ID 복사하기
디스코드 내 설정 -> 고급 탭으로 이동합니다.
개발자 모드를 키면 역할에 우클릭을 할 시 `ID 복사하기` 버튼이 뜹니다.
## 3. config.json 수정
```json
{
"TOKEN" : "",
"RoleID" : 0,
"ChangeDelay" : 0
}
```
프로그램 폴더 내의 config.json 파일을 수정해야 합니다.
`"TOKEN" : ""` 의 "" 안에 봇의 토큰값을 넣습니다.
`"RoleID" : 0` 의 0을 역할 ID로 변경합니다.
`"ChangeDelay" : 0` 의 0을 색깔이 바뀌는데 소요될 시간으로 바꿉니다. (단위: 초)
## 4. 실행
main.exe 파일을 실행시키면 봇이 작동합니다.