https://github.com/devanshbatham/headerpwn
A fuzzer for finding anomalies and analyzing how servers respond to different HTTP headers
https://github.com/devanshbatham/headerpwn
Last synced: 9 months ago
JSON representation
A fuzzer for finding anomalies and analyzing how servers respond to different HTTP headers
- Host: GitHub
- URL: https://github.com/devanshbatham/headerpwn
- Owner: devanshbatham
- License: mit
- Created: 2023-08-19T11:06:31.000Z (over 2 years ago)
- Default Branch: main
- Last Pushed: 2023-12-14T05:03:19.000Z (about 2 years ago)
- Last Synced: 2025-03-31T04:06:39.895Z (9 months ago)
- Language: Go
- Homepage:
- Size: 1.26 MB
- Stars: 332
- Watchers: 5
- Forks: 38
- Open Issues: 5
-
Metadata Files:
- Readme: README.md
- License: LICENSE
Awesome Lists containing this project
- WebHackersWeapons - headerpwn
- awesome-rainmana - devanshbatham/headerpwn - A fuzzer for finding anomalies and analyzing how servers respond to different HTTP headers (Go)
README
headerpwn
A fuzzer for analyzing how servers respond to different HTTP headers.
🏗️ Install
⛏️ Usage
📡 Proxying HTTP Requests

# Install
To install `headerpwn`, run the following command:
```
go install github.com/devanshbatham/headerpwn@v0.0.3
```
# Usage
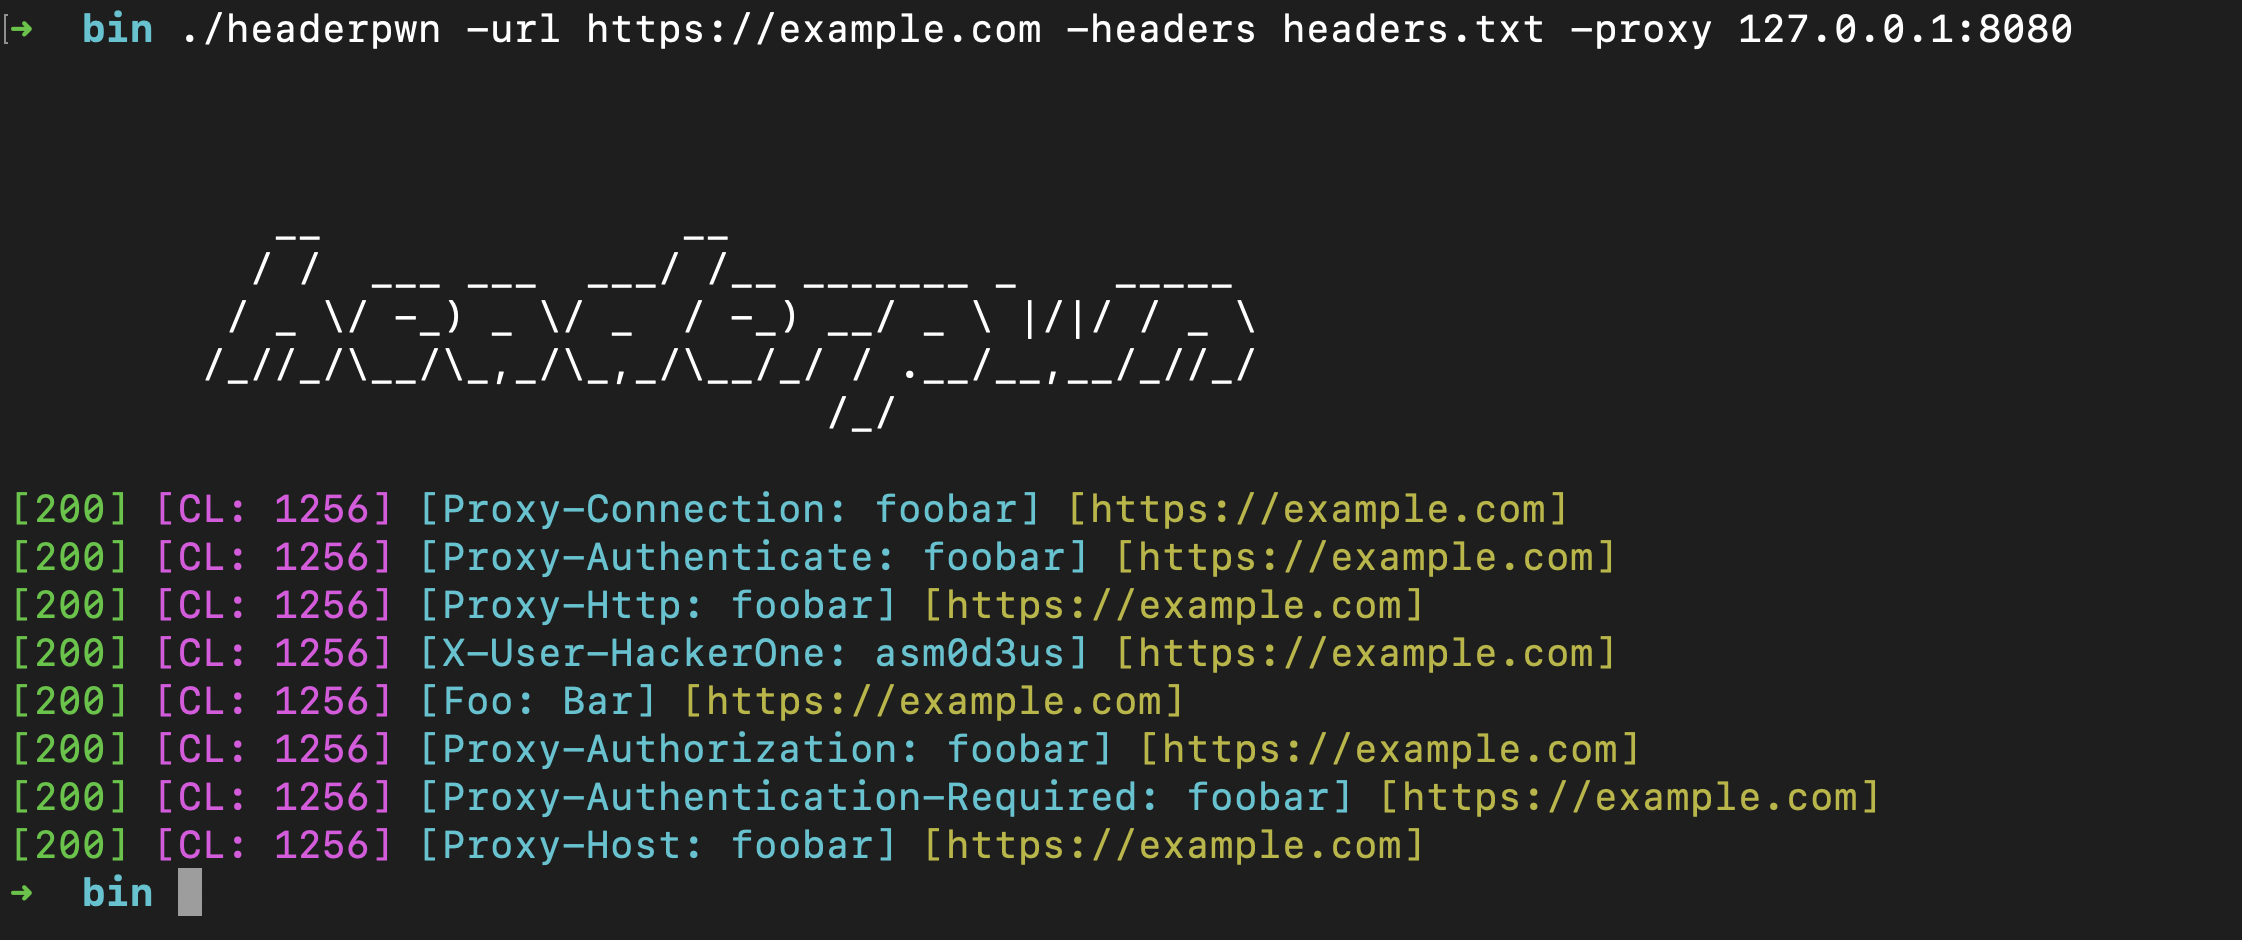
headerpwn allows you to test various headers on a target URL and analyze the responses. Here's how to use the tool:
1. Provide the target URL using the `-url` flag.
2. Create a file containing the headers you want to test, one header per line. Use the `-headers` flag to specify the path to this file.
Example usage:
```sh
headerpwn -url https://example.com -headers my_headers.txt
```
- Format of `my_headers.txt` should be like below:
```sh
Proxy-Authenticate: foobar
Proxy-Authentication-Required: foobar
Proxy-Authorization: foobar
Proxy-Connection: foobar
Proxy-Host: foobar
Proxy-Http: foobar
```
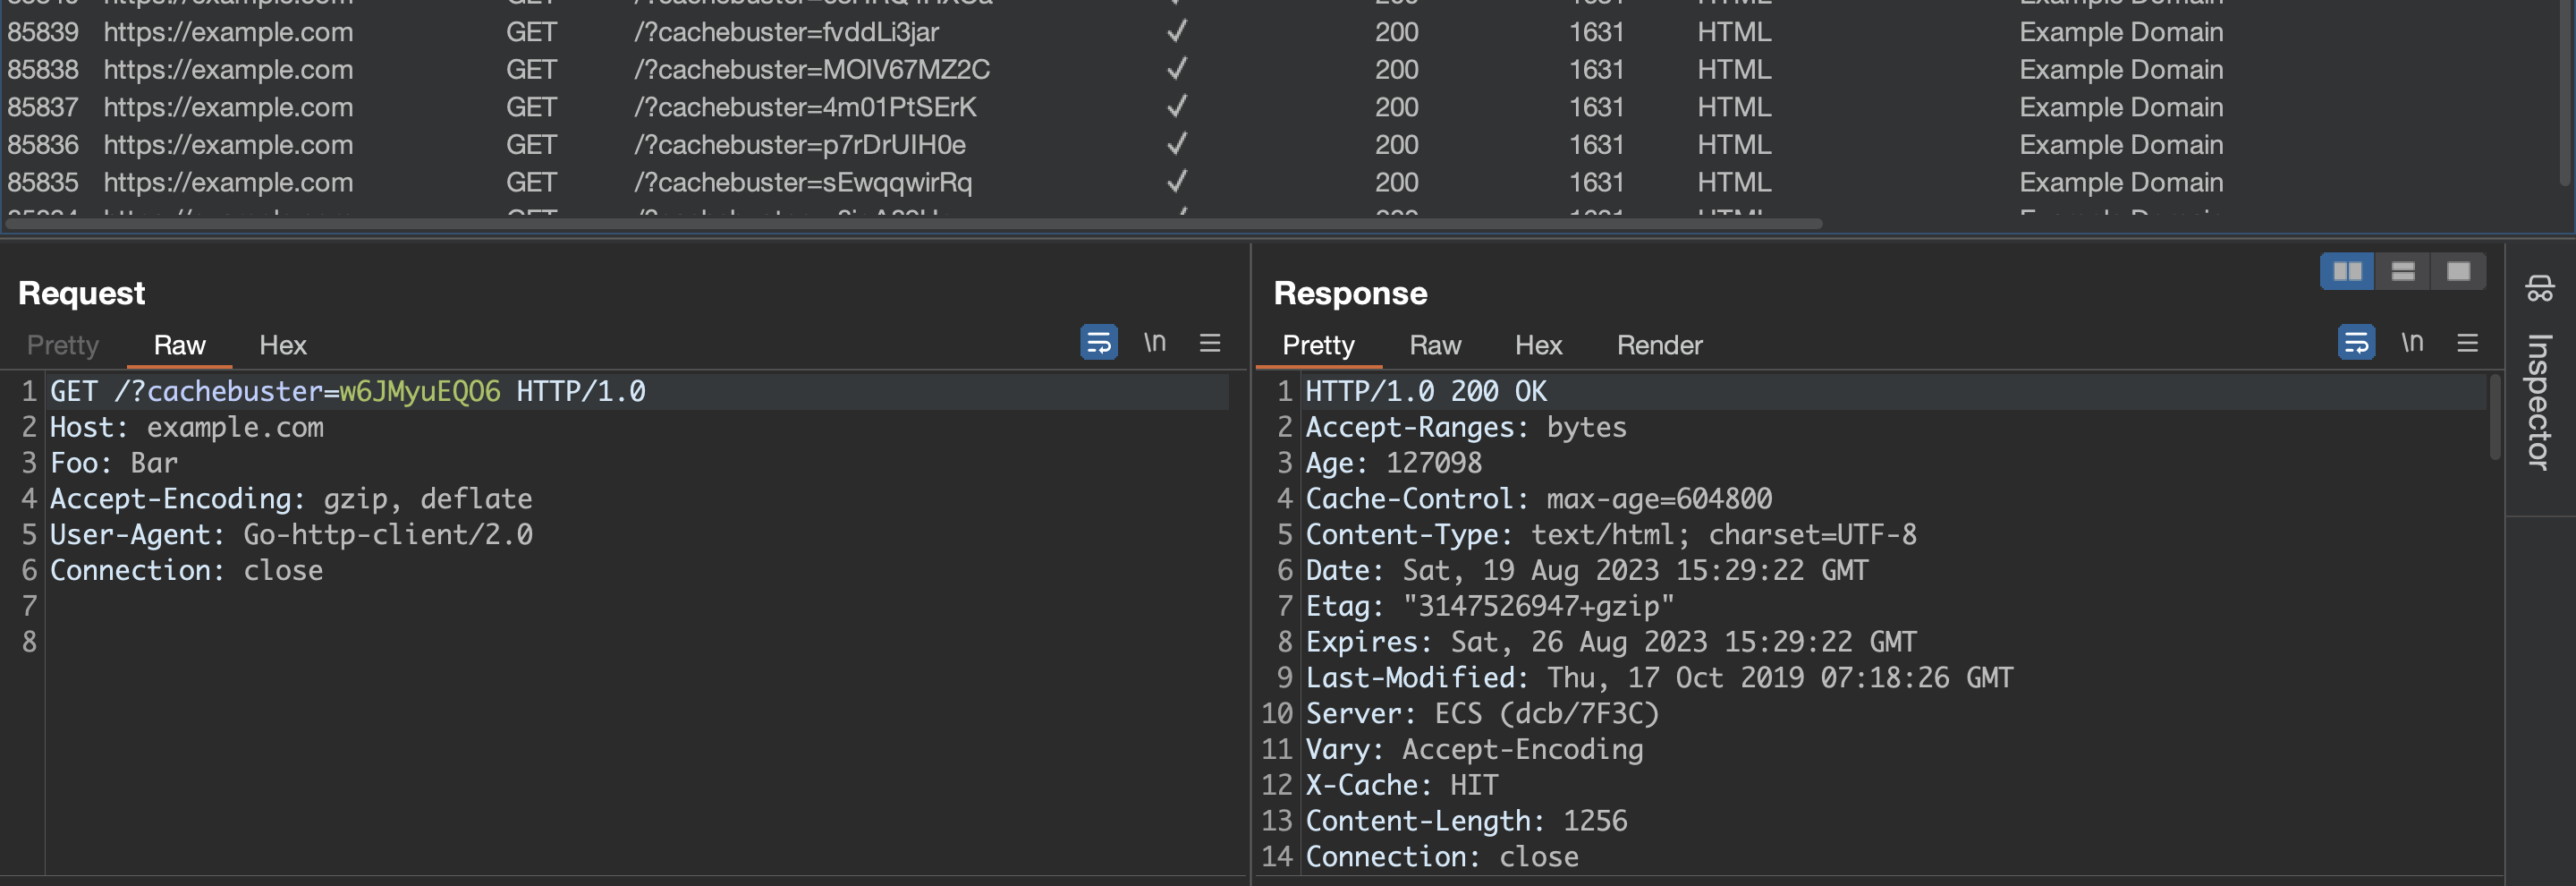
## Proxying requests through Burp Suite:
Follow following steps to proxy requests through Burp Suite:
- Export Burp's Certificate:
- In Burp Suite, go to the "Proxy" tab.
- Under the "Proxy Listeners" section, select the listener that is configured for `127.0.0.1:8080`
- Click on the "Import/ Export CA Certificate" button.
- In the certificate window, click "Export Certificate" and save the certificate file (e.g., burp.der).
- Install Burp's Certificate:
- Install the exported certificate as a trusted certificate on your system. How you do this depends on your operating system.
- On Windows, you can double-click the .cer file and follow the prompts to install it in the "Trusted Root Certification Authorities" store.
- On macOS, you can double-click the .cer file and add it to the "Keychain Access" application in the "System" keychain.
- On Linux, you might need to copy the certificate to a trusted certificate location and configure your system to trust it.
You should be all set:
```sh
headerpwn -url https://example.com -headers my_headers.txt -proxy 127.0.0.1:8080
```


## Credits
The `headers.txt` file is compiled from various sources, including the [Seclists project](https://github.com/danielmiessler/SecLists). These headers are used for testing purposes and provide a variety of scenarios for analyzing how servers respond to different headers.