https://github.com/durobot/arduinorgbchristmaslights
Simple firmware for RGB Christmas lights for Arduino and similar boards / MCUs
https://github.com/durobot/arduinorgbchristmaslights
Last synced: 5 months ago
JSON representation
Simple firmware for RGB Christmas lights for Arduino and similar boards / MCUs
- Host: GitHub
- URL: https://github.com/durobot/arduinorgbchristmaslights
- Owner: Durobot
- License: mit
- Created: 2019-01-08T07:40:33.000Z (over 6 years ago)
- Default Branch: master
- Last Pushed: 2019-02-17T09:50:57.000Z (over 6 years ago)
- Last Synced: 2025-02-15T06:53:57.056Z (5 months ago)
- Language: C++
- Size: 237 KB
- Stars: 0
- Watchers: 1
- Forks: 0
- Open Issues: 0
-
Metadata Files:
- Readme: README.md
- License: LICENSE
Awesome Lists containing this project
README
ArduinoRgbChristmasLights
-------------------------
Simple firmware for RGB Christmas lights for Arduino and similar boards / MCUs.
This program aims to turn Arduino Nano (probably most other Arduinos, or similar boards
and microcontrollers) into a controller for WS2811 / WS2812(b) -based RGB decoration lights (of Christmas variety).
The program fits into ATMega168 nicely, but, of course, works on ATMega328 just as well (not better, there's no difference).
This is an [Arduino IDE](https://www.arduino.cc/en/Main/Software) project.
### Video demonstration
(Click to open Youtube video)
[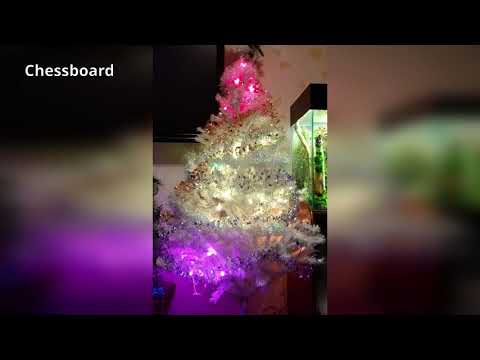](http://www.youtube.com/watch?v=enWjkxR_uSA)
### Circuit Diagram

### Frimware Installation
- Download and install [Arduino IDE](https://www.arduino.cc/en/Main/Software), if you
don't have it installed already. Depending on your OS, you may need to install additional
USB drivers to be able to upload complied firmware to your board.
- Start Arduino IDE.
- If you're using a development board or microcontroller Arduino IDE doesn't support out
of the box (e.g. ESP8266 or ESP32 or whatever), now is a good time to install support
for this platform. Instructions on how to do it should normally come with the platform
(e.g. [Arduino core for ESP8266](https://github.com/esp8266/Arduino)), but generally speaking
you (1) add URL of the configuration JSON to Additional Board Manager URLs in the Preferences
window and (2) find and install the plaform in Boards Manager window.
But in this case you would probably need to change the circuit and the source code too, so
you should know what you're doing.
- Install [Adafruit Neopixel library](https://github.com/adafruit/Adafruit_NeoPixel).
Go to ``Sketch -> Include Library -> Manage Libraries...`` and find Adafruit Neopixel library
in the list of libraries in the Library Manager window. Tip: select "All" in Type and Topic
and type "Adafruit NeoPixel" the filter box.
The latest version available _should_ be the one to install, but if it doesn't work for you
for whatever reason, try 1.1.7 - this is the version I've been using.
- Go to ``File -> Open`` and pick ArduinoRgbChristmasLights.ino
- Go to ``Tools -> Board``, and pick your board type. Some boards come in several versions,
like Arduino Nano, so make sure that ``Tools -> Processor`` is set correctly as well.
- Disconnect your board from all external connections. It _might_ be OK to leave LED strip
connected, but you must definitely disconnect external power supply.
- Connect your board to the computer. Most Arduino boards can be connected using a USB
cable, but some (e.g. Arduino Pro Mini) require a USB-to-TTL serial convertor board;
- Go to ``Tools -> Port`` and make sure USB port corresponding to your board is selected.
In Linux, the name of the port should be similar to /dev/USB0 or /dev/USB1, etc.
- Run ``Sketch -> Upload`` command, wait for the operation to finish. Arduino IDE should
display "Done Uploading" on the cyan bar below the source code.
- Connect your board to the LED strip and power supply.
- Done.