https://github.com/electro-logic/cameravision
Low-level FPGA / D8M / OV8865 interfacing with PC throught USB
https://github.com/electro-logic/cameravision
camera d8m de0-nano fpga jtag mipi ov8865 usb
Last synced: 11 days ago
JSON representation
Low-level FPGA / D8M / OV8865 interfacing with PC throught USB
- Host: GitHub
- URL: https://github.com/electro-logic/cameravision
- Owner: electro-logic
- Created: 2017-08-01T20:31:32.000Z (over 8 years ago)
- Default Branch: master
- Last Pushed: 2023-10-11T08:51:04.000Z (about 2 years ago)
- Last Synced: 2025-10-13T08:56:28.315Z (23 days ago)
- Topics: camera, d8m, de0-nano, fpga, jtag, mipi, ov8865, usb
- Language: C
- Homepage: https://electro-logic.blogspot.com
- Size: 38.1 MB
- Stars: 9
- Watchers: 2
- Forks: 8
- Open Issues: 0
-
Metadata Files:
- Readme: README.md
Awesome Lists containing this project
README
# Camera Vision
Low-level FPGA / D8M / OV8865 interfacing with PC throught USB.
**IMPORTANT: This project is now discontinued and superseed by Camera Vision 2 (https://github.com/electro-logic/CameraVision2)**
Requirements:
- Microsoft Visual Studio 2017 (.NET 4.5)
- Intel Quartus Prime 17
Supported Hardware:
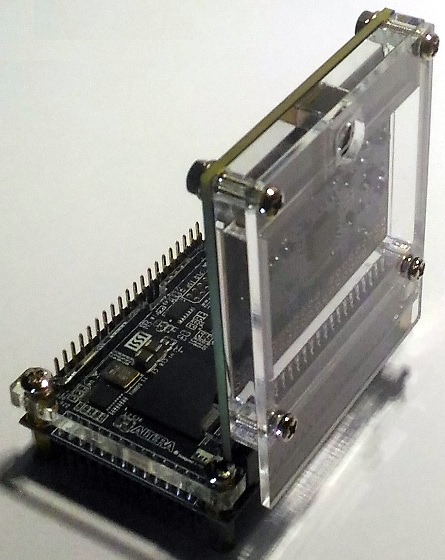
- Terasic DE0-Nano
- Terasic D8M
Notes:
Power consumption of DE0-Nano with D8M connected throught USB: 0.35A
Quick start:
1) Connect D8M into GPIO0 of DE0-Nano like shown into images into \doc folder
2) Connect DE0-Nano to PC with USB cable bundled
3) Load with Quartus Programmer \eda\de0-nano\output_files\DE0_NANO_D8M.sof into DE0-Nano
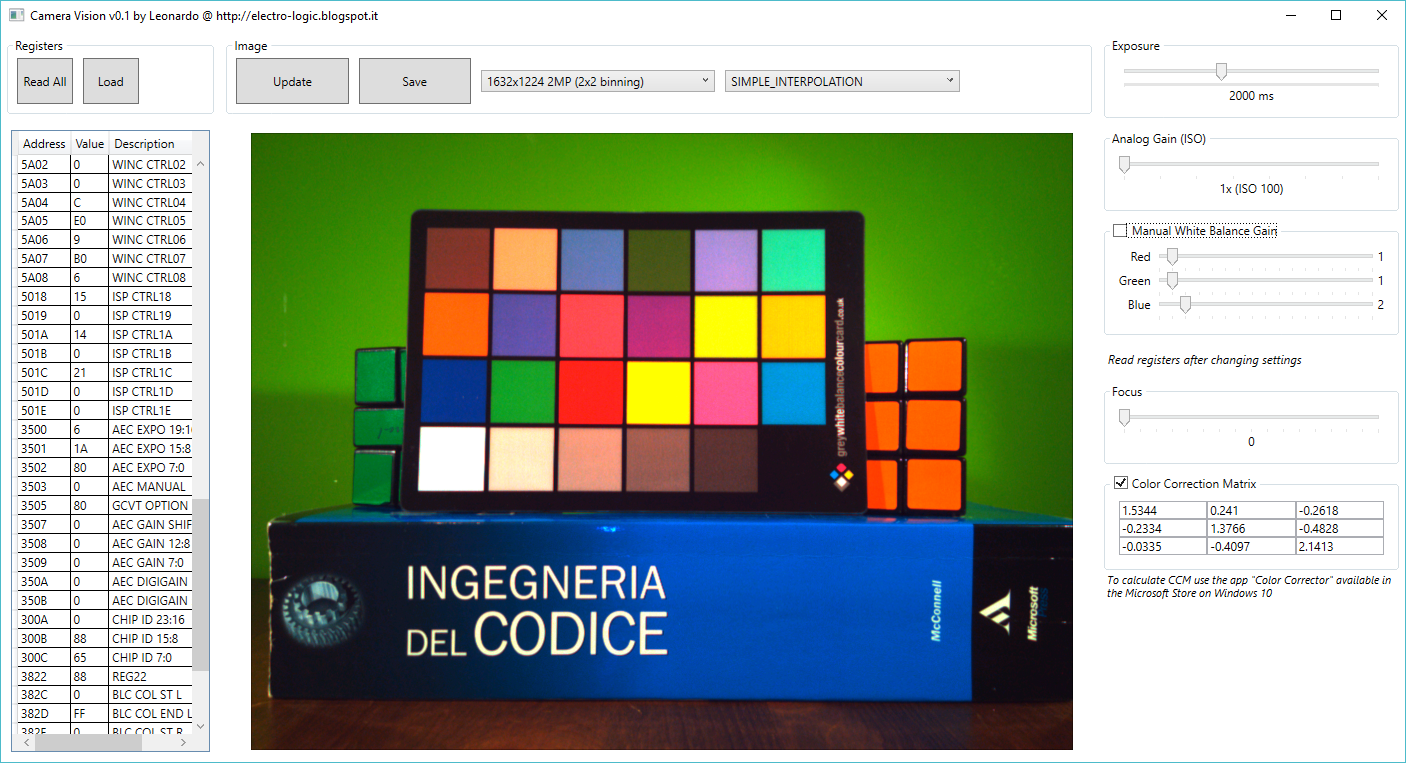
4) Wait that LED0 turn on and launch \sw\CameraVision\CameraVision\bin\Release\CameraVision.exe
5) Press Update into Image panel to take a new image
F.A.Q.
Q) When I launch CameraVision.exe image is corrupted.
A) Try to press KEY0 on DE0-NANO to reset the system and try again to launch the software. Try changing resolution (avoid binning) just after programming and before acquiring images.