https://github.com/elog-x/notion-hexo
Notion + Elog + Hexo + GitHub Actions + Vercel 博客解决方案
https://github.com/elog-x/notion-hexo
blog hexo notion
Last synced: 8 months ago
JSON representation
Notion + Elog + Hexo + GitHub Actions + Vercel 博客解决方案
- Host: GitHub
- URL: https://github.com/elog-x/notion-hexo
- Owner: elog-x
- Created: 2023-11-08T12:32:11.000Z (about 2 years ago)
- Default Branch: master
- Last Pushed: 2024-10-03T21:31:15.000Z (about 1 year ago)
- Last Synced: 2024-11-07T11:43:57.368Z (about 1 year ago)
- Topics: blog, hexo, notion
- Language: JavaScript
- Homepage: https://notion-hexo.vercel.app/
- Size: 90.8 KB
- Stars: 29
- Watchers: 0
- Forks: 47
- Open Issues: 3
-
Metadata Files:
- Readme: README.md
Awesome Lists containing this project
README
# Notion + Hexo + GitHub Actions + Vercel 博客解决方案
# 博客工具
- 写作平台:Notion
- 博客平台:[Hexo](https://hexo.io/)
- 博客主题:[Butterfly@4.10.0](https://github.com/jerryc127/hexo-theme-butterfly)
- 博客文档同步:[Elog](https://github.com/LetTTGACO/elog)
- 部署平台:Vercel
# 博客搭建指南
## 1. Fork模板仓库
[点击 Fork](https://github.com/elog-x/notion-hexo/fork) 该模板仓库到个人 Github 账号仓库下并 clone 到本地
## 2. 安装依赖
在项目根目录下运行命令安装依赖
```shell
npm install
```
## 3. 新建 Elog 本地调试文件
在项目根目录中复制`.elog.example.env`文件并改名为`.elog.env`,此文件将用于本地同步Notion 文档
## 4. 配置 Notion 关键信息
按照[文档提示](https://elog.1874.cool/notion/gvnxobqogetukays#notion)配置 Notion 并获取 `token` 和 `databaseId`,在本地`.elog.env`中写入
```text
NOTION_TOKEN=获取的token
NOTION_DATABASE_ID=获取的databaseId
```
## 5.本地调试
在项目根目录运行同步命令
```shell
npm run sync:local
```
## 6.启动 Hexo
在项目根目录运行hexo启动命令,会自动打开本地博客
```shell
npm run server
```
## 7. 配置 Hexo 博客
根据 [Hexo](https://hexo.io/) 文档和 [Butterfly](https://github.com/jerryc127/hexo-theme-butterfly) 主题配置文档,配置你的博客直到你满意为主,你也可以换别的主题,这里不做演示
## 8. 提交代码到 github
本地访问没问题直接提交所有文件到 Github 仓库即可
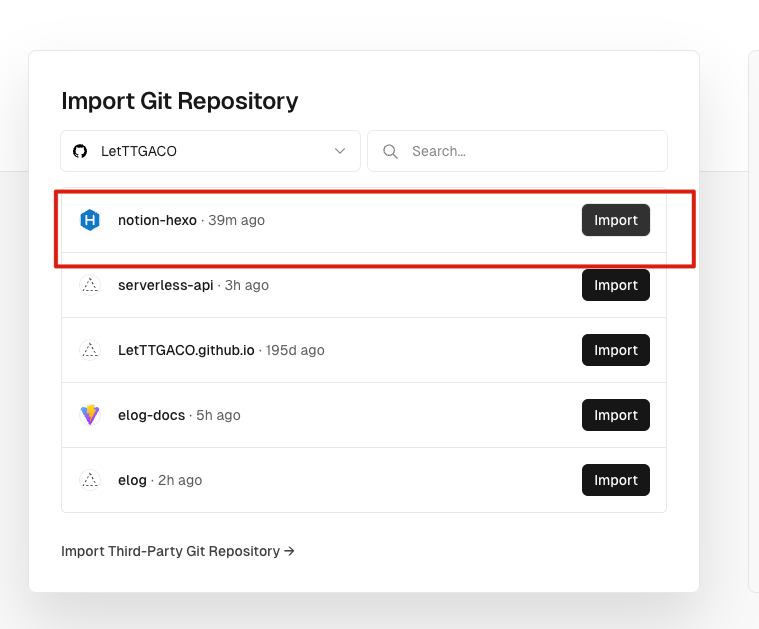
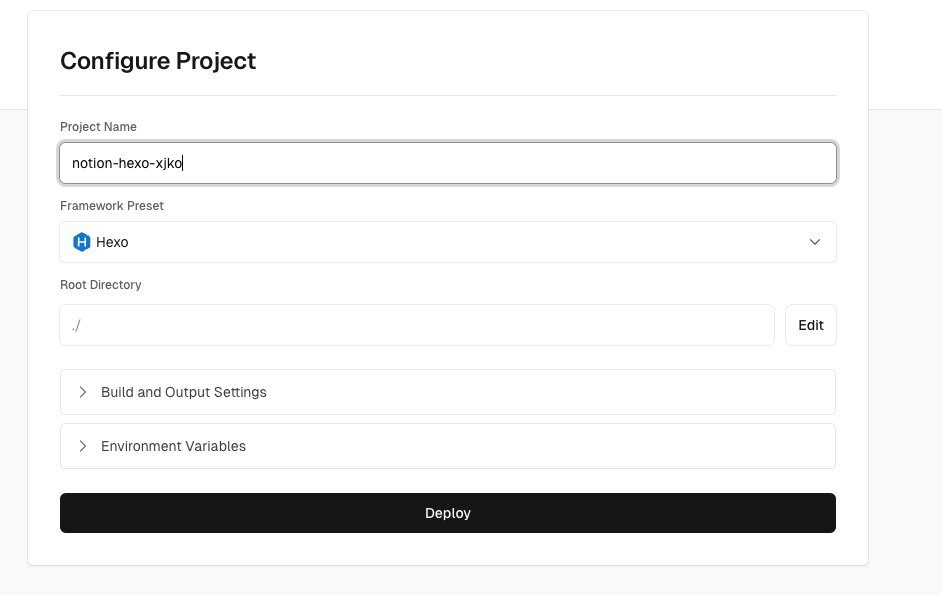
## 9. 部署到 Vercel
注册 Vercel 账号并绑定 Github,在 Vercel 导入 该项目,Vercel 会自动识别出该 Hexo 项目,不需要改动,直接选择 Deploy 部署。部署完成会有一个 Vercel 临时域名,你也可以绑定自己的域名。
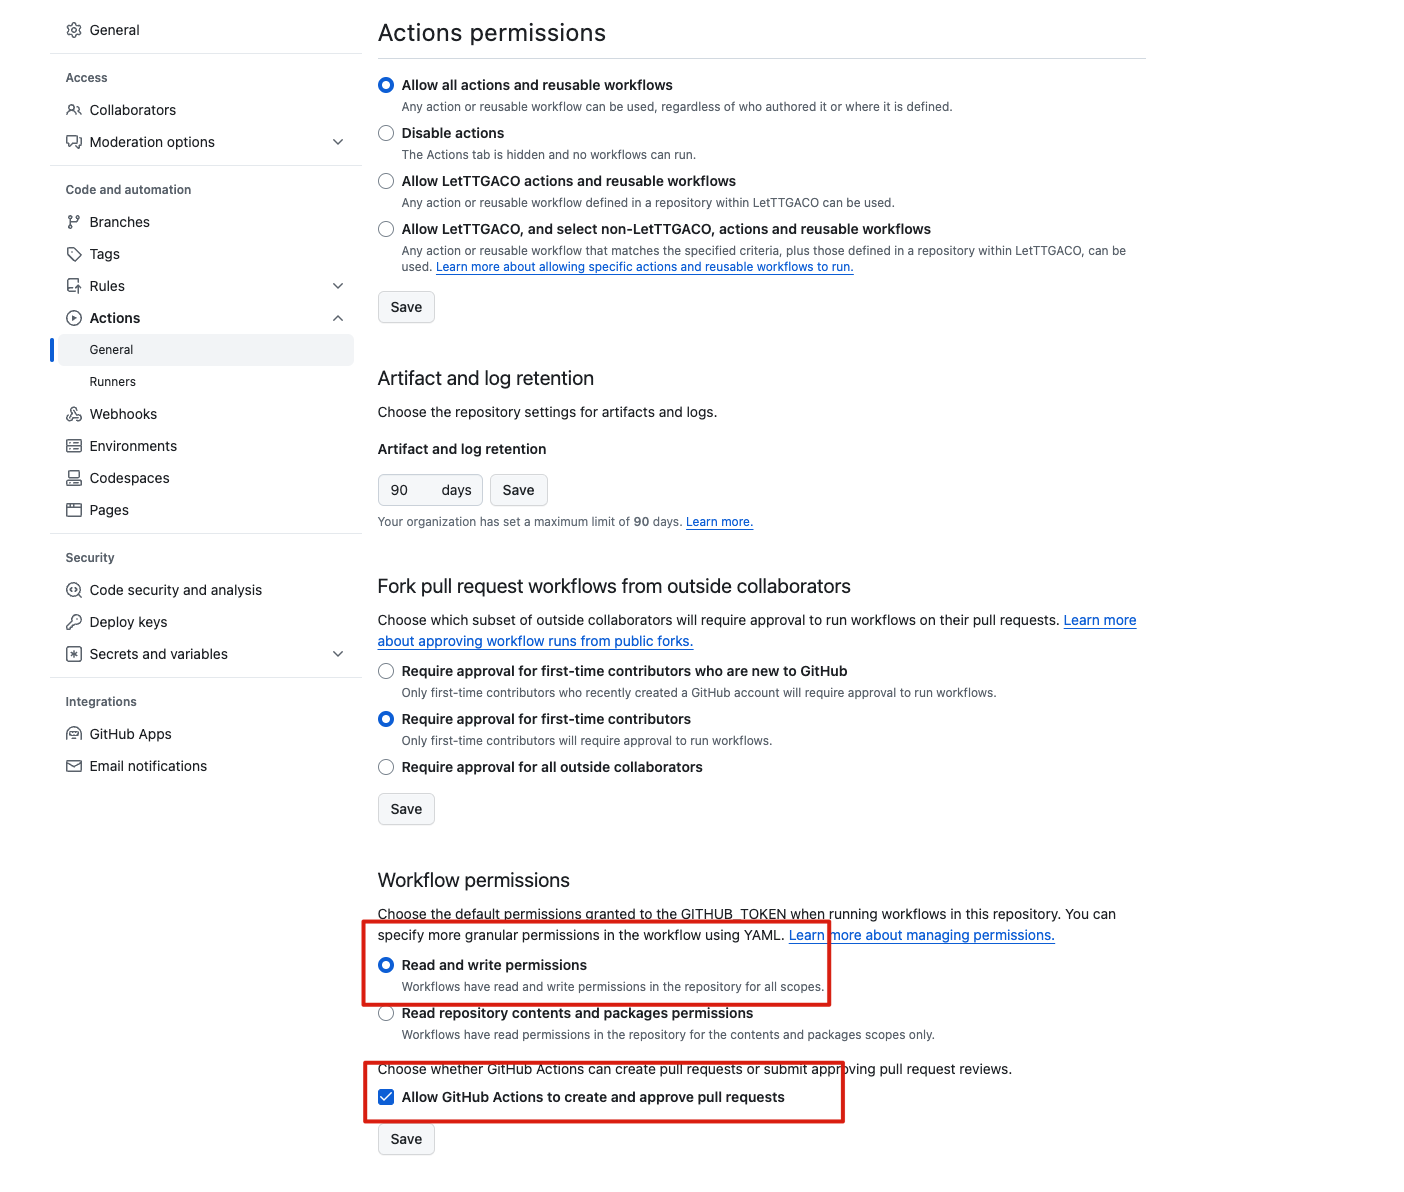
## 10. 配置 Github Actions 权限
在 Github 仓库的设置中找到 `Actions-General`,打开流水线写入权限`Workflow permissions`
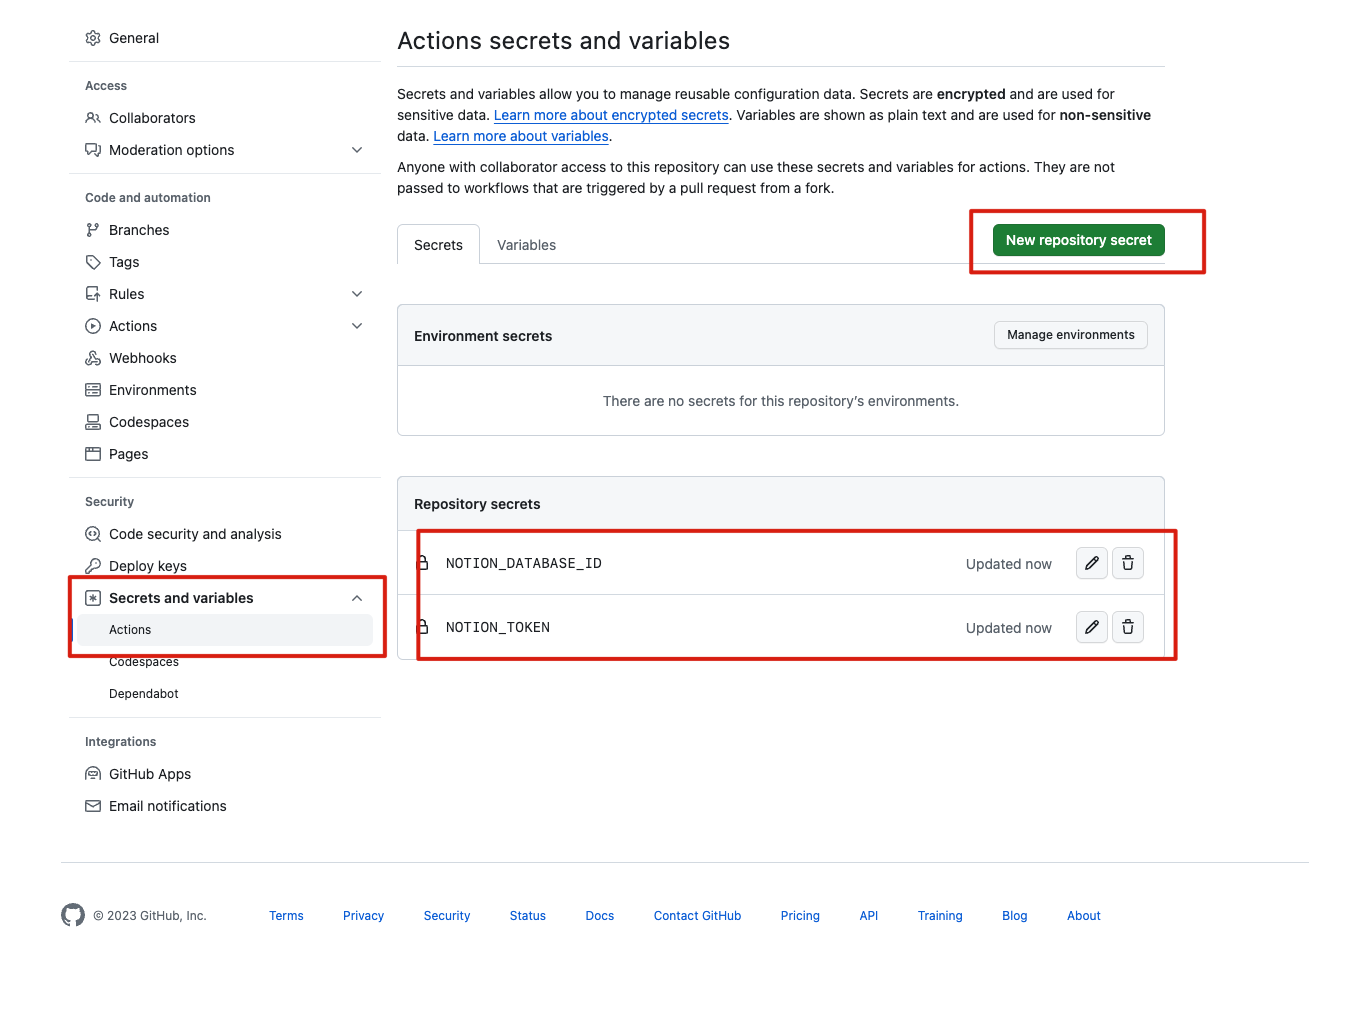
## 11. 配置环境变量
在本地运行时,用的是`.elog.env`文件中定义的 Notion 账号信息,而在 Github Actions 时,需要提前配置环境变量。
在 Github 仓库的设置中找到 `Secrets and variables`,新增仓库的环境变量`NOTION_DATABASE_ID`和`NOTION_TOKEN`和`.elog.env`保持一致即可
## 12. 自动化部署
当在 Notion 中改动文档后,手动/自动触发 Github Actions流水线,会重新从 Notion 增量拉取文档,自动提交代码到 Github 仓库。
Vercel 会实时监测仓库代码,当有新的提交时都会重新部署博客。如此就实现了自动化部署博客。
整个流程的关键点就在于:如何手动/自动触发 Github Actions
在项目.`github/workflows/sync.yaml`中已经配置了外部 API 触发 Github Actions 事件,所以只需要调用 API 触发流水线即可。
### 手动触发
为了方便,这里提供一个部署在 Vercel 的免费公用的[**ServerlessAPI**](https://github.com/elog-x/serverless-api),只需要配置好 URL 参数并浏览器访问即可触发流水线
```shell
https://serverless-api-elog.vercel.app/api/github?user=xxx&repo=xxx&event_type=deploy&token=xxx
```
### 自动触发
可在 Notion 中结合 Slack 触发,[参考教程](https://elog.1874.cool/notion/vy55q9xwlqlsfrvk),这里就不做进一步演示了
# 自定义 Elog 配置
如果想自定义 Elog 配置,可访问 [Elog 文档](https://elog.1874.cool/)
# 示例
示例仓库:[https://github.com/LetTTGACO/notion-hexo](https://github.com/LetTTGACO/notion-hexo)
Notion数据库模版:[elog-hexo-template](https://1874.notion.site/867486af567f4a8897427b15ffd10b3c?v=a25aec8e27d5415e8605e43034f822bd&pvs=4)
博客示例地址:[https://notion-hexo.vercel.app](https://notion-hexo.vercel.app/)