https://github.com/etherealxx/shuttle-madness
OpenGL C++ game made with glut.h, stb_image.h and miniaudio.h
https://github.com/etherealxx/shuttle-madness
arcade-game college-project cpp freeglut game gamedev glut opengl opengl-game university-project
Last synced: 2 months ago
JSON representation
OpenGL C++ game made with glut.h, stb_image.h and miniaudio.h
- Host: GitHub
- URL: https://github.com/etherealxx/shuttle-madness
- Owner: etherealxx
- License: mit
- Created: 2023-11-03T09:42:15.000Z (over 2 years ago)
- Default Branch: main
- Last Pushed: 2023-12-06T23:54:05.000Z (over 2 years ago)
- Last Synced: 2025-04-02T19:11:18.098Z (over 1 year ago)
- Topics: arcade-game, college-project, cpp, freeglut, game, gamedev, glut, opengl, opengl-game, university-project
- Language: C
- Homepage:
- Size: 8.03 MB
- Stars: 0
- Watchers: 2
- Forks: 0
- Open Issues: 0
-
Metadata Files:
- Readme: README.md
- License: LICENSE
Awesome Lists containing this project
README
# Shuttle Madness
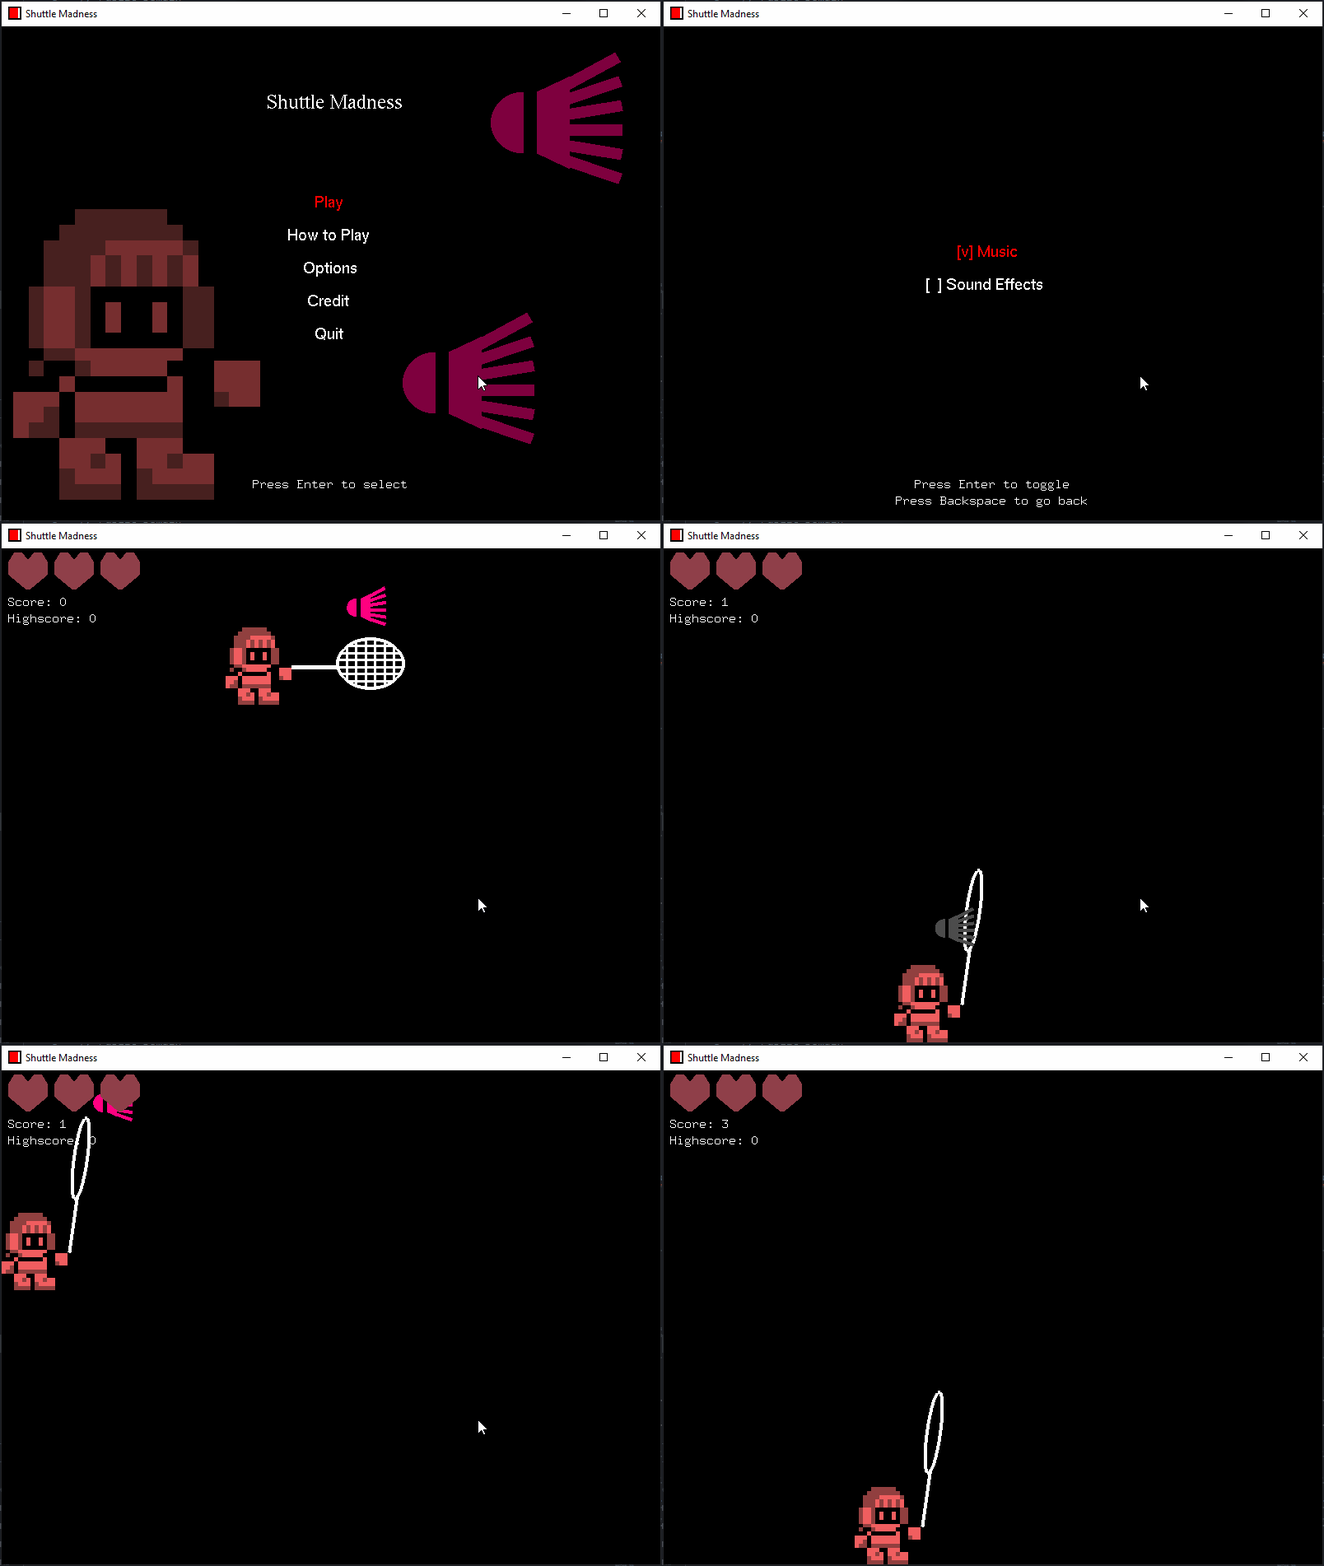
OpenGL C++ game made with glut.h, [stb_image.h](https://github.com/nothings/stb) and [miniaudio.h](https://github.com/mackron/miniaudio). Third semester final project. For Windows only. The point of this project is to use only single file header libraries (other than GLUT and standard library) to make a presentable arcade game.
## Workspace Setup (VSCode, the easy way)
- Clone this repository
- Download [this zip](https://github.com/MdAlbinHossain/Computer-Graphics/archive/refs/heads/main.zip) containing OpenGL dependencies from [MdAlbinHossain/Computer-Graphics](https://github.com/MdAlbinHossain/Computer-Graphics)
- Extract the zip, open the folder `Computer-Graphics > OpenGL Programming`
- Inside, copy 'mingw' and '.vscode' folder into this repo's folder you've cloned earlier (`shuttle-madness`)
- On VSCode, install an extension called Run++ ([this one](https://marketplace.visualstudio.com/items?itemName=AlbinBD.run))
- Still on VSCode, `File > Open Folder...` and choose the cloned directory (`shuttle-madness`)
#### The Manual Way
I haven't tried this myself, but you need to do a GLUT installation by yourself, and run the program with this (there might be other dependencies, tbh idk how to install those manually).
```
g++.exe shuttle_madness.cpp -lfreeglut -lopengl32 -lglu32 -lwinmm -lgdi32 -Wl,--subsystem,windows -o shuttle_madness
```
## Running the game
- Open `shuttle_madness.cpp`
- Click the `Run++` button on the top right, OR press Alt + B
#### Controls
- WASD controls: `W` to jump/double jump. `S` to fastfall/crouch.
- `Space` to swing the racket
- Immediately jumping after releasing crouch button will result in high jump.
- Hit the pink shuttlecock to score point, dodge the gray shuttlecock, and don't hit the yellow shuttlecock.
## Building the game
- Download `cmake` from [here](https://cmake.org/download/) and install it. (Choose the Windows x64 Installer, recommended to install for all user).
- Make sure that the `mingw32` folder from the previous guide is located properly inside the repo's folder (`shuttle-madness`)
**or**
- You can use your locally installed MSYS64 *if you have already installed one*.
###### Note:
I tried several dev tools and only MSYS64 which works (aside the above *mingw32 method*), my MSYS2 apparently can't. So for other build tools, you need to adjust the `CMakeLists.txt` manually. And to make things worse, the built executable from the MSYS64 method can't run on other device. So, just stick with the mingw32 method.
#### Python Method (assuming you installed one)
- Run `cmakeautomate_mingw32.py` inside the `tools` folder
- Go to newly made `build` folder, the executable name is `ShuttleMadness.exe` (it needs the png and wav files to be on the same directory as it). There will also a zip file that contains everything you need to run the game.
###### Note:
Use `cmakeautomate_msys64.py` instead if you want to use MSYS64 method.
#### Manual Method
- Inside the repo folder, create a new folder named `build`
- Download `ninja-win.zip` [from here](https://github.com/ninja-build/ninja/releases/download/v1.11.1/ninja-win.zip)
- Extract it, put the `ninja.exe` inside the `build folder`
- Launch command prompt (`cmd.exe`), change directory (`cd`) to the build folder
- Type these in succesion,
if you're using mingw32 (default) method:
```
for %I in ("%CD%") do set "updir=%~dpI"
set "updir=%updir:\=/%"
cmake -G "Ninja" -DCMAKE_MAKE_PROGRAM=%updir%build/ninja.exe -DCMAKE_PREFIX_PATH=%updir%mingw32 -DCMAKE_C_COMPILER=%updir%mingw32/bin/gcc.exe -DCMAKE_CXX_COMPILER=%updir%mingw32/bin/c++.exe ..
cmake ..
ninja
```
if you're using MSYS64 method:
```
cmake -G "Ninja" -DCMAKE_MAKE_PROGRAM=ninja.exe ..
cmake ..
ninja
```
- Go to newly made `build` folder, the executable name is `ShuttleMadness.exe` (it needs the png and wav files to be on the same directory as it).
## Static Linking (Single Portable Executable)
- Download [Enigma Virtual Box](https://enigmaprotector.com/en/downloads.html), install it.
#### Python Method (assuming you installed one)
- Run `enigmavirtualboxsetup.py` inside the `tools` folder
- Double click the `shuttle_build.evb`, it should open the Enigma Virtual Box app.
- Click `Process` on the bottom right
- Visit `build` folder, the executable name is `ShuttleMadnessPortable.exe` (you can move it wherever you like)
#### Manual Method (assuming you installed one)
- Open the `Enigma Virtual Box` app.
- Browse the input file name, choose the newly built `ShuttleMadness.exe`
- Click `Add > Add File(s)`, choose every `.png`, `.wav`, and `.dll` file inside the `build` folder. Also include `shuttle_howtoplay.txt` and `shuttle_audio_credit.txt`.
- Click `Process` on the bottom right
- Visit `build` folder, the executable name is `ShuttleMadnessPortable.exe` (you can move it wherever you like)
## To-Dos
- Make challenges (like how the way the shuttlecock spawns) as a reason for the player to not just stay on the bottom without jumping at all. (also challenges that utilizes ducking)
- Make the directory clean (separate files into folders based on extension)
- ~~Figure out the build dependency problem~~
- Static linking the `libfreeglut.dll`
## Attribution
- `Arcade Music Loop.wav` by joshuaempyre on [freesound.org](https://freesound.org/people/joshuaempyre/sounds/251461/)
Adjusted so that the volume is 20% of the original
- `Jump_C_05.wav` by cabled_mess on [freesound.org](https://freesound.org/people/cabled_mess/sounds/350905/)
- `Tennis racket_whoosh.wav` by speedygonzo on [freesound.org](https://freesound.org/people/speedygonzo/sounds/235727/)
Cutted so that only the second last swing that plays
- `Badminton.wav` by PerMagnusLindborg on [freesound.org](https://freesound.org/people/PerMagnusLindborg/sounds/324244/)
Cutted so that it plays a little bit faster
- `8-bit damage sound.wav by EVRetro` on [freesound.org](https://freesound.org/people/EVRetro/sounds/501104/)
Cutted so that it ends earlier
- `retro taking damage sfx.wav` by stumpbutt on [freesound.org](https://freesound.org/people/stumpbutt/sounds/629656/)
- `8-bit Explosion2.aiff` by timgormly on [freesound.org](https://freesound.org/people/EVRetro/sounds/501104/)
Converted to 24bit pcm wav, decreased the volume to 50%
- `Game over sounds 1.wav` by afleetingspeck on [freesound.org](https://freesound.org/people/afleetingspeck/sounds/232444/)
Cutted so that only the first part is used
- `pause.mp3` by crisstanza on [freesound.org](https://freesound.org/people/crisstanza/sounds/167127/)
Converted to 24bit pcm wav, decreased the volume to 60%
- `Chiptune Loop Episode 01.wav` by orginaljun on [freesound.org](https://freesound.org/people/orginaljun/sounds/396960/)
Decreased the tempo by 30%
- `Menu screen mouse over.wav` by DrMinky on [freesound.org](https://freesound.org/people/DrMinky/sounds/166186/)
Amplified by 15dB
- `SFX UI Button Click.wav` by suntemple on [freesound.org](https://freesound.org/people/suntemple/sounds/253168/)
Amplified by 15dB
## Used Libraries
- [GLUT](https://www.opengl.org/resources/libraries/glut/glut_downloads.php)/[FreeGLUT](https://github.com/FreeGLUTProject/freeglut)
- [stb_image](https://github.com/nothings/stb)
- [miniaudio](https://github.com/mackron/miniaudio)
## Special Thanks
- Ikhsan Ridwan who made the `shuttle_knight.png` sprite
###### Note:
The directory itself is messy since I thought I was just gonna use the single cpp file and the single file headers, but eventually i split the code into parts, and i added images, musics, and icon.