https://github.com/findologic/plugin-plentymarkets-ceres-api
Findologic API plugin for plentymarkets Ceres
https://github.com/findologic/plugin-plentymarkets-ceres-api
Last synced: 5 months ago
JSON representation
Findologic API plugin for plentymarkets Ceres
- Host: GitHub
- URL: https://github.com/findologic/plugin-plentymarkets-ceres-api
- Owner: findologic
- Created: 2018-02-02T09:25:39.000Z (over 8 years ago)
- Default Branch: develop
- Last Pushed: 2024-04-08T08:53:24.000Z (about 2 years ago)
- Last Synced: 2024-04-08T10:04:53.783Z (about 2 years ago)
- Language: PHP
- Homepage: https://marketplace.plentymarkets.com/plugins/individualisierung/shop-erweiterungen/findologic_6390
- Size: 13.3 MB
- Stars: 1
- Watchers: 6
- Forks: 3
- Open Issues: 5
-
Metadata Files:
- Readme: README.md
Awesome Lists containing this project
README
# Findologic API plugin for Plentymarkets Ceres
[](https://travis-ci.org/findologic/plugin-plentymarkets-ceres-api)
## Table of Contents
1. [Setup](#setup)
1. [Prerequisites](#prerequisites)
1. [Installation](#installation)
1. [Development](#development)
1. [Installing dependencies](#installing-dependencies)
1. [Development cycle](#development-cycle)
1. [Initial Setup](#initial-setup)
1. [Building non-compiled files](#building-non-compiled-files)
1. [Running unit-tests locally](#running-unit-tests-locally)
1. [Deployment & Release](#deployment--release)
1. [Versioning](#versioning)
## Setup
### Prerequisites
Installation of Plentymarkets plugins:
* [Ceres](https://marketplace.plentymarkets.com/ceres_4697) >= 5.0.35
* [IO](https://marketplace.plentymarkets.com/io_4696) >= 5.0.35
### Installation
For development install the Findologic plugin in the Plentymarkets backend via Git.
For production install the Findologic plugin via the [Plentymarkets marketplace](https://marketplace.plentymarkets.com/findologic_6390).
> Note: In the Plentymarkets Backend you have the possibility to change the code of your plugin but this only works if
the plugin has been installed via the marketplace.
## Development
Plentymarkets is a cloud hosted shop system, this means that it's not possible to setup on a local machine.
Create separate plugin sets in the Plentymarkets for development or debugging purposes.
### Requirements
* PHP 7.1, 7.2 or 7.3 (7.4 and greater **is not supported**)
* Composer
* nodejs 16
* npm 8
### Installing dependencies
Install PHP dependencies:
```bash
composer install
```
Install JS dependencies:
```
npm install
```
### Development cycle
### Initial Setup
Before you can start developing, download the [PlentyDevTool](https://marketplace.plentymarkets.com/plenty-tools/plentydevtool_6652).
It is available for Windows, Linux and MacOS. This tool allows us to change files locally
and let Plenty update it for us automatically.
Start the downloaded program. If you run Linux, you may need to give it execution
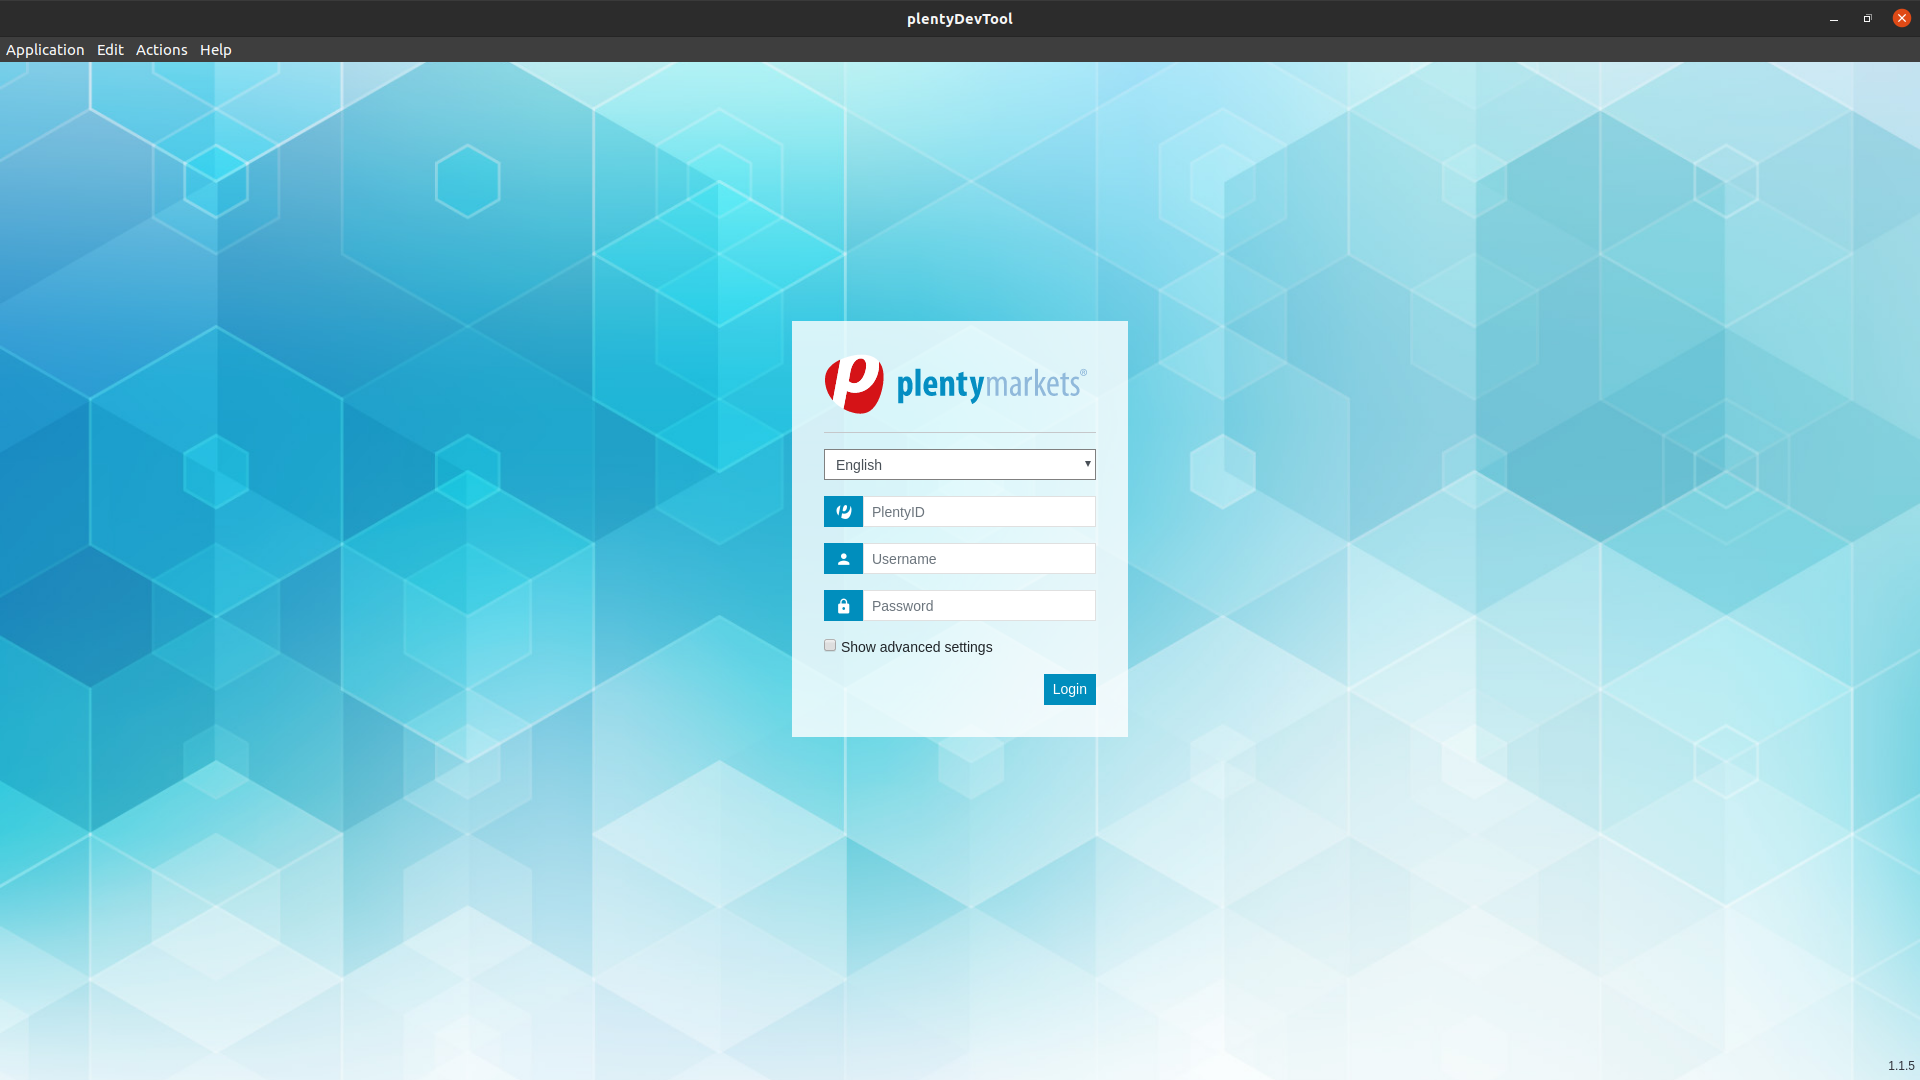
permission with `chmod +x PlentyDevTool-1.1.5.AppImage`. Log in with your Plentymarkets credentials.
Create a new folder, where you will save all plugins from your plugin-sets. Something like
`~/Documents/plentyDevTool` should be sufficient. Select this folder in your PlentyDevTool.
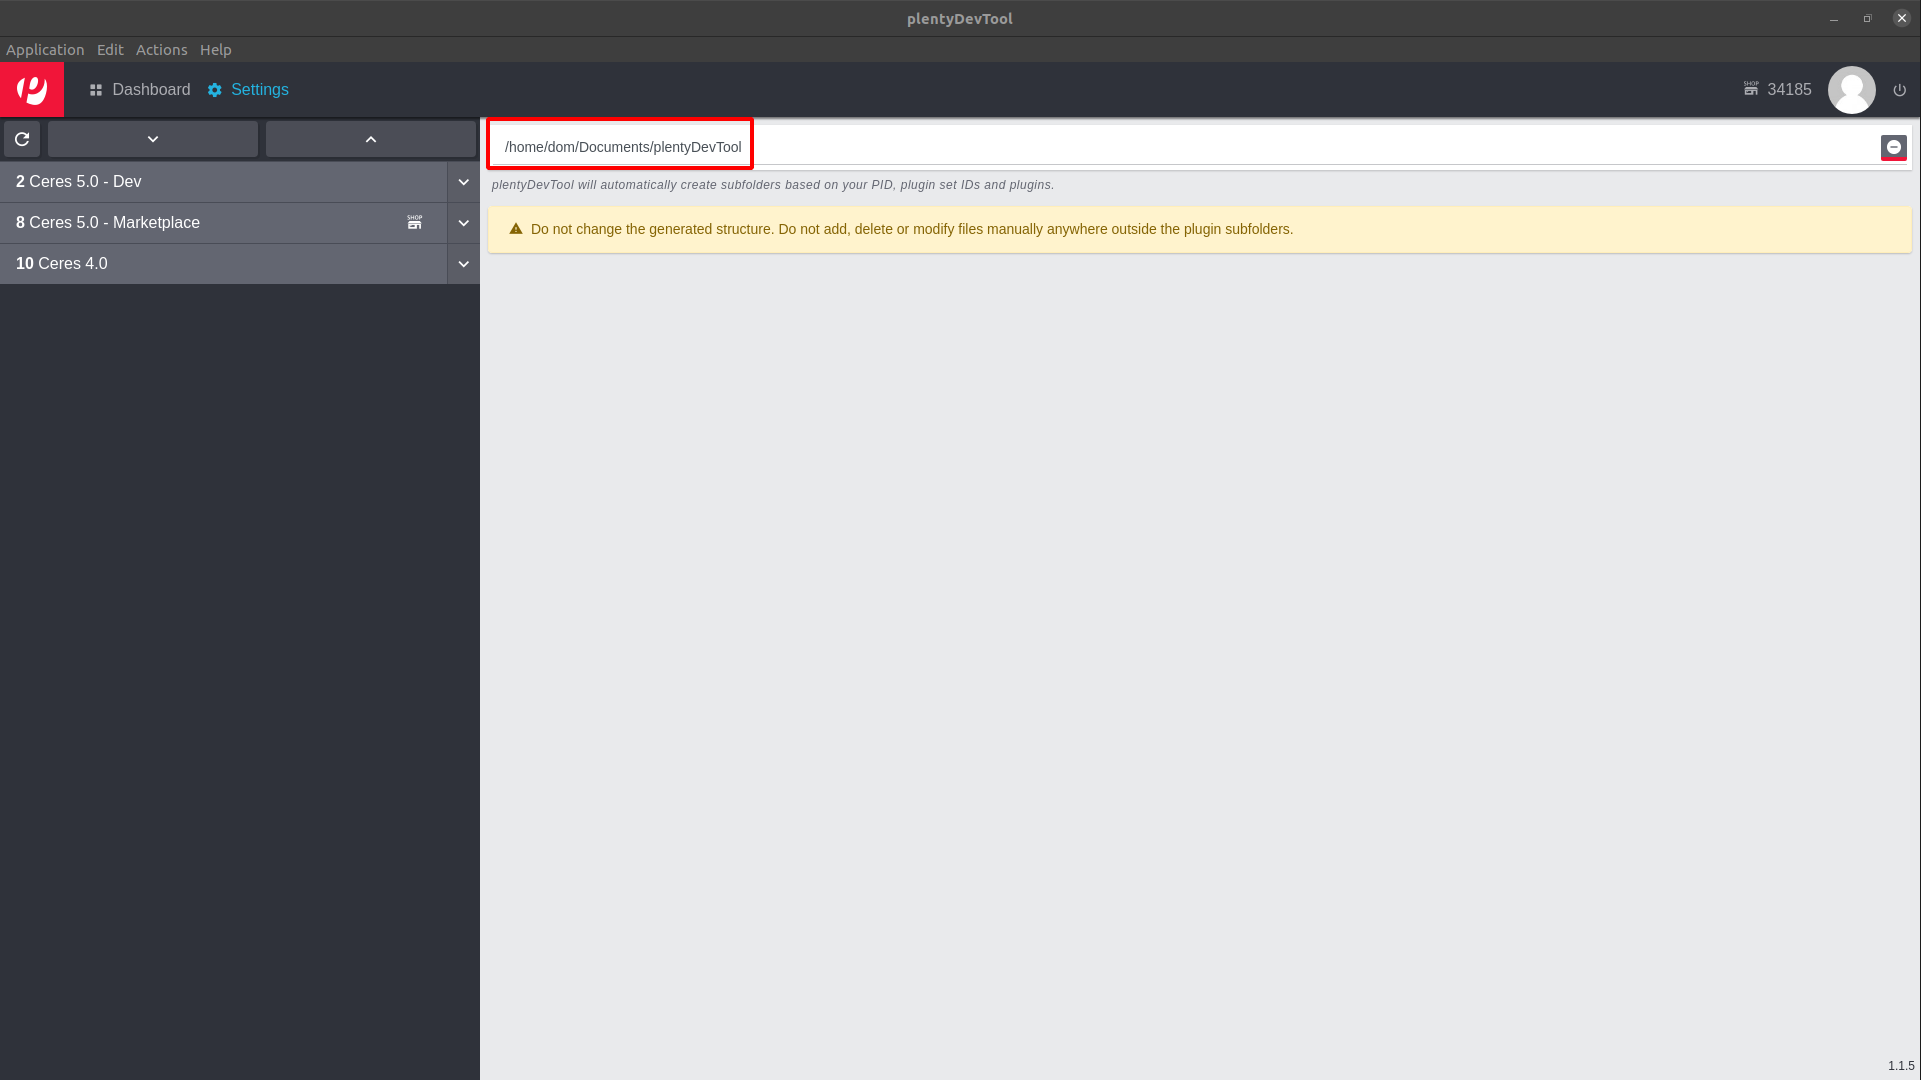
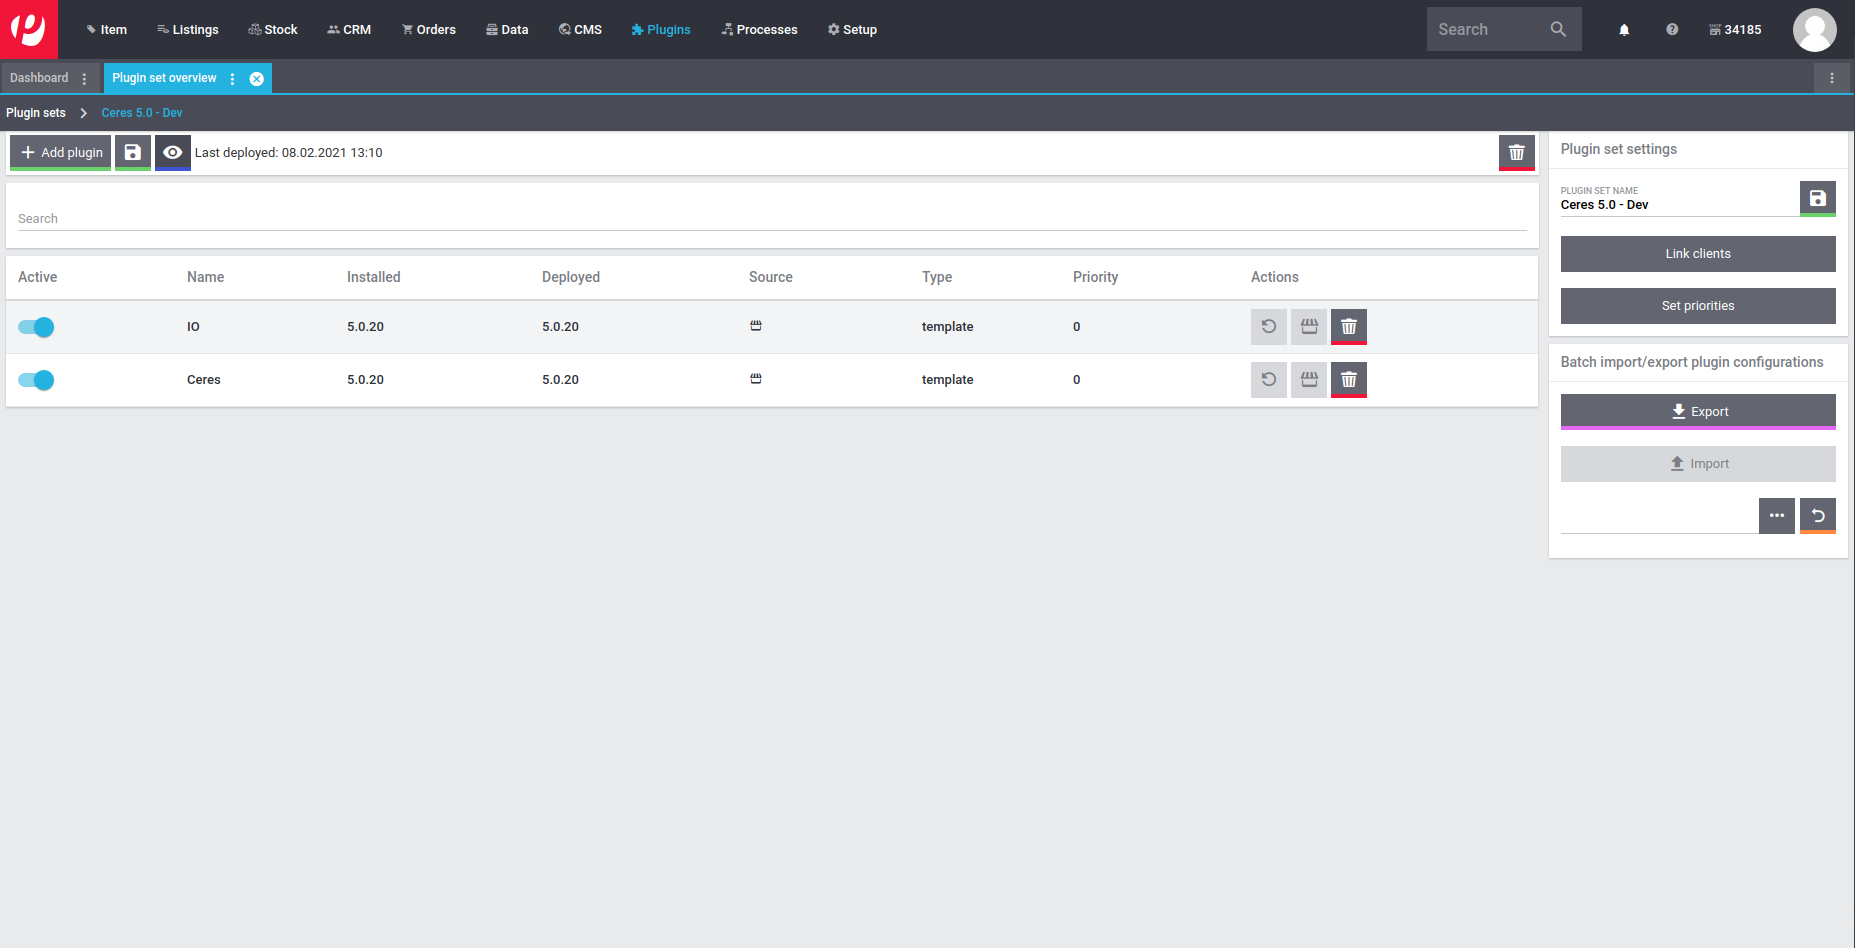
In the Plentymarkets Backend create a new Plugin-Set that **only** contains **Ceres** and **IO**.
This Plugin-Set **must not be linked with any store**, otherwise automatic deployment **does not work**.
Back in the PlentyDevTool go to the *Dashboard* and *Reload* the Plugin-Set list.
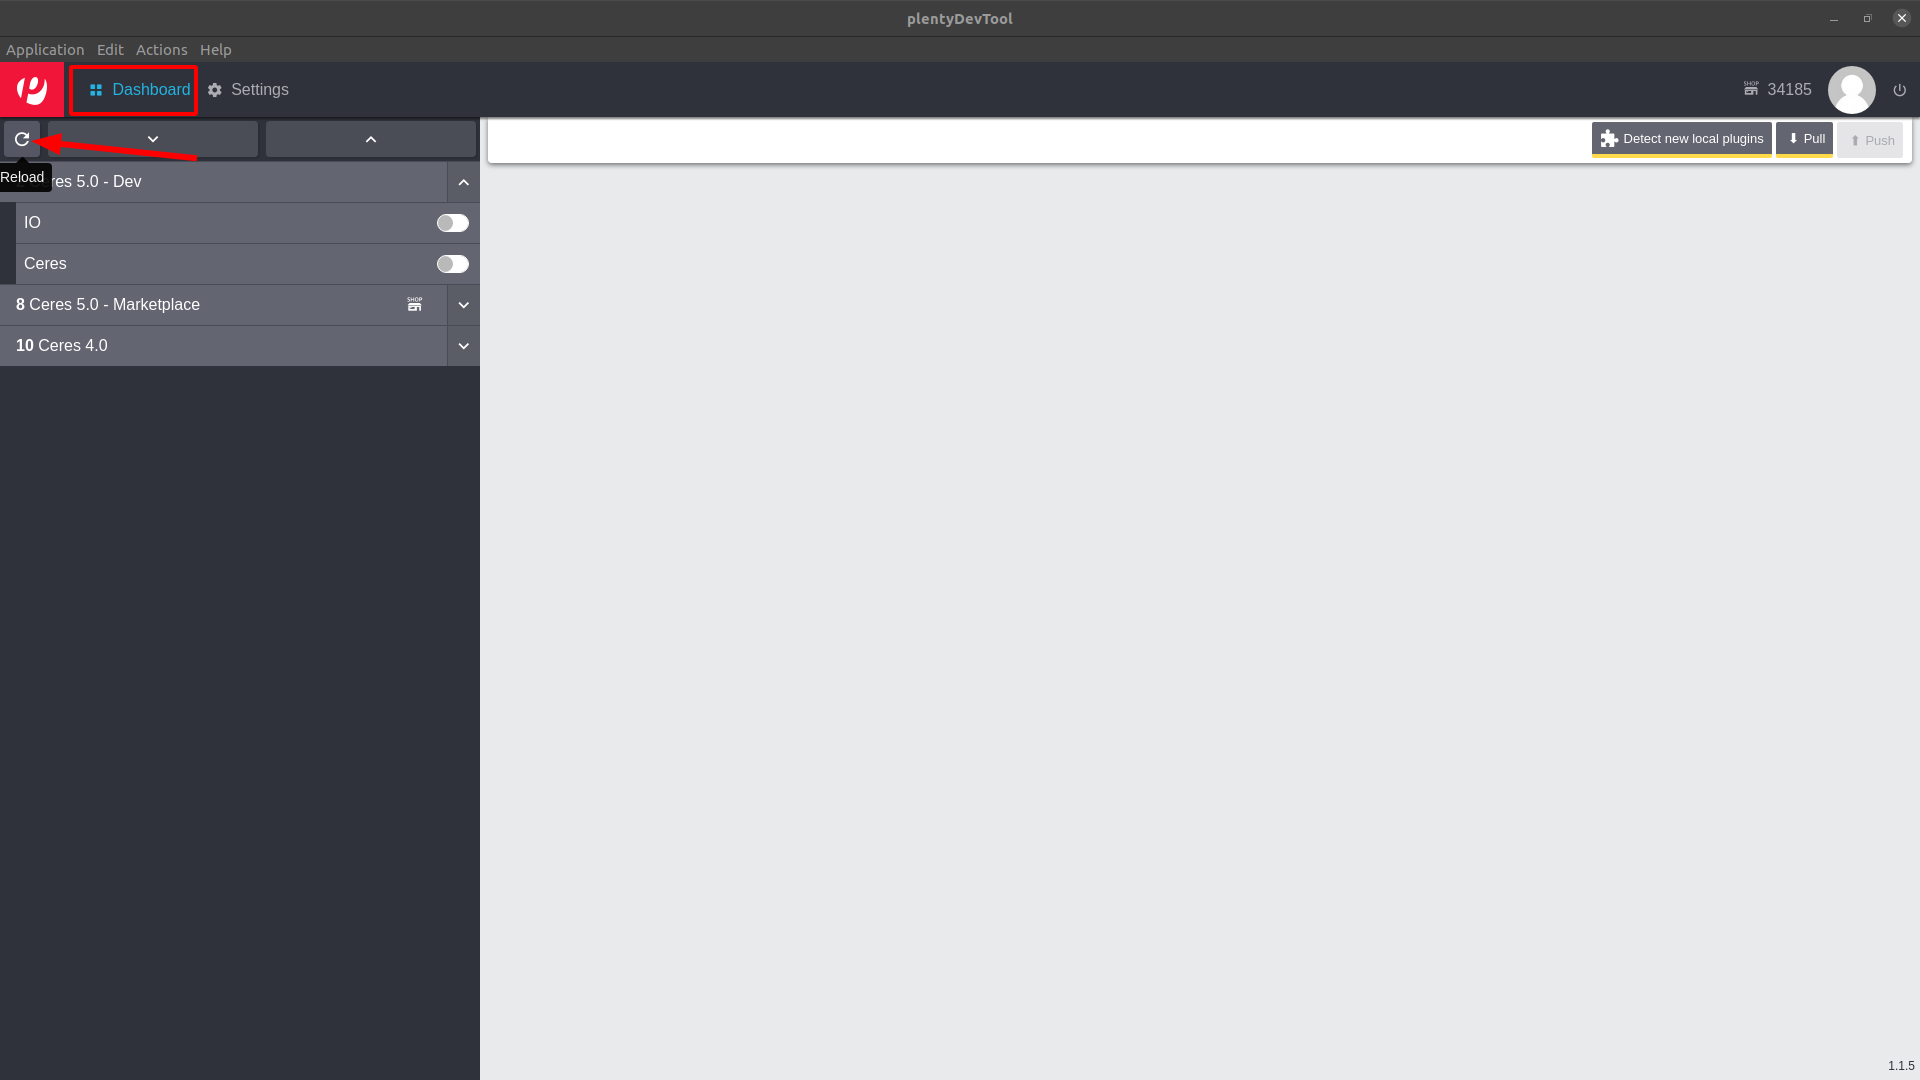
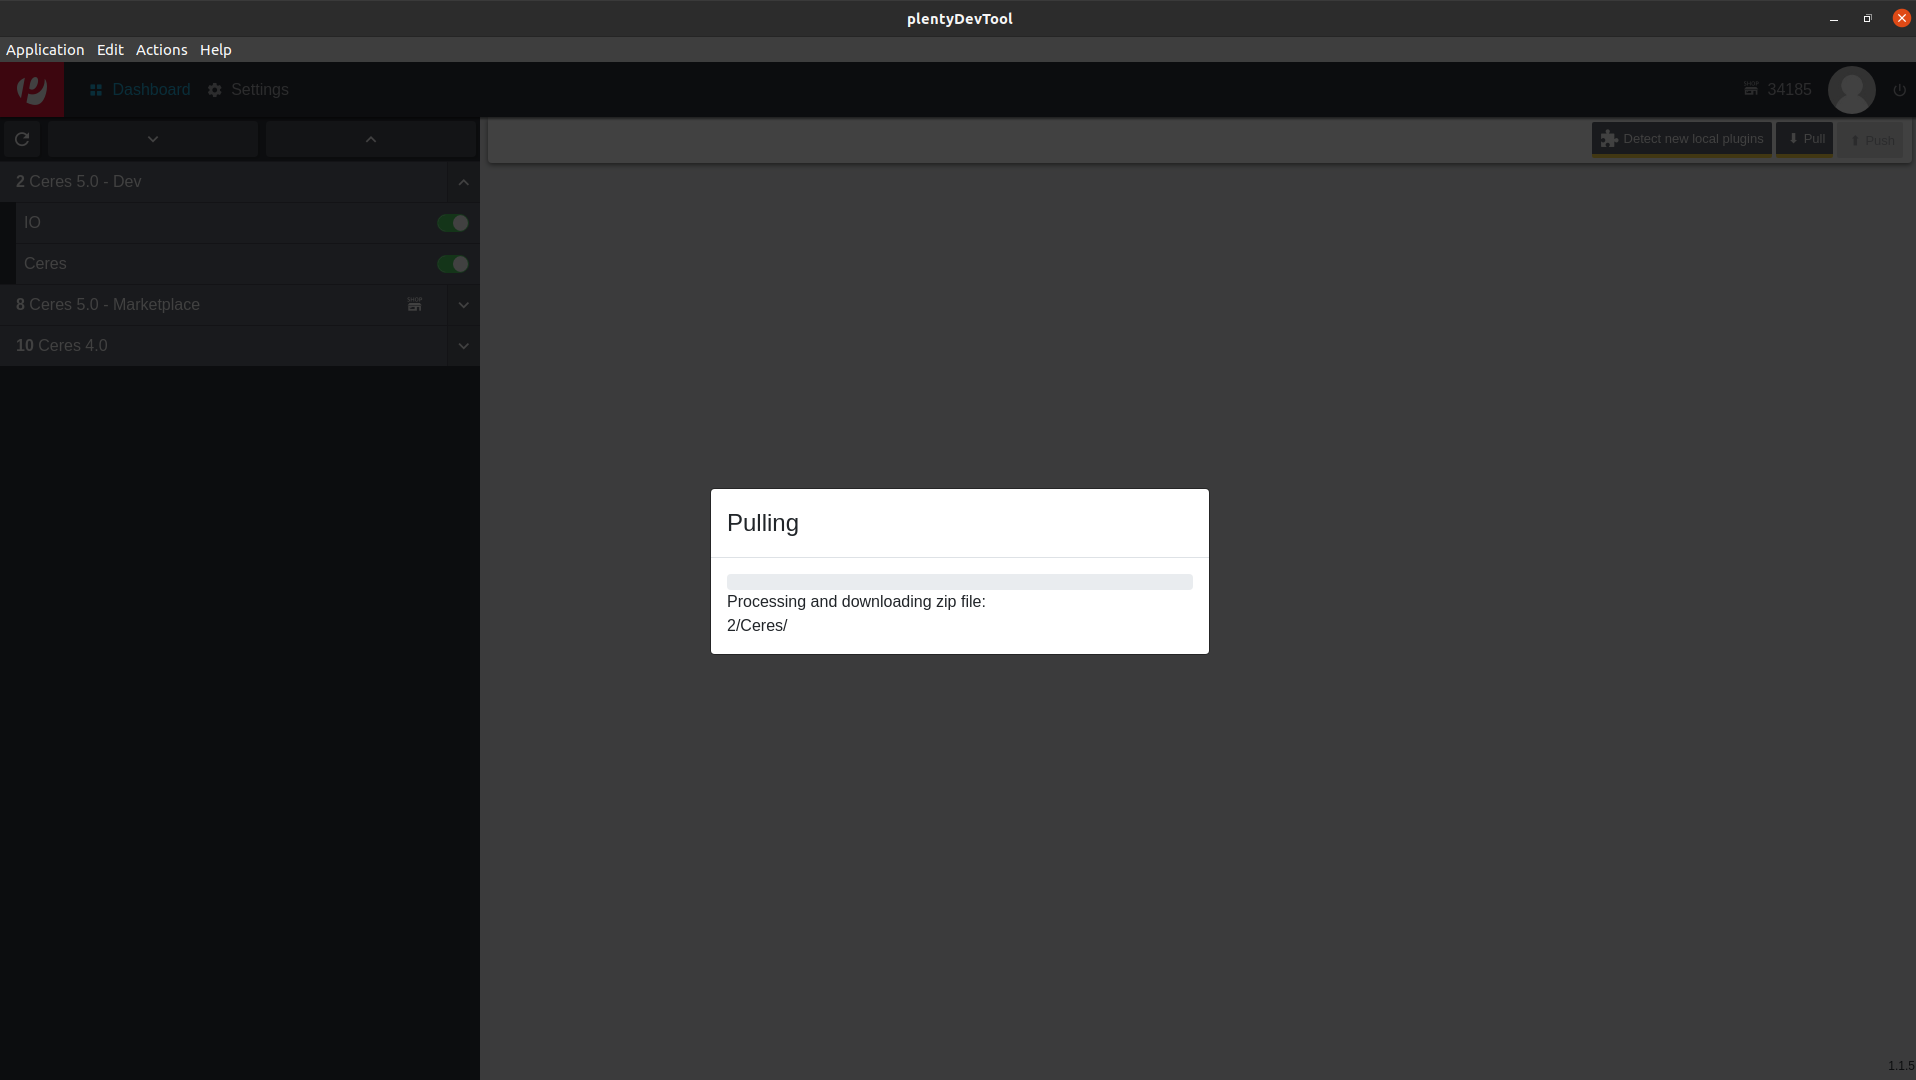
On the left side open your Plugin-Set and check the *Ceres* and *IO* plugin and then click on *Pull*.
The initial pull may take some time, feel free to get a ☕ coffee in the meantime.
Now that everything is setup, clone this repo inside of the Plugin-Set path.
The path may be `~/Documents/plentyDevTool/34185/2`. The cloned repository name
**must be Findologic**, otherwise will not be recognized by the PlentyDevTool.
```bash
git clone git@github.com:findologic/plugin-plentymarkets-ceres-api.git Findologic
```
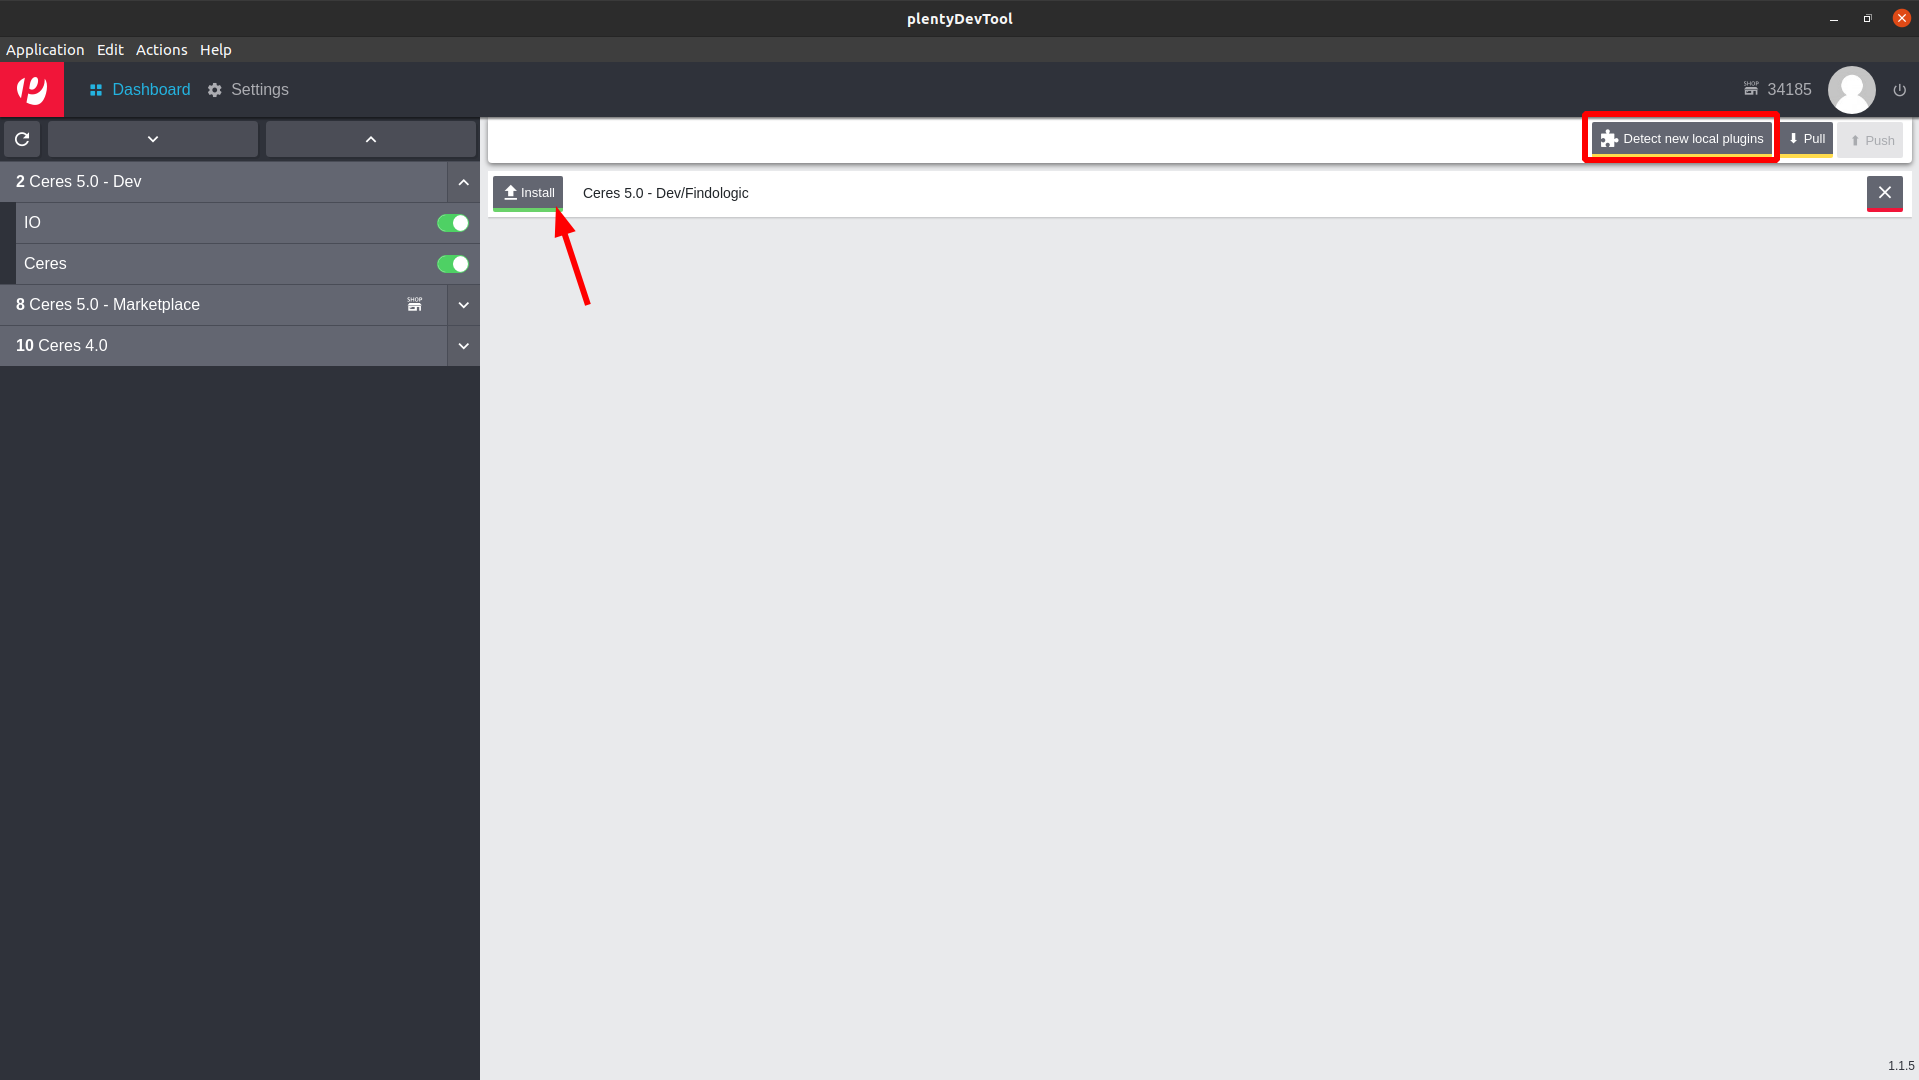
Now clicking *Detect new local plugins* in the PlentyDevTool should show the
Findologic plugin in the list. Click *Install*, which will upload your local plugin.
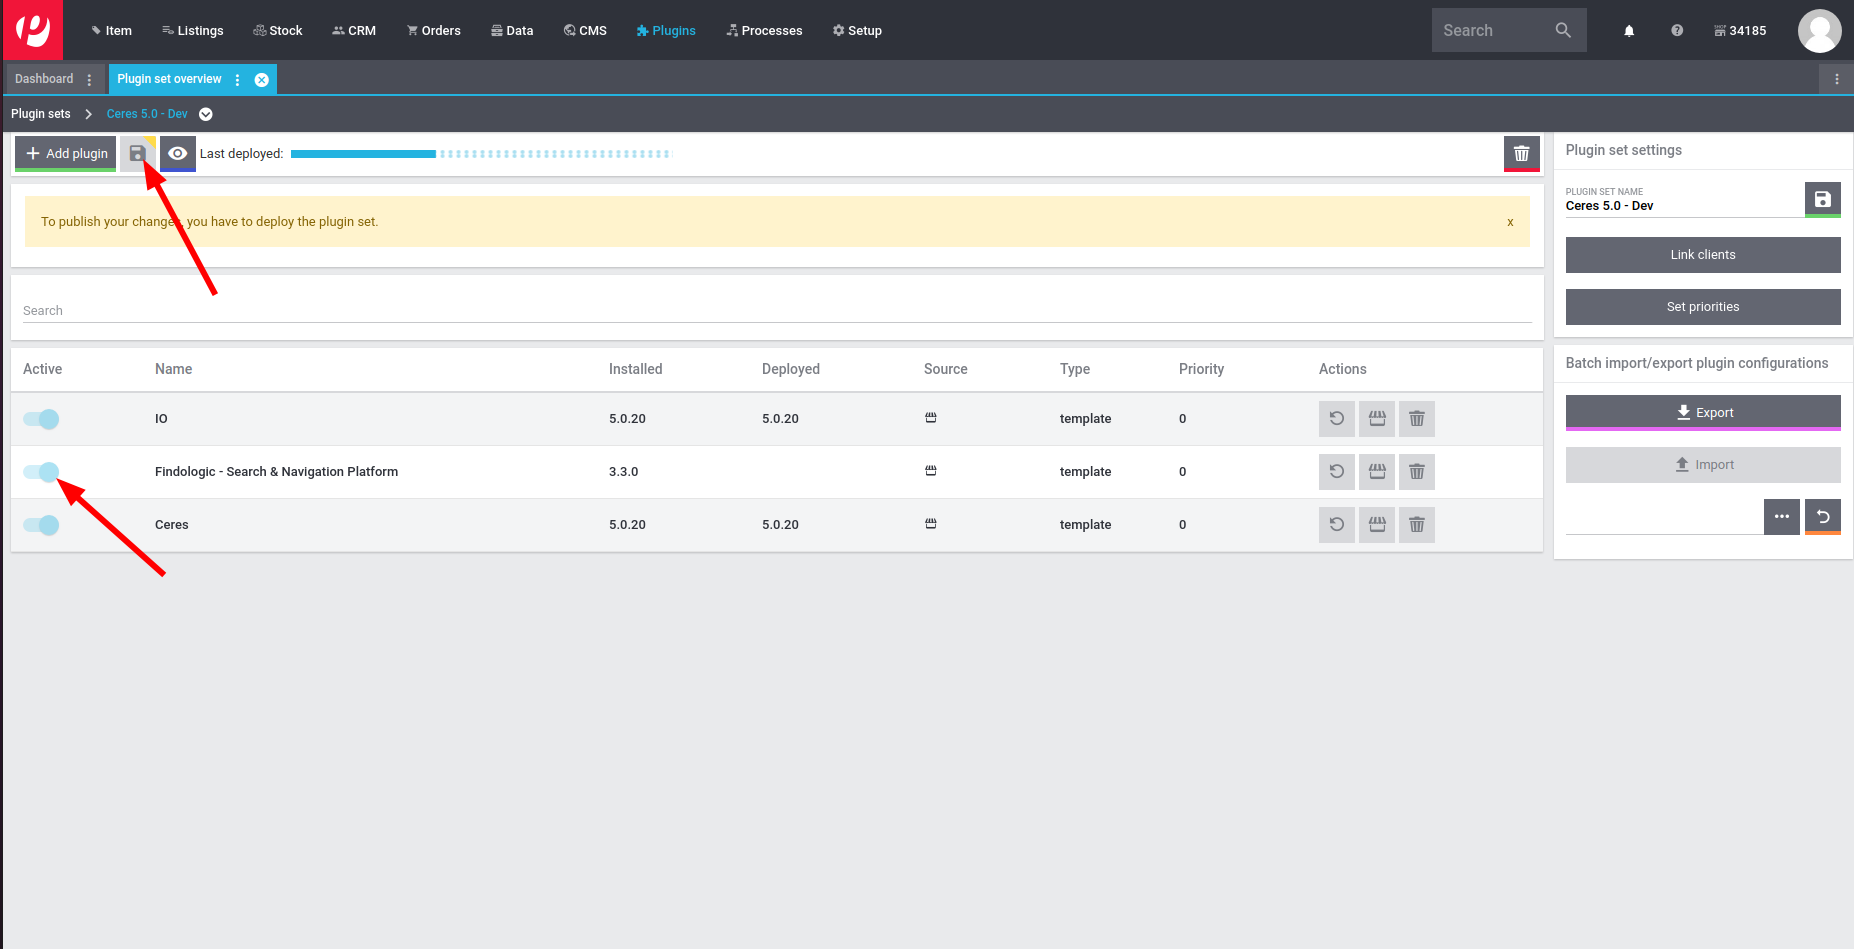
Refresh the Plugin-Sets in the PlentyDevTool and ensure to check the *Findologic* plugin
now and uncheck *Ceres* and *IO*. This tells Plentymarkets to only check for file
changes in the Findologic plugin.
Next refresh the Plugin-Set page in the browser and activate the newly added Findologic
plugin. Follow the [configuration instructions](https://docs.findologic.com/doku.php?id=integration_documentation:plentymarkets_ceres_plugin:ceres_plugin_configuration)
in our documentation and deploy the Plugin-Set.
When files are now changed, the PlentyDevTool will automatically detect them and allow you to
push your changes. Once pushed Plentymarkets will automatically trigger a build, that only
builds your changes, which makes it an almost immediate change.
From the [PlentyDevTool description](https://marketplace.plentymarkets.com/en/plentydevtool_6652):
> Warning:
> The auto build is an abbreviated build. It only checks the files changed, but does not validate how
> they interact with other files. Consequently, the auto build may not show errors that would become
> apparent in the manual build.
### Building non-compiled files
Before pushing you may run build to ensure your JS/CSS is built.
```
npm run build
```
### Local TS and Vue development
When developing you can also run a local test server, where your compiled JS and CSS is being fetched from your local system. The following things have to be done in order to serve files locally:
* Start local development server
* This will install local SSL certificates on first start
* Update views to serve files locally
* Accept certificates in your browser
**Starting local development server**
You can start your local development server anytime with this command.
```bash
npm run serve
```
**Serve files locally**
In order to serve the files locally, simply update the views responsible for loading them.
**`resources/views/content/scripts.twig`**
```twig
{# Old #}
{# Replace old with this #}
```
**`resources/views/content/styles.twig`**
```twig
{# Old #}
{# Replace old with this #}
```
Push these changes to your Plugin-Set using the PlentyDevTool.
**Accept certificates in your browser**
Open https://localhost:5173/ and accept the certificates.
### Running unit-tests locally
Make sure to include the `tests/phpunit.xml` as an *alternative configuration file* in your IDE.
Alternatively run all tests with
```
composer test
```
## Deployment & Release
1. Update the German and English change logs in folder `meta/documents`.
1. Bump the plugin version in files `plugin.json` and `src/Constants/Plugin.php`.
1. Open the backend from our Plentymarkets shop.
1. Go to *Plugins > Plugin overview > Plugin Release > Findologic > Git* and fetch & pull the `main` branch.
1. Go back to *Plugin overview* and click *Save & deploy plugin set*.
1. Open the plugin again and click on *Upload to plentyMarketplace*.
1. The plugin may not be available yet, Plentymarkets has to do a review on their side.
1. After review was successful notify colleagues in #releases.
## Versioning
We use [SemVer](http://semver.org/) for versioning. For the versions available, see the [tags on this repository](https://github.com/findologic/plugin-plentymarkets-ceres-api/tags).