https://github.com/francoiswnel/Serial-Boy
Serial Boy is a Game Boy Link Cable to Arduino Uno adapter.
https://github.com/francoiswnel/Serial-Boy
arduino camera game-boy
Last synced: about 1 month ago
JSON representation
Serial Boy is a Game Boy Link Cable to Arduino Uno adapter.
- Host: GitHub
- URL: https://github.com/francoiswnel/Serial-Boy
- Owner: francoiswnel
- License: mit
- Created: 2020-07-06T17:45:54.000Z (almost 5 years ago)
- Default Branch: master
- Last Pushed: 2020-07-06T18:02:05.000Z (almost 5 years ago)
- Last Synced: 2023-02-28T11:12:08.307Z (about 2 years ago)
- Topics: arduino, camera, game-boy
- Homepage:
- Size: 3.17 MB
- Stars: 3
- Watchers: 1
- Forks: 0
- Open Issues: 0
-
Metadata Files:
- Readme: README.md
- License: LICENSE.md
Awesome Lists containing this project
README
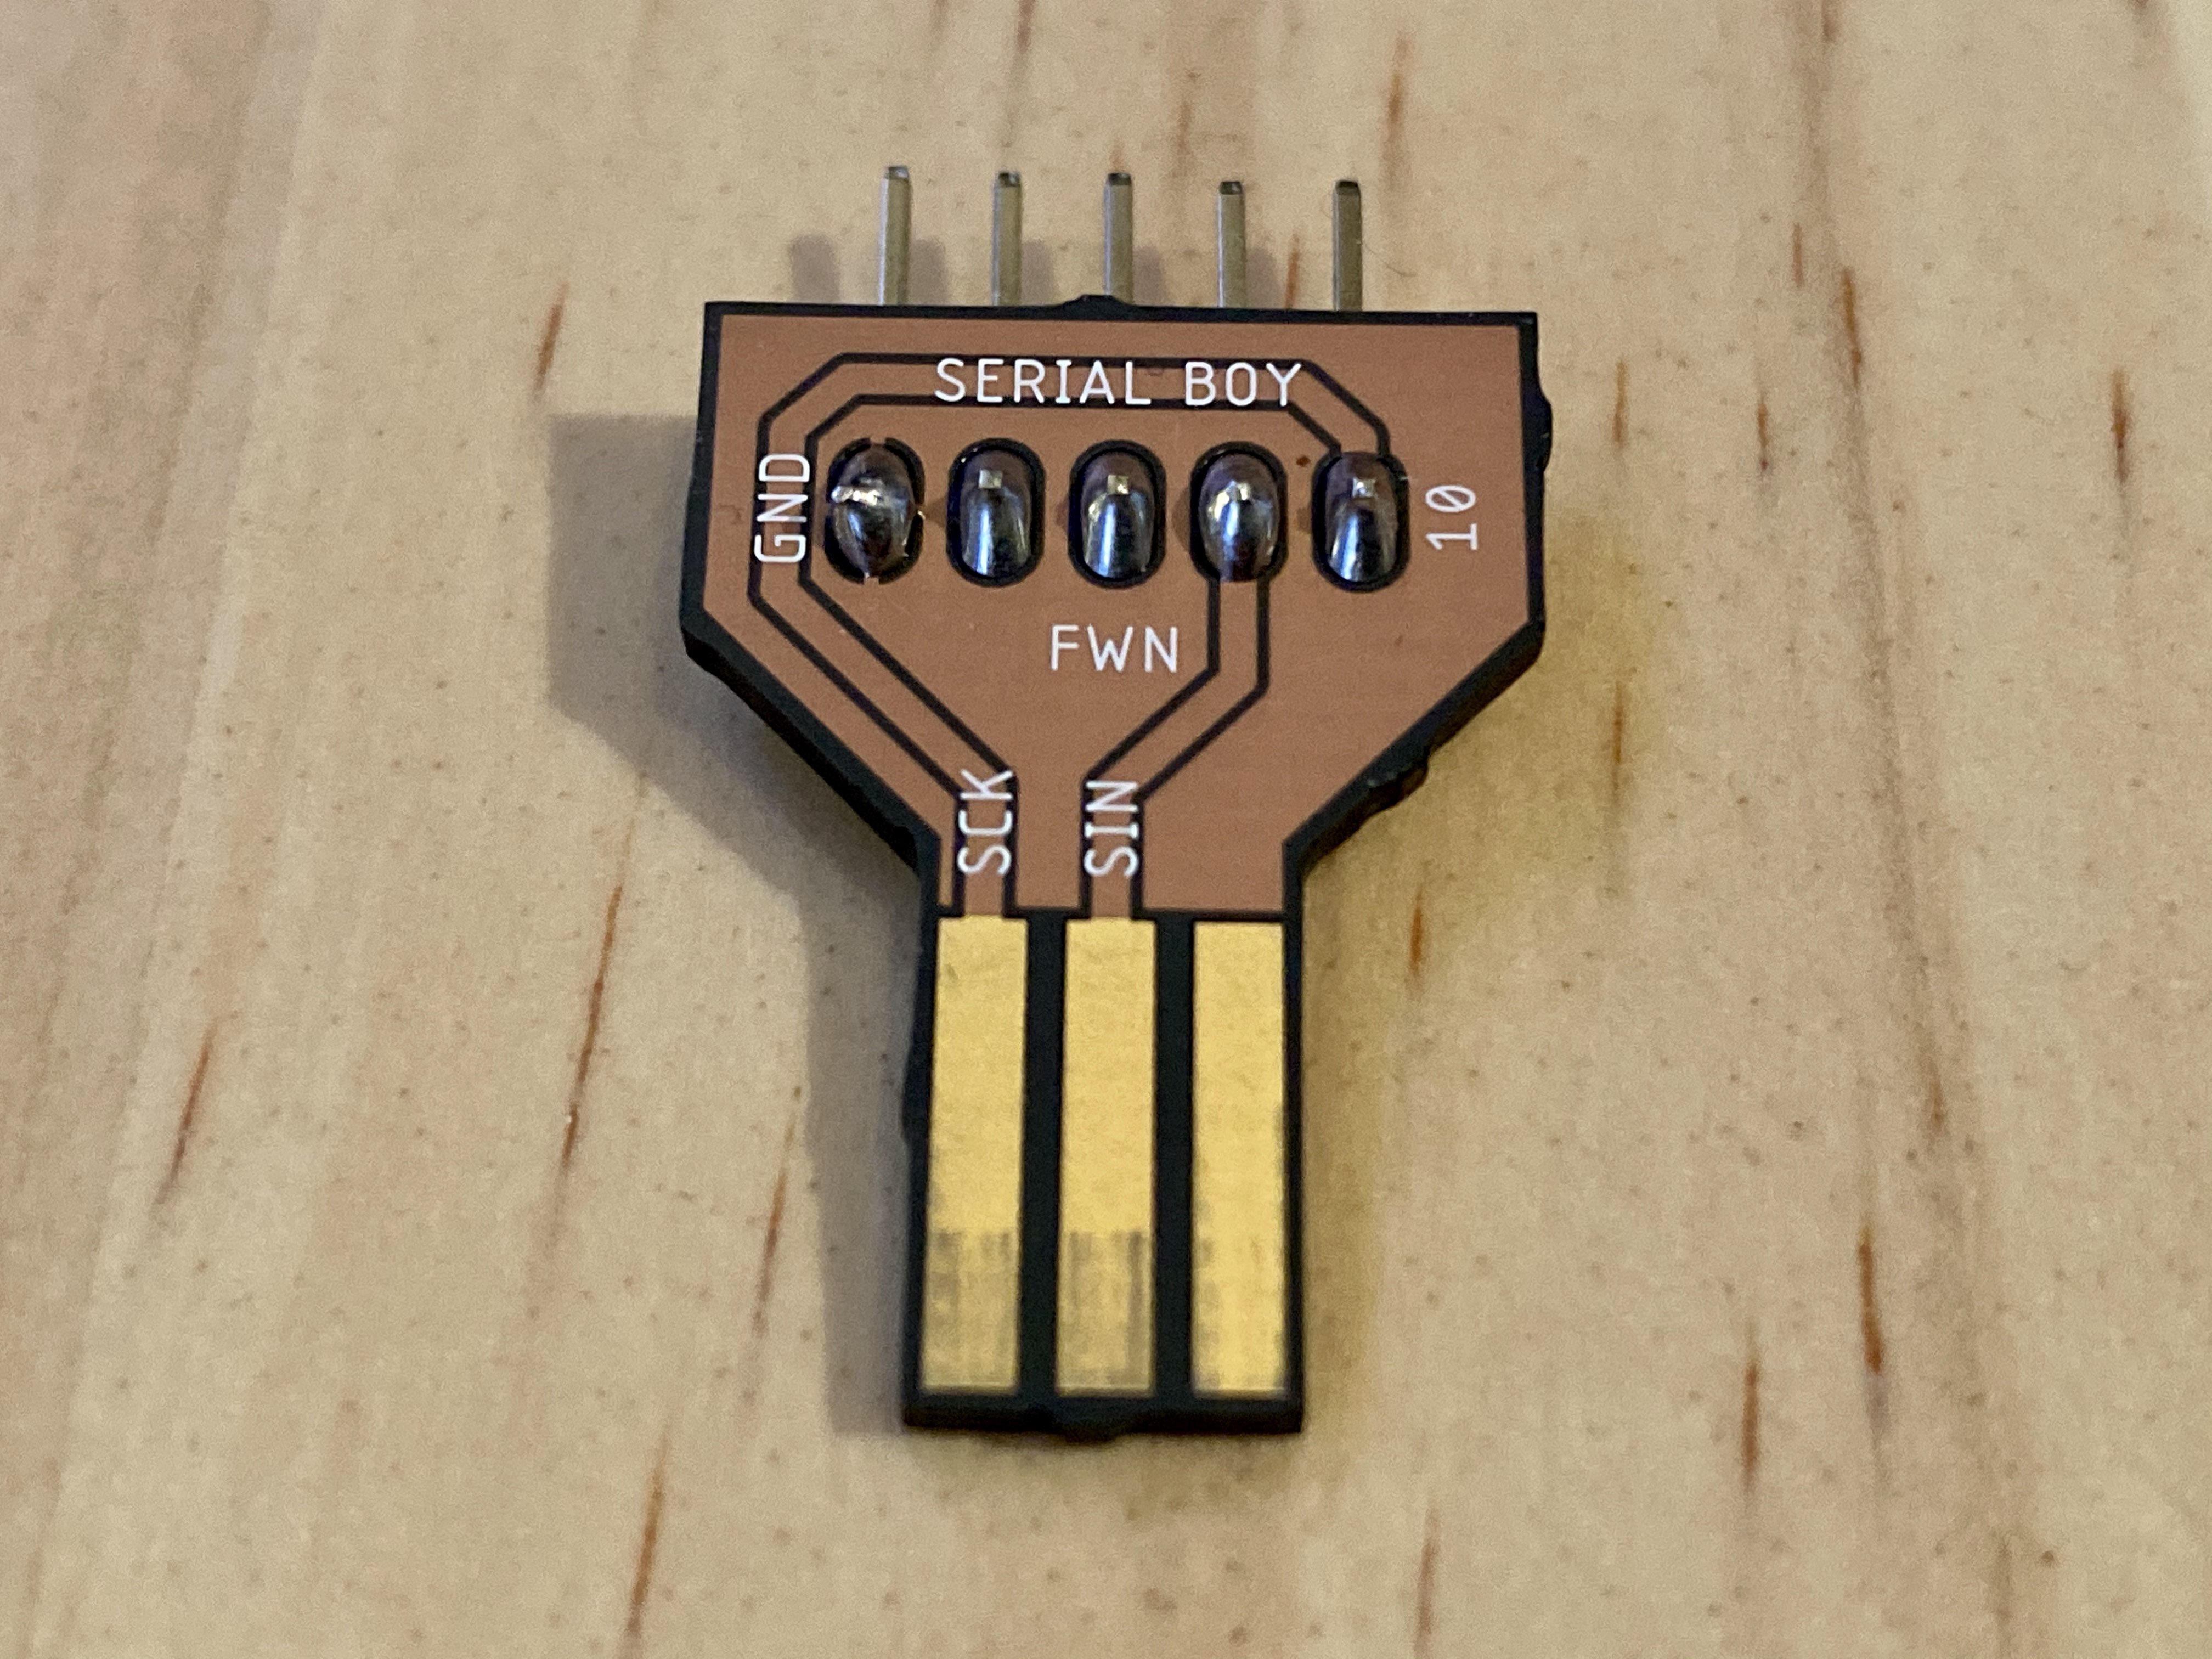
# Serial Boy
Serial Boy is a Game Boy Link Cable to Arduino Uno adapter. The main purpose being to connect a Game Boy Pocket Camera to an emulated Game Boy Printer.
# Get the PCB
You can upload the generated CAM job in the output directory to your favourite PCB fab, or you can generate a new CAM job from the project files, or you can use the [shared project on OSH Park](https://oshpark.com/shared_projects/0MKOwrEA). Please note that the version on OSH Park has the pin numbers incorrectly labelled since I had not realised at the time that the serial clock needs to be connected to a pin with hardware interrupt.
# Get the Game Boy Printer emulator
I've forked [mofosyne's Arduino Gameboy Printer Emulator](https://github.com/mofosyne/arduino-gameboy-printer-emulator) project and reconfigured it to work with Serial Boy, since that project assumes that you'll be cutting up a link cable and directly soldering it to Arduino Micro pins. Get the [Serial Boy branch](https://github.com/francoiswnel/arduino-gameboy-printer-emulator/tree/serial-boy) and transfer it to your Arduino Uno.
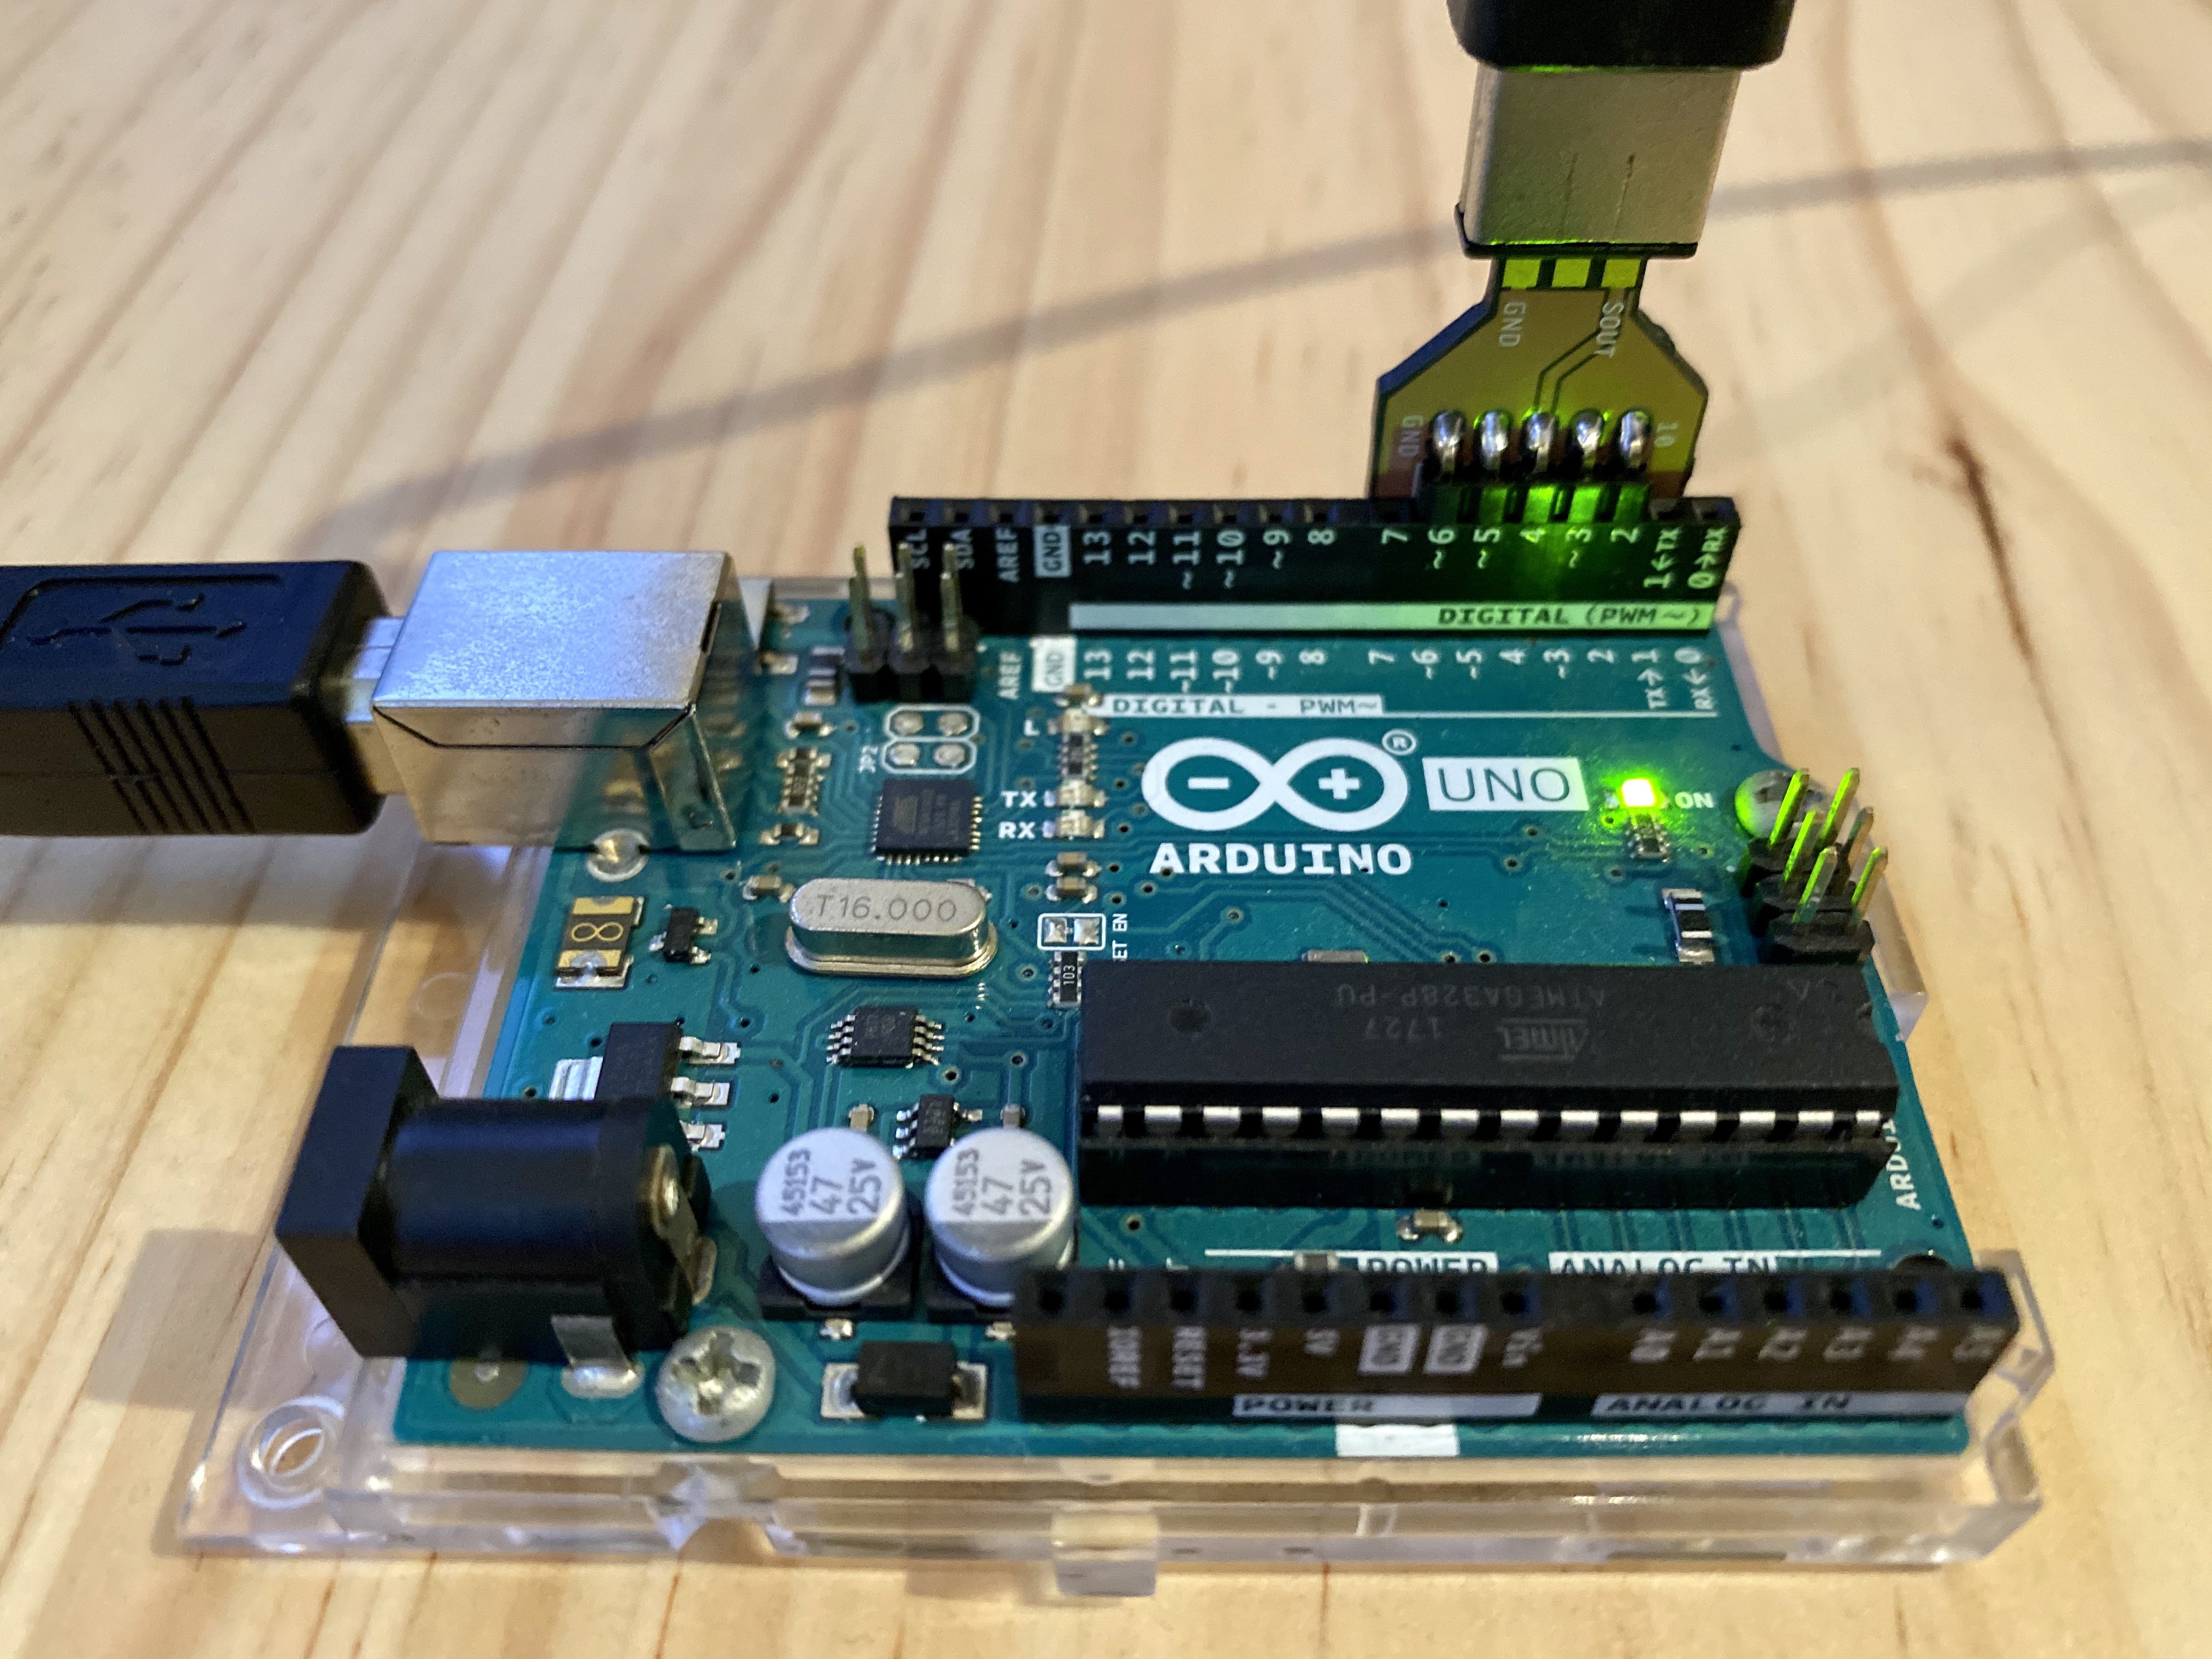
# Connect your Game Boy to your Arduino
You'll need to solder some pins to the PCB, angled ones will be ideal. Insert the pins into headers 2 to 6 on the Arduino Uno, and connect the link cable to the other end of the PCB. It can fit both ways, so just orient the internal pins with the labels printed on the PCB - you'll see some pins in the cable are missing. Then follow the instructions from the [emulator repository](https://github.com/francoiswnel/arduino-gameboy-printer-emulator/tree/serial-boy).