https://github.com/frgallah/mastertransitions
Interactive transition library for tabbar, navigation and modal view controller. iOS only.
https://github.com/frgallah/mastertransitions
animation custom-transitions interface-builder ios ios10 navigation navigation-controller storyboard swift swift3 tabbarcontroller transition-animation translation uicomponent uikit uinavigationcontroller uitabbarcontroller uiviewcontroller
Last synced: 10 months ago
JSON representation
Interactive transition library for tabbar, navigation and modal view controller. iOS only.
- Host: GitHub
- URL: https://github.com/frgallah/mastertransitions
- Owner: Frgallah
- License: mit
- Created: 2017-04-10T03:21:57.000Z (almost 9 years ago)
- Default Branch: master
- Last Pushed: 2021-10-28T19:49:25.000Z (over 4 years ago)
- Last Synced: 2025-04-10T00:01:26.904Z (10 months ago)
- Topics: animation, custom-transitions, interface-builder, ios, ios10, navigation, navigation-controller, storyboard, swift, swift3, tabbarcontroller, transition-animation, translation, uicomponent, uikit, uinavigationcontroller, uitabbarcontroller, uiviewcontroller
- Language: Swift
- Homepage:
- Size: 18.3 MB
- Stars: 24
- Watchers: 1
- Forks: 6
- Open Issues: 1
-
Metadata Files:
- Readme: README.md
- License: LICENSE
Awesome Lists containing this project
README

# MasterTransitions
[](https://github.com/Frgallah/MasterTransitions)
[](http://cocoapods.org/pods/MasterTransitions)
[](http://cocoapods.org/pods/MasterTransitions)
[](http://cocoapods.org/pods/MasterTransitions)
[](http://cocoapods.org/pods/MasterTransitions)
[](http://cocoapods.org/pods/MasterTransitions)
## Introduction
**MasterTransitions** is a library that contains a collection of custom transitions for view controller. It allows you to create a custom transition with just a few lines of code, making the process of creating custom transitions easy and painless for developers.
## Requirements
- iOS 12.0+
- Xcode 12+
- Swift 5
## Installation
### [CocoaPods](http://cocoapods.org).
To install it, simply add the following lines to your Podfile:
```ruby
use_frameworks!
pod "MasterTransitions"
```
### Manually
Copy `Sources` folder to your Xcode project.
## Usage
How to use MasterTransitions to create a custom transition:
### Navigation and TabBar Controller
#### Code
In the root view controller or the first view controller:
1. Get a reference to your Navigation or TabBar Controller
2. Create a Navigation or TabBar Controller delegate using Navigation or TabBar Controller, transition type and is Interactive as parameters.
3. Optional: in your delegate object
- set the transition duration
- set the transition direction
4. Your Done!
Navigation Controller
```swift
// In the root view controller
override func viewDidLoad() {
super.viewDidLoad()
// 1- Get a reference to your Navigation Controller
guard let navigationController = self.navigationController else {
return
}
// 2- Create a Navigation Controller delegate with :
let navigationControllerDelegate = NavigationControllerDelegate.init(navigationController: navigationController, transitionType: .Puzzle1, isInteractive: true)
// 3- Optional: in your delegate object
// - set the transition duration
// - set the transition direction
navigationControllerDelegate.duration = 1.4
navigationControllerDelegate.transitionSubType = .LeftToRight
}
```
TabBar Controller
```swift
// In the first view controller
override func viewDidLoad() {
super.viewDidLoad()
// 1- Get a reference to your TabBar Controller
guard let tabBarController = self.tabBarController else {
return
}
// 2- Create a tabBar Controller delegate with :
let tabBarControllerDelegate = TabBarControllerDelegate.init(tabBarController: tabBarController, transitionType: .Puzzle1, isInteractive: true)
// 3- Optional: in your delegate object
// - set the transition duration
// - set the transition direction
tabBarControllerDelegate.duration = 1.4
tabBarControllerDelegate.transitionSubType = .LeftToRight
}
```
#### Interface Builder
if you are using the storyboard only:
1. Drag an Object from the Object Library to your:
navigation controller scene
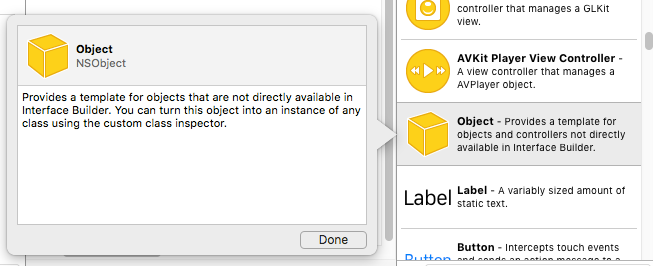
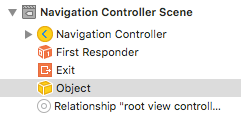
or
tabBar controller scene

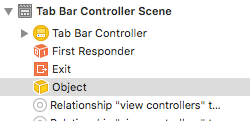
----------
2. In the Custom Class Inspector of the object set its class to:
NavigationControllerDelegate
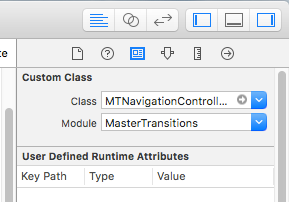
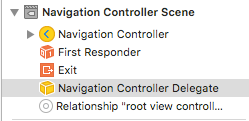
or
TabBarControllerDelegate
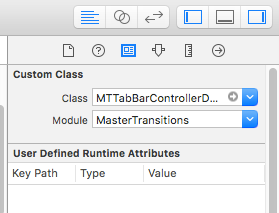
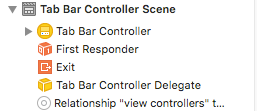
----------
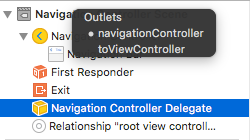
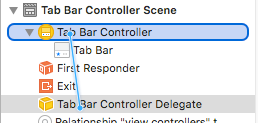
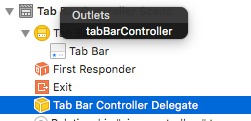
3. control-drag from the delegate object to:
the navigation controller and set the outlet to navigationController
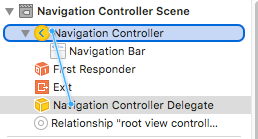
or
the tabBar controller and set the outlet to tabBarController
----------
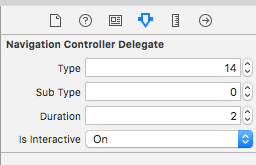
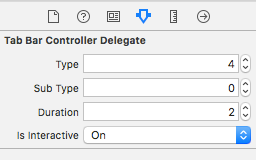
4. Optional:
In the Attributes Inspector of the delegate object
- set the Type as transition type
- set the Sub Type as transition direction
- set the Duration as transition durtion
- set Is Interactive
----------
### Modal Controller
#### In code
In the source or presenting view controller:
1. Create or get a reference to your destination controller
2. set the modal Presentation Style of your destination controller to full screen
3. Create a Modal Controller delegate using the destination controller and a transition type as parameters.
4. Optional:
- make the transition interactive
- set the transition duration
- set the transition direction
5. Your Done!
```swift
// In the source or presenting view controller:
@IBAction func presentViewControllerModally(_ sender: Any) {
// 1- Create your destination Controller
guard let destinationController = storyboard?.instantiateViewController(withIdentifier: "desVC") as? DestinationViewController else { return }
/*
or get a reference to your destination controller if you are using prepare for segue function
let destinationController = segue.destination
*/
// 2- set the modal Presentation Style of your destination controller to full screen
destinationController.modalPresentationStyle = .fullScreen
// 3- Create a Modal Controller delegate using the destination controller and a transition type as parameters.
let controllerDelegate = ModalControllerDelegate.init(destinationController: destinationController, transitionType: .Door2)
// 4- Optional:
// - make the transition interactive
// supply a pan gesture if the destination controller view already has a one, if not do not warry about it, the Modal Controller Delegate will create one for you.
controllerDelegate.addInteractiveToDestinationController(panGesture: nil)
// - set the transition duration
controllerDelegate.duration = 2
// - set the transition direction
controllerDelegate.transitionSubType = .RightToLeft
// - present the destination controller modally
present(destinationController, animated: true, completion: nil)
}
```
#### In Interface Builder
if you using the storyboard only:
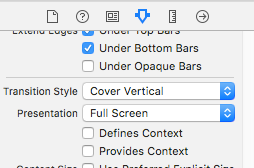
1. In the Attributes Inspector of the destination controller set Presentation to Full Screen
----------
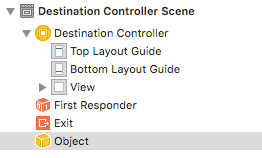
2. Drag an Object from the Object Library to the destination controller scene

----------
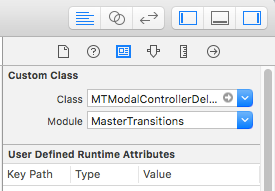
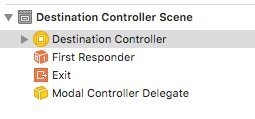
3. In the Custom Class Inspector of the object set its class to ModalControllerDelegate
----------
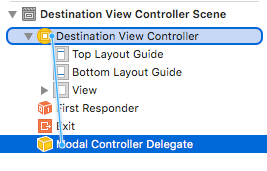
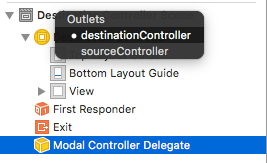
4. control-drag from the delegate object to the destination controller and set the outlet to destinationController
----------
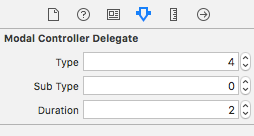
5. Optional:
In the Attributes Inspector of the delegate object
- set the Type as transition type
- set the Sub Type as transition direction
- set the Duration as transition durtion
----------
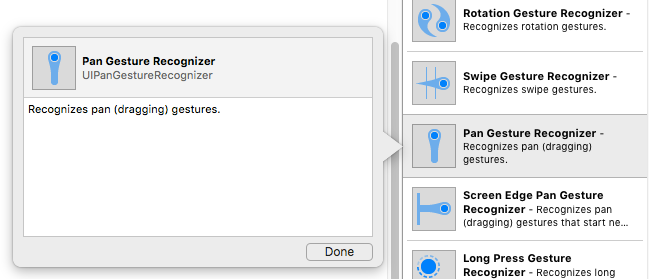
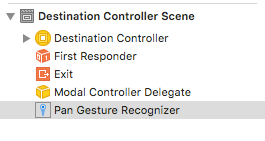
6. Drag a Pan Gesture Recognizer from the Object Library to the destination controller view.
----------
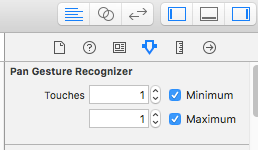
7. In the Attributes Inspector of the Pan Gesture Recognizer set the Minimum and Maximum Touches to 1
----------
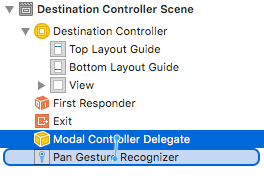
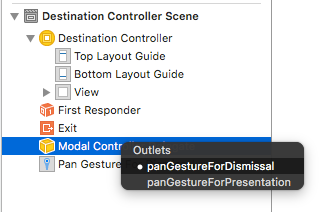
8. control-drag from the delegate object to the Pan Gesture Recognizer and set the outlet to panGestureForDismissal
----------
## Example
To run the example project, clone the repo, and run `pod install` from the Example directory first.
## Author
frgallah, frgallah@outlook.com
## Transitions
### Available Transitions
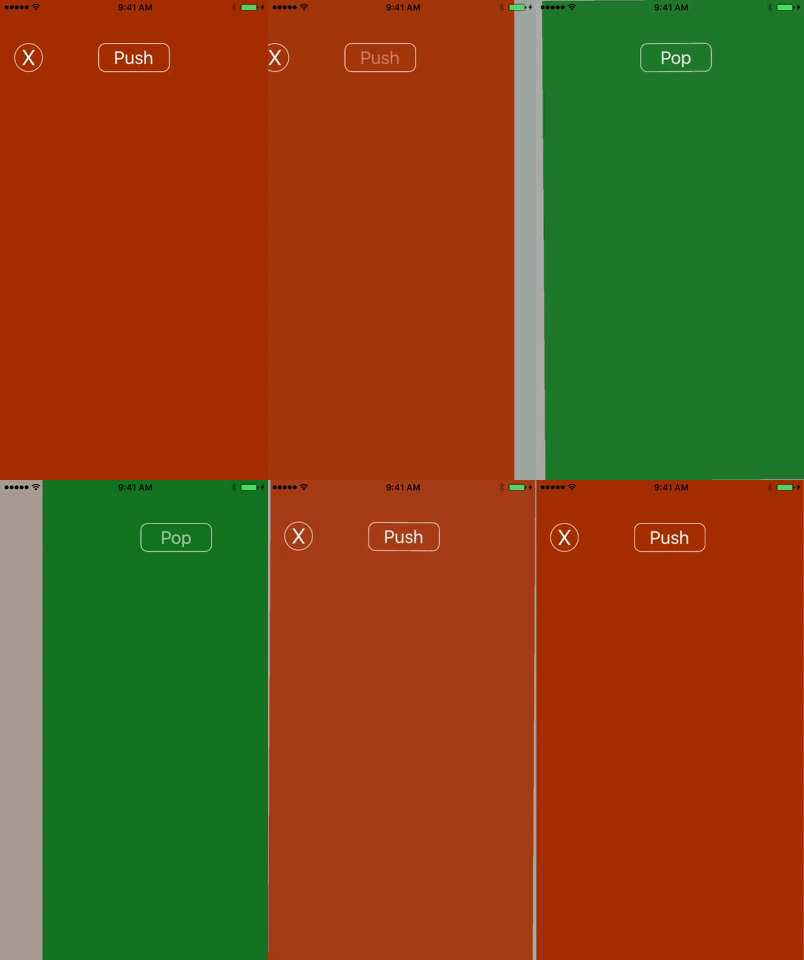
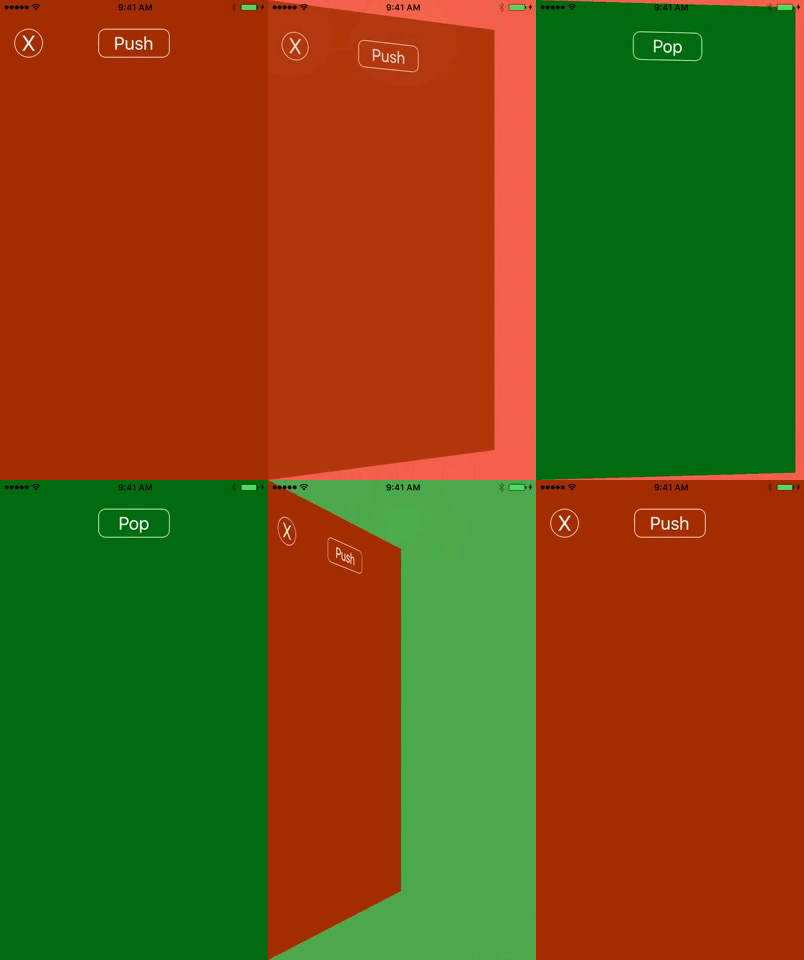
**1. Push 2**
Transition's Directions as Transition SubType
> - RightToLeft
> - LeftToRight
> - BottomToTop
> - TopToBottom
----------
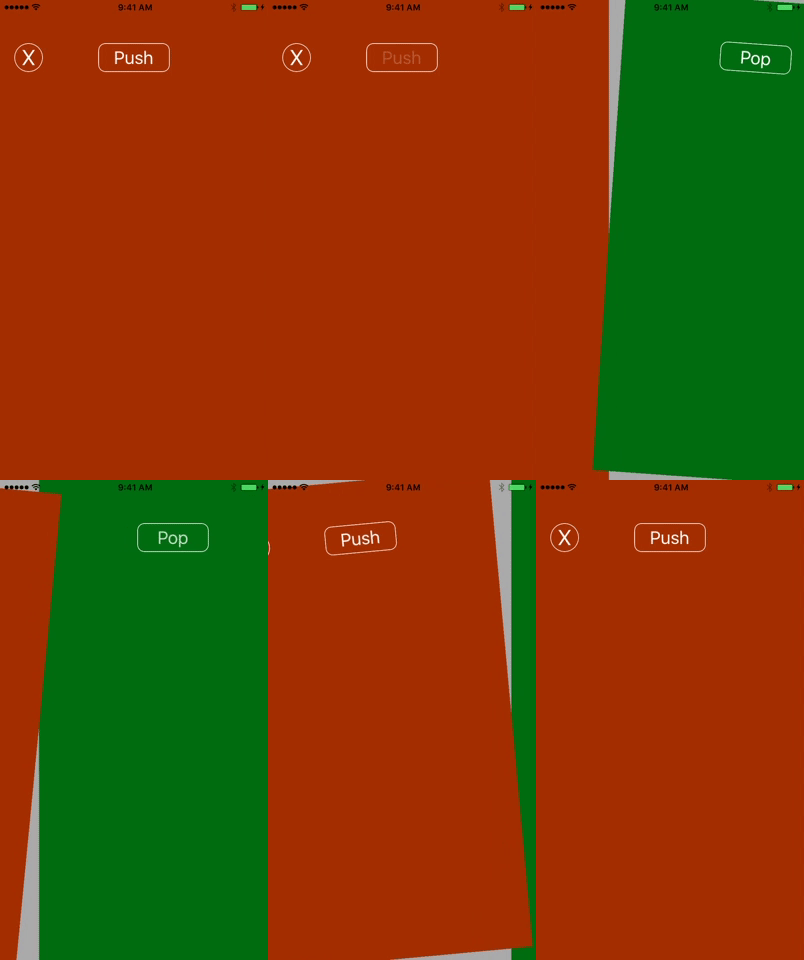
**2. Pull 1**
Transition's Directions as Transition SubType
> - RightToLeft
> - LeftToRight
> - BottomToTop
> - TopToBottom
----------
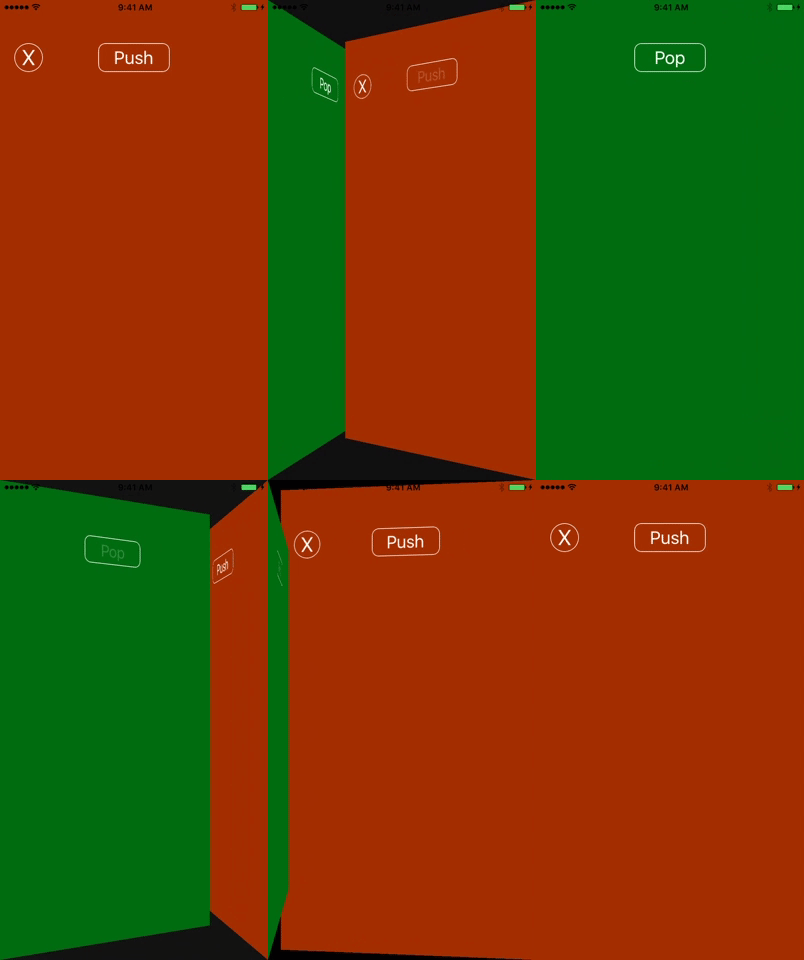
**3. Swing Door**
Transition's Directions as Transition SubType
> - RightToLeft
> - LeftToRight
> - BottomToTop
> - TopToBottom
----------
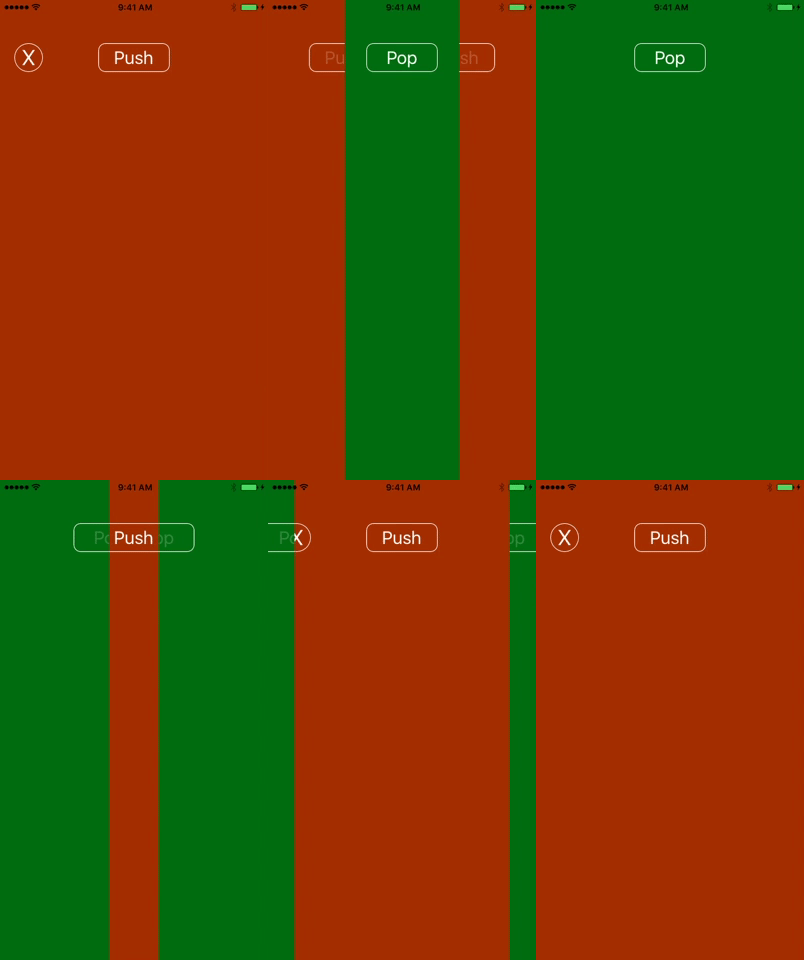
**4. Door 2**
Transition's Directions as Transition SubType
> - Horizontal
> - Vertical
----------
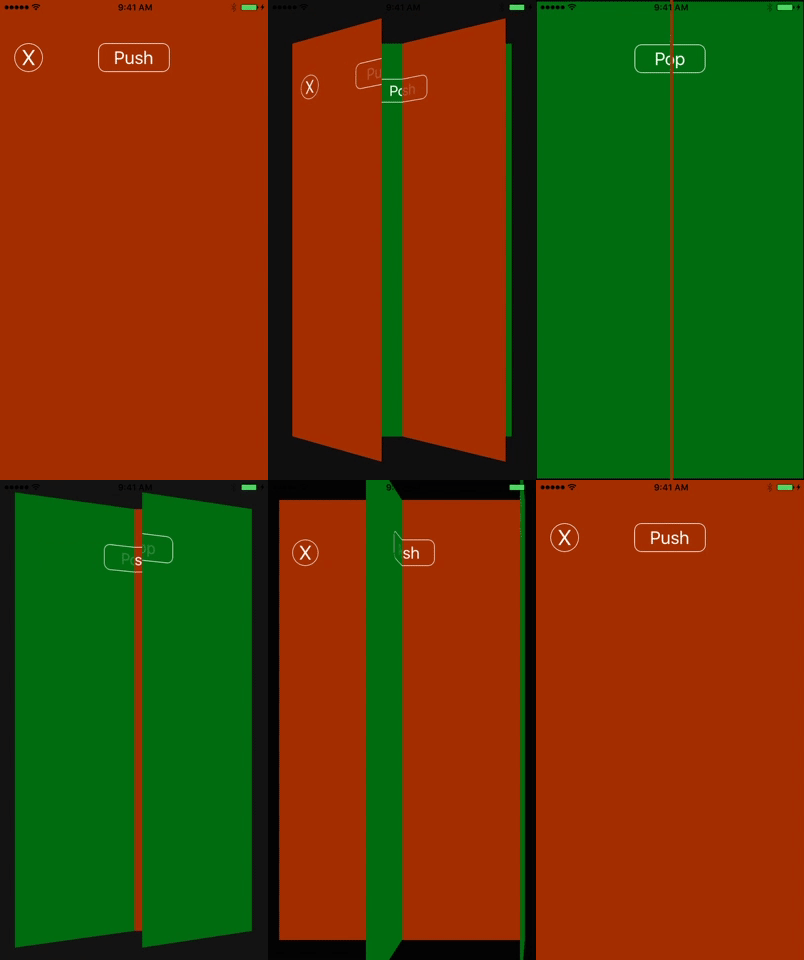
**5. Door 3**
Transition's Directions as Transition SubType
> - RightToLeft
> - LeftToRight
> - BottomToTop
> - TopToBottom
----------
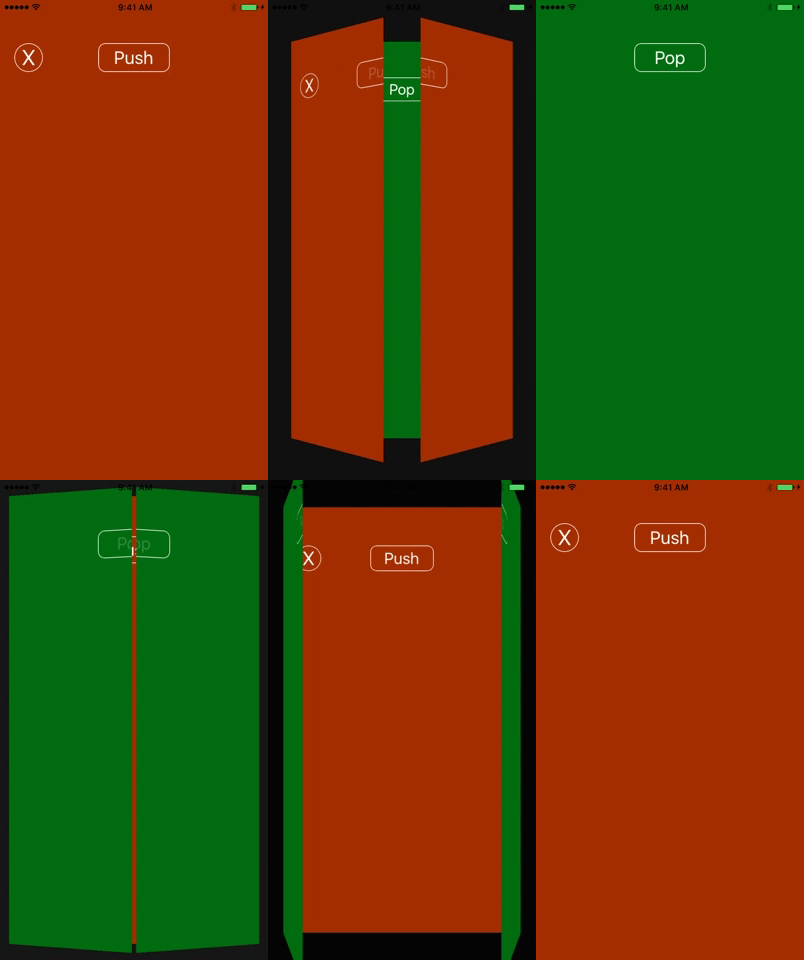
**6. Door 4**
Transition's Directions as Transition SubType
> - Horizontal
> - Vertical
----------
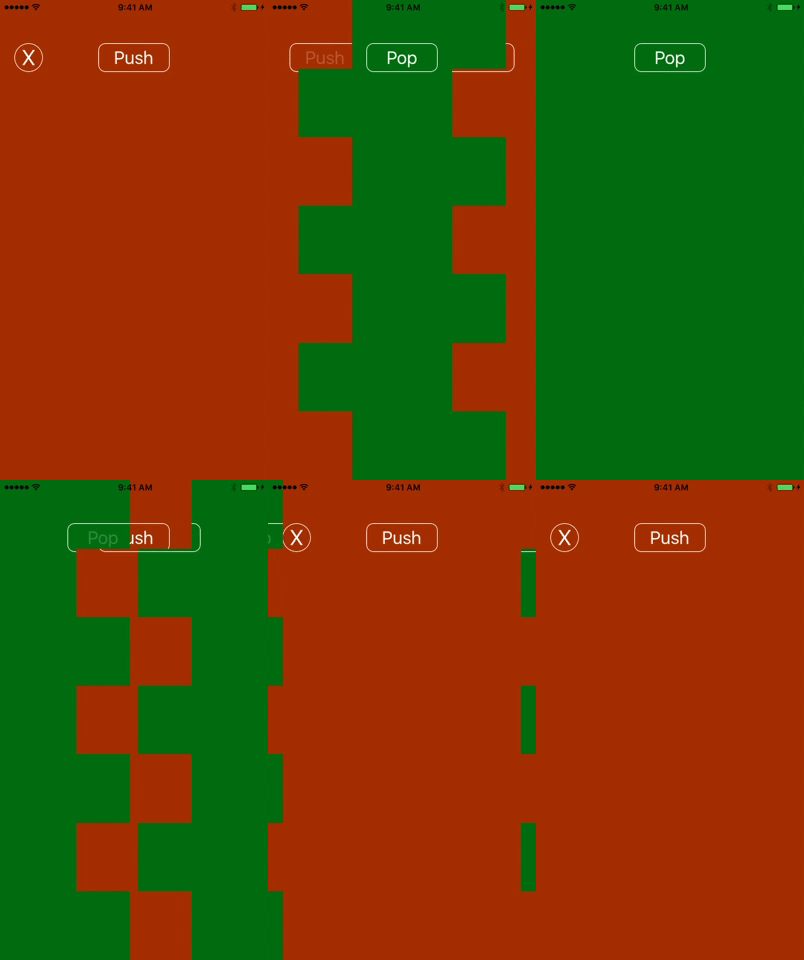
**7. Door 5**
Transition's Directions as Transition SubType
> - Horizontal
> - Vertical
----------
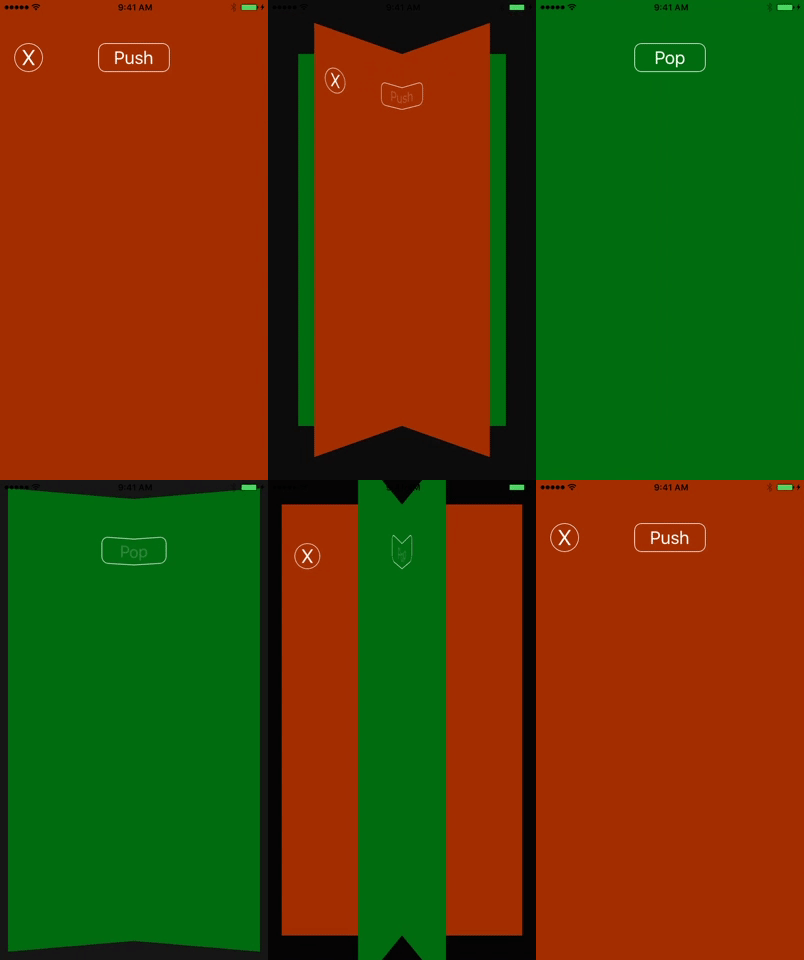
**8. Folder 1**
Transition's Directions as Transition SubType
> - Horizontal
> - Vertical
----------
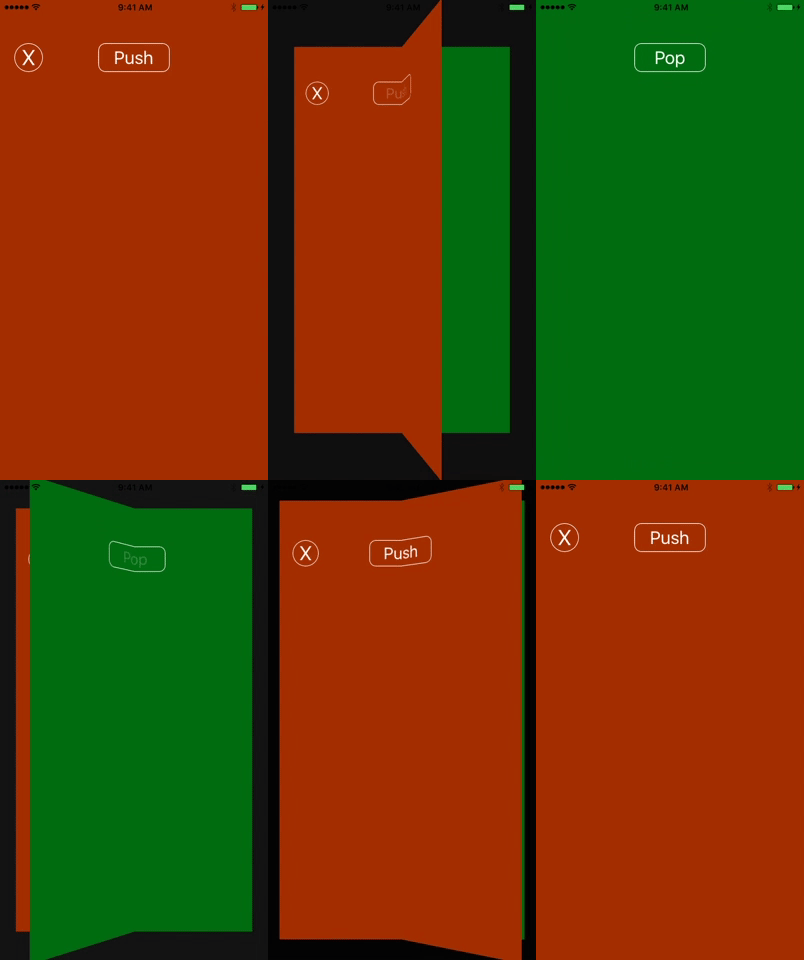
**9. Book 1**
Transition's Directions as Transition SubType
> - RightToLeft
> - LeftToRight
> - BottomToTop
> - TopToBottom
----------
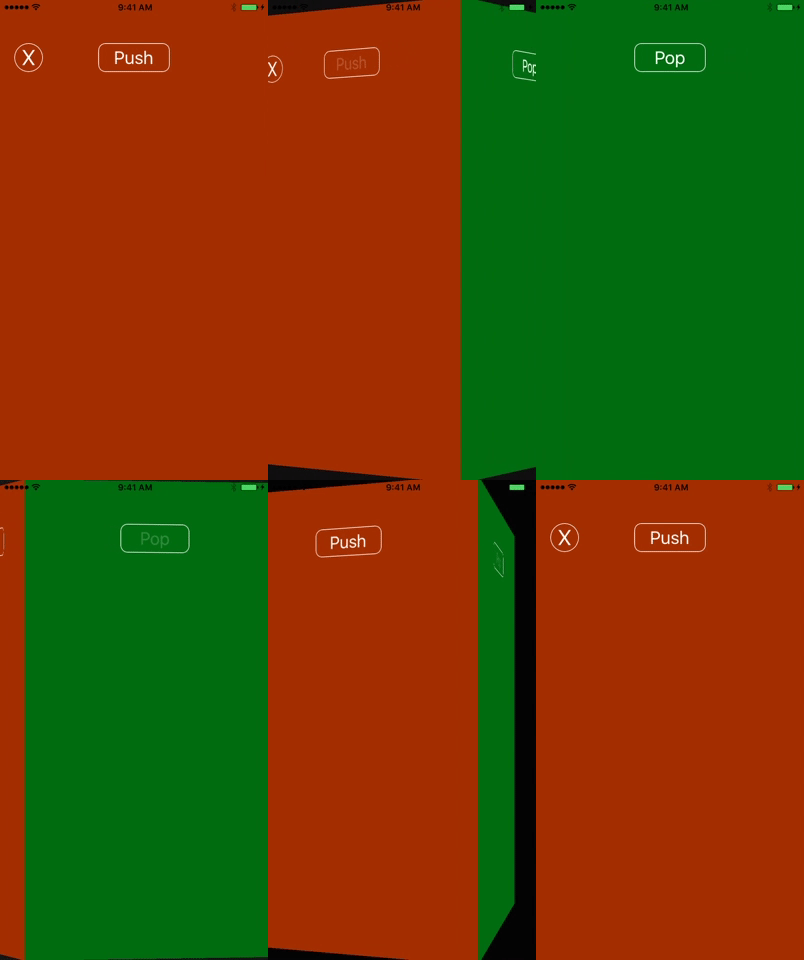
**10. Cube 1**
Transition's Directions as Transition SubType
> - RightToLeft
> - LeftToRight
> - BottomToTop
> - TopToBottom
----------
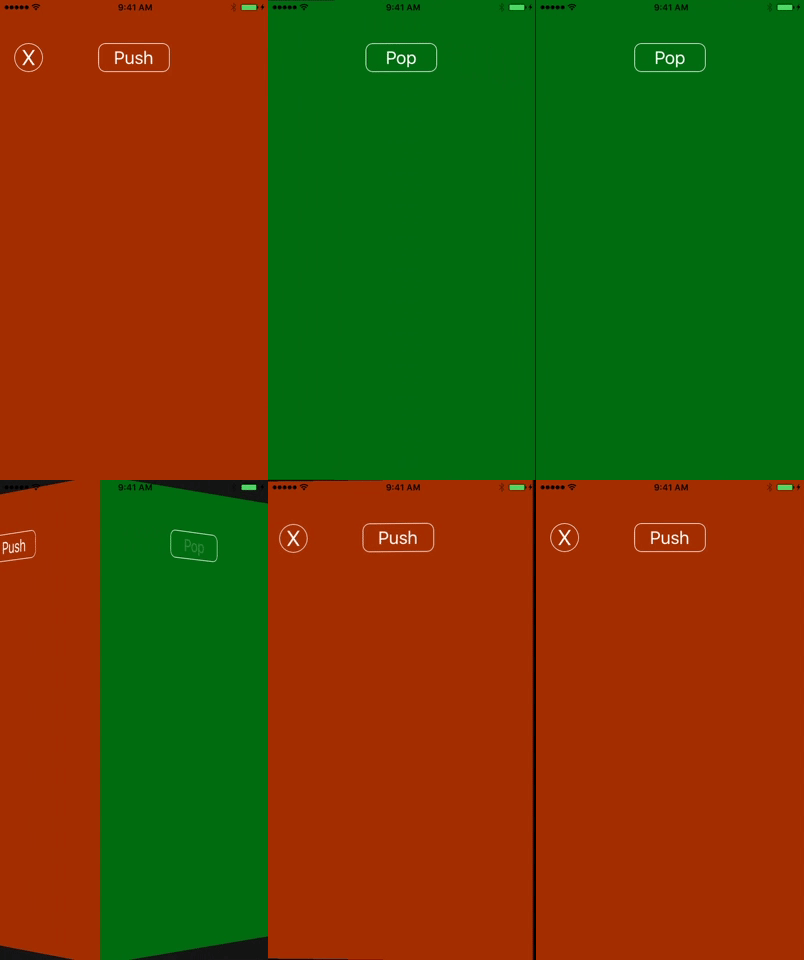
**11. Cube 2**
Transition's Directions as Transition SubType
> - RightToLeft
> - LeftToRight
> - BottomToTop
> - TopToBottom
----------
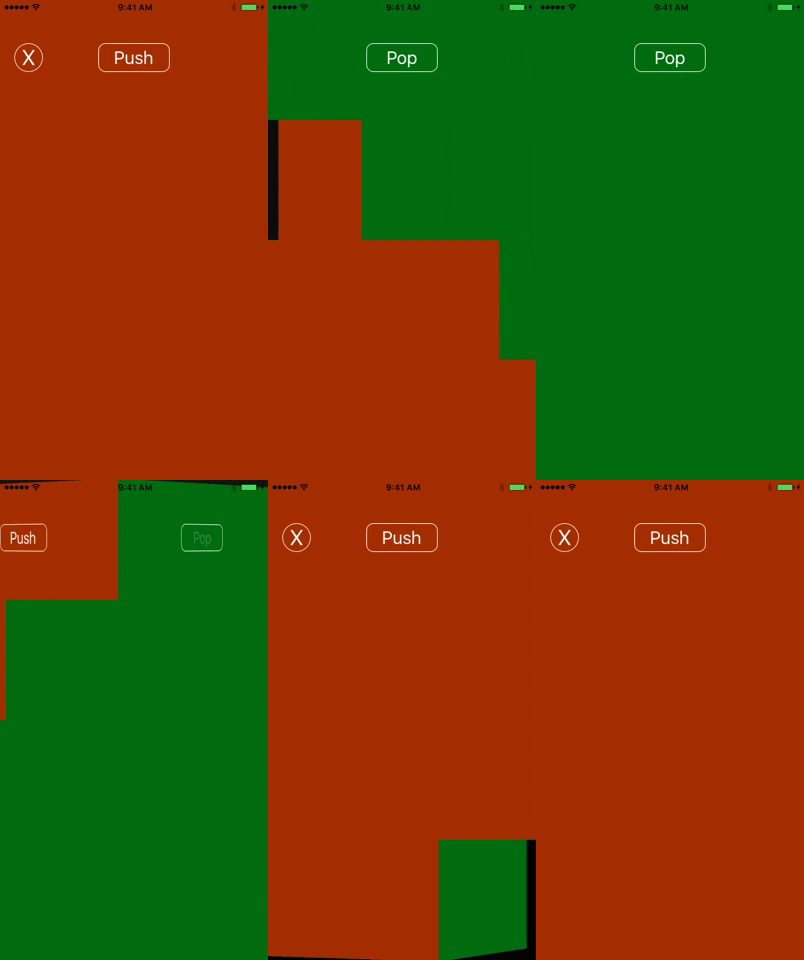
**12. Cube 3**
Transition's Directions as Transition SubType
> - RightToLeft
> - LeftToRight
> - BottomToTop
> - TopToBottom
----------
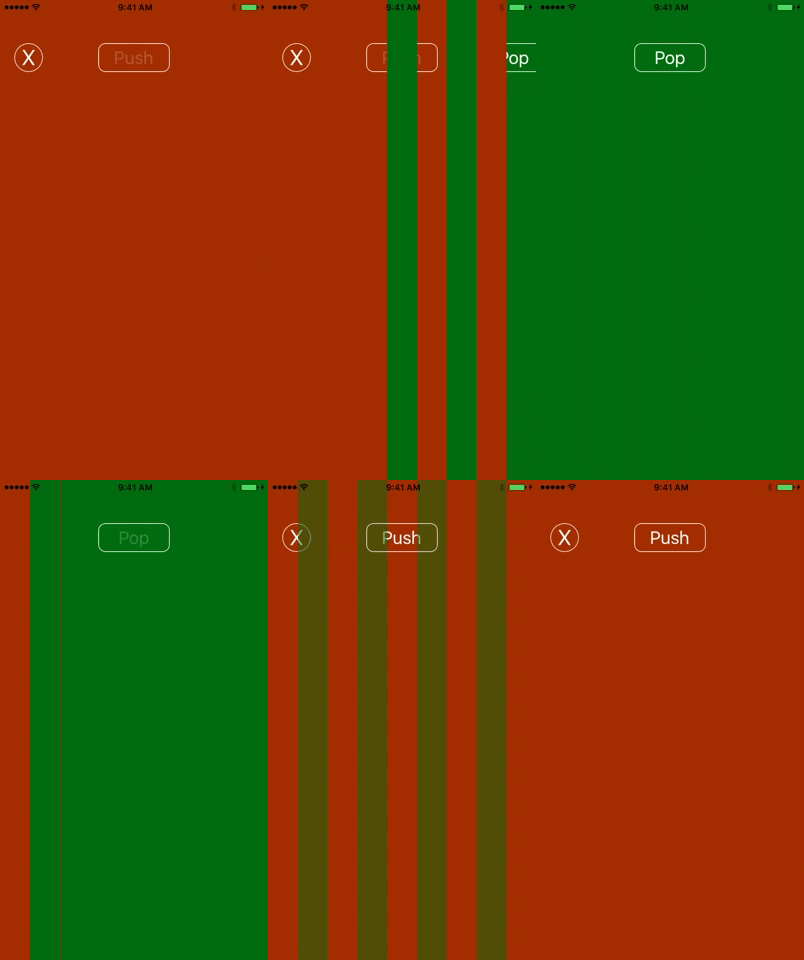
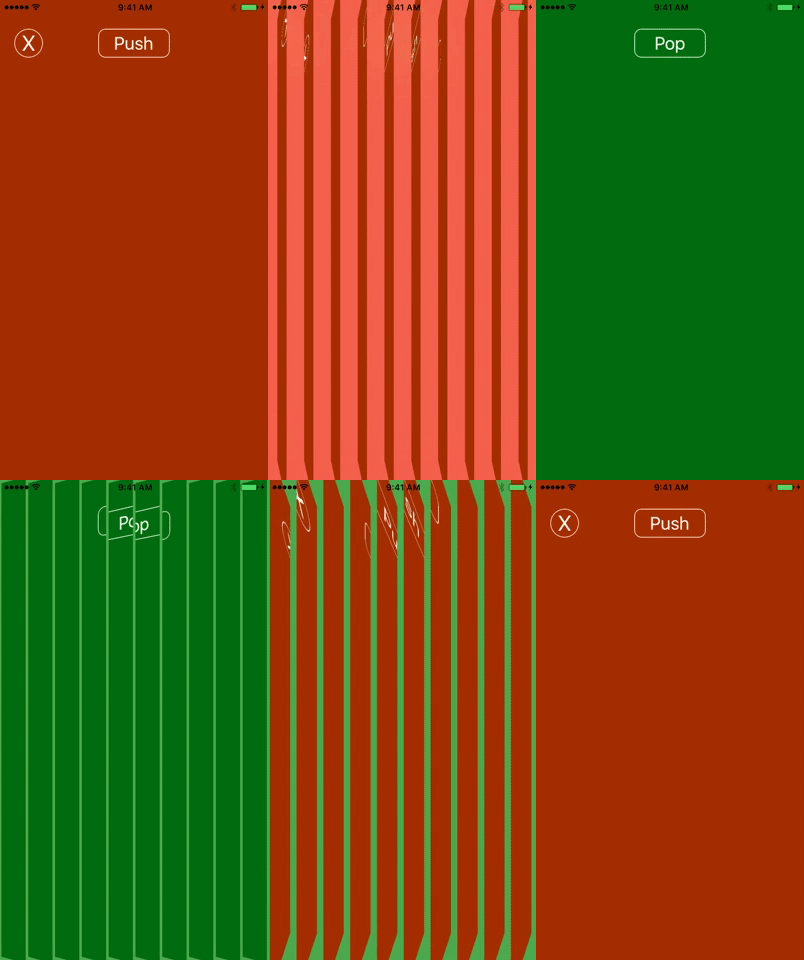
**13. Blinds 1**
Transition's Directions as Transition SubType
> - RightToLeft
> - LeftToRight
> - BottomToTop
> - TopToBottom
----------
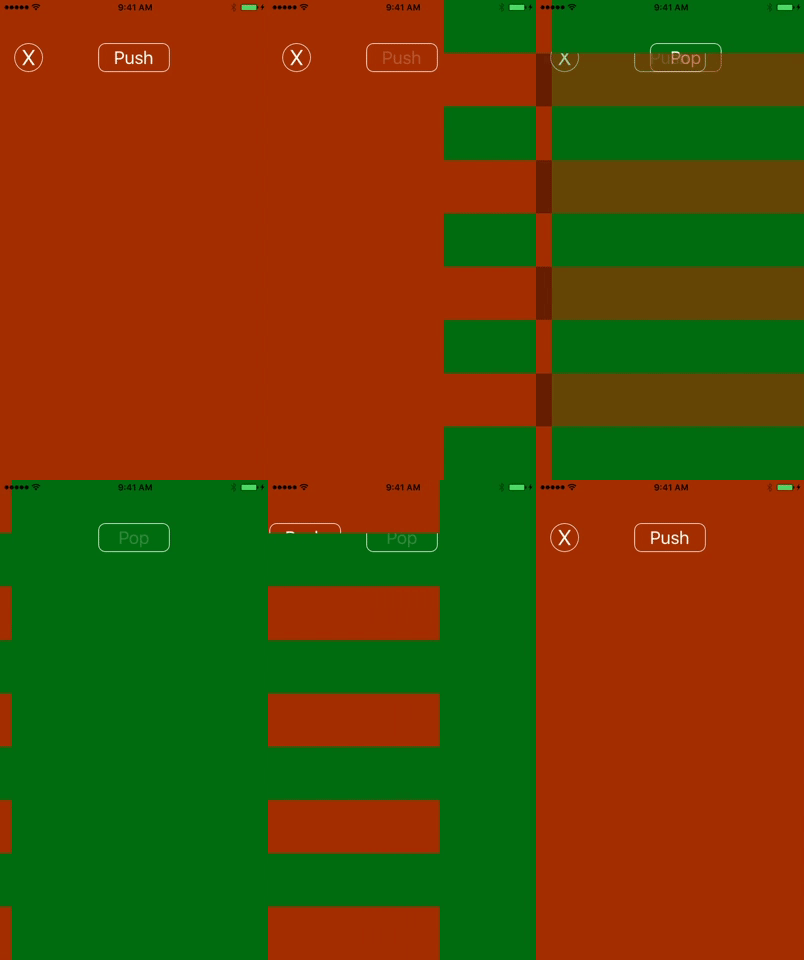
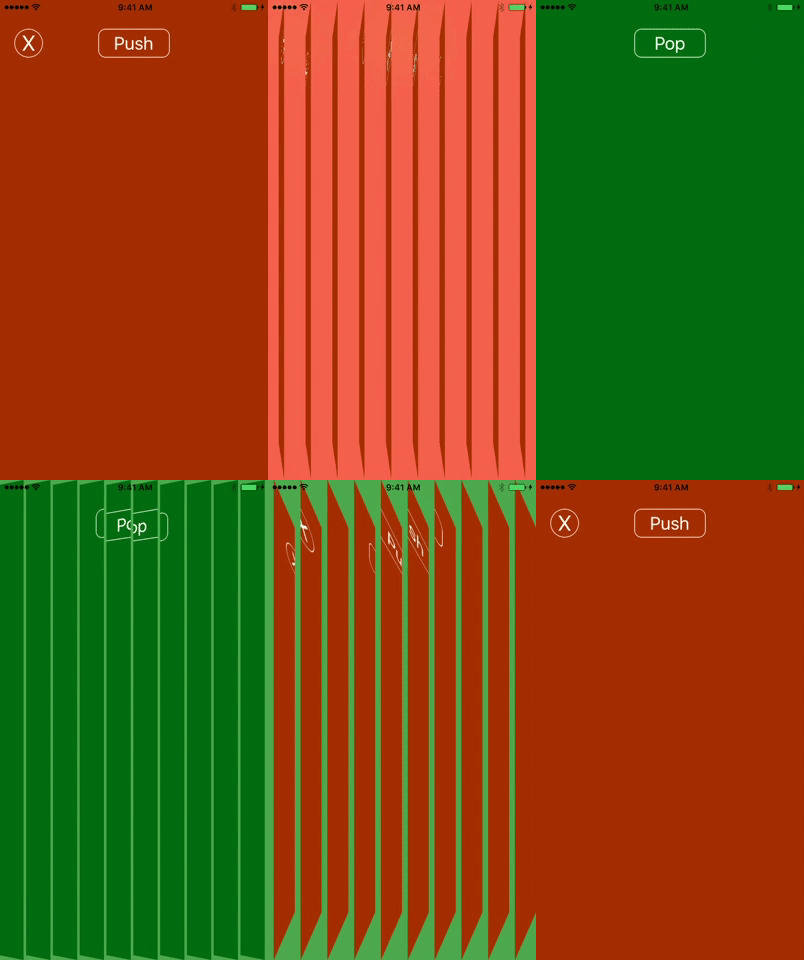
**14. Blinds 2**
Transition's Directions as Transition SubType
> - RightToLeft
> - LeftToRight
> - BottomToTop
> - TopToBottom
----------
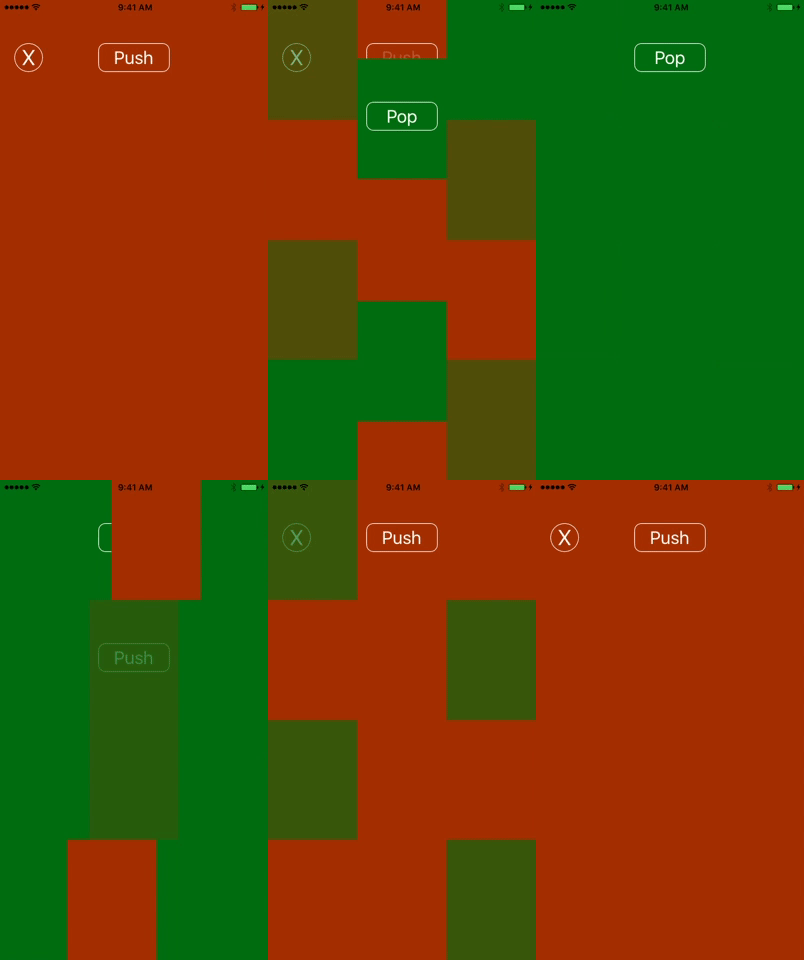
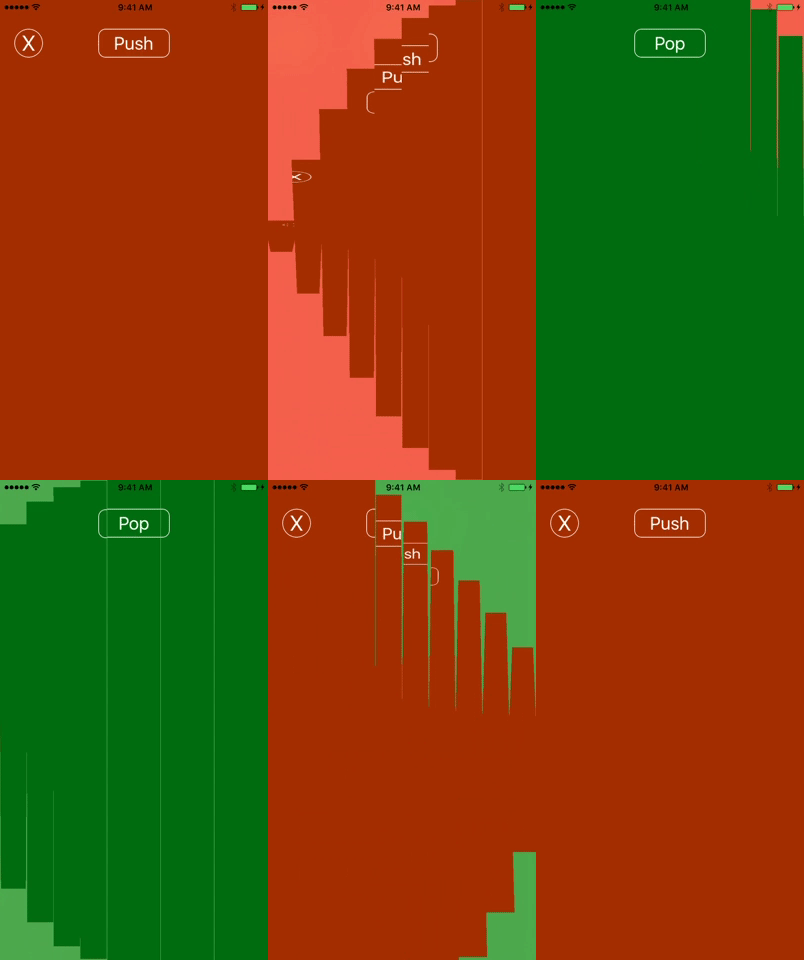
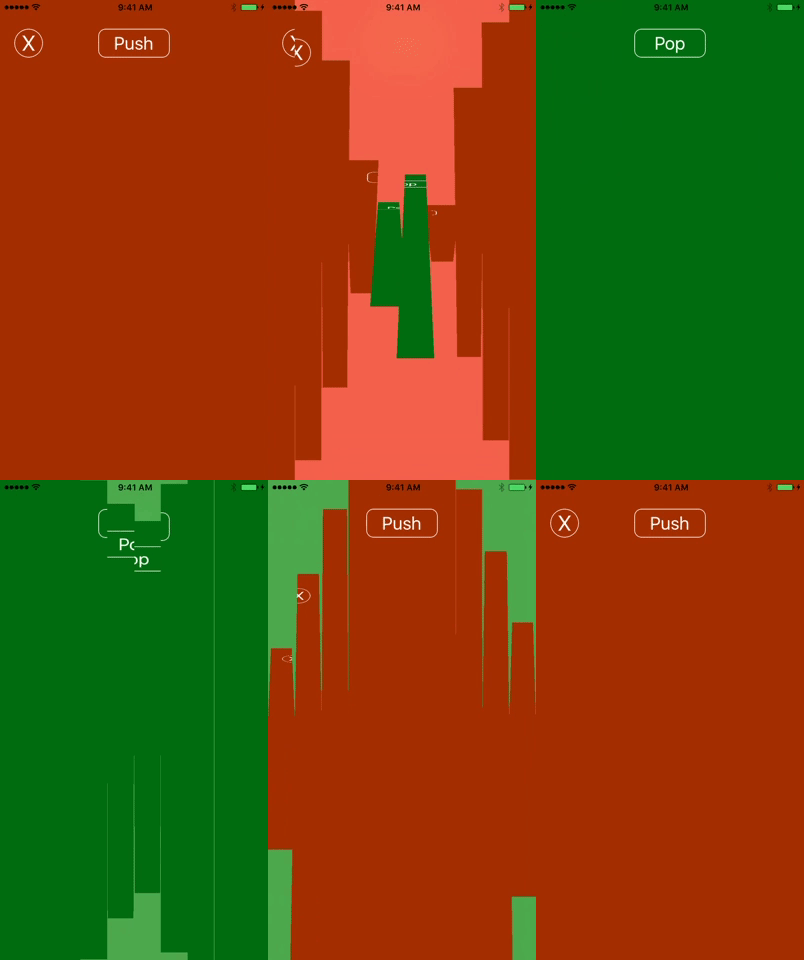
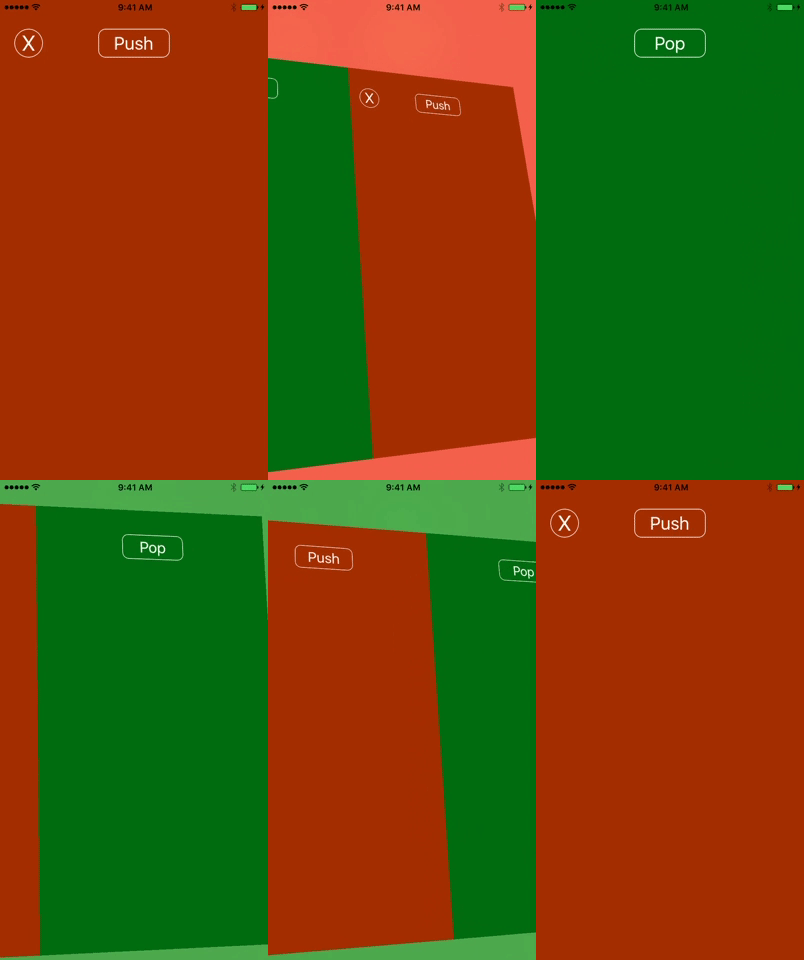
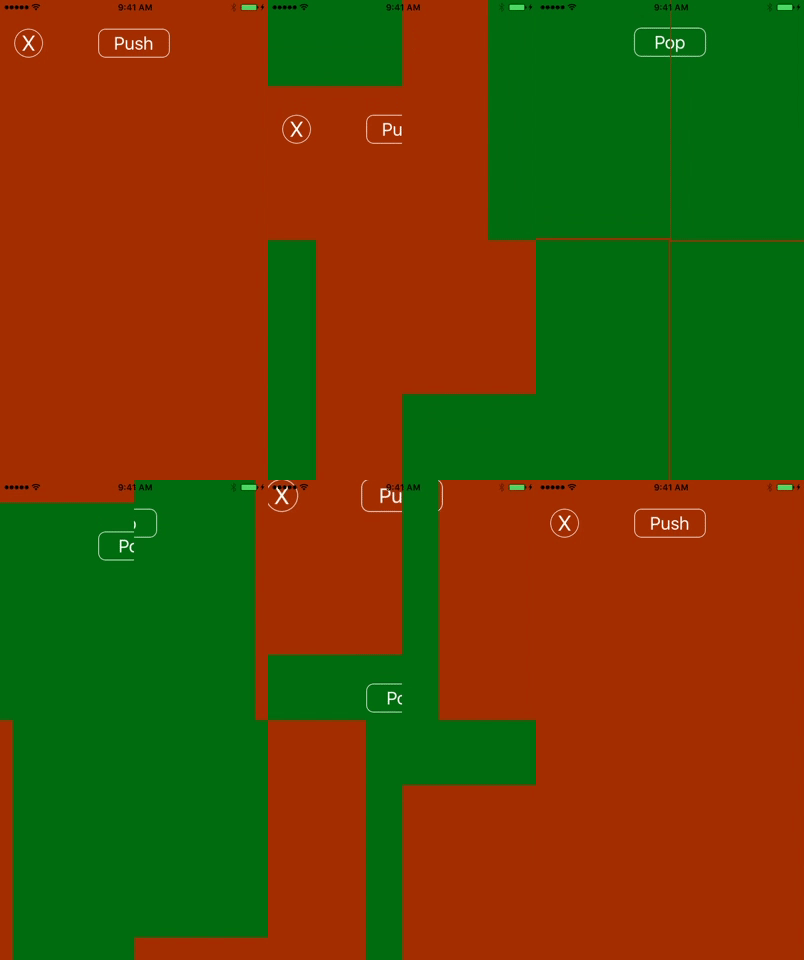
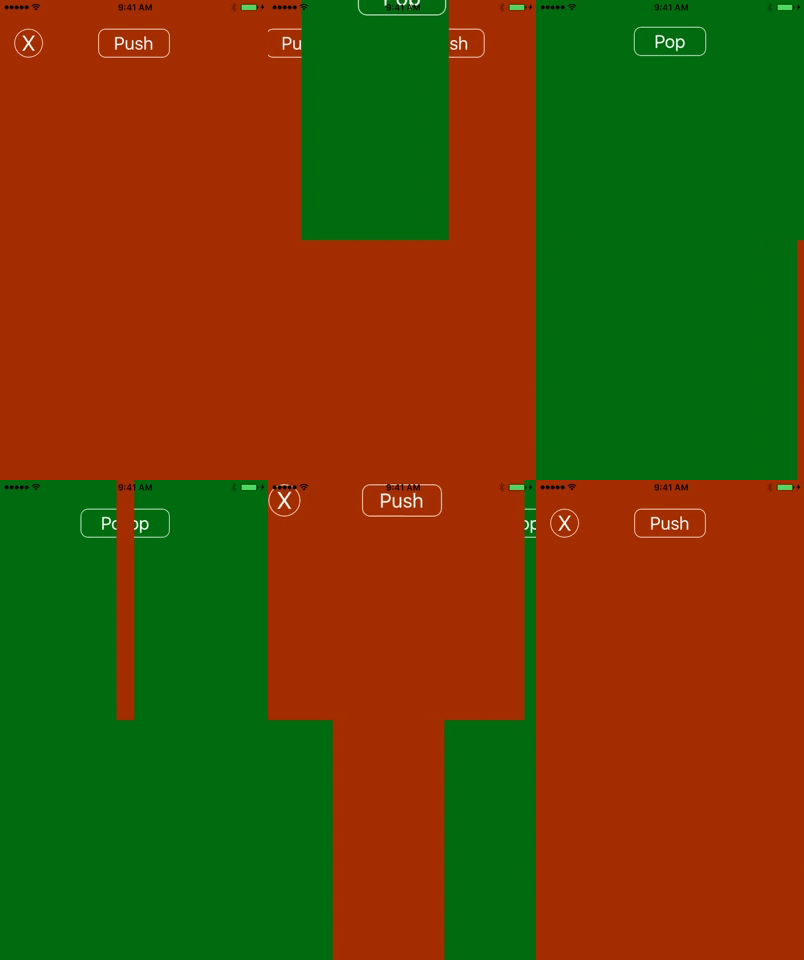
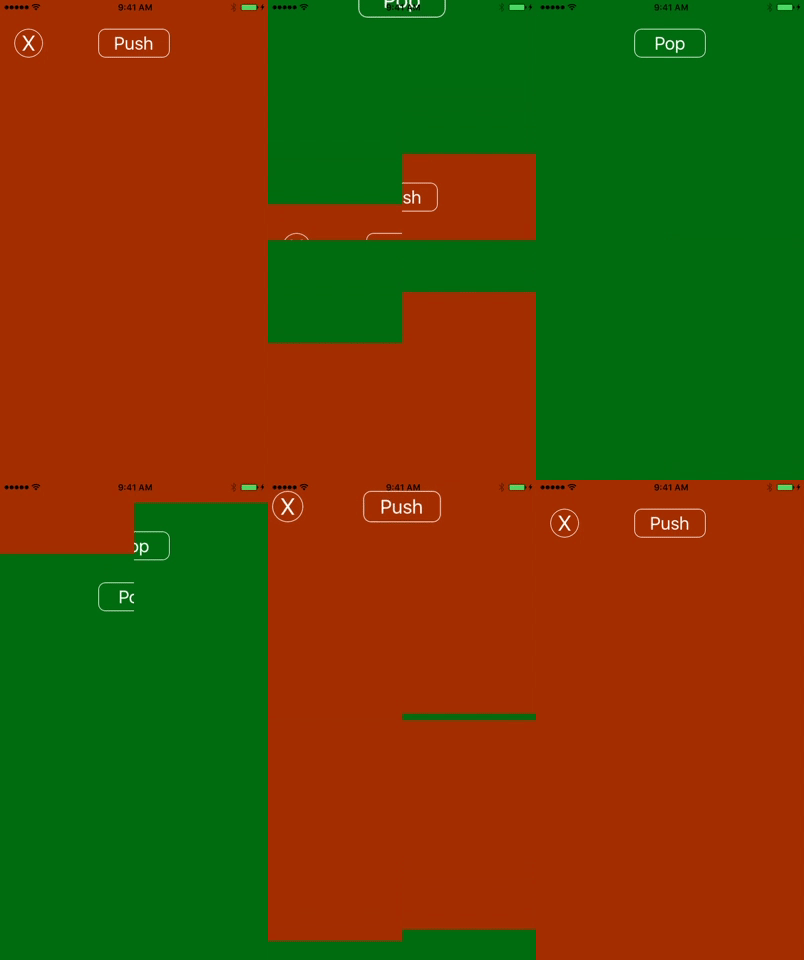
**15. Puzzle 1**
----------
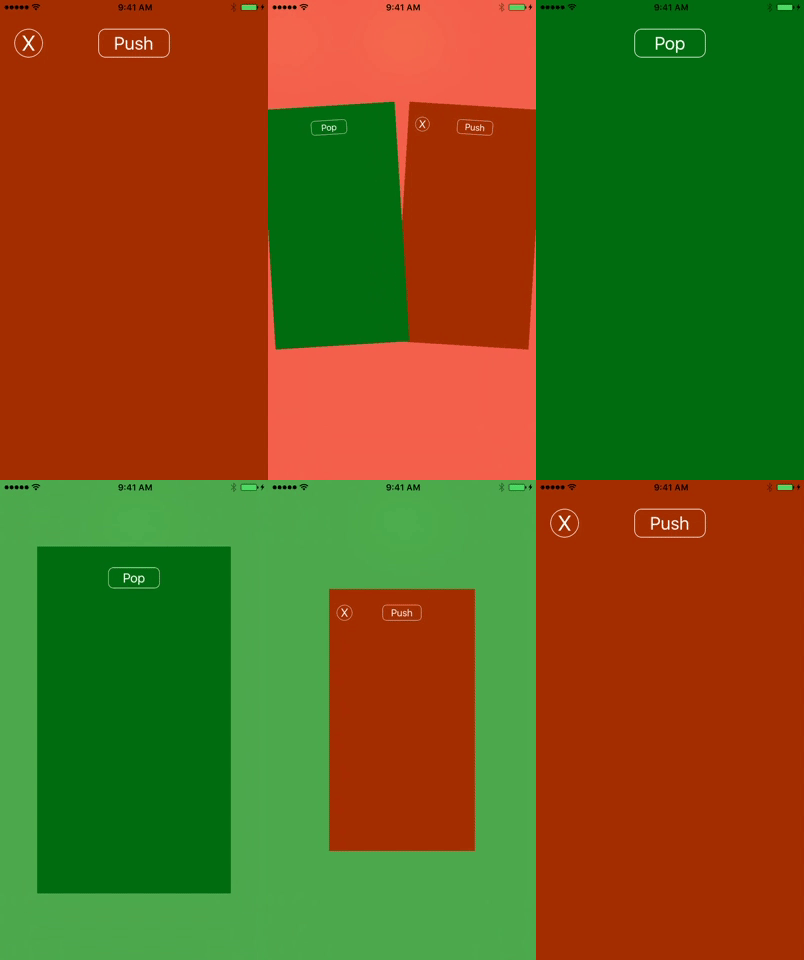
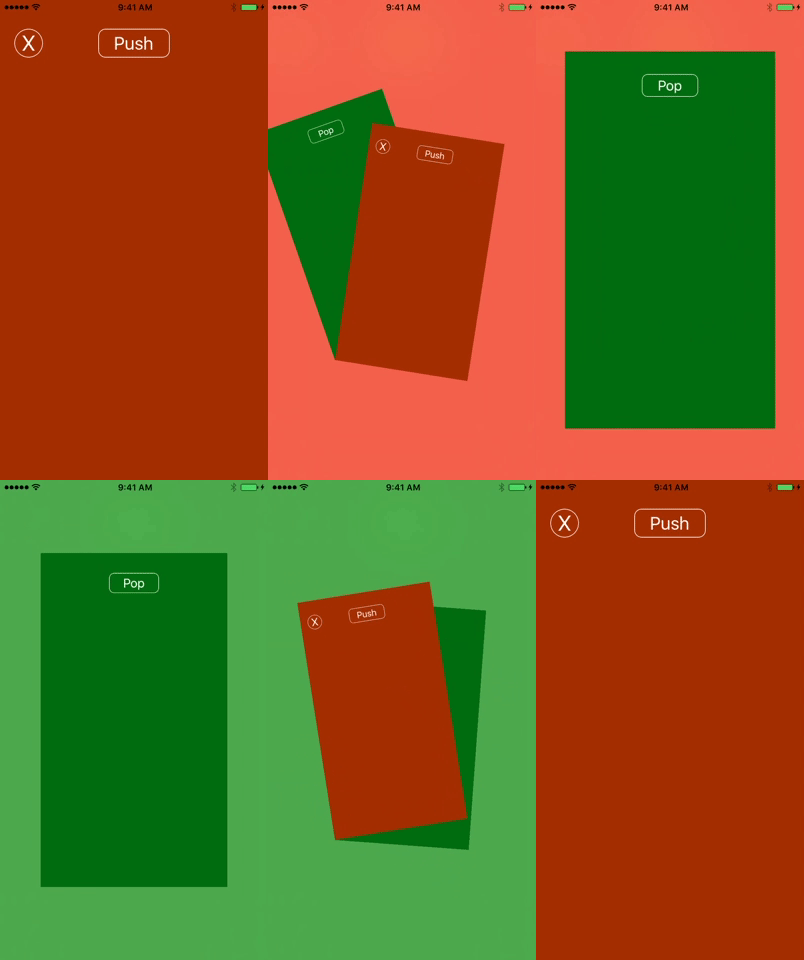
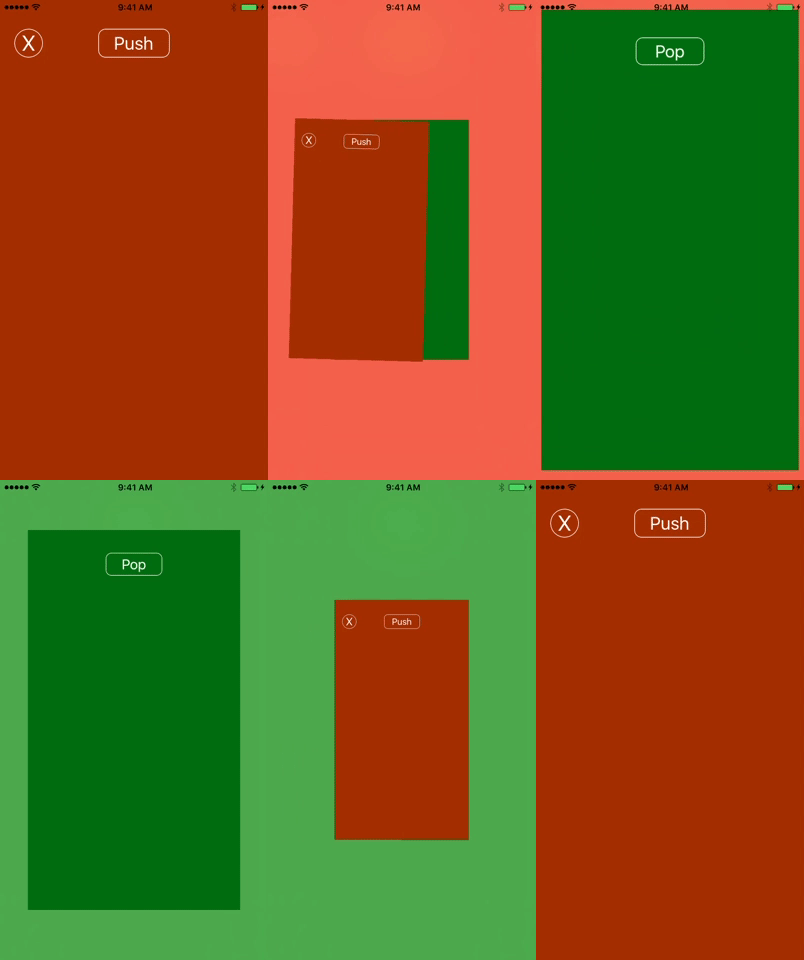
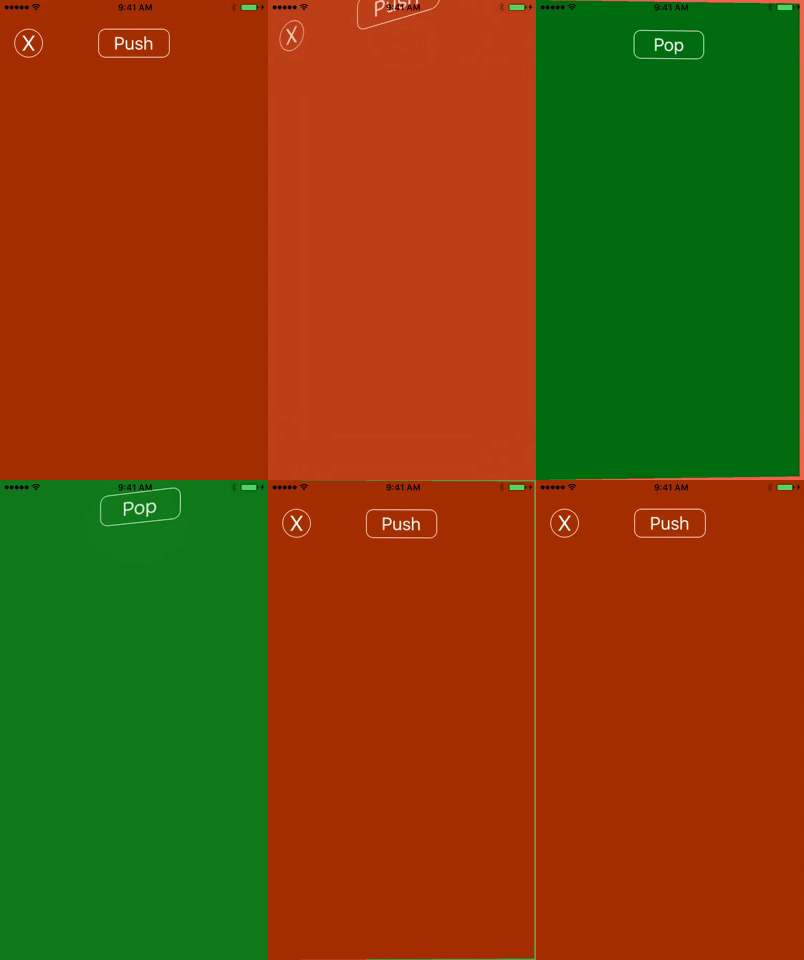
### Coming soon
----------
----------
----------
----------
----------
----------
----------
----------
----------
----------
----------
----------
----------
----------
----------
----------
## License
MasterTransitions is available under the MIT license. See the LICENSE file for more info.