https://github.com/garrettmac/react-web-pay
https://github.com/garrettmac/react-web-pay
Last synced: over 1 year ago
JSON representation
- Host: GitHub
- URL: https://github.com/garrettmac/react-web-pay
- Owner: garrettmac
- Created: 2017-10-16T23:19:21.000Z (almost 9 years ago)
- Default Branch: master
- Last Pushed: 2017-10-17T01:03:34.000Z (almost 9 years ago)
- Last Synced: 2024-10-06T01:23:19.464Z (almost 2 years ago)
- Language: CSS
- Size: 81.1 KB
- Stars: 0
- Watchers: 1
- Forks: 0
- Open Issues: 0
-
Metadata Files:
- Readme: README.md
Awesome Lists containing this project
README
Accept Payments with Apple Pay and Android Pay using the [Payment Request API](https://paymentrequest.show).
__Features__
- __Simple.__ No more checkout forms.
- __Effective__. Faster checkouts that increase conversion.
- __Future-proof__. Use a W3C Standards API, supported by companies like Google, Firefox and others.
- __Cross-platform__. Share payments code between your iOS, Android, and web apps.
- __Add-ons__. Easily enable support for Stripe or Braintree via add-ons.
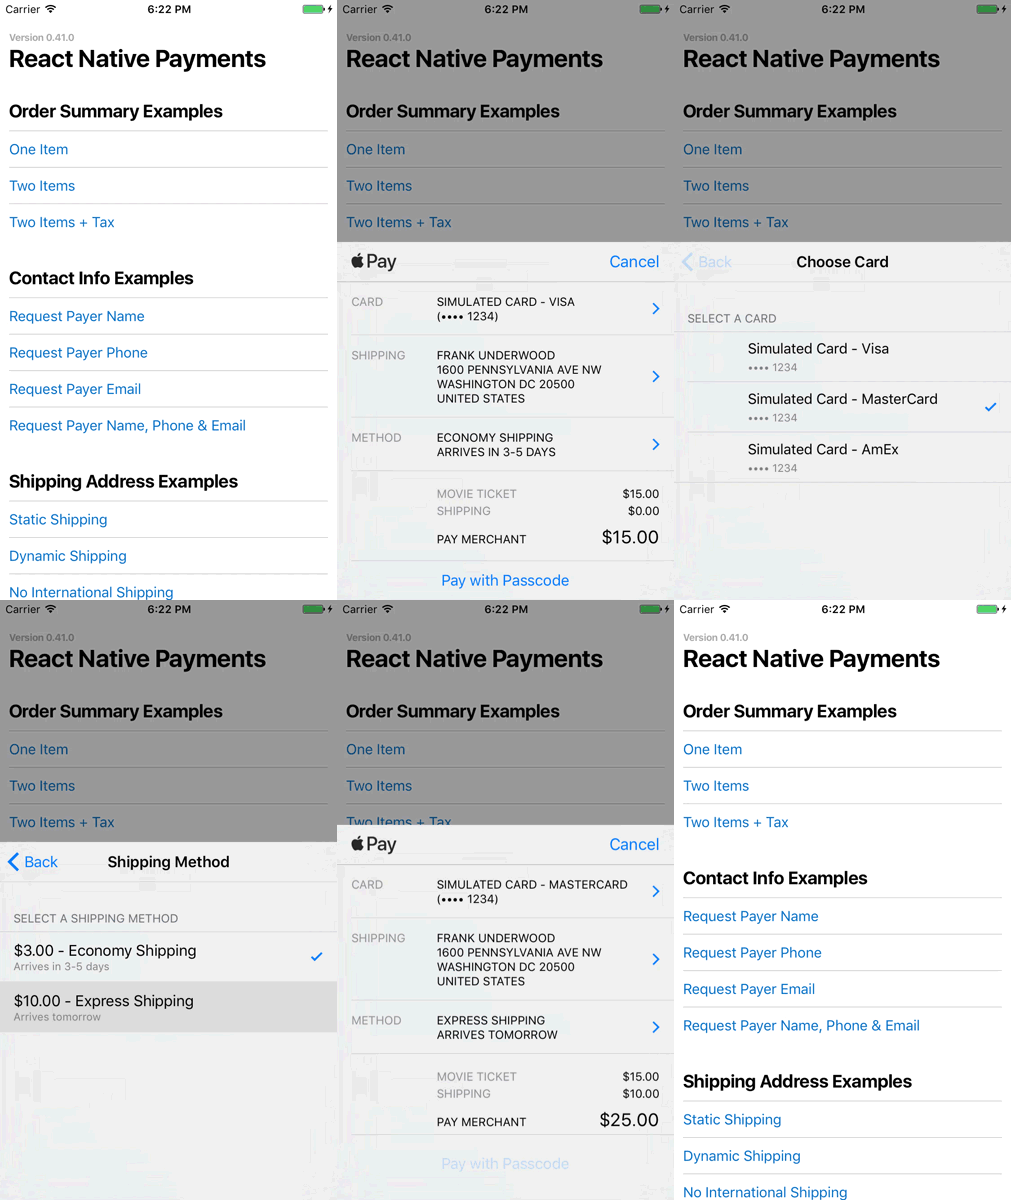
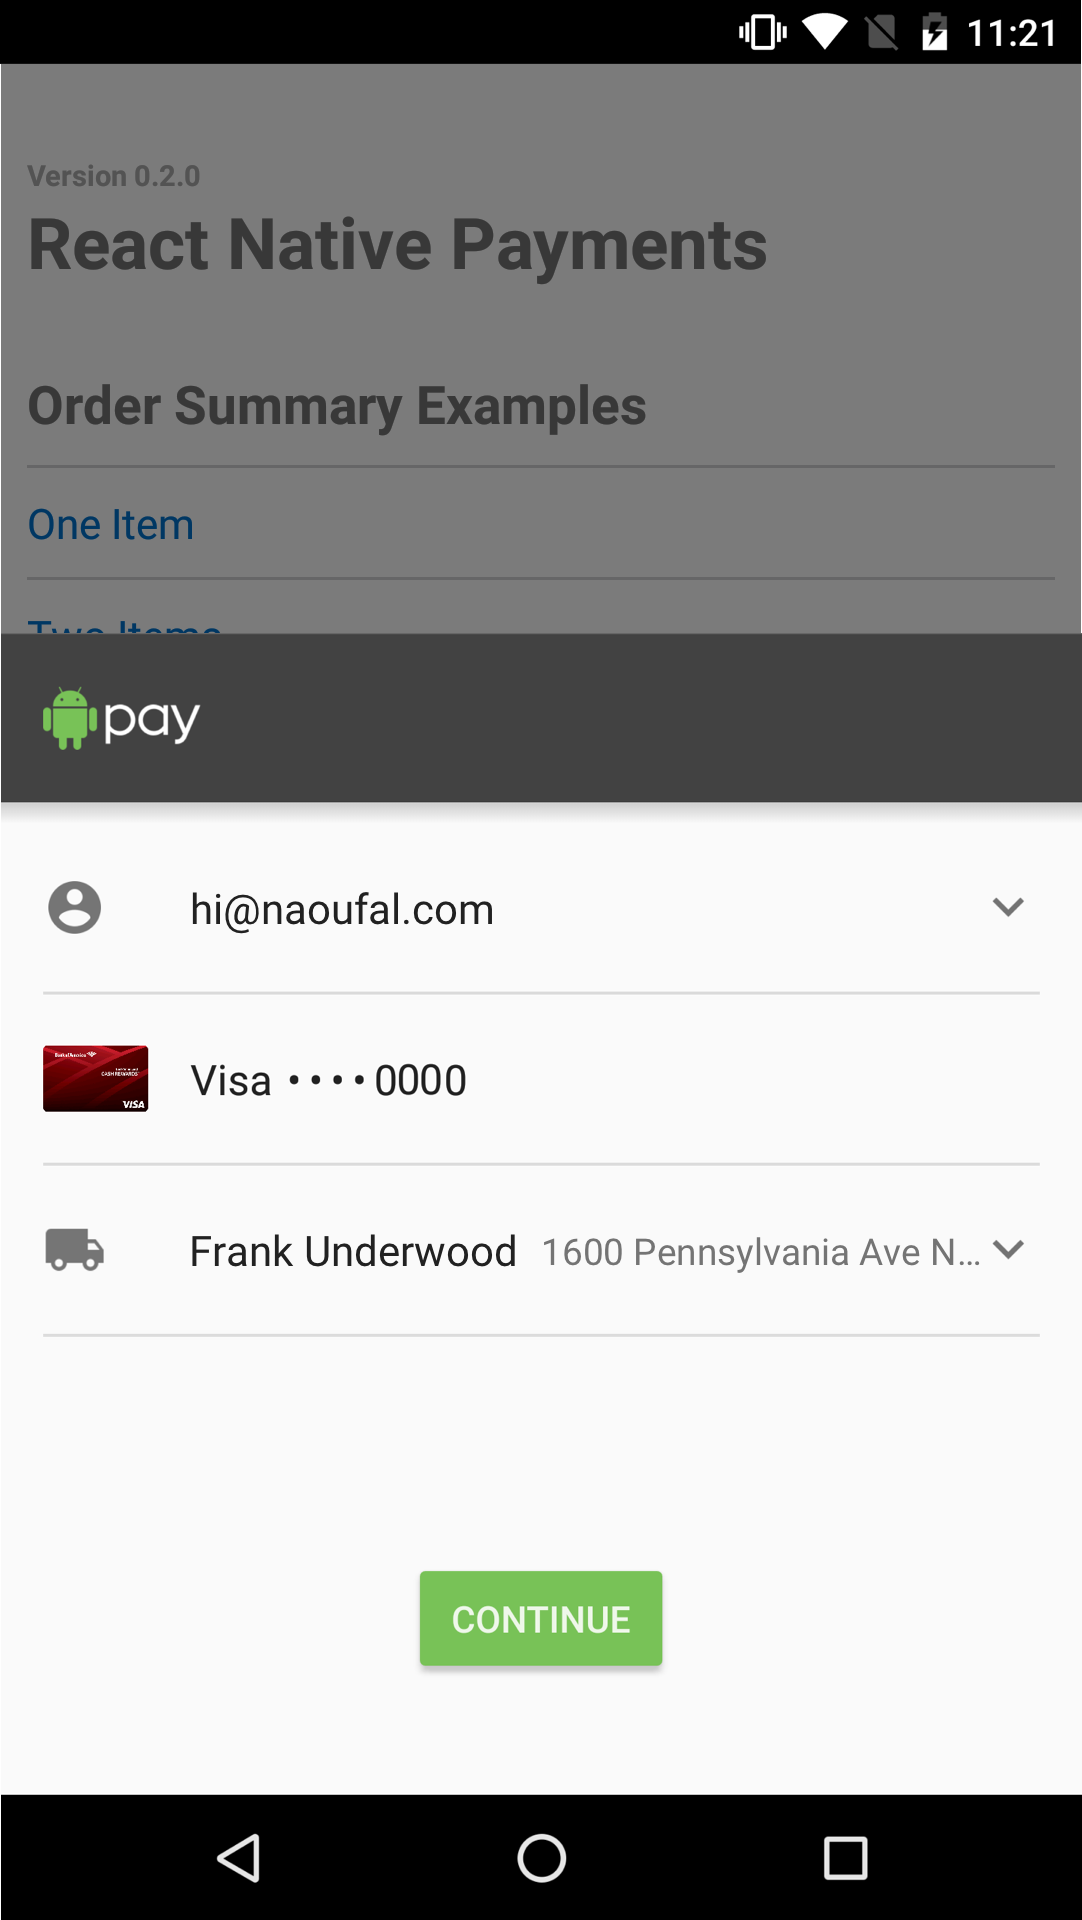
---
## Table of Contents
- [Demo](#demo)
- [Installation](#installation)
- [Usage](#usage)
- [Add-ons](#add-ons)
- [API](#api)
- [Resources](#resources)
- [License](#license)
## Demo
You can run the demo by cloning the project and running:
```shell
$ yarn run:demo
```
In a rush? Check out the [browser version](https://rnp.nof.me) of the demo.
_Note that you'll need to run it from a browser with [Payment Request support](https://caniuse.com/#search=payment%20request)._
## Installation
First, download the package:
```shell
$ yarn add react-web-pay
```
## Usage
- [Setting up Apple Pay/Android Pay](#setting-up-apple-payandroid-pay)
- [Importing the Library](#importing-the-library)
- [Initializing the Payment Request](#initializing-the-payment-request)
- [Displaying the Payment Request](#displaying-the-payment-request)
- [Aborting the Payment Request](#aborting-the-payment-request)
- [Requesting Contact Information](#requesting-contact-information)
- [Requesting a Shipping Address](#requesting-a-shipping-address)
- [Processing Payments](#processing-payments)
- [Dismissing the Payment Request](#dismissing-the-payment-request)
### Setting up Apple Pay/Android Pay
Before you can start accepting payments in your App, you'll need to setup Apple Pay and/or Android Pay.
#### Apple Pay
1. Register as an Apple Developer
1. Obtain a merchant ID
1. Enable Apple Pay in your app
Apple has a documentation on how to do this in their _[Configuring your Environment](https://developer.apple.com/library/content/ApplePay_Guide/Configuration.html)_ guide.
#### Android Pay
1. Add Android Pay and Google Play Services to your dependencies
1. Enable Android Pay in your Manifest
Google has documentation on how to do this in their _[Setup Android Pay](https://developers.google.com/android-pay/setup)_ guide.
### Importing the Library
Once Apple Pay/Android Pay is enabled in your app, jump into your app's entrypoint and make the `PaymentRequest` globally available to your app.
```es6
// index.ios.js
global.PaymentRequest = require('react-web-pay').PaymentRequest;
```
### Initializing the Payment Request
To initialize a Payment Request, you'll need to provide `PaymentMethodData` and `PaymentDetails`.
#### Payment Method Data
The Payment Method Data is where you defined the forms of payment that you accept. To enable Apple Pay, we'll define a `supportedMethod` of `apple-pay`. We're also required to pass a `data` object to configures Apple Pay. This is where we provide our merchant id, define the supported card types and the currency we'll be operating in.
```es6
const METHOD_DATA = [{
supportedMethods: ['apple-pay'],
data: {
merchantIdentifier: 'merchant.com.your-app.namespace',
supportedNetworks: ['visa', 'mastercard', 'amex'],
countryCode: 'US',
currencyCode: 'USD'
}
}];
```
See Android Pay Example
```es6
const METHOD_DATA = [{
supportedMethods: ['android-pay'],
data: {
supportedNetworks: ['visa', 'mastercard', 'amex'],
currencyCode: 'USD',
environment: 'TEST', // defaults to production
paymentMethodTokenizationParameters: {
tokenizationType: 'NETWORK_TOKEN',
parameters: {
publicKey: 'your-pubic-key'
}
}
}
}];
```
#### Payment Details
Payment Details is where define transaction details like display items, a total and optionally shipping options.
Google has excellent documentation for [Defining Payment Details](https://developers.google.com/web/fundamentals/discovery-and-monetization/payment-request/deep-dive-into-payment-request#defining_payment_details).
```es6
const DETAILS = {
id: 'basic-example',
displayItems: [
{
label: 'Movie Ticket',
amount: { currency: 'USD', value: '15.00' }
}
],
total: {
label: 'Merchant Name',
amount: { currency: 'USD', value: '15.00' }
}
};
```
Once you've defined your `methodData` and `details`, you're ready to initialize your Payment Request.
```es6
const paymentRequest = new PaymentRequest(METHOD_DATA, DETAILS);
```
🚨 _Note: On Android, display items are not displayed within the Android Pay view. Instead, the _[User Flows documentation](https://developers.google.com/android-pay/payment-flows)_ suggests showing users a confirmation view where you list the display items. When using React Native Payments, show this view after receiving the `PaymentResponse`._
### Displaying the Payment Request
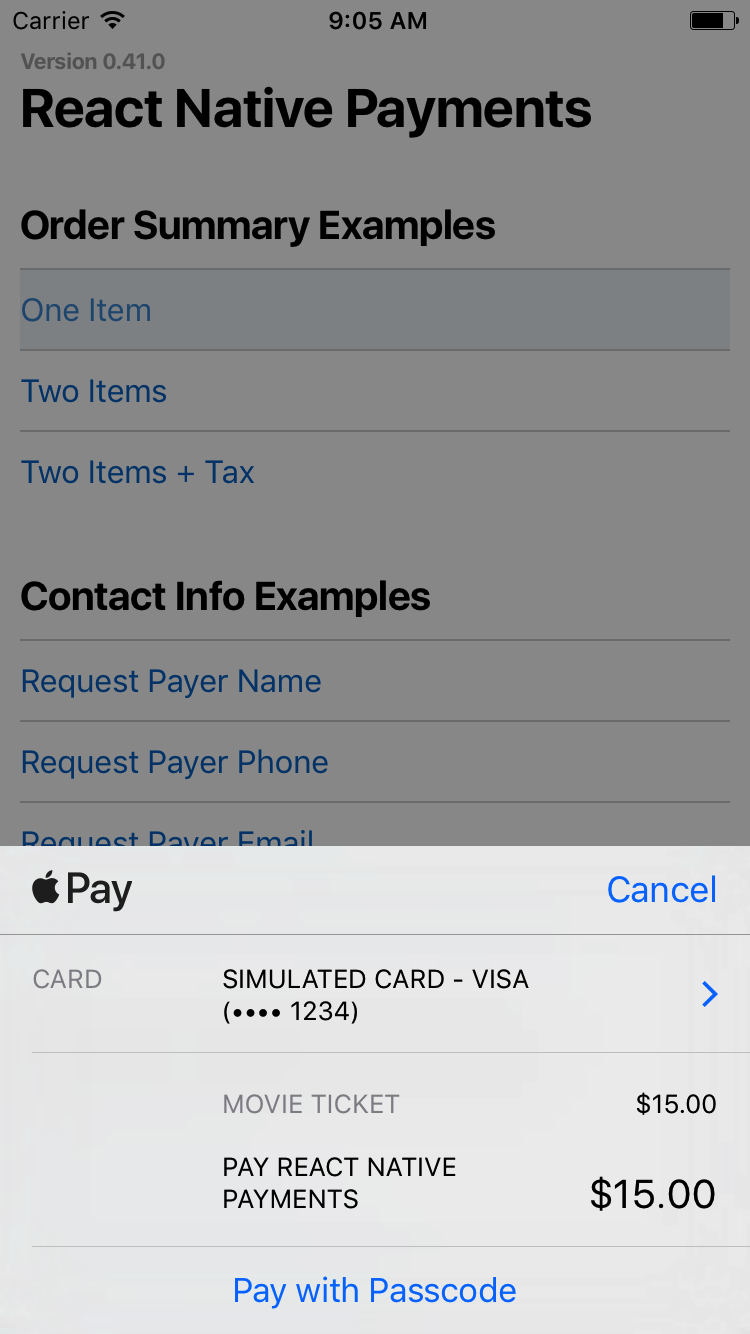
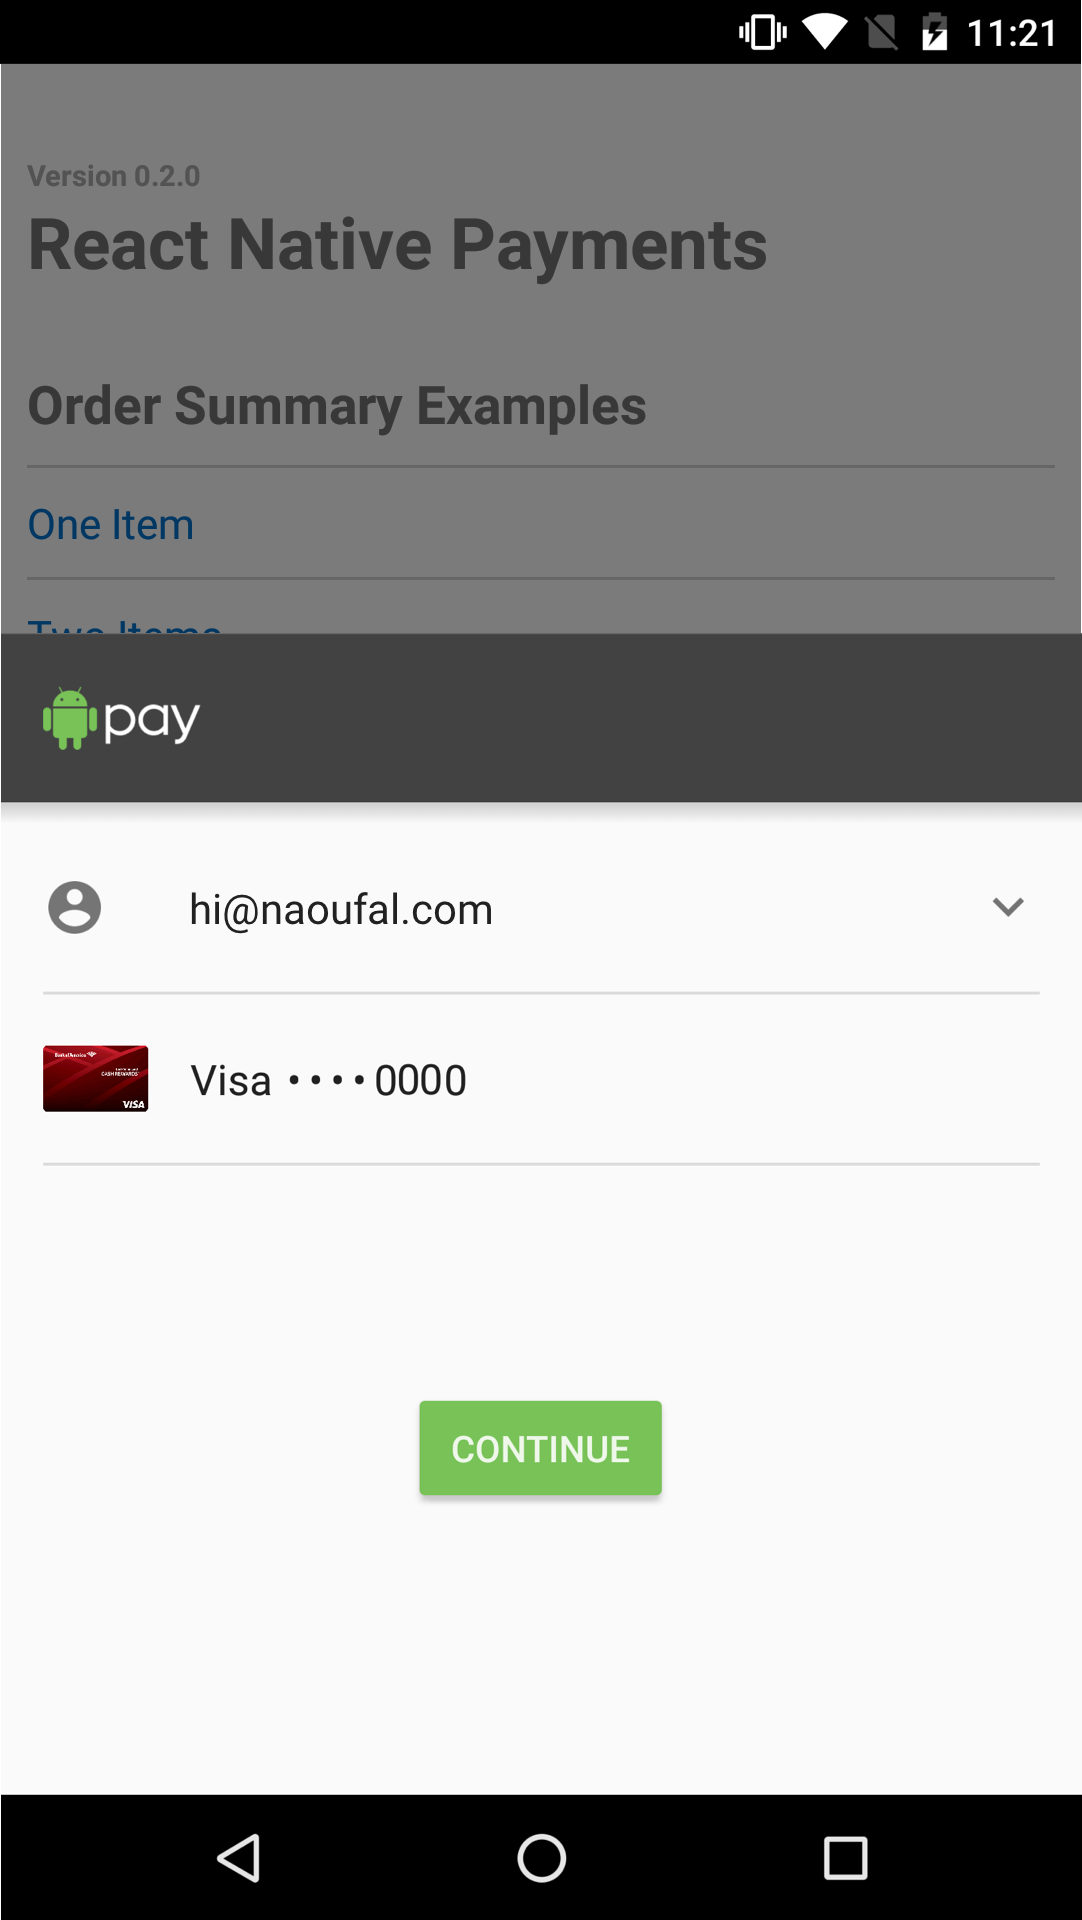
Now that you've setup your Payment Request, displaying it is as simple as calling the `show` method.
```es6
paymentRequest.show();
```
See Screenshots
### Aborting the Payment Request
You can abort the Payment Request at any point by calling the `abort` method.
```es6
paymentRequest.abort();
```
🚨 _Note: Not yet implemented on Android Pay_
### Requesting Contact Information
Some apps may require contact information from a user. You can do so by providing a [`PaymentOptions`]() as a third argument when initializing a Payment Request. Using Payment Options, you can request a contact name, phone number and/or email.
#### Requesting a Contact Name
Set `requestPayerName` to `true` to request a contact name.
```es6
const OPTIONS = {
requestPayerName: true
};
```
See Screenshots
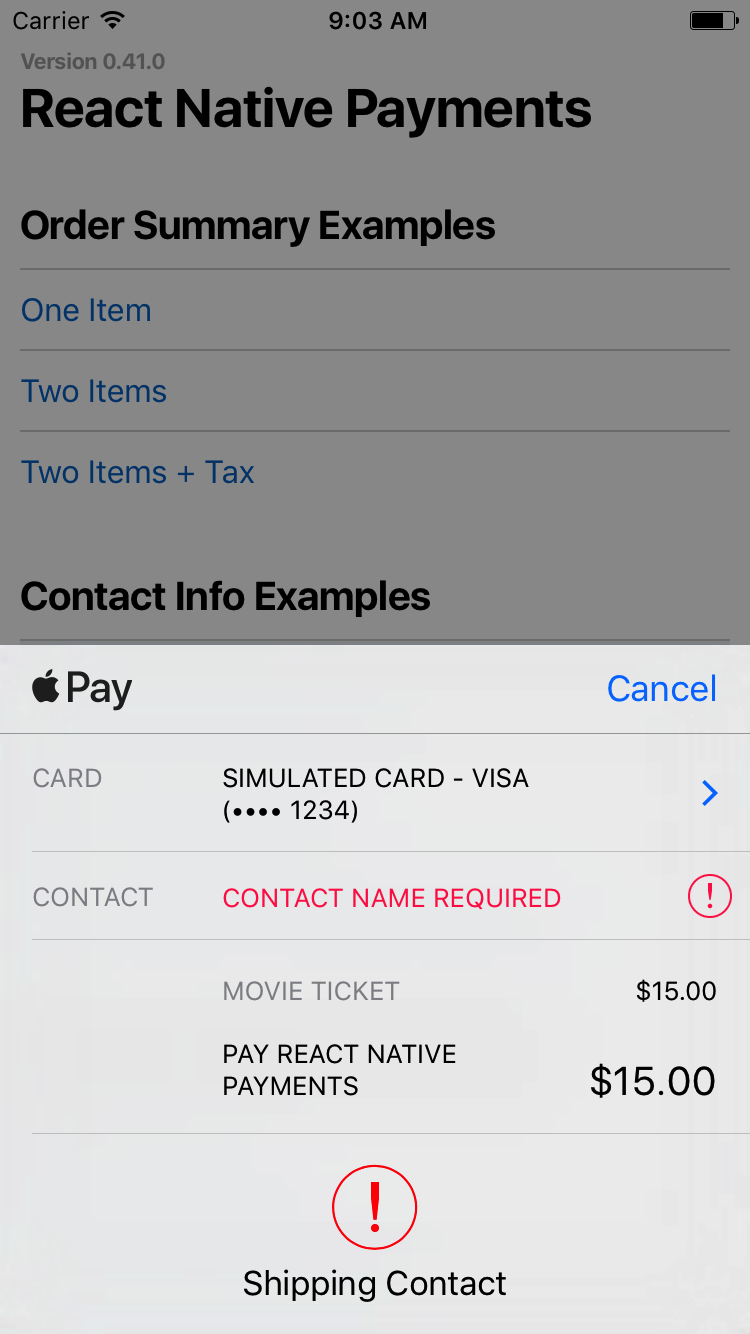
🚨 _Note: On Android, requesting a contact name will present the user with a shipping address selector. If you're not shipping anything to the user, consider capturing the contact name outside of Android Pay._
#### Requesting a Phone Number
Set `requestPayerPhone` to `true` to request a phone number.
```es6
const OPTIONS = {
requestPayerPhone: true
};
```
See Screenshots
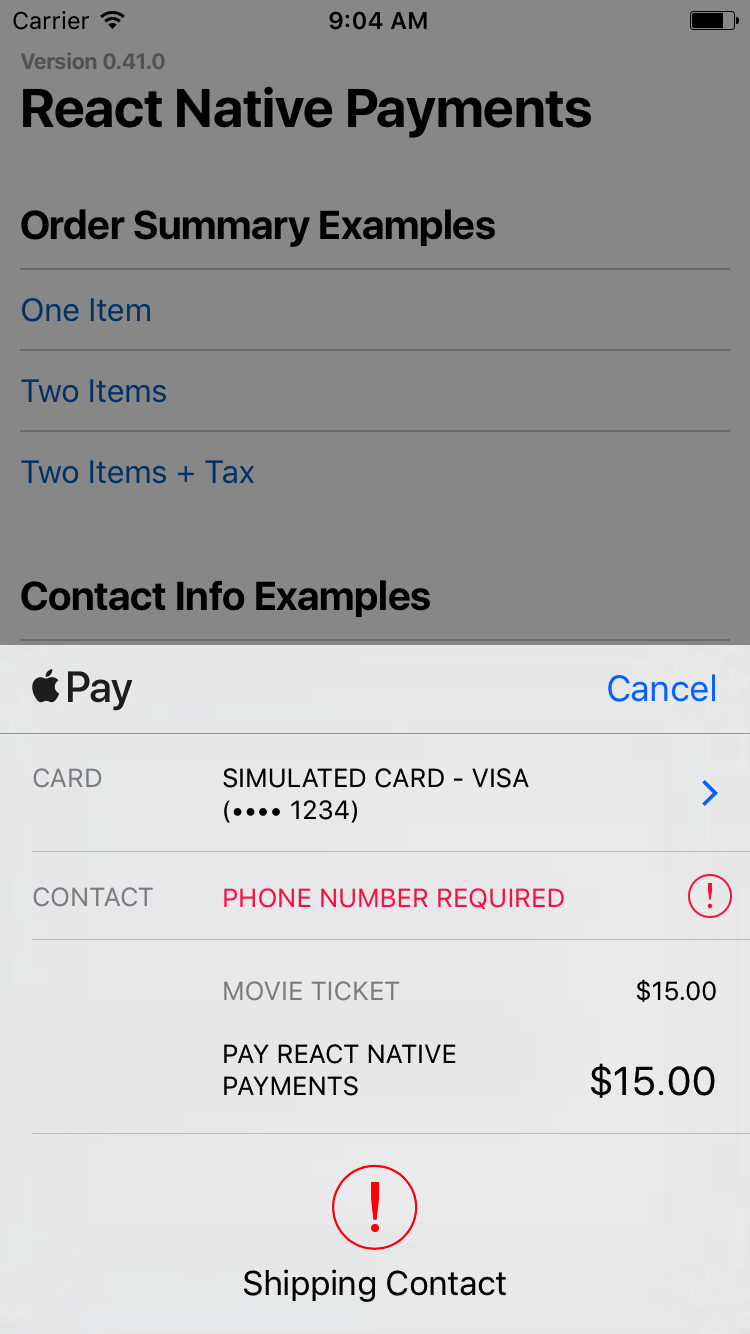
🚨 _Note: On Android, requesting a phone number will present the user with a shipping address selector. If you're not shipping anything to the user, consider capturing the phone number outside of Android Pay._
#### Requesting an Email Address
Set `requestPayerEmail` to `true` to request an email address.
```es6
const OPTIONS = {
requestPayerEmail: true
};
```
See Screenshots
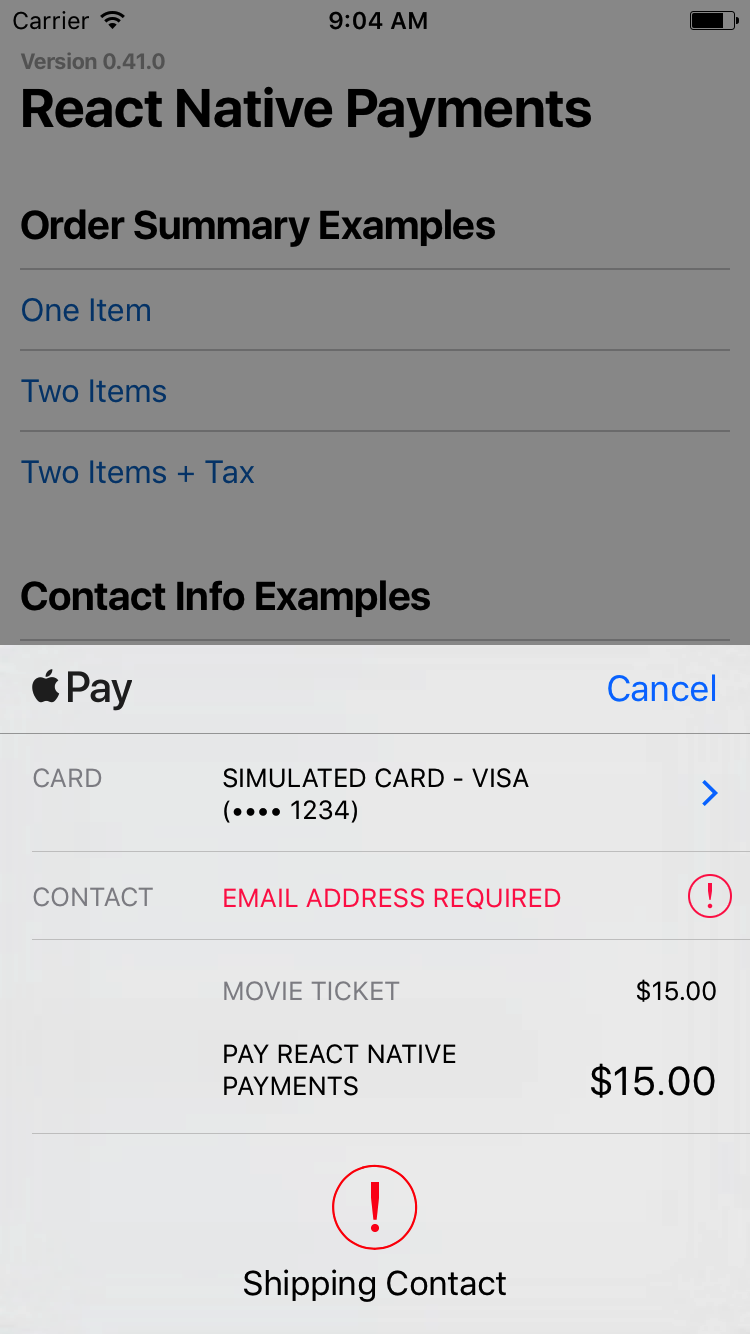
You can also request all three by setting them all to `true`.
```es6
const OPTIONS = {
requestPayerName: true,
requestPayerPhone: true,
requestPayerEmail: true
};
```
### Requesting a Shipping Address
Requesting a shipping address is done in three steps.
First, you'll need to set `requestShipping` to `true` within `PaymentOptions`.
```es6
const OPTIONS = {
requestShipping: true
};
```
Second, you'll need to include `shippingOptions` in your Payment Details.
```diff
const DETAILS = {
id: 'basic-example',
displayItems: [
{
label: 'Movie Ticket',
amount: { currency: 'USD', value: '15.00' }
}
],
+ shippingOptions: [{
+ id: 'economy',
+ label: 'Economy Shipping',
+ amount: { currency: 'USD', value: '0.00' },
+ detail: 'Arrives in 3-5 days' // `detail` is specific to React Native Payments
+ }],
total: {
label: 'Merchant Name',
amount: { currency: 'USD', value: '15.00' }
}
};
```
Lastly, you'll need to register event listeners for when a user selects a `shippingAddress` and/or a `shippingOption`. In the callback each event, you'll need to provide new `PaymentDetails` that will update your PaymentRequest.
```es6
paymentRequest.addEventListener('shippingaddresschange', e => {
const updatedDetails = getUpdatedDetailsForShippingAddress(paymentRequest.shippingAddress;
e.updateWith(updatedDetails);
});
paymentRequest.addEventListener('shippingoptionchange', e => {
const updatedDetails = getUpdatedDetailsForShippingOption(paymentRequest.shippingOption);
e.updateWith(updatedDetails);
});
```
For a deeper dive on handling shipping in Payment Request, checkout Google's _[Shipping in Payment Request](https://developers.google.com/web/fundamentals/discovery-and-monetization/payment-request/deep-dive-into-payment-request#shipping_in_payment_request_api)_.
🚨 _Note: On Android, there are no `shippingaddresschange` and `shippingoptionchange` events. To allow users to update their shipping address, you'll need to trigger a new `PaymentRequest`. Updating shipping options typically happens after the receiving the `PaymentResponse` and before calling its `getPaymentToken` method._
### Processing Payments
Now that we know how to initialize, display, and dismiss a Payment Request, let's take a look at how to process payments.
When a user accepts to pay, `PaymentRequest.show` will resolve to a Payment Response.
```es6
paymentRequest.show()
.then(paymentResponse => {
// Your payment processing code goes here
return processPayment(paymentResponse);
});
```
There are two ways to process Apple Pay/Android Pay payments -- on your server or using a payment processor.
#### Processing Payments on Your Server
If you're equiped to process Apple Pay/Android Pay payments on your server, all you have to do is send the Payment Response data to your server.
```es6
import React from 'react';
paymentRequest.show()
.then(paymentResponse => {
const { transactionIdentifier, serializedPaymentData } = paymentResponse.details;
return fetch('...', {
method: 'POST',
body: {
transactionIdentifier,
serializedPaymentData
}
})
.then(res => res.json())
.then(successHandler)
.catch(errorHandler)
});
```
See Android Pay Example
```es6
paymentRequest.show()
.then(paymentResponse => {
const { getPaymentToken } = paymentResponse.details;
return getPaymentToken()
.then(paymentToken => {
const { ephemeralPublicKey, encryptedMessage, tag } = paymentResponse.details;
return fetch('...', {
method: 'POST',
body: {
ephemeralPublicKey,
encryptedMessage,
tag
}
})
.then(res => res.json())
.then(successHandler)
.catch(errorHandler)
});
});
```
You can learn more about server-side decrypting of Payment Tokens on Apple's [Payment Token Format Reference](https://developer.apple.com/library/content/documentation/PassKit/Reference/PaymentTokenJSON/PaymentTokenJSON.html) documentation.
#### Processing Payments with a Payment Processor
When using a payment processor, you'll receive a `paymentToken` field within the `details` of the `PaymentResponse`. Use this token to charge customers with your payment processor.
```es6
paymentRequest.show()
.then(paymentResponse => {
const { paymentToken } = paymentResponse.details; // On Android, you need to invoke the `getPaymentToken` method to receive the `paymentToken`.
return fetch('...', {
method: 'POST',
body: {
paymentToken
}
})
.then(res => res.json())
.then(successHandler)
.catch(errorHandler);
});
```
See Android Pay Example
```es6
paymentRequest.show()
.then(paymentResponse => {
const { getPaymentToken } = paymentResponse.details;
return getPaymentToken()
.then(paymentToken => fetch('...', {
method: 'POST',
body: {
paymentToken
}
})
.then(res => res.json())
.then(successHandler)
.catch(errorHandler);
});
});
```
For a list of supported payment processors and how to enable them, see the [Add-ons](#add-ons) section.
### Dismissing the Payment Request
Dismissing the Payment Request is as simple as calling the `complete` method on of the `PaymentResponse`.
```es6
paymentResponse.complete('success'); // Alternatively, you can call it with `fail` or `unknown`
```
🚨 _Note: On Android, there is no need to call `paymentResponse.complete` -- the PaymentRequest dismisses itself._
## Add-ons
Here's a list of Payment Processors that you can enable via add-ons:
- [Stripe](https://github.com/garrettmac/react-web-pay/blob/master/packages/react-web-pay-addon-stripe)
- [Braintree](https://github.com/garrettmac/react-web-pay/blob/master/packages/react-web-pay-addon-braintree)
🚨 _Note: On Android, Payment Processors are enabled by default._
## API
### [PaymentRequest](https://github.com/garrettmac/react-web-pay/blob/master/cli/packages/react-web-pay/docs/PaymentRequest.md)
### [PaymentRequestUpdateEvent](https://github.com/garrettmac/react-web-pay/blob/master/cli/packages/react-web-pay/docs/PaymentRequestUpdateEvent.md)
### [PaymentResponse](https://github.com/garrettmac/react-web-pay/blob/master/cli/packages/react-web-pay/docs/PaymentResponse.md)
## Resources
### Payment Request
- [Introducing the Payment Request API](https://developers.google.com/web/fundamentals/discovery-and-monetization/payment-request)
- [Deep Dive into the Payment Request API](https://developers.google.com/web/fundamentals/discovery-and-monetization/payment-request/deep-dive-into-payment-request)
- [W3C API Working Draft](https://www.w3.org/TR/payment-request/)
- [Web Payments](https://www.youtube.com/watch?v=U0LkQijSeko)
- [The Future of Web Payments](https://www.youtube.com/watch?v=hU89pPBmhds)
### Apple Pay
- [Getting Started with Apple Pay](https://developer.apple.com/apple-pay/get-started)
- [Configuring your Environment](https://developer.apple.com/library/content/ApplePay_Guide/Configuration.html)
- [Processing Payments](https://developer.apple.com/library/content/ApplePay_Guide/ProcessPayment.html#//apple_ref/doc/uid/TP40014764-CH5-SW4)
- [Payment Token Format Reference](https://developer.apple.com/library/content/documentation/PassKit/Reference/PaymentTokenJSON/PaymentTokenJSON.html#//apple_ref/doc/uid/TP40014929)
### Android Pay
- [Setup Android Pay](https://developers.google.com/android-pay/setup)
- [User Flows](https://developers.google.com/android-pay/payment-flows)
- [Best Practices](https://developers.google.com/android-pay/best-practices)
- [Gateway Token Approach](https://developers.google.com/web/fundamentals/discovery-and-monetization/payment-request/android-pay#gateway_token_approach)
- [Network Token Approach](https://developers.google.com/web/fundamentals/discovery-and-monetization/payment-request/android-pay#network_token_approach)
# License
Licensed under the MIT License, Copyright © 2017, [Garrett Mac](https://twitter.com/garrettmac).
See [LICENSE](https://github.com/garrettmac/react-web-pay/blob/master/LICENSE) for more information.