https://github.com/gerhynes/webcam-fun
A page built to practice manipulating data from the webcam. Built for Wes Bos' JavaScript 30 course.
https://github.com/gerhynes/webcam-fun
javascript javascript30 webcam
Last synced: 12 months ago
JSON representation
A page built to practice manipulating data from the webcam. Built for Wes Bos' JavaScript 30 course.
- Host: GitHub
- URL: https://github.com/gerhynes/webcam-fun
- Owner: gerhynes
- Created: 2017-10-23T20:05:47.000Z (almost 9 years ago)
- Default Branch: master
- Last Pushed: 2018-01-30T13:00:21.000Z (over 8 years ago)
- Last Synced: 2025-01-31T11:34:27.319Z (over 1 year ago)
- Topics: javascript, javascript30, webcam
- Language: JavaScript
- Homepage: https://gk-hynes.github.io/webcam-fun/
- Size: 6.84 KB
- Stars: 0
- Watchers: 0
- Forks: 0
- Open Issues: 0
-
Metadata Files:
- Readme: README.md
Awesome Lists containing this project
README
# Webcam Fun
A page built to practice manipulating data from the webcam. Built for Wes Bos' [JavaScript 30](https://javascript30.com/) course.
[](https://gk-hynes.github.io/webcam-fun/)
## Notes
### Getting the video from the webcam
Because of security restrictions on getting access to a user's webcam, it must be tied to a secure origin (either localhost or a website that is https). For this reason, this project uses browsersync to run a local server.
The video from the webcam is sent to the video element. By piping it to the canvas element it can be manipulated.
First, select the video, canvas, ctx, the strip where screenshots will go, and the sound effect that will accompany them.
Make a function, `getVideo`. Use `navigator.mediaDevices.getUserMedia` and pass it `video`, set to `true`, and `audio`, set to `false`.
This returns a promise. Call `then` on it and it will give you a `localMediaStream`.
Set the source of the video to be `localMediaStream`.
To receive a live video feed, it must be from a url, not an object. So use `window.URL.createObjectURL`.
Then call `video.play()`.
If you inspect the video source, it is a `blob`, i.e. the raw data being piped in off the webcam.
Use `catch` to handle the error caused by someone not allowing you to access their webcam.
```js
function getVideo() {
navigator.mediaDevices
.getUserMedia({ video: true, audio: false })
.then(localMediaStream => {
console.log(localMediaStream);
video.src = window.URL.createObjectURL(localMediaStream);
video.play();
})
.catch(err => {
console.error(`OH NO!!!`, err);
});
}
```
### Painting the video onto the canvas
Make a function, `paintToCanvas`. Get the width and height of the video, and set the width and height of the canvas to be equal to those of the video.
Using `setInterval`, every 16 milliseconds run `drawImage` on the canvas `ctx` and pass it the video. Start at the top left-hand corner and paint the width and the height.
Return the `setInterval` so that if you ever need to stop painting you can have access to the interval and call clearInterval on it.
### Taking a photo
Make a function, `takePhoto`.
Set `snap.currentTime` to 0 and run `snap.play` to add the camera shutter sound effect.
Listen for an event on the video element called `canplay` (emitted when the video plays) and run `paintToCanvas`.
To extract the data from the canvas use `canvas.toDataURL` and pass it `"image/jpeg"`. This will give you the data in text-based form.
To get a photo from it, use `document.createElement("a")` and set `link.href` equal to the `data`.
Set the `link`'s attributes to `download` and give it the filename you want the photo to have.
Set the `link`'s `textContent` to "Download Image".
Finally, take the `strip` and insert the link node right before the `strip.firstChild` (similar to jQuery's `prepend`).
Now you can download the image.
To make the image visible on the strip, replace `link.textContent` with `link.innerHTML` and set the `src` to the `data`.
### Manipulate the video with filters
A filter works by getting the pixels from the canvas, changing their rgba values, and putting them back in.
In `paintToCanvas`, inside the interval, use `ctx.getImageData(0, 0, width, height)` to get the pixels. This will produce a massive array, `pixels.data`.
Now make the filter functions.
Make a function, `redEffect`, pass it in pixels, and loop over every pixel.
`pixels.data[0]` will be the first pixel's red value, `pixels.data[1]` will be its green value, `pixels.data[2]` will be its blue value, `pixels.data[3]` will be its alpha value, and then this will repeat.
On each loop, increment `i` by 4 and modify the three intervening pixels to change their rgba values. Then return the pixels. This will create a red filter.
```js
function redEffect(pixels) {
for (let i = 0; i < pixels.data.length; i += 4) {
pixels.data[i + 0] = pixels.data[i + 0] + 100; // red
pixels.data[i + 1] = pixels.data[i + 1] - 50; // green
pixels.data[i + 2] = pixels.data[i + 2] * 0.5; // blue
}
return pixels;
}
```
Now, make a function, `rgbSplit`. This time set the red value to -150, the green value to +500, and the blue value to -550. This will shift the pixels left or right. If you also set `ctx.globalAlpha` to 0.8 you can get a ghosting effect.
```js
function rgbSplit(pixels) {
for (let i = 0; i < pixels.data.length; i += 4) {
pixels.data[i - 150] = pixels.data[i + 0]; // red
pixels.data[i + 500] = pixels.data[i + 1]; // green
pixels.data[i - 550] = pixels.data[i + 2]; // blue
}
return pixels;
}
```
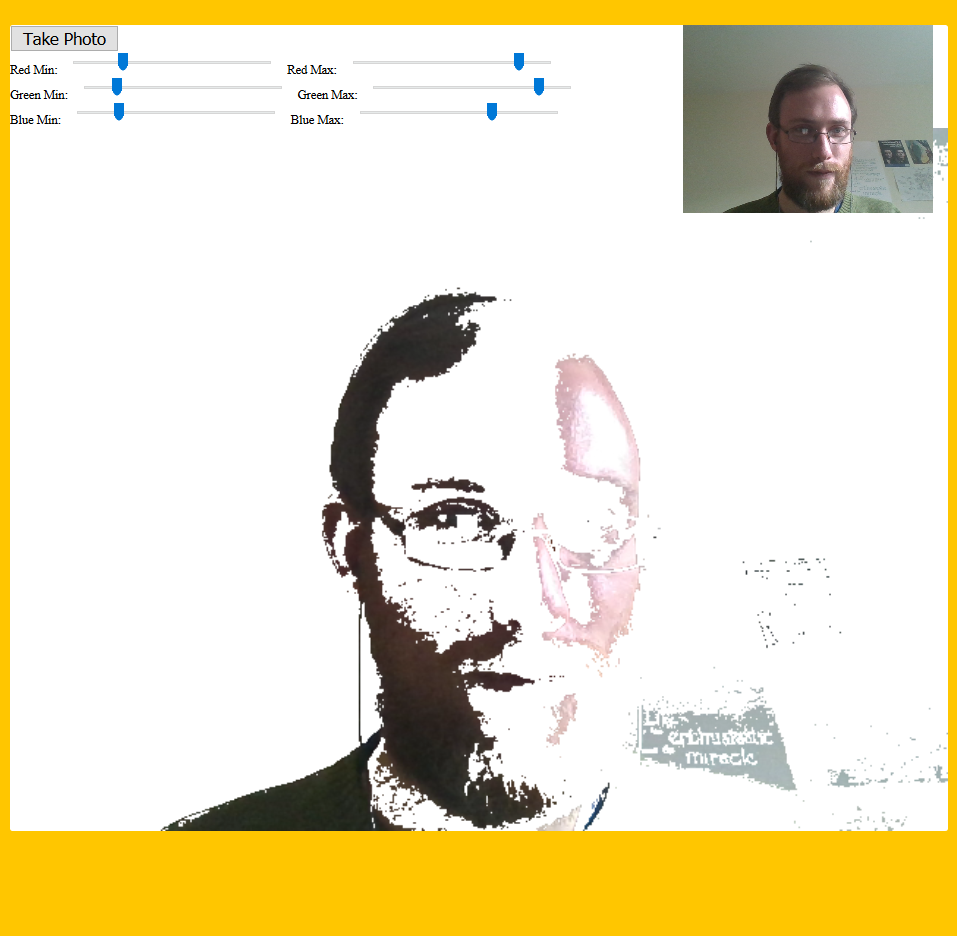
Finally, make a function, `greenScreen`.
Create an object, `levels`, to store the minimum and maximum green.
Select the rbg input sliders and set `levels[input.name]` to be their input value.
Then, using a huge `for` loop, check if the red, green, and blue values are between the min and max values, and if they are then remove them.
Do this by setting the fourth pixel value, the alpha, to 0, which makes it totally transparent.
```js
function greenScreen(pixels) {
const levels = {};
document.querySelectorAll(".rgb input").forEach(input => {
levels[input.name] = input.value;
});
for (i = 0; i < pixels.data.length; i = i + 4) {
red = pixels.data[i + 0];
green = pixels.data[i + 1];
blue = pixels.data[i + 2];
alpha = pixels.data[i + 3];
if (
red >= levels.rmin &&
green >= levels.gmin &&
blue >= levels.bmin &&
red <= levels.rmax &&
green <= levels.gmax &&
blue <= levels.bmax
) {
// If rgb values are between the min and the max take them out
pixels.data[i + 3] = 0;
}
}
return pixels;
}
```