https://github.com/getraid/raspberrypi-led-node-and-webserver
Control LED stripes through your Webbrowser via Websockets from the Raspberry Pi.
https://github.com/getraid/raspberrypi-led-node-and-webserver
Last synced: 16 days ago
JSON representation
Control LED stripes through your Webbrowser via Websockets from the Raspberry Pi.
- Host: GitHub
- URL: https://github.com/getraid/raspberrypi-led-node-and-webserver
- Owner: getraid
- License: gpl-3.0
- Created: 2018-02-11T17:49:12.000Z (over 8 years ago)
- Default Branch: master
- Last Pushed: 2023-01-25T20:41:07.000Z (over 3 years ago)
- Last Synced: 2025-01-04T05:19:24.743Z (over 1 year ago)
- Language: JavaScript
- Homepage:
- Size: 1.83 MB
- Stars: 1
- Watchers: 1
- Forks: 0
- Open Issues: 0
-
Metadata Files:
- Readme: README.md
- License: LICENSE
Awesome Lists containing this project
README
# Raspberry Pi LED-stripe controller with Node running a Webserver
Control LED stripes through your Webbrowser via Websockets from the Pi.
Also useable, with for example C#, to write applications that send the data via websockets: [possible idea](http://www.screenbloom.com/) or to sync it via Logitech-Software via API.
## Showcase:
Youtube:
[](https://www.youtube.com/watch?v=o8wPmeHrHuY)


## Requirements:
* Raspberry Pi 1 model B up to Raspberry Pi 3 Model B (tested everything but Pi 1a, Pi2 and Pi3b)
* Noobs or Rasbian (tested)
* 1 LED stripe with RGB connected on RPi GPIO pins (can be changed at manual setup: 6): red: gpio27, green: gpio17, blue: gpio22 (raspberry pi zero w)
* A local network (to reach the pi) and the IP adress of the PI
* A PC with open port 22, to ssh/connect to the pi.
## Standard Pinout
* red: gpio pin **27** / pincount 11
* green: gpio pin **17** / pincount 13
* blue: gpio pin **22** / pincount 15
* ground: gpio pin **4** / pincount 7
## Setup:
### Automated
1. SSH into your Pi via [Putty](https://www.chiark.greenend.org.uk/~sgtatham/putty/latest.html) on Windows or the Terminal on Linux / macOs (`ssh pi@your-pi-local-ip-adress:22`)
2. type in these commands, this will automate the installation.
```
wget http://git.getraid.com/raspberrypi-led-node-and-webserver/script.sh
chmod +x script.sh
sh script.sh
```
### Manual
You effectively need to change the **thick** written parts, because they are depending on your setup (GPIO)
1. SSH into your Pi via [Putty](https://www.chiark.greenend.org.uk/~sgtatham/putty/latest.html) on Windows or the Terminal on Linux / macOs (`ssh pi@your-pi-local-ip-adress:22`)
2. To update the PI and the repositories itself -> `sudo apt-get update && upgrade --y`
3. Install Node.js shown [here](https://nodejs.org/en/download/package-manager/#debian-and-ubuntu-based-linux-distributions) (I had Node 6.11.4 on my pi) or [here(german)](https://stefanreimers.wordpress.com/2017/03/18/node-js-auf-dem-raspberry-pi-zero-w/)
4. Clone this repo to your pi `git clone https://github.com/getraid/raspberrypi-led-node-and-webserver`
5. Go into the folder `cd raspberrypi-led-node-and-webserver`
6. **Change the RGB pins to the ones that you connected** `nano ws.js`
* `var led1 = new Gpio(your-gpio-pin-g, { mode: Gpio.OUTPUT });`
* `var led2 = new Gpio(your-gpio-pin-r, { mode: Gpio.OUTPUT });`
* `var led3 = new Gpio(your-gpio-pin-b, { mode: Gpio.OUTPUT });`
* to save changes: *CTRL + X -> Y -> Enter*
7. \* (Change the IP where the websocketserver lies to your Pi's ip `nano ws-client.js`)
* ` var ws = new WebSocket("ws://your-pi-local-ip-adress:3000");`
* to save changes: *CTRL + X -> Y -> Enter*
8. Install pigpio `sudo apt-get install pigpio -y`
9. Update all dependecies: `npm install`
10. Run the script: `sudo node ws-dev.js` (sudo necessary because of GPIO access and port 80)
10.1 If further down no problems occur, you can launch `sudo node ws.js` instead. Ws-dev just shows more log data.
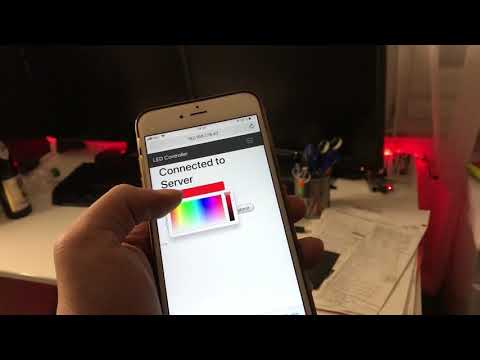
11. Open your Webbrowser and enter the IP adress of your pi in the url bar. For example: `http://192.168.178.42/`
12. If the title of the page says *Connected to Server* then you can click on the field with the "FFFFFF" and drag the color slider around.
* Else check the console of the Pi. Maybe your port is blocked or there is a GPIO error.
* Used Ports: 80 (webserver) & 3000 (websocketserver)
13. Install tmux to run the script in the background `sudo apt-get install tmux`
* `tmux`
* `sudo node ws`
* *CTRL + B and then press d*
* You can now close the terminal. To re-enter the tmux session, type `tmux a`
14. Enjoy your LED-Stripe webcontroller from any device in your local area network
* It is also possible to start this script running with tmux on the startup of the system -> rc.local.
\* 7 - Is not necessary anymore, change it if you encounter errors.
## Sidenote:
You'll see the count of users connected in the console, as well as a client number. This number doesn't have a meaning or anything else, it is just a random number, to quickly differenciate which user send what. (for the lulz)