https://github.com/giacomo/ngx-calendar-widget
A lightweight, customizable, and feature-rich Angular calendar widget designed to simplify event management and scheduling in your Angular applications.
https://github.com/giacomo/ngx-calendar-widget
Last synced: 7 months ago
JSON representation
A lightweight, customizable, and feature-rich Angular calendar widget designed to simplify event management and scheduling in your Angular applications.
- Host: GitHub
- URL: https://github.com/giacomo/ngx-calendar-widget
- Owner: giacomo
- Created: 2025-05-01T11:45:01.000Z (about 1 year ago)
- Default Branch: main
- Last Pushed: 2025-05-02T13:41:26.000Z (about 1 year ago)
- Last Synced: 2025-05-02T14:57:55.415Z (about 1 year ago)
- Language: TypeScript
- Homepage: https://www.npmjs.com/package/@localia/ngx-calendar-widget
- Size: 175 KB
- Stars: 5
- Watchers: 1
- Forks: 1
- Open Issues: 3
-
Metadata Files:
- Readme: README.md
Awesome Lists containing this project
- trackawesomelist - ngx-calendar-widget (⭐8) - A lightweight, customizable, and feature-rich calendar widget designed to simplify event management and scheduling in your Angular applications. (Recently Updated / [May 03, 2025](/content/2025/05/03/README.md))
- awesome-angular - ngx-calendar-widget - A lightweight, customizable, and feature-rich calendar widget designed to simplify event management and scheduling in your Angular applications. (Third Party Components / Calendars)
- fucking-awesome-angular - ngx-calendar-widget - A lightweight, customizable, and feature-rich calendar widget designed to simplify event management and scheduling in your Angular applications. (Third Party Components / Calendars)
README
# @localia/ngx-calendar-widget


A lightweight, customizable, and feature-rich Angular calendar widget designed to simplify event management and scheduling in your Angular applications.

## Features
- **Multi-locale support**: Display calendar in different languages (English, Spanish, German, French, Italian)
- **Customizable sizes**: Choose between default, large, and extra-large sizes
- **Event management**: Add, display, and interact with events
- **Responsive design**: Works seamlessly across devices
- **Easy integration**: Simple to set up and use in Angular projects
- **Flexible date handling**: Use the default date-fns adapter or inject your own date library implementation
## Installation
Install the library using npm:
```bash
npm install @localia/ngx-calendar-widget
```
Or with yarn:
```bash
yarn add @localia/ngx-calendar-widget
```
If you plan to use the default date adapter (based on date-fns), you'll need to install date-fns as well:
```bash
npm install @localia/ngx-calendar-widget date-fns
```
Or with yarn:
```bash
yarn add @localia/ngx-calendar-widget date-fns
```
## Usage
### Import the Module
Import the `NgxCalendarWidgetModule` into your Angular module:
```typescript
import { NgxCalendarWidgetModule } from '@localia/ngx-calendar-widget';
@NgModule({
imports: [
// ...other imports
NgxCalendarWidgetModule.forRoot() // Using default date-fns adapter
],
// ...other module properties
})
export class AppModule {
}
```
### Date Adapters
The calendar widget uses date adapters to handle date manipulations. By default, it uses date-fns, but you can provide your own implementation to use any date library of your choice (like Day.js, Moment.js, or others).
#### Using the Default date-fns Adapter
The default adapter is automatically configured when you use `forRoot()` without parameters:
```typescript
import { NgxCalendarWidgetModule } from '@localia/ngx-calendar-widget';
@NgModule({
imports: [
NgxCalendarWidgetModule.forRoot() // Uses default date-fns adapter
],
// ...
})
export class AppModule { }
```
#### Creating a Custom Date Adapter
To use a different date library, create a class that implements the `DateAdapter` interface:
```typescript
import { DateAdapter } from '@localia/ngx-calendar-widget';
import * as dayjs from 'dayjs';
import * as weekOfYear from 'dayjs/plugin/weekOfYear';
import * as isSameOrBefore from 'dayjs/plugin/isSameOrBefore';
import * as isSameOrAfter from 'dayjs/plugin/isSameOrAfter';
// Initialize dayjs plugins
dayjs.extend(weekOfYear);
dayjs.extend(isSameOrBefore);
dayjs.extend(isSameOrAfter);
export class DayjsDateAdapter implements DateAdapter {
getMonth(date: Date): number {
return dayjs(date).month();
}
getYear(date: Date): number {
return dayjs(date).year();
}
startOfWeek(date: Date, options?: { weekStartsOn: number }): Date {
const weekStart = options?.weekStartsOn || 0;
return dayjs(date).startOf('week').add(weekStart, 'day').toDate();
}
// Implement the rest of the methods from DateAdapter interface
// ...
}
```
#### Using Your Custom Date Adapter
To use your custom adapter, provide it through the `forRoot()` method:
```typescript
import { NgxCalendarWidgetModule, NgxCalendarWidgetConfigService, DATE_ADAPTER } from '@localia/ngx-calendar-widget';
import { DayjsDateAdapter } from './dayjs-date.adapter';
@NgModule({
imports: [
NgxCalendarWidgetModule.forRoot({
dateAdapter: new DayjsDateAdapter()
}),
],
// or using providers via injecton token
providers: [
{ provide: DATE_ADAPTER, useClass: DayjsDateAdapter }
]
// ...
})
export class AppModule { }
```
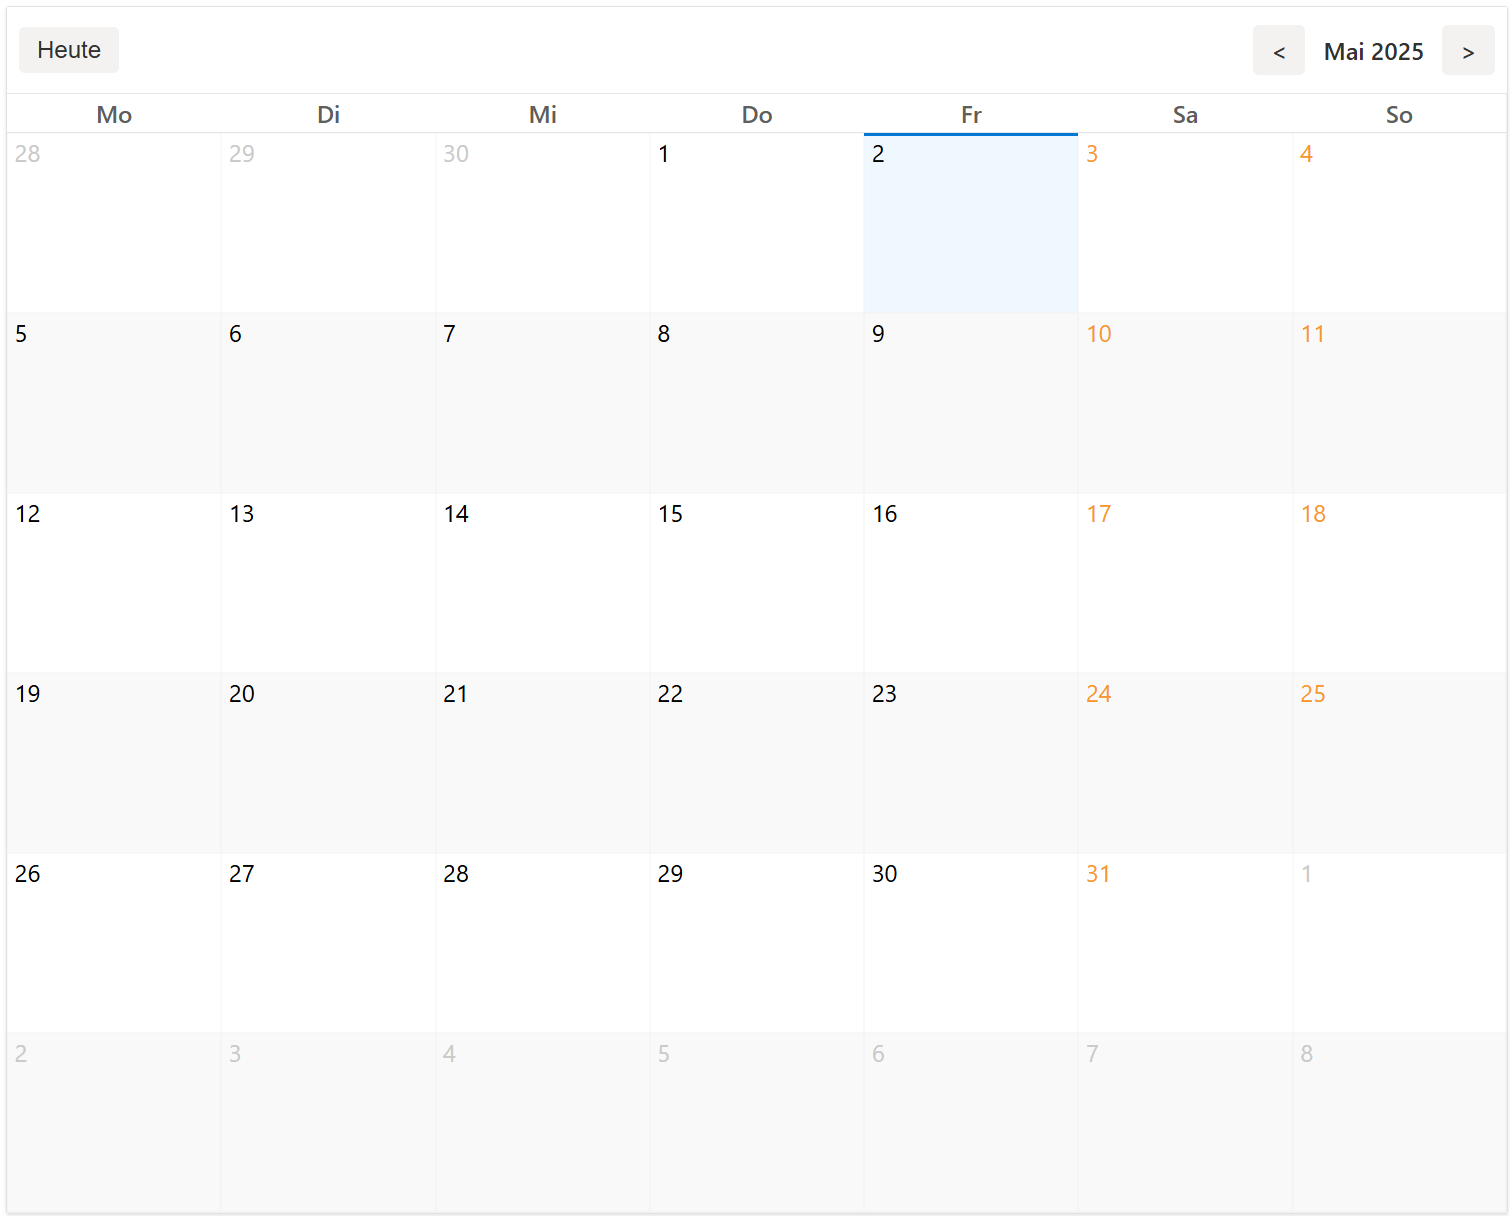
### Add to Template
Use the component in your template:
```html
```
### Component Preview
### Event Structure
Events must follow this interface:
```typescript
interface CalendarEventInterface {
id: number | string; // Unique identifier for the event
title: string; // Event title to display on the calendar
date: string; // Start date/time in ISO format (YYYY-MM-DDTHH:mm:ss)
endDate: string | null; // End date/time in ISO format (optional)
}
```
#### Example Event Objects
```typescript
// Single-day event
{
id: 1,
title: "Team Meeting",
date: "2023-10-15T14:00:00",
endDate: "2023-10-15T15:30:00"
}
// Multi-day event
{
id: "conf-2023",
title: "Annual Conference",
date: "2023-11-01T09:00:00",
endDate: "2023-11-03T17:00:00"
}
// Event without end date (treated as single-day)
{
id: 42,
title: "Deadline",
date: "2023-10-31T23:59:59",
endDate: null
}
```
### Component Inputs
| Input | Type | Default | Description |
|--------------------------|-------------------------------------|-------------|---------------------------------------------|
| `locale` | `'en' \| 'es'\| 'de'\| 'fr'\| 'it'` | `'de'` | Locale for the calendar. |
| `size` | `'default'\| 'large'\| 'x-large'` | `'default'` | Size of the calendar. |
| `hideMultiDayEventsText` | `boolean` | `true` | Hide text for multi-day events. |
| `enableAddEvent` | `boolean` | `false` | Enable the "Add Event" button. |
| `events` | `CalendarEventInterface[]` | `[]` | Array of events to display on the calendar. |
### Component Outputs
| Output | Description |
|--------------|--------------------------------------------------------|
| `addEvent` | Emits the date when the "Add Event" button is clicked. |
| `clickEvent` | Emits the event object when an event is clicked. |
### Handling Events
In your component, handle the emitted events:
```typescript
import { Component } from '@angular/core';
import { CalendarEventInterface } from '@localia/ngx-calendar-widget';
@Component({
selector: 'app-calendar-page',
template: `
`
})
export class CalendarPageComponent {
events: CalendarEventInterface[] = [
{
id: 1,
title: 'Team Meeting',
date: '2023-10-01T10:00:00',
endDate: '2023-10-01T12:00:00',
},
{
id: 2,
title: 'Conference',
date: '2023-10-05T09:00:00',
endDate: '2023-10-07T17:00:00',
}
];
onAddEvent(date: string) {
console.log('Add event on:', date);
// Implement your event creation logic here
}
onEventSelect(event: CalendarEventInterface) {
console.log('Event clicked:', event);
// Implement your event handling logic here
}
}
```
## Visual Appearance
The calendar displays events with different styles based on their duration:
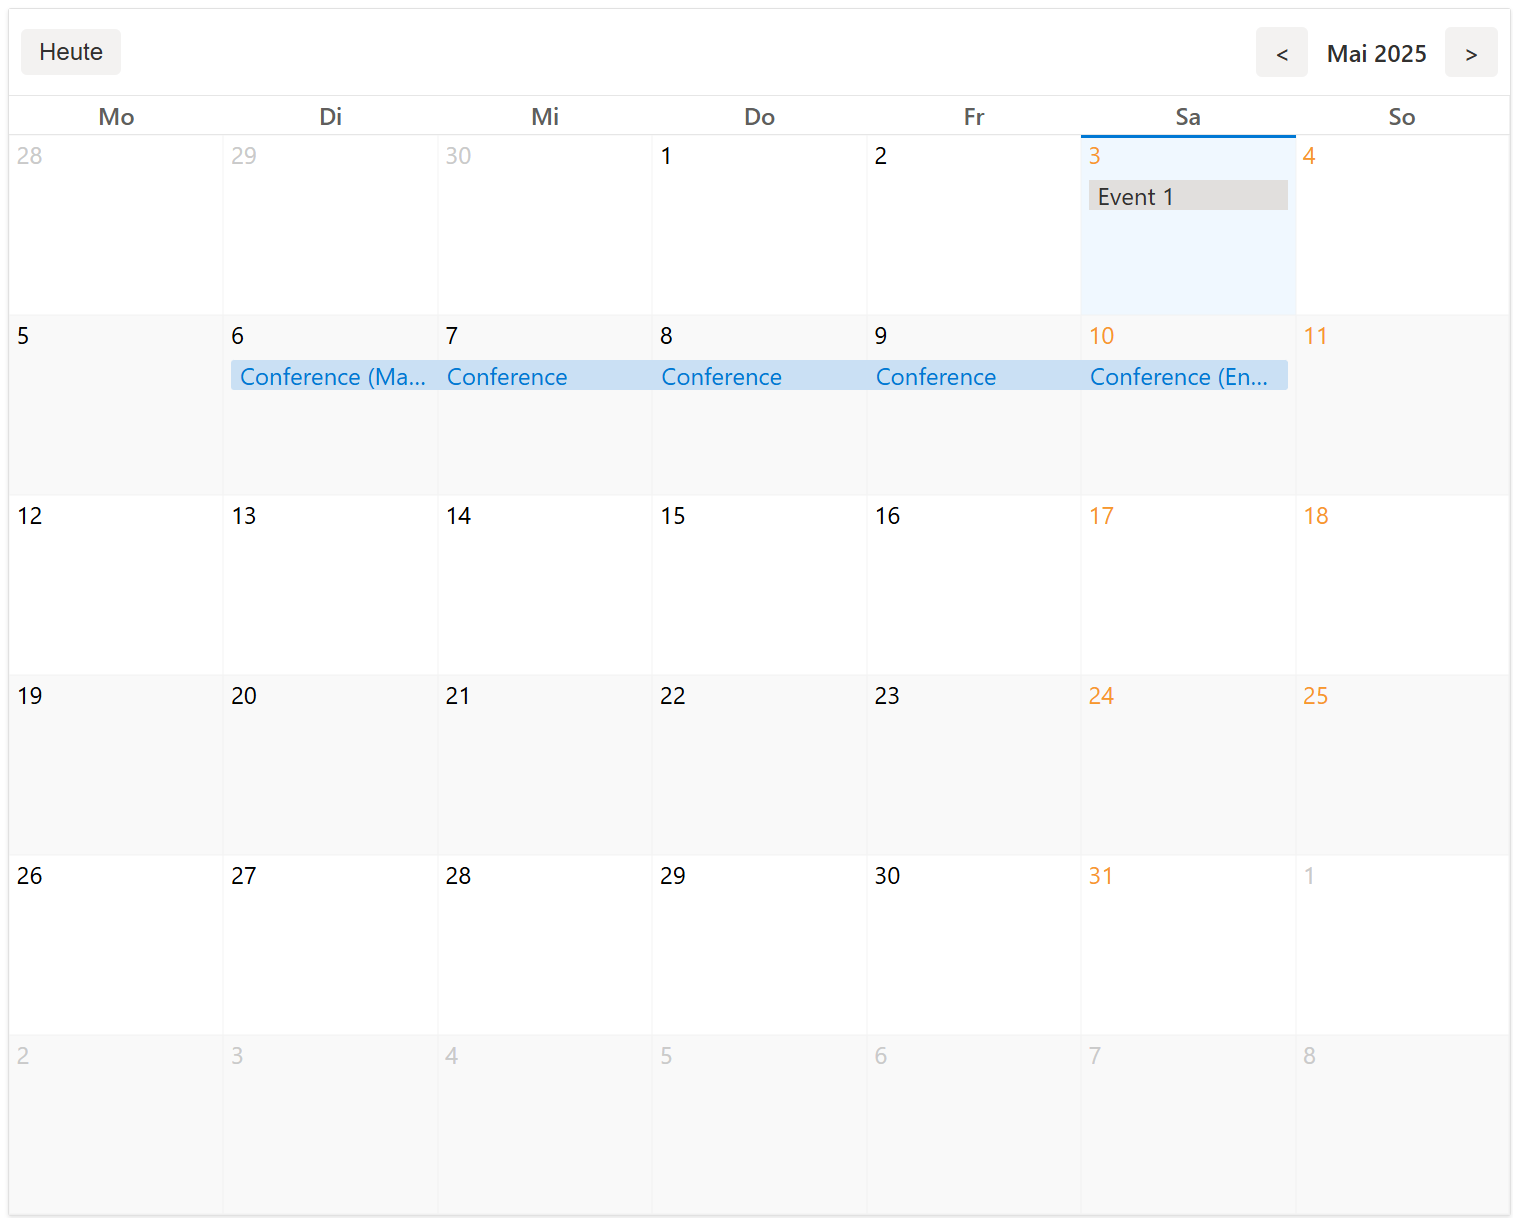
- **Single-day events**: Displayed with start and end time
- **Multi-day events**:
- First day shows the event title with full date range
- Middle days can be configured to show or hide text (controlled by `hideMultiDayEventsText`)
- Last day shows the event title with end date information
## Building the Library
To build the library, run:
```bash
ng build @localia/ngx-calendar-widget
```
The build artifacts will be stored in the `dist/@localia/ngx-calendar-widget` directory.
## Publishing the Library
To publish the library to npm:
1. Build the library:
```bash
ng build @localia/ngx-calendar-widget
```
2. Navigate to the `dist` directory:
```bash
cd dist/@localia/ngx-calendar-widget
```
3. Publish the library:
```bash
npm publish --access public
```
## Running Tests
### Unit Tests
Run unit tests using [Karma](https://karma-runner.github.io):
```bash
ng test
```
## Browser Support
The widget is compatible with:
- Chrome (latest)
- Firefox (latest)
- Safari (latest)
- Edge (latest)
## Contributing
Contributions are welcome! If you find a bug or have a feature request, please open an issue or submit a pull request.
1. Fork the repository
2. Create your feature branch: `git checkout -b feature/my-new-feature`
3. Commit your changes: `git commit -am 'Add some feature'`
4. Push to the branch: `git push origin feature/my-new-feature`
5. Submit a pull request
## License
This project is licensed under the [MIT License](https://opensource.org/license/MIT).
## Additional Resources
- [Angular Documentation](https://angular.dev)
- [Date-fns Documentation](https://date-fns.org) (used for default date manipulations)
## Credits
Developed by Localia
`