Ecosyste.ms: Awesome
An open API service indexing awesome lists of open source software.
https://github.com/glujaz/rotel-a12mkii-homekit
Adding Rotel A12MKII Amplifier naively to HomeKit using an ESP32 and Homespan
https://github.com/glujaz/rotel-a12mkii-homekit
amplifier audio esp32 esp32-arduino homespan rotel
Last synced: about 6 hours ago
JSON representation
Adding Rotel A12MKII Amplifier naively to HomeKit using an ESP32 and Homespan
- Host: GitHub
- URL: https://github.com/glujaz/rotel-a12mkii-homekit
- Owner: Glujaz
- License: mit
- Created: 2024-03-16T16:26:53.000Z (8 months ago)
- Default Branch: main
- Last Pushed: 2024-08-04T19:33:14.000Z (4 months ago)
- Last Synced: 2024-08-04T21:30:21.021Z (4 months ago)
- Topics: amplifier, audio, esp32, esp32-arduino, homespan, rotel
- Language: C
- Homepage:
- Size: 6.09 MB
- Stars: 2
- Watchers: 1
- Forks: 0
- Open Issues: 0
-
Metadata Files:
- Readme: README.md
- License: LICENSE
Awesome Lists containing this project
README
Rotel-A12MKII-Homekit 📻
This project is used to add the Rotel A12MKII Amplifier to HomeKit using an ESP32 and Homespan over RS232.
Works also for Rotel A14, A14MKII, and A12.
🎨 Layout


💻 Technologies
It is based on the Homespan library only to make as simple as possible
You will also require an ESP32
🚀 Getting started
Download the 4 files located inside the [Rotel-Homespan](https://github.com/Glujaz/Rotel-A12MKII-Homekit/tree/main/Rotel-Homespan) folder and open it inside the Arduino IDE.
Connect the ESP32 to you computer and load it in !
There are 2 optional variables in the code at the top.
- The first is used to determine how often the ESP32 is asking the current state of the amp. Default is 5 minutes as for each actions, the amp is already sending this information
- the second information is to disable the second accessory used for the additional controls of the amp (volume, speakers, etc...)
Prerequisites
- An [ESP32](https://www.amazon.fr/AZDelivery-NodeMCU-développement-dénergie-successeur/dp/B074RGW2VQ/ref=sr_1_5?__mk_fr_FR=ÅMÅŽÕÑ&crid=24QGNDT517DD0&dib=eyJ2IjoiMSJ9.uHqGnIpXI9uhMmv-IBGAlCEYXHMRMss5w9EtYaSS5P9_rm2ZJSxka8iXhmOG1wf8K-E_MwtgndcVFEDwakiOUpXDkqKOkGC56pynpIWUPAKjtR0noSonpAm5ZvvoqgO1qjisP4bVsbs1UkhF7aCvAy1BMfdffhanRyN2lso3Aeo6_0X_z38002Cu006NbUR4KmJTIQ3wO4tlH7CMRssLn5VEQP_j4sI_SgAh_g9vvBiD7P3eA_3XqR_u3oVbsUPehn_NlP1nKDM5mj0o0QT7aIVwmd4yNGcG8ztncgIbM6Y.ObBM9Yf9RsFkemHEYO50y__9-vg8o78aw-bY-OfS9BY&dib_tag=se&keywords=esp32&qid=1717357011&sprefix=esp32%2Caps%2C76&sr=8-5&th=1) is of course required. You can get one on amazon for less then 20€.
- Follow the instructions install the Homespan library on the Arduino IDE (if you are new to ESP32, the instructions include already everything you need)
- It requires to connect a [MAX3232](https://www.amazon.fr/DollaTek-MAX3232-Serial-Convertisseur-Connecteur/dp/B07DK3874B/ref=sr_1_9?crid=3IVH5H135RCEW&dib=eyJ2IjoiMSJ9.57fLPOGn2pbRDH7sWS9ENUZ2HKE7L1RohiWnwUmc9ufUvNeSxtR0JH_xHxbwmFkGBf4-8GoR3KSEJKlSjMpI4918OJPP-_Ue3tyEeFwdnNN5VMmtAnEevGN43WltNkJt5PnOqcRsrwFMOQ-nKSxYvZZqF9TiFOH3Z3wDcxwEPis4oD8PBkH_rryc1ndhGOfO8z6PsSQg9X6vjcFYbHFprlyH2fkkfpfit7Tn2FPl7X52bhH0-U0YHAzVm1E8I8NqDs165w55bYN7XN7fzWdgv5Z-mm_BM0zig0teIgFEreM._gvNVW_dW758rw49l1p8CZHllvrH9v_lLgF1oLHVMac&dib_tag=se&keywords=max3232&qid=1710891151&sprefix=%2Caps%2C84&sr=8-9) to pins used for TTL2 (typically 16 & 17 for RX & TX respectively), and use a crossed RS232 cable to connect to the amp.

Starting
Once the ESP32 is booted, follow the instructions to add a new Homespan device to HomeKit.
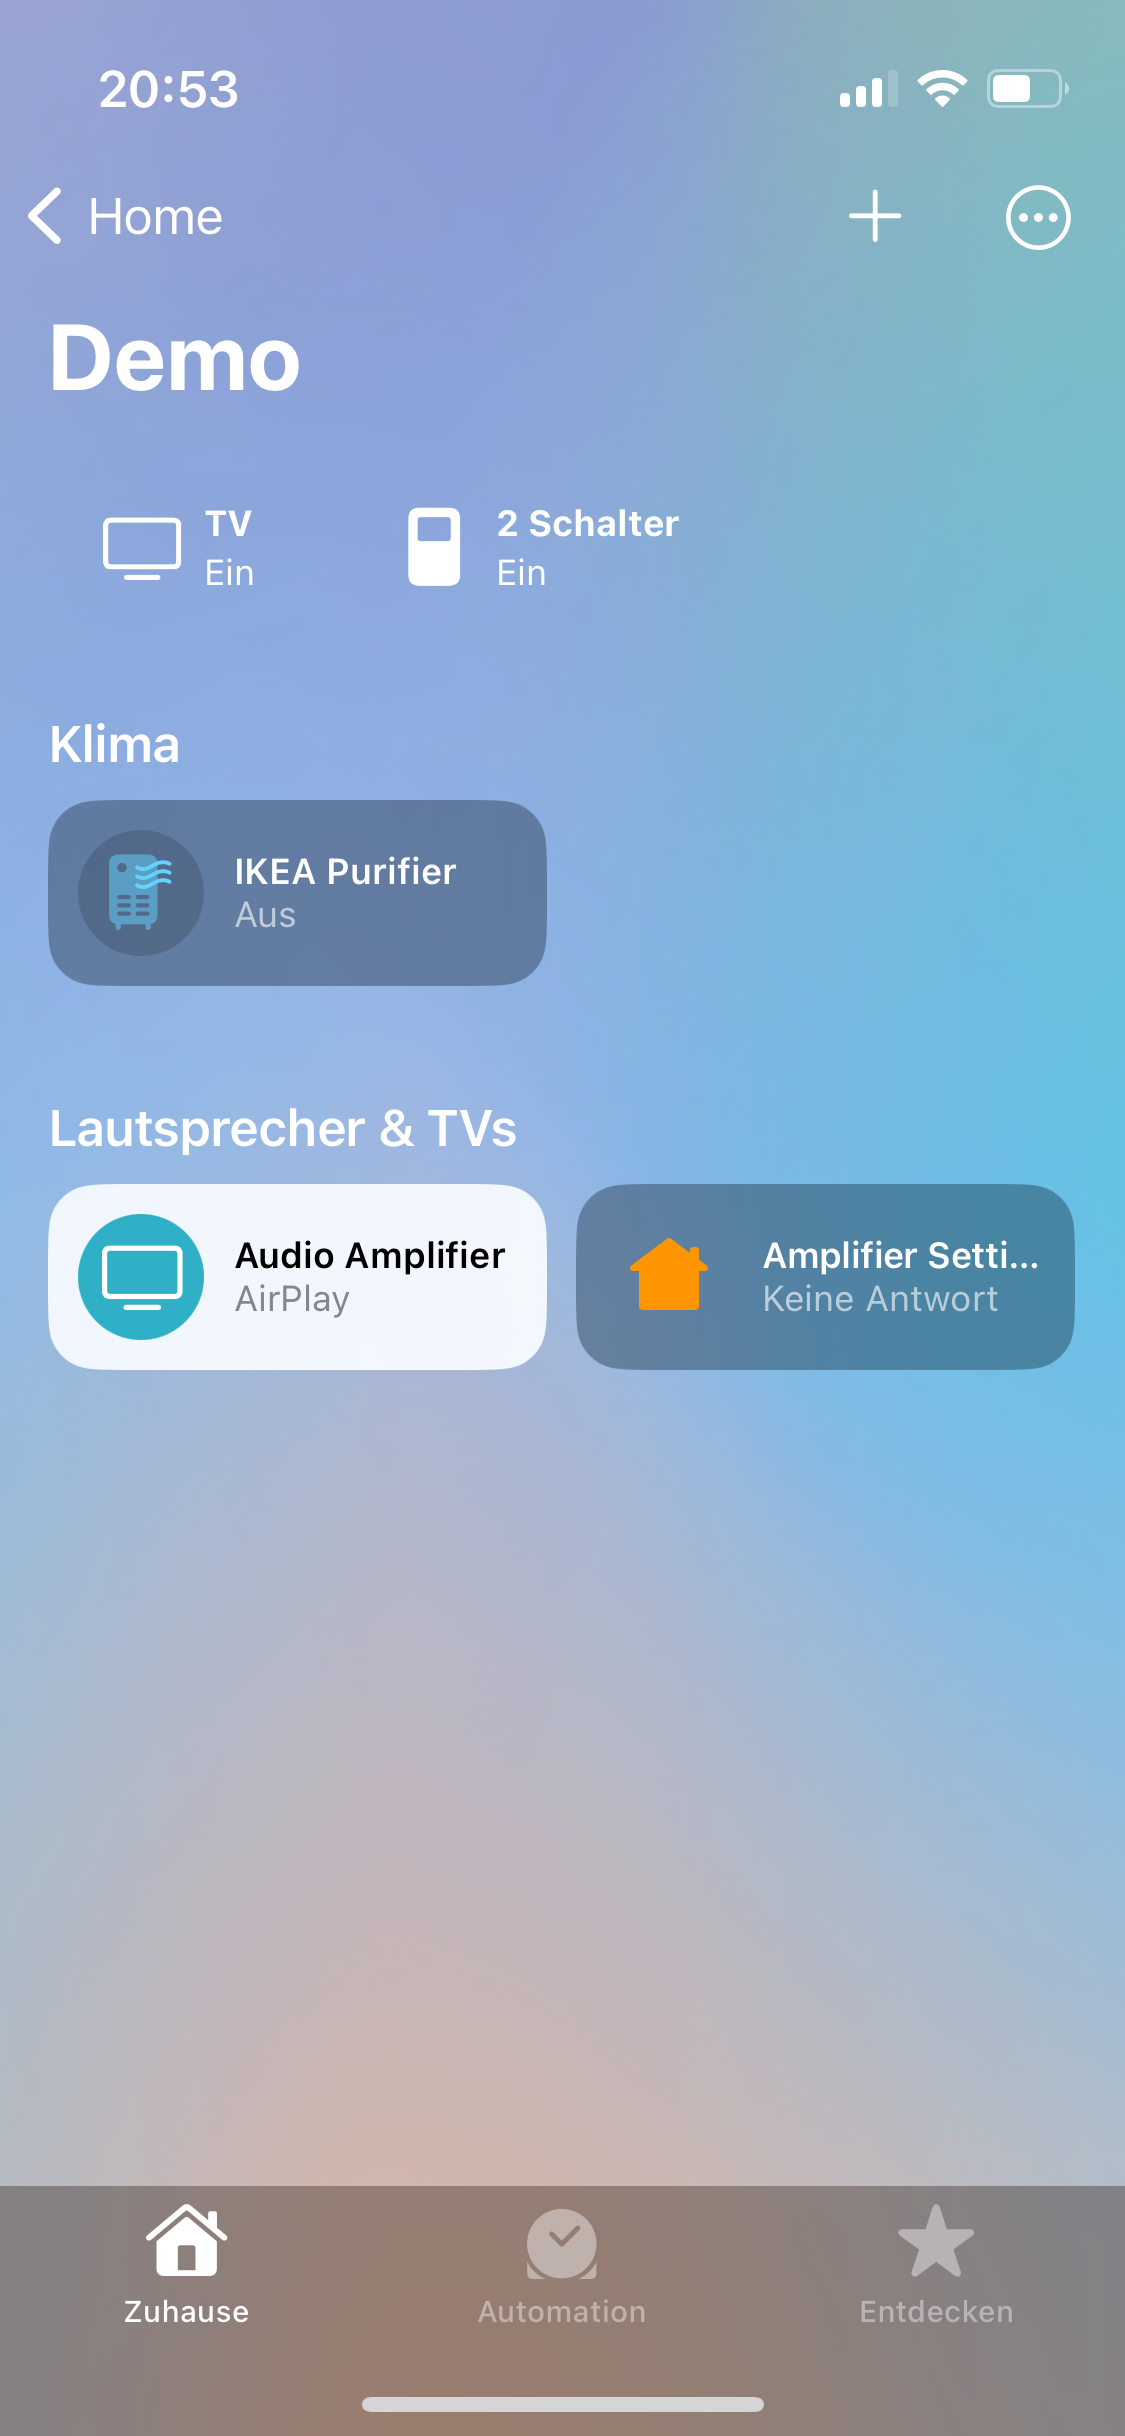
Two Accessories will show up in your Home app under the TV section. The first one is the Rotel Amplifier, the second one will be a supplemental accessory with multiple switches allowing you to control other elements via HomeKit and it's automations (which speaker is turned on, volume, etc...)
📫 Contribute
This is probably my first and biggest code in C++. It is very ugly, so if you have other propositions, feel free to contribute !
Documentations that might help
- 📄[Homespan introduction Manual](https://github.com/HomeSpan/HomeSpan/blob/master/docs/GettingStarted.md)
- 📄[Rotel connectivity Documentation](https://www.rotel.com/sites/default/files/product/rs232/A12-A12MKII-A14-A14MKII%20Protocol.pdf)