https://github.com/guilospanck/jenkins-github-polling
Tutorial on how to use Jenkins with GitHub and take advantage of the polling system.
https://github.com/guilospanck/jenkins-github-polling
github jenkins polling
Last synced: 2 months ago
JSON representation
Tutorial on how to use Jenkins with GitHub and take advantage of the polling system.
- Host: GitHub
- URL: https://github.com/guilospanck/jenkins-github-polling
- Owner: Guilospanck
- Created: 2021-11-24T17:25:29.000Z (over 4 years ago)
- Default Branch: main
- Last Pushed: 2021-11-24T18:57:29.000Z (over 4 years ago)
- Last Synced: 2025-04-06T07:28:02.395Z (over 1 year ago)
- Topics: github, jenkins, polling
- Homepage: https://medium.com/@guilospanck/how-to-use-jenkins-to-deploy-apps-directly-from-github-to-aws-ec2-78d607442325
- Size: 21.5 KB
- Stars: 1
- Watchers: 2
- Forks: 0
- Open Issues: 0
-
Metadata Files:
- Readme: README.md
Awesome Lists containing this project
README
# Jenkins GitHub Polling
Tutorial on how to use Jenkins with GitHub and take advantage of the polling system.
# Table Of Contents
- [Installation](#installation)
- [Java](#java)
- [Jenkins](#jenkins)
- [Configuration](#configuration)
- [Jenkins](#jenkins-1)
- [Adding GitHub Credentials](#adding-github-credentials)
- [Adding repository polling on GitHub](#adding-repository-polling-on-github)
- [Jenkins configuration with GitHub Polling on Push](#jenkins-configuration-with-github-polling-on-push)
- [Example of Jenkinsfile](#example-of-jenkinsfile)
- [Jenkins Workspace Directory](#jenkins-workspace-directory)
- [Common errors in Jenkinsfile](#common-errors-in-jenkinsfile)
- [Authentication error in Jenkins on using sudo](#authentication-error-in-jenkins-on-using-sudo)
## Installation
### Java
Firstly you'll have to install Java JDK, JRE (credits to [DigitalOcean - How To Install Java with Apt on Ubuntu 20.04](https://www.digitalocean.com/community/tutorials/how-to-install-java-with-apt-on-ubuntu-20-04#installing-specific-versions-of-openjdk)).
```bash
sudo apt update
```
Next, check if Java is already installed:
```bash
java -version
```
If Java is not currently installed, you’ll see the following output:
```bash
Command 'java' not found, but can be installed with:
sudo apt install openjdk-11-jre-headless # version 11.0.11+9-0ubuntu2~20.04, or
sudo apt install default-jre # version 2:1.11-72
sudo apt install openjdk-13-jre-headless # version 13.0.7+5-0ubuntu1~20.04
sudo apt install openjdk-16-jre-headless # version 16.0.1+9-1~20.04
sudo apt install openjdk-8-jre-headless # version 8u292-b10-0ubuntu1~20.04
```
Execute the following command to install the default Java Runtime Environment (JRE), which will install the JRE from OpenJDK 11:
```bash
sudo apt install default-jre
```
Next, check if Java is already installed:
```bash
java -version
```
You’ll see output similar to the following:
```bash
openjdk version "11.0.11" 2021-04-20
OpenJDK Runtime Environment (build 11.0.11+9-Ubuntu-0ubuntu2.20.04)
OpenJDK 64-Bit Server VM (build 11.0.11+9-Ubuntu-0ubuntu2.20.04, mixed mode, sharing))
```
You may need the Java Development Kit (JDK) in addition to the JRE in order to compile and run some specific Java-based software. To install the JDK, execute the following command, which will also install the JRE:
```bash
sudo apt install default-jdk
```
Verify that the JDK is installed by checking the version of javac, the Java compiler:
```bash
javac -version
```
### Jenkins
First, add the repository key to the system (credits to [DigitalOcean - How To Install Jenkins on Ubuntu 20.04](https://www.digitalocean.com/community/tutorials/how-to-install-jenkins-on-ubuntu-20-04)):
```bash
wget -q -O - https://pkg.jenkins.io/debian-stable/jenkins.io.key | sudo apt-key add -
```
After the key is added the system will return with OK.
Next, let’s append the Debian package repository address to the server’s sources.list:
```bash
sudo sh -c 'echo deb http://pkg.jenkins.io/debian-stable binary/ > /etc/apt/sources.list.d/jenkins.list'
```
```bash
sudo apt update
```
Finally, we’ll install Jenkins and its dependencies.
```bash
sudo apt install jenkins
```
Start and verify if Jenkins is running:
```bash
sudo systemctl start jenkins
sudo systemctl status jenkins
```
## Configuration
### Jenkins
Go to ```http://your_server_ip_or_domain:8080``` to configure Jenkins. You'll see this image:

Get the password from:
```bash
sudo cat /var/lib/jenkins/secrets/initialAdminPassword
```
Install suggested plugins:

Create your new user and password for the Jenkins server.
### Adding Github credentials
Go to Manage Jenkins
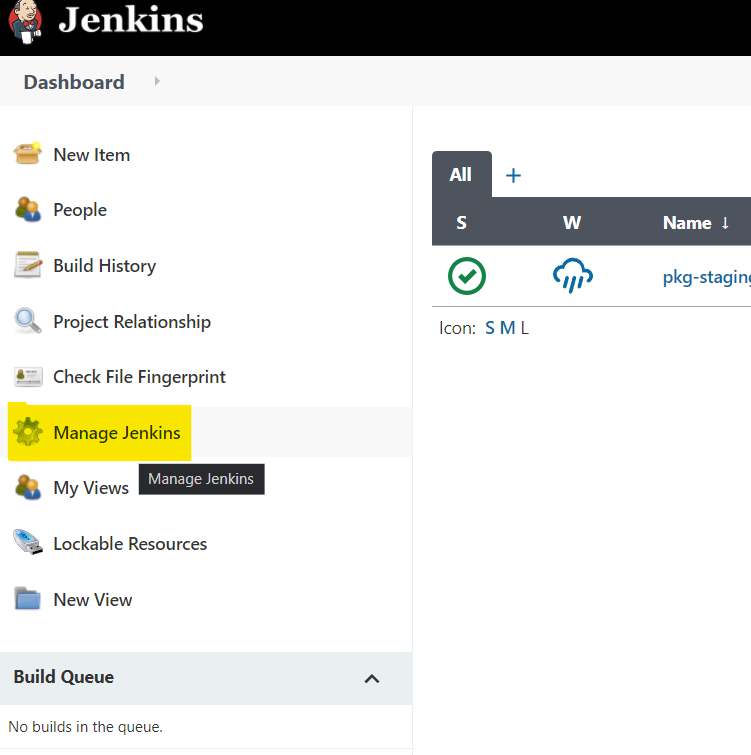
Then hit Manage Credentials
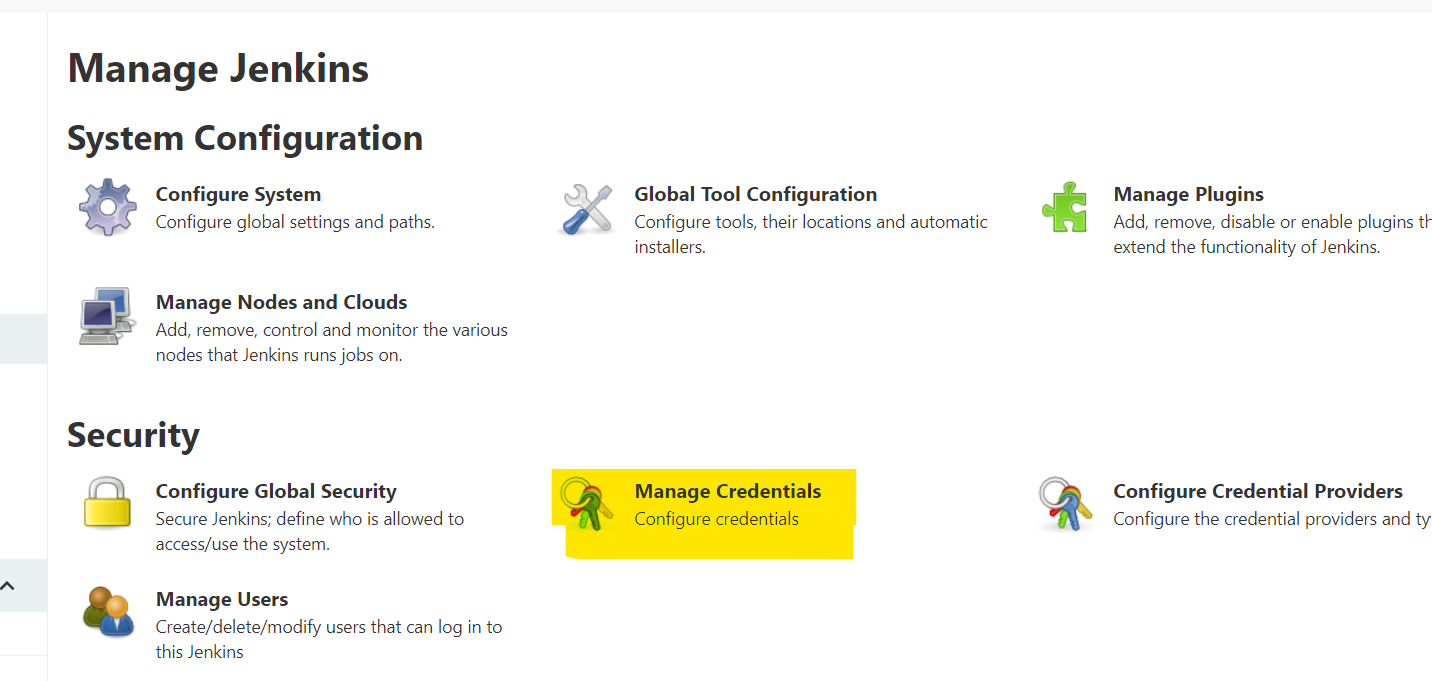
Then go to Global
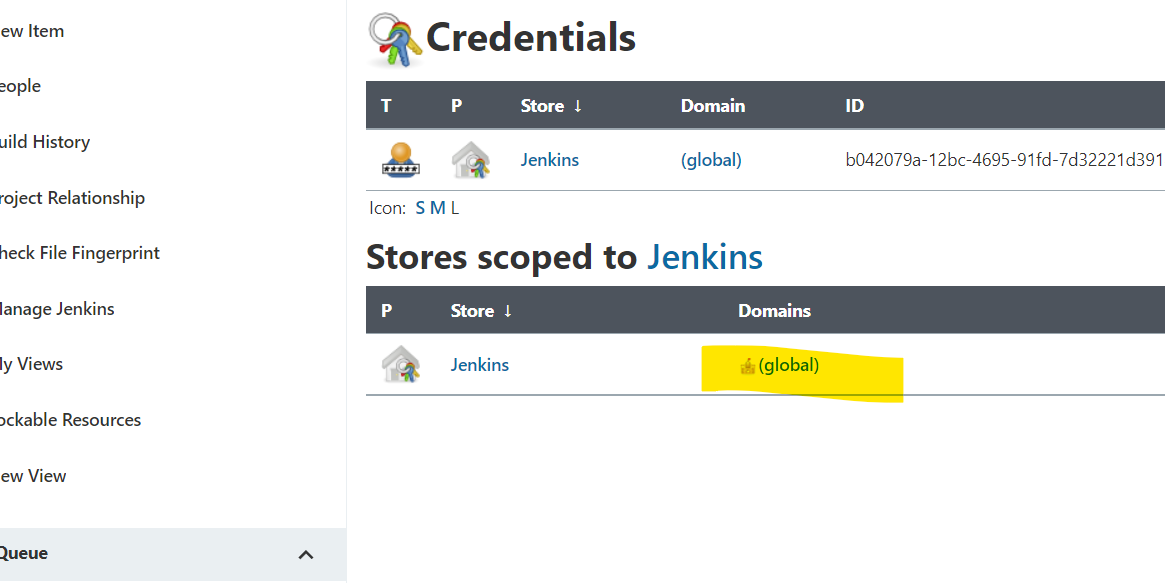
Add Credential
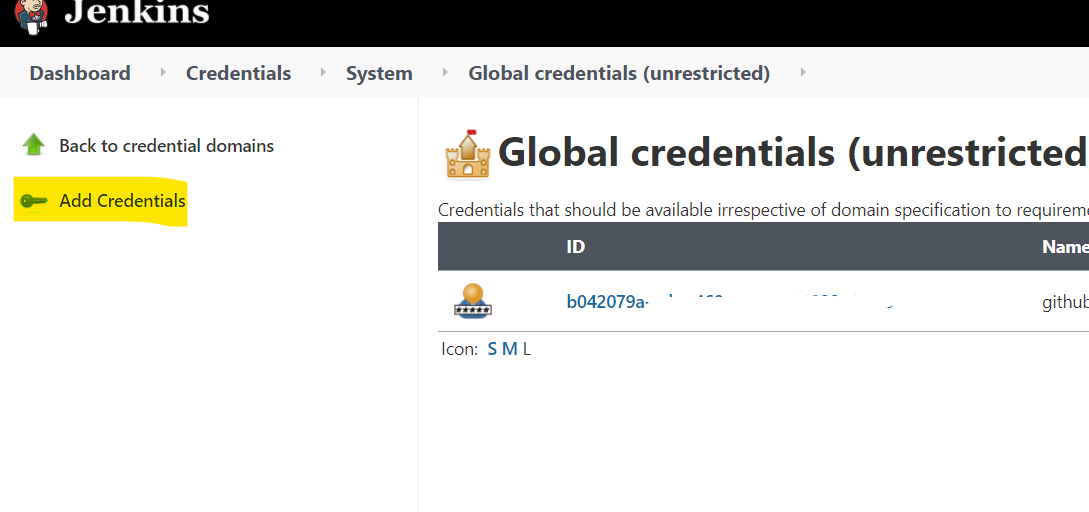
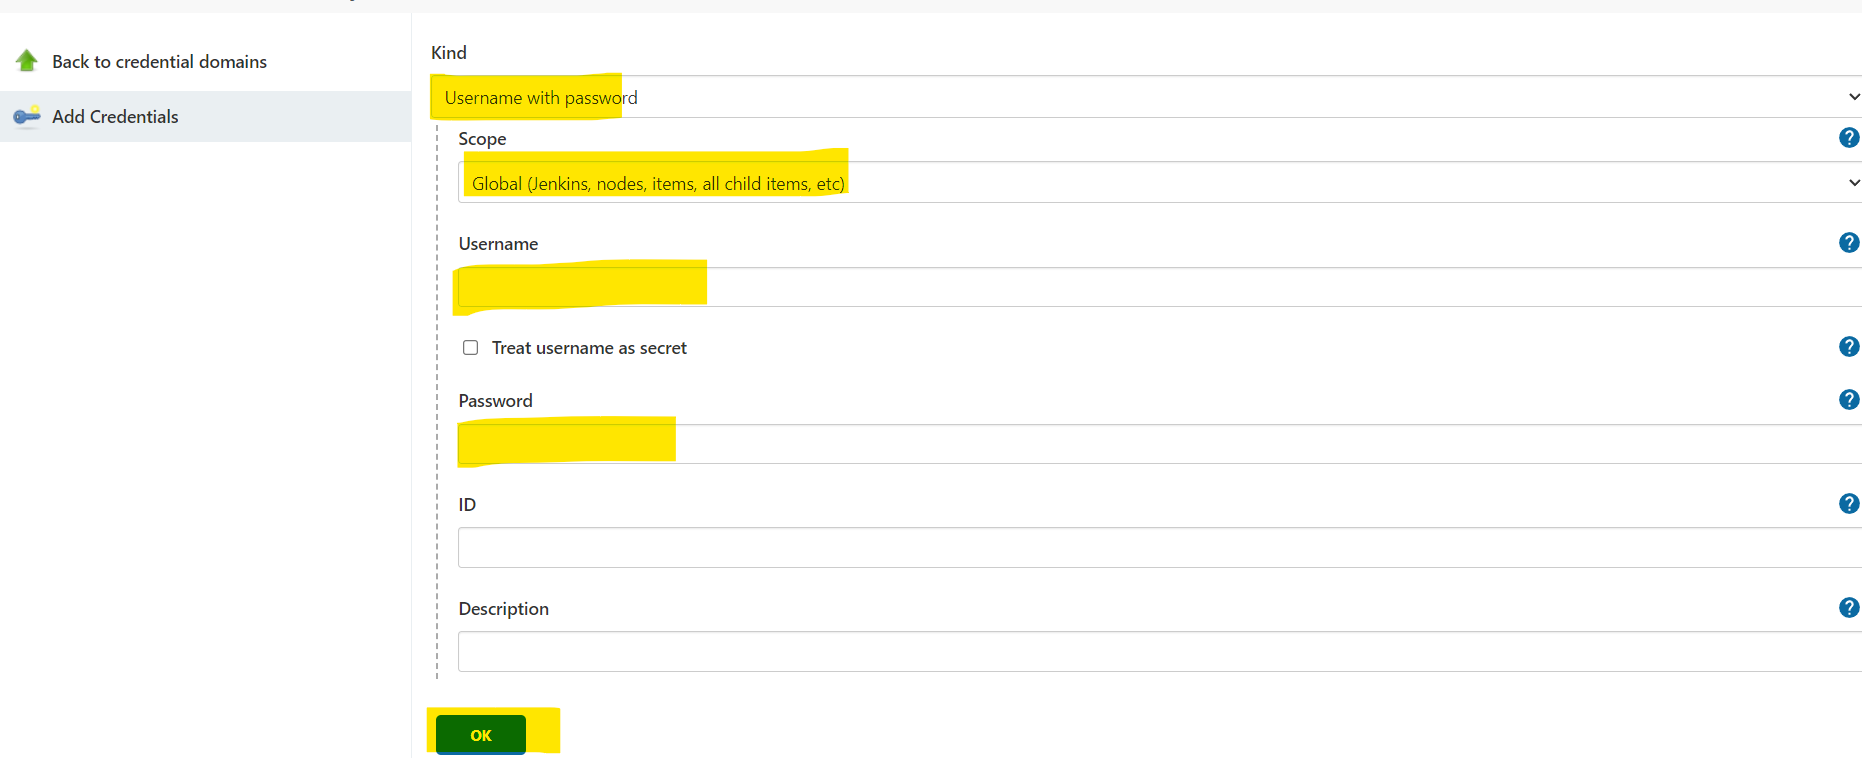
If you're using a PAT (Personal Access Token):
- Kind: select ```Username with Password```
- Scope: Global (Jenkins, nodes...)
- Username: give it a name (any name)
- Password: paste your PAT
- Hit OK
--------------------------------------------
### Adding repository polling on GitHub
Go to your repository on GitHub, then go to ```Settings > Webhooks > Add webhook```
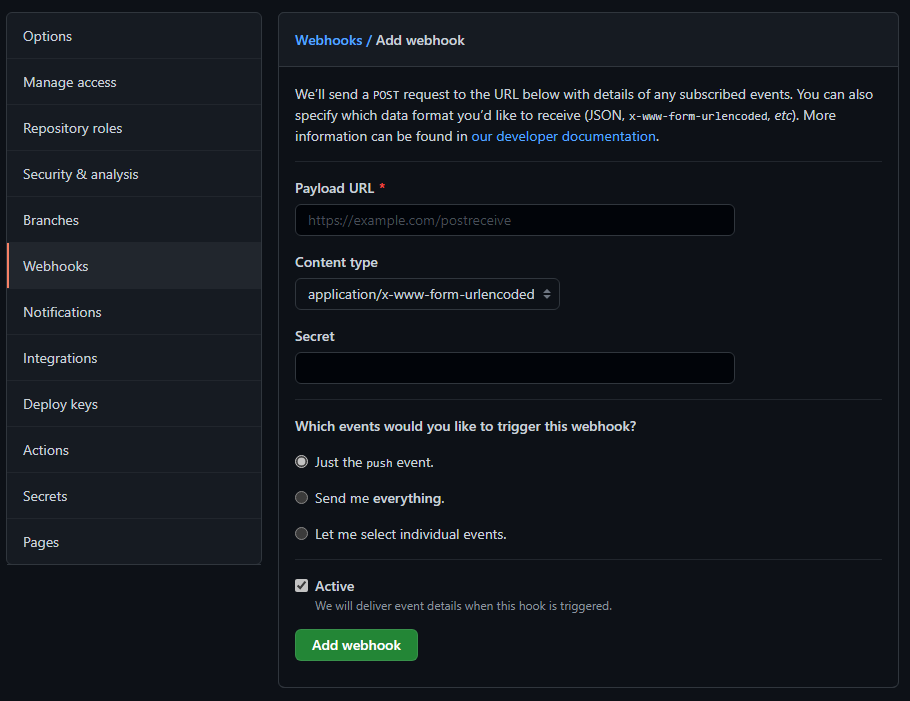
- In Payload URL add your Jenkins server address, adding ```/github-webhook/``` at the final, to look like: http://{IP Jenkins Server}:8080/github-webhook/
- In Content type, choose ```application/json```
- Leave Secret blank
- Choose in which events you want to trigger the webhook
- Check the Active checkbox
- Hit Add webhook

--------------------------------------------
### Jenkins configuration with GitHub Polling on Push
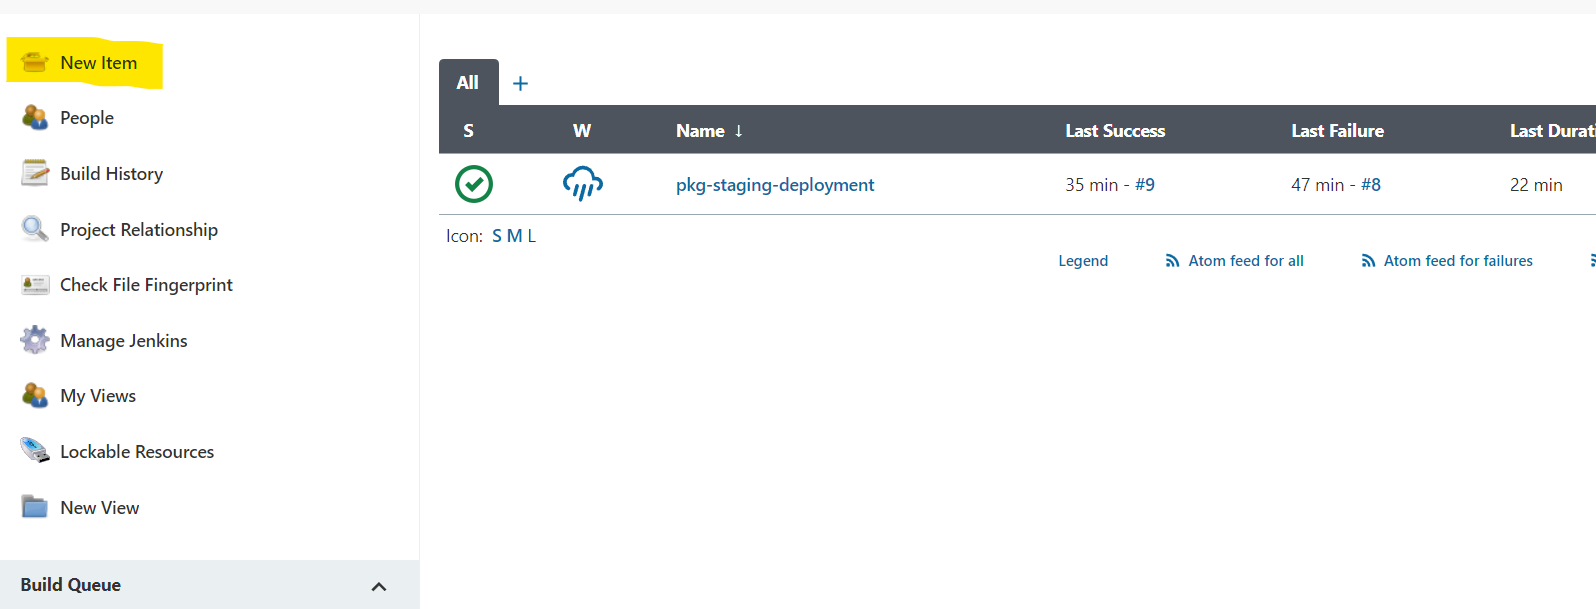
Inside Jenkins server, click on New Item
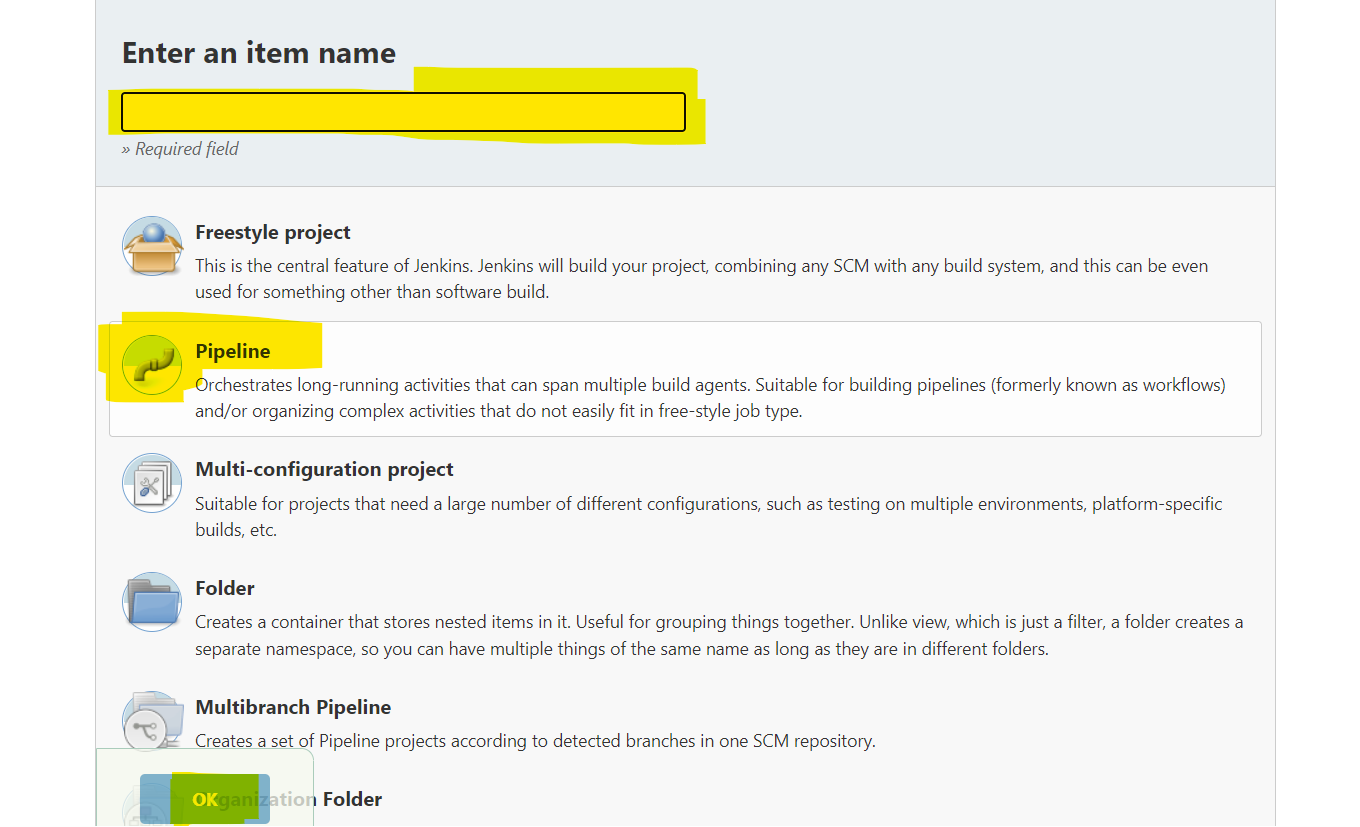
Give the process a name, select Pipeline and click on OK.
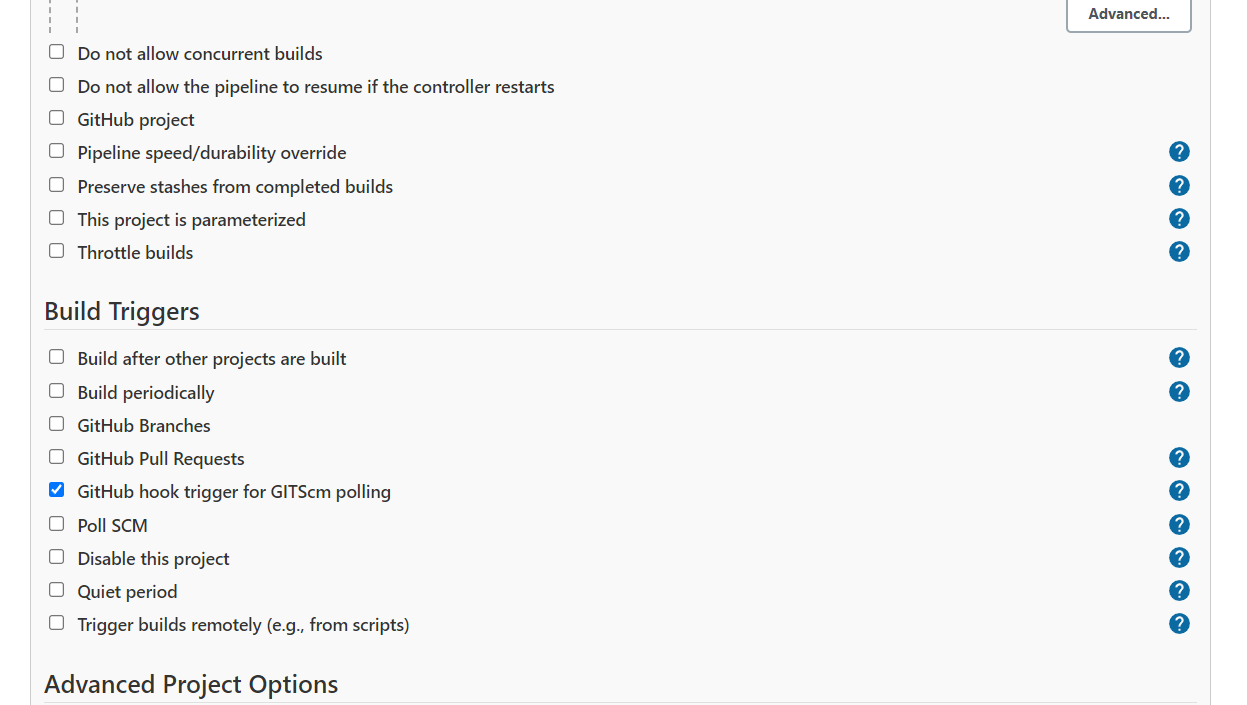
Add some configurations:

GitHub hook trigger for GITScm polling must be checked in order to generate the build when some event occurs in GitHub(push, pull...)
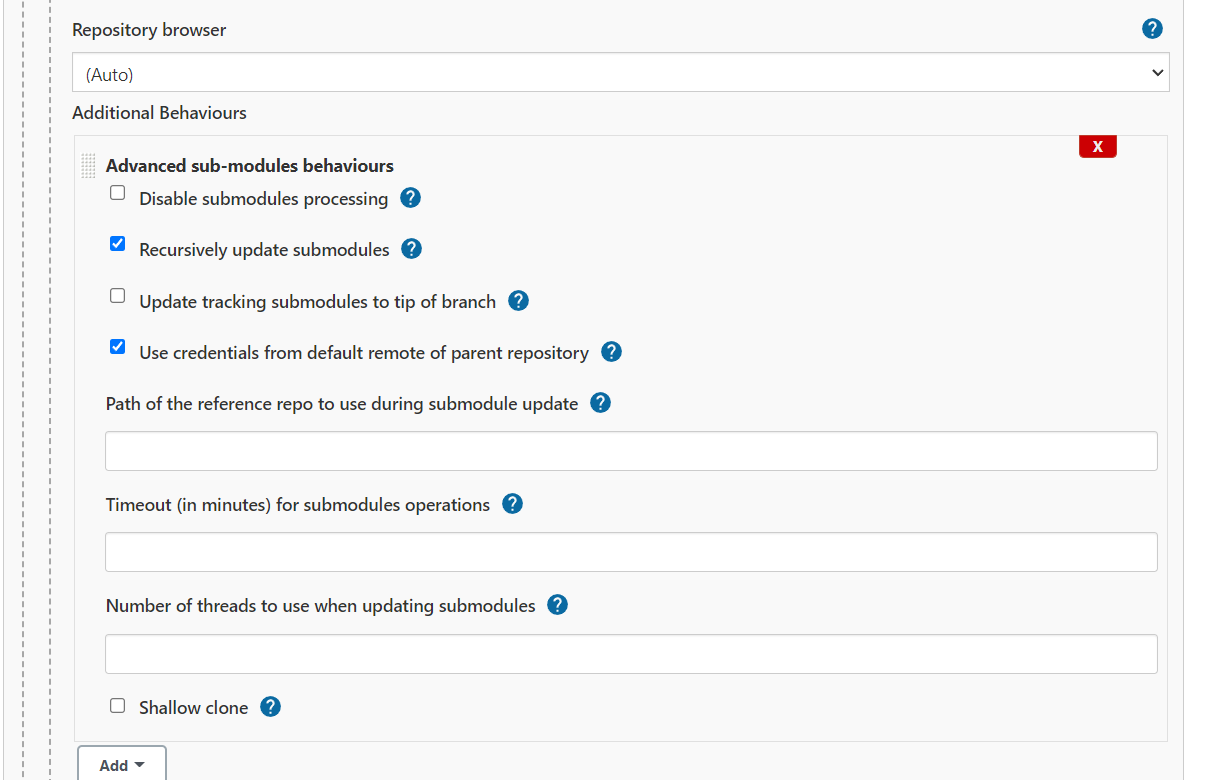
Add the GitHub repository that you're going to publish, add your GitHub Credentials and select the specific branch you want to pull (or leave it blank for any).

Add some behaviours (it's needed if you want to work with submodules)
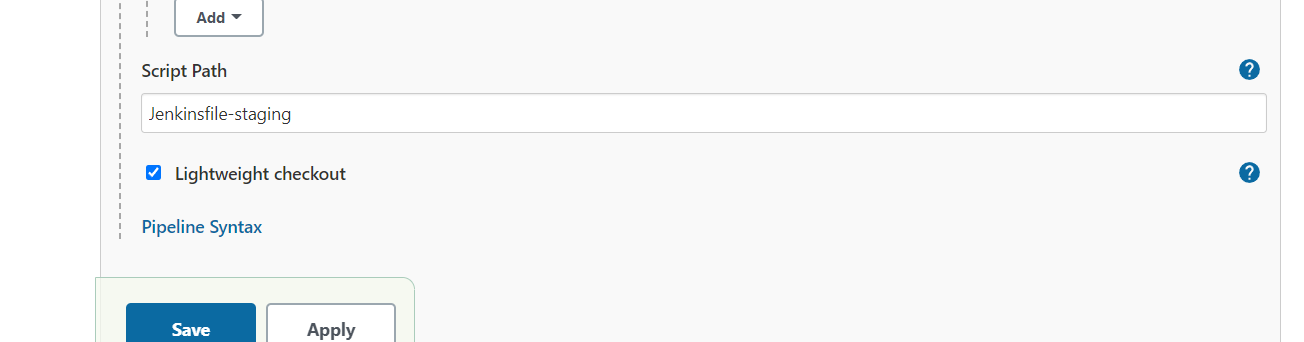
Finally, put the name of your Jenkinsfile file and then hit Save.
## Example of Jenkinsfile
```yml
pipeline{
agent any
stages{
stage('Run Docker Compose'){
steps {
sh """ #!/bin/bash
git submodule update --init --recursive
"""
sh """ #!/bin/bash
sudo docker-compose -f docker-compose-staging.yml up -d --build
"""
}
}
}
}
```
## Jenkins Workspace Directory
It is located at: ```/var/lib/jenkins/workspace```
## Common errors in Jenkinsfile
### Authentication error in Jenkins on using sudo
```bash
sudo su
visudo -f /etc/sudoers
```
add the following line at the end: ```jenkins ALL= NOPASSWD: ALL```