https://github.com/harmonydata/app
Harmony front end
https://github.com/harmonydata/app
data-science deep-learning fair-data foss front-end harmonisation harmony javascript llms machine-learning natural-language-processing nlp open-source react
Last synced: about 1 year ago
JSON representation
Harmony front end
- Host: GitHub
- URL: https://github.com/harmonydata/app
- Owner: harmonydata
- License: mit
- Created: 2023-06-09T16:11:29.000Z (about 3 years ago)
- Default Branch: master
- Last Pushed: 2025-03-13T22:38:52.000Z (over 1 year ago)
- Last Synced: 2025-04-01T15:42:20.614Z (over 1 year ago)
- Topics: data-science, deep-learning, fair-data, foss, front-end, harmonisation, harmony, javascript, llms, machine-learning, natural-language-processing, nlp, open-source, react
- Language: JavaScript
- Homepage: https://harmonydata.ac.uk/app/
- Size: 39 MB
- Stars: 0
- Watchers: 2
- Forks: 6
- Open Issues: 10
-
Metadata Files:
- Readme: README.md
- License: LICENSE
Awesome Lists containing this project
README

# Harmony Front End

[](https://github.com/harmonydata/harmony/blob/main/LICENSE)
[](https://github.com/harmonydata/app/forks)
This is the app in React which is running at https://harmonydata.ac.uk/app. It is not the blog which is at the base of the https://harmonydata.ac.uk domain at all paths other than /app.
- 🪧 The source code of the Harmony static blog at https://harmonydata.ac.uk is in this repo: https://github.com/harmonydata/harmonydata.github.io. It is hosted with Github Pages.
- 🪧 The Harmony Python library source code is here: https://github.com/harmonydata/harmony.
- 🪧 The Harmony R library source code is here: https://github.com/harmonydata/harmony_r.
- 🪧 The Harmony API source code is here: https://github.com/harmonydata/harmonyapi.
## Installing on your local machine
[YouTube video on installing and running the app in Windows](https://www.youtube.com/watch?v=1xp3Uh6dptg)
## How to run Harmony's Node.js front end.
First you need the [API server](https://github.com/harmonydata/harmonyapi) running. Download, install and start the Harmony API. The Node.js front end will connect to the API server.
Follow the steps to install [Node.js](https://docs.npmjs.com/downloading-and-installing-node-js-and-npm).
Then `cd` into this cloned folder (`cd app`) and run:
```
npm install
npm start
```
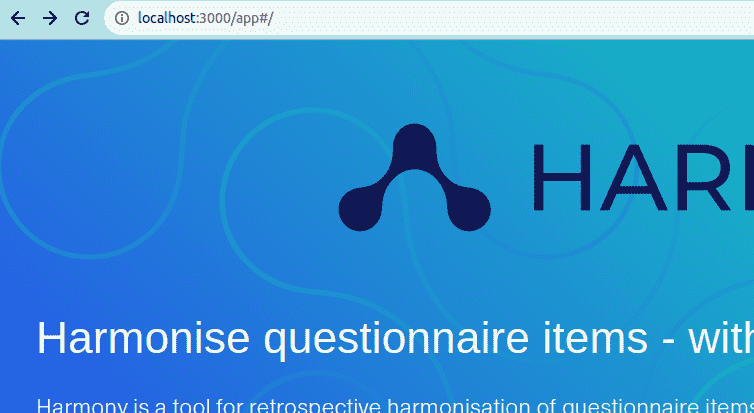
You can access Harmony in your browser at `http://localhost:3000/app#/`.
## How to run this front end and connect to localhost API
[Watch a video tutorial on how to run the Harmony front end locally and connect to Harmony API on localhost](https://youtu.be/1xp3Uh6dptg?si=g2CkXGEJCtevgdzY)
Run the [Harmony API](https://github.com/harmonydata/harmonyapi) app in Python.
Open `.env` and change `REACT_APP_API_URL` to `http://localhost:8000` and change `REACT_APP_ABSOLUTE_URL_PREFIX` to `http://localhost:8000/app` (so that the front end knows that it's running on localhost and that it should connect to a localhost API)
```
REACT_APP_API_URL=http://localhost:8000
REACT_APP_ABSOLUTE_URL_PREFIX=http://localhost:8000/app
```
Then run `npm install; npm start` as usual.
## Who to contact?
You can contact Harmony team at https://harmonydata.ac.uk/, Thomas Wood at http://fastdatascience.com/ or John Rogers at http://delosis.com
## Deployment
Commits / pull requests to the master or staging branches will trigger an automatic build on netlifiy - temporay build URLS will be displayed in pull requests and please manually confirm your commits are working as intended.
The staging branch is always available at https://harmony-staging.netlify.app/
This app is deployed to the main website using Github actions when there is a push to `releases` branch - this is a protected branch. The script to do this is under folder `.github`.
Ulster University is managing the domain `harmonydata.ac.uk` which is configured to point to the IPs of the Github Pages deployment.
## Harmony export library
This repository also includes the [distributable library](https://github.com/harmonydata/app/blob/master/src/components/HarmonyExport.js) to simplify making external links to the harmony model definition.
To build this component run
```
npm run build:HarmonyExport
```
To use this component on other sites include the package:
```
```
You then have two routes to creating an harmony link - the easiest is using the custom web component `` it provides. This takes care of creating the special link code and provides the harmony icon.
```
const harmonyLink = document.createElement("harmony-export");
' questions can be defined as a simple text array
harmonyLink.questions = ["question1", "question2" ...]
' OR as an array of objects which must specify both question_text and question_no
harmonyLink.questions = [{question_no:1, question_text:"question1"}, {question_no:2, question_text:"question2"} ...]
' You can also optionally define the name for the instrument containing these questions
harmonyLink.instrument_name = "PHQ-7";
' the icon size defaults to 24px but you can alter it with:
harmonyLink.size= "36px"
' Finally - apply any styling to the component you need and add it to your DOM
wrapper.append(harmonyLink);
```
The alternative method is to call the globally available function `createHarmonyUrl({questions, instrument_name})` This will return the bare URL needed to import your questions into the Harmony upload page. You will have to provide the means of following this link yourself. Note that you need to set a constant `target` for multiple links to ensure that the same session of the harmony site is reused to allow multiple imports into the same session.
# How to contribute
You can raise an issue in the [issue tracker](https://github.com/harmonydata/harmony/issues), and you can open a [pull request](https://github.com/harmonydata/harmony/pulls).
Please contact us at https://harmonydata.ac.uk/contact or write to thomas@fastdatascience.com if you would like to be involved in the project.
# Harmony Browser Extensions
Browser extensions for sending selected text to Harmony. Available for Chrome, Firefox, and Safari.
## Features
- Right-click to send selected text to Harmony
- Popup interface for pasting text from PDFs
- Seamless integration with Harmony Data platform
- Cross-browser support
## Development
The extensions are built using vanilla JavaScript and browser-specific Extension APIs. Each browser extension is located in its own directory:
- `extensions/chrome/`: Chrome extension
- `extensions/firefox/`: Firefox add-on
- `extensions/safari/`: Safari extension
### Common Components
Each extension shares similar core functionality:
- Context menu integration
- Popup interface
- Text selection handling
- PDF text extraction
### Local Development
1. Clone the repository:
```bash
git clone https://github.com/harmonydata/harmony-browser-extension.git
cd harmony-browser-extension
```
2. Install dependencies:
```bash
npm install
```
3. Load the extension in your browser:
**Chrome:**
- Open Chrome and go to `chrome://extensions/`
- Enable "Developer mode"
- Click "Load unpacked" and select the `extensions/chrome` directory
**Firefox:**
- Open Firefox and go to `about:debugging`
- Click "This Firefox" on the left
- Click "Load Temporary Add-on"
- Select the `extensions/firefox/manifest.json` file
**Safari:**
- Open Safari and go to Safari > Settings > Extensions
- Enable "Developer mode"
- Click "Load Extension"
- Select the `extensions/safari` directory
## Publishing
The extensions are automatically published to their respective stores when changes are pushed to the main branch. This is handled by GitHub Actions.
### Chrome Web Store
1. Go to the [Chrome Web Store Developer Dashboard](https://chrome.google.com/webstore/devconsole)
2. Create a new item or select your existing extension
3. Get your Extension ID from the URL
4. Go to the "API Access" tab
5. Create a new API key:
- Click "Create new credentials"
- Choose "Chrome Web Store API"
- Save the Client ID and Client Secret
### Firefox Add-ons
1. Go to the [Firefox Add-ons Developer Hub](https://addons.mozilla.org/developers/)
2. Create a new add-on or select your existing one
3. Get your Add-on ID
4. Generate API credentials in the Developer Hub
### Safari Extensions
1. Go to the [Apple Developer Portal](https://developer.apple.com)
2. Create a new Safari extension or select your existing one
3. Get your Extension ID
4. Generate API credentials in the Developer Portal
### Configuring GitHub Secrets
Add the following secrets to your GitHub repository (Settings > Secrets and variables > Actions):
**Chrome:**
- `CHROME_EXTENSION_ID`
- `CHROME_CLIENT_ID`
- `CHROME_CLIENT_SECRET`
- `CHROME_REFRESH_TOKEN`
**Firefox:**
- `FIREFOX_EXTENSION_ID`
- `FIREFOX_API_KEY`
- `FIREFOX_API_SECRET`
**Safari:**
- `SAFARI_EXTENSION_ID`
- `SAFARI_API_KEY`
- `SAFARI_API_SECRET`
## Contributing
1. Fork the repository
2. Create your feature branch (`git checkout -b feature/amazing-feature`)
3. Commit your changes (`git commit -m 'Add some amazing feature'`)
4. Push to the branch (`git push origin feature/amazing-feature`)
5. Open a Pull Request
## License
This project is licensed under the MIT License - see the LICENSE file for details.


