https://github.com/hermannsblum/kindle_infoscreen
Home-Assisstant Interface That Runs in the Kindle Browser.
https://github.com/hermannsblum/kindle_infoscreen
home-assistant kindle
Last synced: 7 months ago
JSON representation
Home-Assisstant Interface That Runs in the Kindle Browser.
- Host: GitHub
- URL: https://github.com/hermannsblum/kindle_infoscreen
- Owner: hermannsblum
- License: mit
- Created: 2018-06-17T11:46:24.000Z (over 7 years ago)
- Default Branch: master
- Last Pushed: 2022-12-13T02:09:49.000Z (almost 3 years ago)
- Last Synced: 2025-03-25T09:53:01.674Z (7 months ago)
- Topics: home-assistant, kindle
- Language: JavaScript
- Homepage:
- Size: 899 KB
- Stars: 58
- Watchers: 2
- Forks: 5
- Open Issues: 20
-
Metadata Files:
- Readme: README.md
- License: LICENSE
Awesome Lists containing this project
README
# Home-Assisstant Interface That Runs in the Kindle Browser

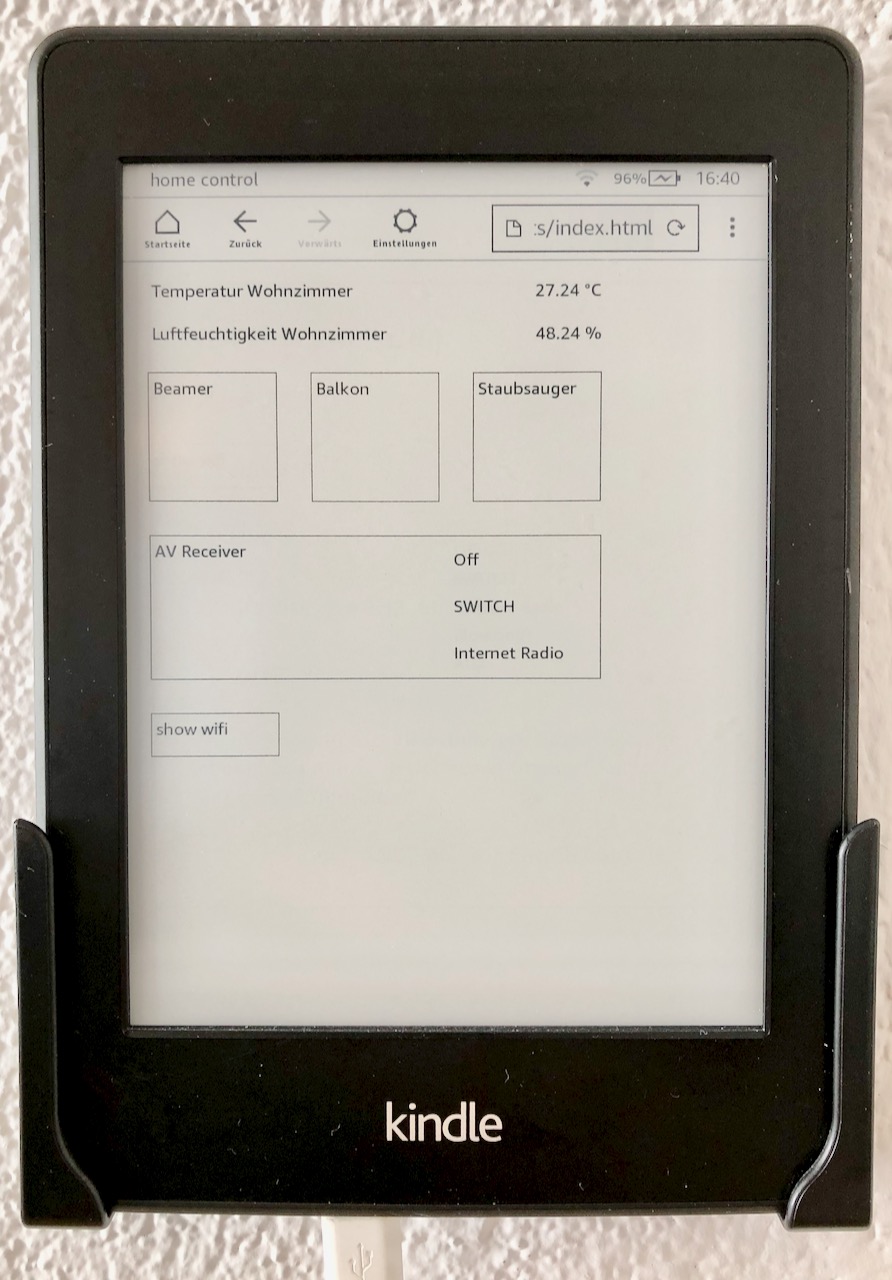
**What?**
Switch on and off devices, lights, or music in your house from a wall-mounted e-paper display.
**Why?**
I had a kindle laying around. However, even new kindles run a 2009ish chromeium browser that does not support modern javascript, also not the home-assistant UI.
# How To
1. create a long-lived access token to your home-assistant in your [account profile](https://www.home-assistant.io/docs/authentication/#your-account-profile). This token will be saved locally on your kindle and used to log into home-assistant.
2. create a [group of entities](https://www.home-assistant.io/integrations/group/) you want to display on the kindle. Currently supported are sensors, switches, lights, scenes, and media players.
```yaml
# Example configuration.yaml entry
group:
on_kindle:
name: Kindle Entities
entities:
- switch.kitchen_pin_3
- sensor.bedroom_temp
- sensor.porch_temp
```
3. clone the repository to a local computer that you can connect via USB to your kindle. Make sure that you have [node.js installed](https://nodejs.org/en/download/).
4. Within the cloned repository on your machine, create a configuration file `src/config.json` for your kindle interface based on the [example config](https://github.com/hermannsblum/kindle_infoscreen/blob/master/src/config.json.example).
```js
// example config.json
{
"token": "askjhdfkshdkf", // your long lived access token
"wifi": "", // see below
"address": "http://hassio.local:8123", // address of your home-assisstant WITHOUT trailing slash /
"groupname": "on_kindle", // the group configured above, you may choose any name
"media_sources": {
"media_player.your_media_player": ["Source 1", "Source 3"] // optional, if you want to show only specific source options
}
}
```
5. build the `index.html` file by running the following commands on your machine. This will create a single file `index.html` that needs to be copied to the kindle.
```bash
npm ci
npm run build
```
6. Copy the file to your kindle. Your kindle has to be connected via USB.
```bash
# example on Mac
cp dist/index.html /Volumes/Kindle/documents/index.html
```
7. Detach the kindle from USB and open the 'Beta-Browser'. Make sure that javascript and images are enabled. Navigate to `file:///mnt/us/documents/index.html`. Done.
The screen reloads every 10s and will update automatically when new entities are added to the specified group on home-assistant.
8. Disable the kindle's screensaver such that the display stays on. For this, you need to go to the home screen and type `~ds` into the search bar. More info [here](https://wiki.mobileread.com/wiki/Kindle_Touch_Hacking#Search_Bar_Shortcuts).
# Supported Devices
Confirmed support was reported for:
- Kindle Paperwhite 1 & 3
# Additional Options
## WiFi
You can display a qr code to let people connect to your wifi. For this, [create a qr code](https://qifi.org/) and [convert it into a base64 string](https://www.base64-image.de/) (click 'copy image'). Then, add the string to the config:
```js
// src/config.json
{
...
"wifi": "data:image/png;base64,...",
...
}
```
## Media Player Sources
If you don't want to display all sources of a media player entity, only put those that you want into the config:
```js
// src/config.json
{
...
"media_sources": {
"media_player.your_media_player": ["Source 1", "Source 3"] // optional, if you want to show only specific source options
}
...
}
```