Ecosyste.ms: Awesome
An open API service indexing awesome lists of open source software.
https://github.com/hibiken/asynqmon
Web UI for Asynq task queue
https://github.com/hibiken/asynqmon
Last synced: 9 days ago
JSON representation
Web UI for Asynq task queue
- Host: GitHub
- URL: https://github.com/hibiken/asynqmon
- Owner: hibiken
- License: mit
- Created: 2020-11-24T14:56:45.000Z (almost 4 years ago)
- Default Branch: master
- Last Pushed: 2024-05-21T00:11:44.000Z (6 months ago)
- Last Synced: 2024-10-29T18:41:23.401Z (10 days ago)
- Language: TypeScript
- Homepage:
- Size: 7.69 MB
- Stars: 656
- Watchers: 9
- Forks: 145
- Open Issues: 58
-
Metadata Files:
- Readme: README.md
- Changelog: CHANGELOG.md
- Funding: .github/FUNDING.yml
- License: LICENSE
Awesome Lists containing this project
README

# Web UI for monitoring & administering [Asynq](https://github.com/hibiken/asynq) task queue
## Overview
Asynqmon is a web UI tool for monitoring and administering [Asynq](https://github.com/hibiken/asynq) queues and tasks.
It supports integration with [Prometheus](https://prometheus.io) to display time-series data.
Asynqmon is both a library that you can include in your web application, as well as a binary that you can simply install and run.
## Version Compatibility
Please make sure the version compatibility with the Asynq package you are using.
| Asynq version | WebUI (asynqmon) version |
| -------------- | ------------------------ |
| 0.23.x | 0.7.x |
| 0.22.x | 0.6.x |
| 0.20.x, 0.21.x | 0.5.x |
| 0.19.x | 0.4.x |
| 0.18.x | 0.2.x, 0.3.x |
| 0.16.x, 0.17.x | 0.1.x |
## Install the binary
There're a few options to install the binary:
- [Download a release binary](#release-binaries)
- [Download a docker image](#docker-image)
- [Build a binary from source](building-from-source)
- [Build a docker image from source](#building-docker-image-locally)
### Release binaries
You can download the release binary for your system from the [releases page](https://github.com/hibiken/asynqmon/releases).
### Docker image
To pull the Docker image:
```bash
# Pull the latest image
docker pull hibiken/asynqmon
# Or specify the image by tag
docker pull hibiken/asynqmon[:tag]
```
### Building from source
To build Asynqmon from source code, make sure you have Go installed ([download](https://golang.org/dl/)). Version `1.16` or higher is required. You also need [Node.js](https://nodejs.org/) and [Yarn](https://yarnpkg.com/) installed in order to build the frontend assets.
Download the source code of this repository and then run:
```bash
make build
```
The `asynqmon` binary should be created in the current directory.
### Building Docker image locally
To build Docker image locally, run:
```bash
make docker
```
## Run the binary
To use the defaults, simply run and open http://localhost:8080.
```bash
# with a binary
./asynqmon
# with a docker image
docker run --rm \
--name asynqmon \
-p 8080:8080 \
hibiken/asynqmon
```
By default, Asynqmon web server listens on port `8080` and connects to a Redis server running on `127.0.0.1:6379`.
To see all available flags, run:
```bash
# with a binary
./asynqmon --help
# with a docker image
docker run hibiken/asynqmon --help
```
Here's the available flags:
_Note_: Use `--redis-url` to specify address, db-number, and password with one flag value; Alternatively, use `--redis-addr`, `--redis-db`, and `--redis-password` to specify each value.
| Flag | Env | Description | Default |
| --------------------------------- | ------------------------- | ---------------------------------------------------------------------------------------------------------------------------- | ---------------- |
| `--port`(int) | `PORT` | port number to use for web ui server | 8080 |
| `---redis-url`(string) | `REDIS_URL` | URL to redis or sentinel server. See [godoc](https://pkg.go.dev/github.com/hibiken/asynq#ParseRedisURI) for supported format | "" |
| `--redis-addr`(string) | `REDIS_ADDR` | address of redis server to connect to | "127.0.0.1:6379" |
| `--redis-db`(int) | `REDIS_DB` | redis database number | 0 |
| `--redis-password`(string) | `REDIS_PASSWORD` | password to use when connecting to redis server | "" |
| `--redis-cluster-nodes`(string) | `REDIS_CLUSTER_NODES` | comma separated list of host:port addresses of cluster nodes | "" |
| `--redis-tls`(string) | `REDIS_TLS` | server name for TLS validation used when connecting to redis server | "" |
| `--redis-insecure-tls`(bool) | `REDIS_INSECURE_TLS` | disable TLS certificate host checks | false |
| `--enable-metrics-exporter`(bool) | `ENABLE_METRICS_EXPORTER` | enable prometheus metrics exporter to expose queue metrics | false |
| `--prometheus-addr`(string) | `PROMETHEUS_ADDR` | address of prometheus server to query time series | "" |
| `--read-only`(bool) | `READ_ONLY` | use web UI in read-only mode | false |
### Connecting to Redis
To connect to a **single redis server**, use either `--redis-url` or (`--redis-addr`, `--redis-db`, and `--redis-password`).
Example:
```sh
$ ./asynqmon --redis-url=redis://:mypassword@localhost:6380/2
$ ./asynqmon --redis-addr=localhost:6380 --redis-db=2 --redis-password=mypassword
```
To connect to **redis-sentinels**, use `--redis-url`.
Example:
```sh
$ ./asynqmon --redis-url=redis-sentinel://:mypassword@localhost:5000,localhost:5001,localhost:5002?master=mymaster
```
To connect to a **redis-cluster**, use `--redis-cluster-nodes`.
Example:
```sh
$ ./asynqmon --redis-cluster-nodes=localhost:7000,localhost:7001,localhost:7002,localhost:7003,localhost:7004,localhost:7006
```
### Integration with Prometheus
The binary supports two flags to enable integration with [Prometheus](https://prometheus.io/).
First, enable metrics exporter to expose queue metrics to Prometheus server by passing `--enable-metrics-exporter` flag.
The metrics data is now available under `/metrics` for Prometheus server to scrape.
Once the metrics data is collected by a Prometheus server, you can pass the address of the Prometheus server to asynqmon to query the time-series data.
The address can be specified via `--prometheus-addr`. This enables the metrics view on the Web UI.

### Examples
```bash
# with a local binary; custom port and connect to redis server at localhost:6380
./asynqmon --port=3000 --redis-addr=localhost:6380
# with prometheus integration enabled
./asynqmon --enable-metrics-exporter --prometheus-addr=http://localhost:9090
# with Docker (connect to a Redis server running on the host machine)
docker run --rm \
--name asynqmon \
-p 3000:3000 \
hibiken/asynqmon --port=3000 --redis-addr=host.docker.internal:6380
# with Docker (connect to a Redis server running in the Docker container)
docker run --rm \
--name asynqmon \
--network dev-network \
-p 8080:8080 \
hibiken/asynqmon --redis-addr=dev-redis:6379
```
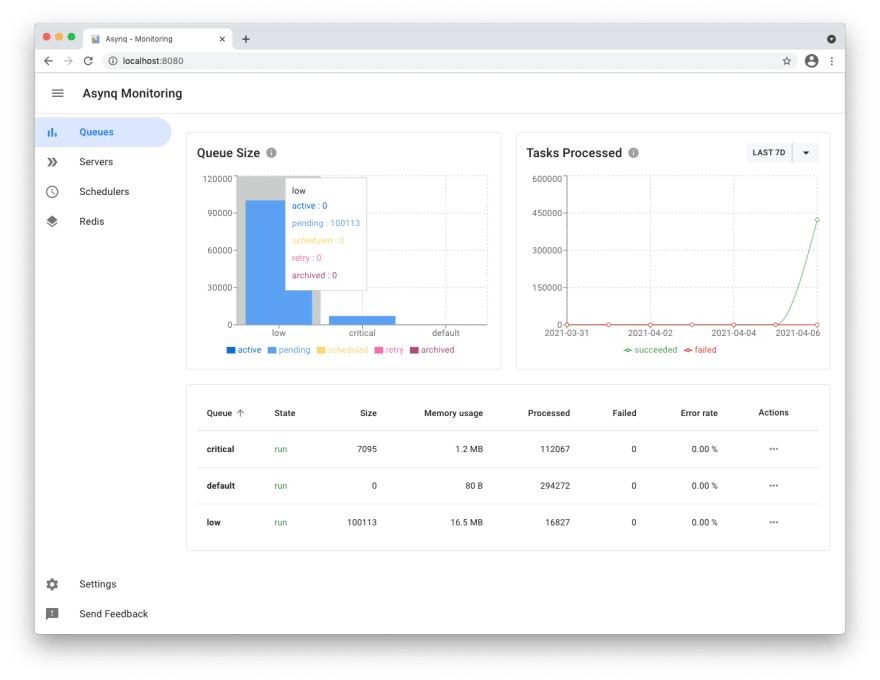
Next, go to [localhost:8080](http://localhost:8080) and see Asynqmon dashboard:

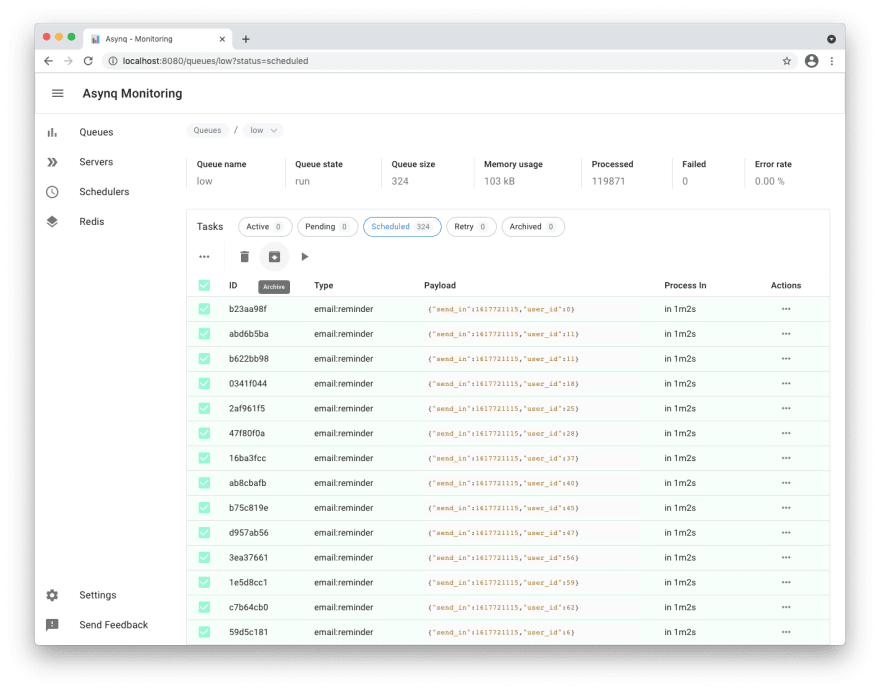
**Tasks view**

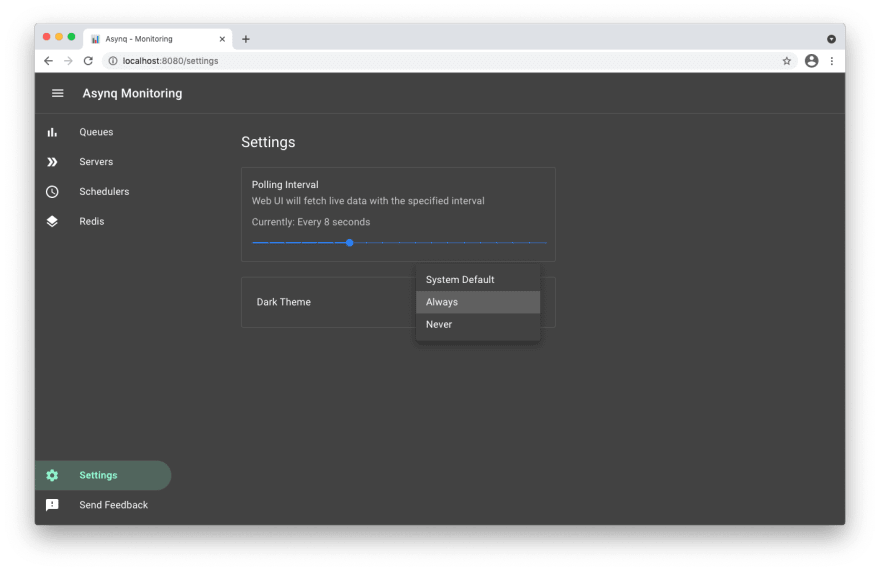
**Settings and adaptive dark mode**

## Import as a Library
[](https://godoc.org/github.com/hibiken/asynqmon)
Asynqmon is also a library which can be imported into an existing web application.
Example with [net/http](https://pkg.go.dev/net/http):
```go
package main
import (
"log"
"net/http"
"github.com/hibiken/asynq"
"github.com/hibiken/asynqmon"
)
func main() {
h := asynqmon.New(asynqmon.Options{
RootPath: "/monitoring", // RootPath specifies the root for asynqmon app
RedisConnOpt: asynq.RedisClientOpt{Addr: ":6379"},
})
// Note: We need the tailing slash when using net/http.ServeMux.
http.Handle(h.RootPath()+"/", h)
// Go to http://localhost:8080/monitoring to see asynqmon homepage.
log.Fatal(http.ListenAndServe(":8080", nil))
}
```
Example with [gorilla/mux](https://pkg.go.dev/github.com/gorilla/mux):
```go
package main
import (
"log"
"net/http"
"github.com/gorilla/mux"
"github.com/hibiken/asynq"
"github.com/hibiken/asynqmon"
)
func main() {
h := asynqmon.New(asynqmon.Options{
RootPath: "/monitoring", // RootPath specifies the root for asynqmon app
RedisConnOpt: asynq.RedisClientOpt{Addr: ":6379"},
})
r := mux.NewRouter()
r.PathPrefix(h.RootPath()).Handler(h)
srv := &http.Server{
Handler: r,
Addr: ":8080",
}
// Go to http://localhost:8080/monitoring to see asynqmon homepage.
log.Fatal(srv.ListenAndServe())
}
```
Example with [labstack/echo](https://github.com/labstack/echo)):
```go
package main
import (
"github.com/labstack/echo/v4"
"github.com/hibiken/asynq"
"github.com/hibiken/asynqmon"
)
func main() {
e := echo.New()
mon := asynqmon.New(asynqmon.Options{
RootPath: "/monitoring/tasks",
RedisConnOpt: asynq.RedisClientOpt{
Addr: ":6379",
Password: "",
DB: 0,
},
})
e.Any("/monitoring/tasks/*", echo.WrapHandler(mon))
e.Start(":8080")
}
```
## License
Copyright (c) 2019-present [Ken Hibino](https://github.com/hibiken) and [Contributors](https://github.com/hibiken/asynqmon/graphs/contributors). `Asynqmon` is free and open-source software licensed under the [MIT License](https://github.com/hibiken/asynq/blob/master/LICENSE). Official logo was created by [Vic Shóstak](https://github.com/koddr) and distributed under [Creative Commons](https://creativecommons.org/publicdomain/zero/1.0/) license (CC0 1.0 Universal).