Ecosyste.ms: Awesome
An open API service indexing awesome lists of open source software.
https://github.com/i5ting/stateview
Stateview is a react render solution for Multi-State View.
https://github.com/i5ting/stateview
react state ui
Last synced: 3 months ago
JSON representation
Stateview is a react render solution for Multi-State View.
- Host: GitHub
- URL: https://github.com/i5ting/stateview
- Owner: i5ting
- License: mit
- Created: 2021-09-25T06:29:17.000Z (over 3 years ago)
- Default Branch: main
- Last Pushed: 2021-12-28T07:09:12.000Z (about 3 years ago)
- Last Synced: 2024-11-01T09:43:35.722Z (3 months ago)
- Topics: react, state, ui
- Language: TypeScript
- Homepage: https://stackblitz.com/github/i5ting/stateview
- Size: 1.03 MB
- Stars: 42
- Watchers: 3
- Forks: 8
- Open Issues: 6
-
Metadata Files:
- Readme: README.md
- Contributing: CONTRIBUTING.md
- License: LICENSE
Awesome Lists containing this project
README
Stateview

a react render solution for Multi-State View.
## Features

- Compatible with JSX ([React](https://reactjs.org/)/[Remax](https://github.com/remaxjs/remax)/[Taro](https://github.com/NervJS/taro)/[Eva.js](https://github.com/eva-engine/eva.js))
- Built-in the Multi-State View with {Stateview , Layer, setViewState }
- Customize Data Dispatch via React Component props.data
- Support the Nested Stateview
## 预览
可以通过[StackBlitz](http://stackblitz.com/)进行线上预览:
[](https://stackblitz.com/github/i5ting/stateview)
## 安装
$ npm install --save stateview
## 用法
下面是3个示例,展示Stateview在多状态视图切换功能上的抽象和能力。
- 示例1:最小示例,只有Logined和UnLogin二个状态,纯UI展示型,通过stateview.show切换视图
- 示例2:数据示例,通过stateview.datashow切换状态来控制视图展示,视图组件在切换的时候,根据props.data进行渲染
- 示例3:嵌套示例,主要演示复杂场景里多状态视图切换。
- 示例4:分组示例,主要演示复杂场景同时存在多个Stateview命名空间冲突问题。
### 最小示例
最小示例,只有Logined和UnLogin二个状态。
```js
import React from 'react';
import { Stateview, Layer, setViewState } from 'stateview';
/**
* 最简单的Demo:2个状态切换
*/
export default () => {
function unlogin() {
setViewState('unlogin')
}
function logined() {
setViewState('logined')
}
return (
Logined, go to UnLogin
UnLogin, go to Logined
);
}
```
### 数据示例
```js
import React from 'react';
import { Stateview, Layer, setViewState } from 'stateview';
const Logined = (props: any) => {
function unlogin() {
setViewState('unlogin', { name: 'unlogin i5ting' })
}
return (
Logined, {props.data.name}
)
}
const UnLogin = (props: any) => {
return (
UnLogin, {props.data.name}
)
}
export default (props: any) => {
function logined() {
setViewState('logined', { name: 'logined i5ting' })
}
return (
} />
} />
);
}
```
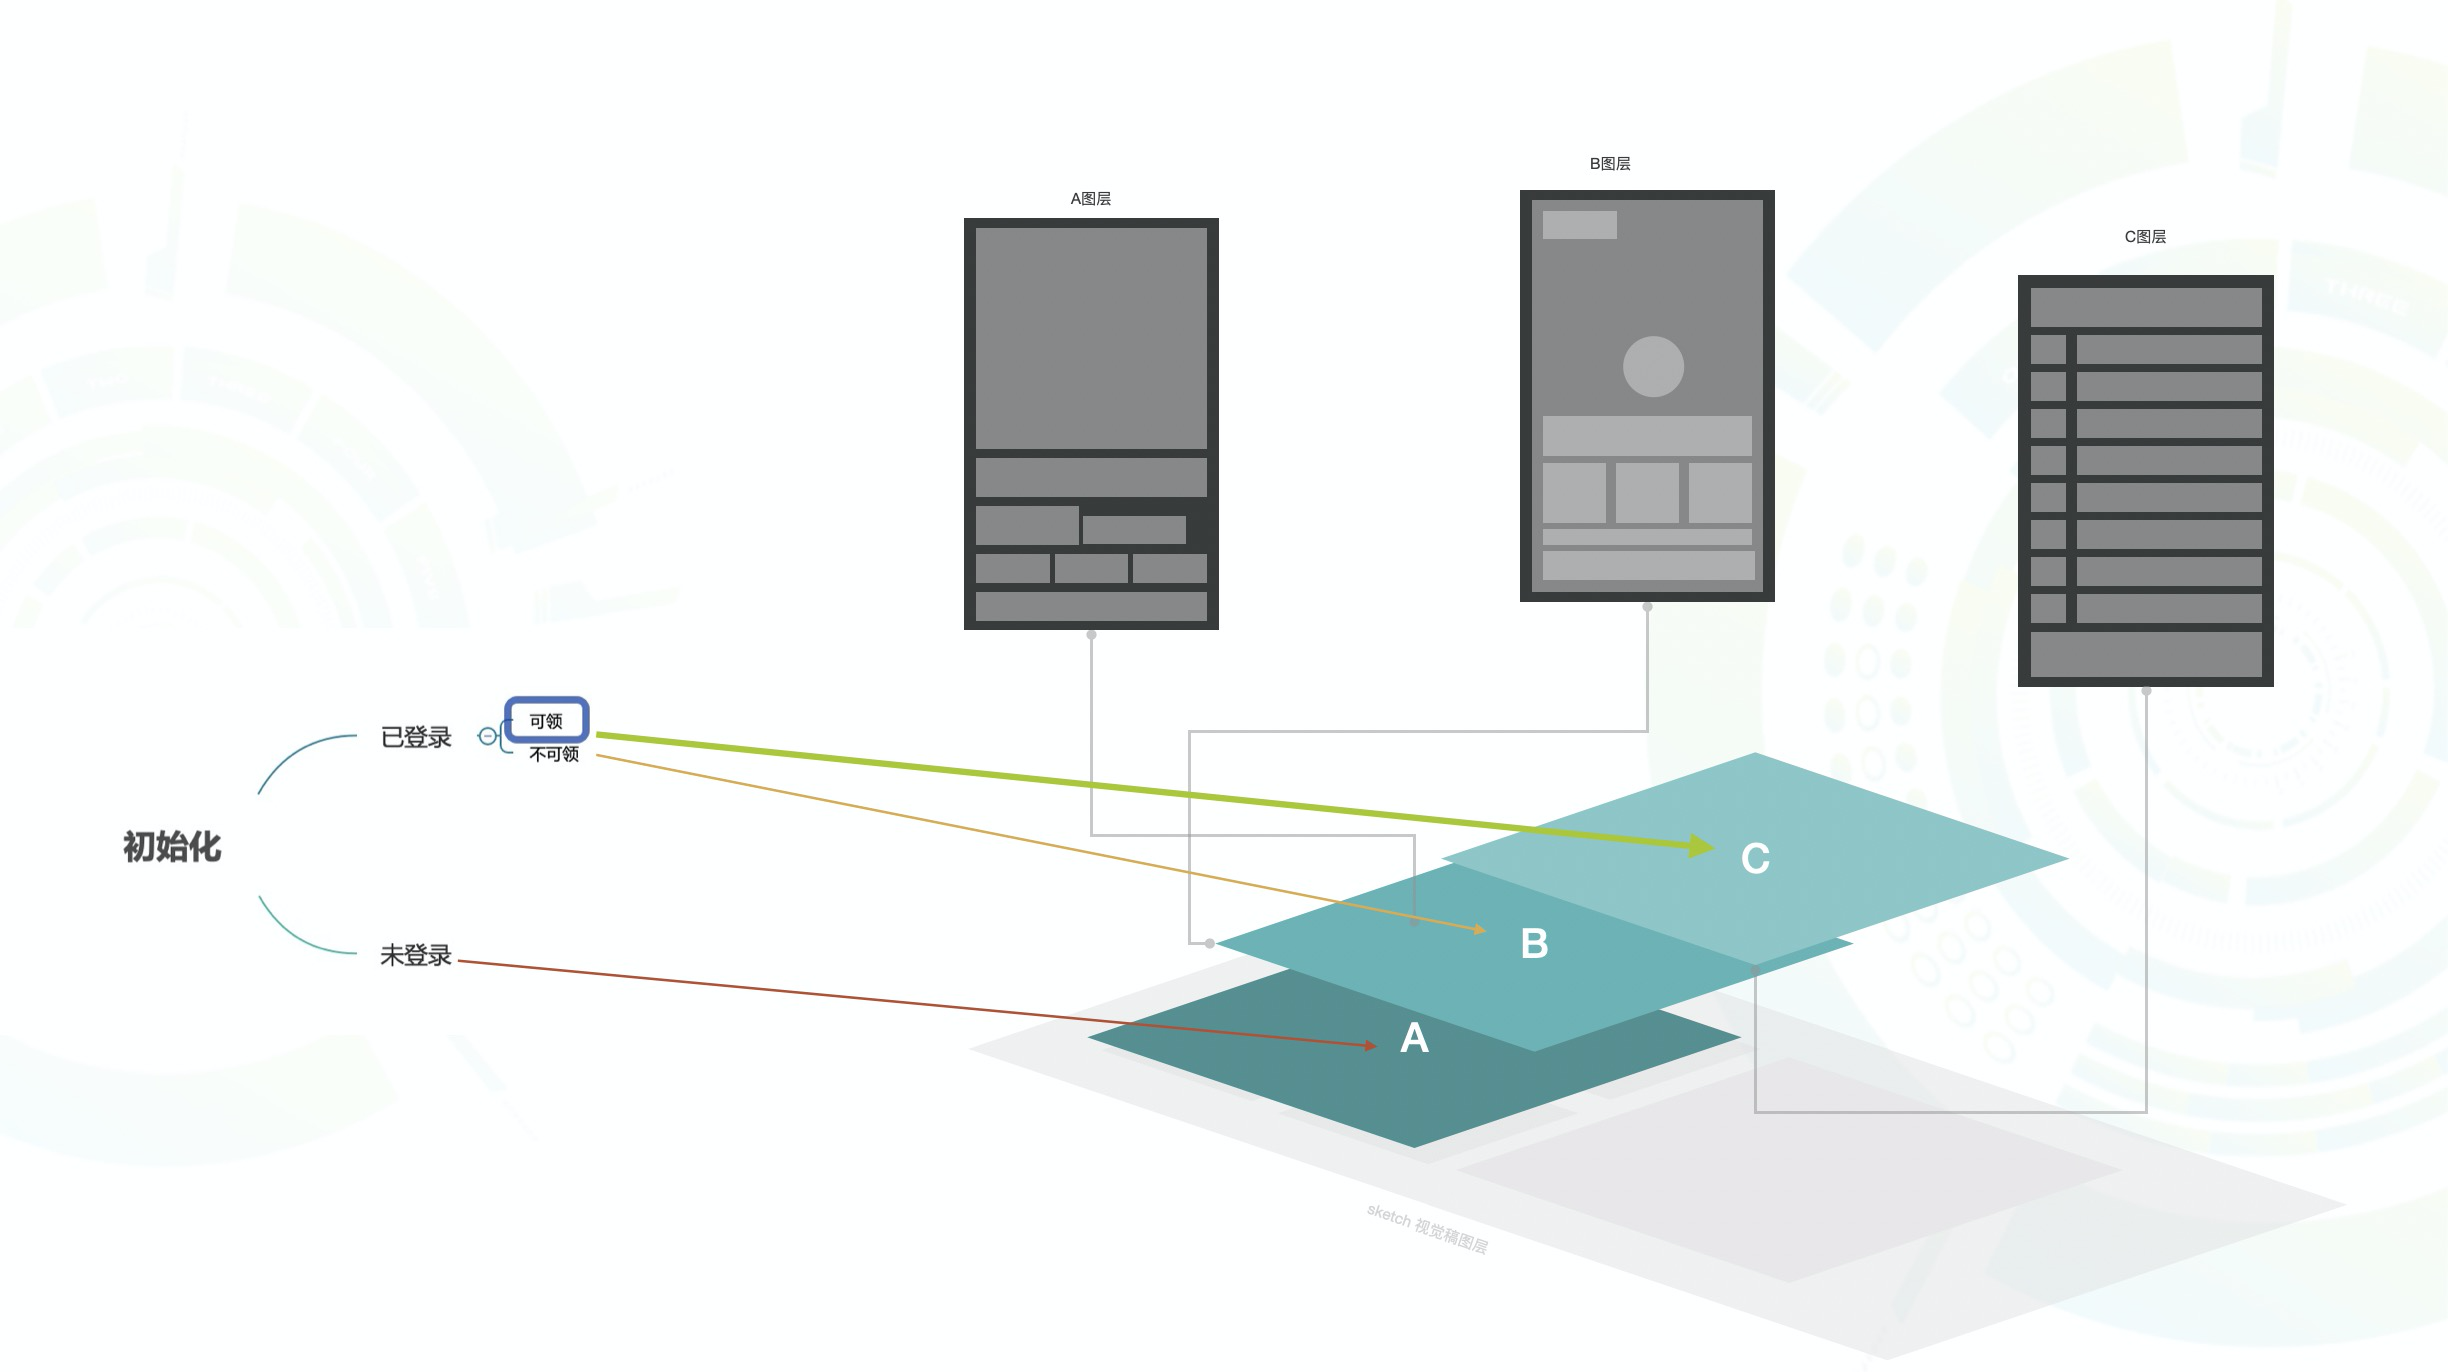
### 嵌套示例
带嵌套的3个状态示例
```js
- root
- 已登录logined
- 可领 candraw
- 次数不足 notdraw
- 未登录unlogin
```
entry
```js
import React from 'react';
import { Stateview, Layer } from 'stateview';
import { Logined, UnLogin } from '../layers/1';
export default () => {
return (
} />
} />
);
}
```
unlogin
```js
import React from 'react';
import { setViewState } from 'stateview';
export function UnLogin(props: any) {
function sayHello() {
setViewState('logined')
}
return
UnLogin, {props.name}
;
}
```
logined
```js
import React from 'react';
import { Stateview, Layer, setViewState } from 'stateview';
import { CanDraw, NotDraw } from './logined/index';
export function Logined(props: any) {
function sayHello() {
setViewState('unlogin')
}
return <>
Logined, {props.name}
} />
} />
>;
}
```
### 分组示例
分组表达,主要解决复杂场景同时存在多个Stateview命名空间冲突问题。通过window.stateview['alfred'],具体方法和window.stateview上的一样。
```js
import React from 'react';
import { Stateview, Layer, getStateview } from 'stateview';
/**
* 最简单的分组Demo:2个状态切换
*/
export default (props: any) => {
function unlogin() {
getStateview('alfred').setViewState('unlogin')
}
function logined() {
getStateview('alfred').setViewState('logined')
}
return (
Logined, go to UnLogin
UnLogin, go to Logined
);
}
```
## 文档
- [Introduction](./docs/introduction.md)
- [Quick Start](./docs/quick-start.md)
- [API](./docs/api.md)
- [Concept](./docs/concept.md)
- [Design](./docs/design.md)
- [Data](./docs/data.md)
- [Examples](./example)
## 运行示例方法
```shell
$ npm i
$ npm run dev
```
## 参与贡献
1. Fork it
2. Create your feature branch (`git checkout -b my-new-feature`)
3. Commit your changes (`git commit -am 'Add some feature'`)
4. Push to the branch (`git push origin my-new-feature`)
5. Create new Pull Request
Refer to the [CONTRIBUTING](./CONTRIBUTING.md).
## License
Copyright © i5ting. All rights reserved.
Licensed under the MIT license.


