https://github.com/ibizaman/skarabox
Opinionated and simplified headless NixOS installer.
https://github.com/ibizaman/skarabox
headless installer nixos webui
Last synced: 2 months ago
JSON representation
Opinionated and simplified headless NixOS installer.
- Host: GitHub
- URL: https://github.com/ibizaman/skarabox
- Owner: ibizaman
- License: agpl-3.0
- Created: 2024-03-24T20:47:53.000Z (about 1 year ago)
- Default Branch: main
- Last Pushed: 2025-04-04T21:31:53.000Z (2 months ago)
- Last Synced: 2025-04-04T22:28:21.208Z (2 months ago)
- Topics: headless, installer, nixos, webui
- Language: Nix
- Homepage:
- Size: 101 KB
- Stars: 29
- Watchers: 3
- Forks: 1
- Open Issues: 6
-
Metadata Files:
- Readme: README.md
- License: LICENSE
Awesome Lists containing this project
- awesome-starred - ibizaman/skarabox - Opinionated and simplified headless NixOS installer. (Nix)
- awesome-starred - ibizaman/skarabox - Opinionated and simplified headless NixOS installer. (Nix)
README
# SkaraboxOS
SkaraboxOS is an opinionated and simplified headless NixOS installer.
It provides a flake [template](./template) which combines:
- Creating a bootable ISO, installable on an USB key.
- [nixos-anywhere](https://github.com/nix-community/nixos-anywhere) to install NixOS headlessly.
- [disko](https://github.com/nix-community/disko) to format the drives using native ZFS encryption with remote unlocking through ssh.
- [sops-nix](https://github.com/Mic92/sops-nix) to handle secrets.
- [deploy-rs](https://github.com/serokell/deploy-rs) to deploy updates.
- Which supports x86_64 and aarch64 platform.
This repository does not invent any of those wonderful tools.
It merely provides an opinionated way to make them all fit together for a seamless experience.
It has a [demo](#demo) which lets you install SkaraboxOS on a VM!
[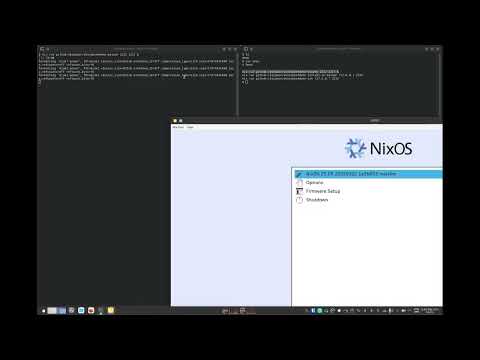](https://www.youtube.com/watch?v=pXuKwhtC-0I)
## Why?
Because the landscape of installing NixOS could be better and this repository is an attempt at that.
By being more opinionated, it allows you to get set up faster.
By the way, the name SkaraboxOS comes from the scarab (the animal), box (for the server) and OS (for Operating System).
Scarab is spelled with a _k_ because it's kool.
A scarab is a _very_ [strong](https://en.wikipedia.org/wiki/Dung_beetle#Ecology_and_behavior) animal representing well what this repository's intention.
## Hardware Requirements
SkaraboxOS expects a particular hardware layout:
- 1 or 2 SSD or NVMe drive for the OS.
If 2, they will be formatted in Raid 1 (mirror) so each hard drive should have the same size.
- 0 or 2 Hard drives that will store data.
Capacity depends on the amount of data that will be stored.
If 2, they will too be formatted in Raid 1.
**WARNING: The disks will be formatted and completely wiped out of data.**
## Installation Process Overview
1. Download the flake template.
2. Generate a ISO and format a USB key.
3. Boot server on USB key and get its IP address.
4. Generate secrets on laptop, update some default values.
5. Run installer from laptop.
6. Done!
At the end of the process, the server will:
- Have an encrypted ZFS root partition using the NVMe drive, unlockable remotely through ssh.
- Have an encrypted ZFS data hard drives.
- Be accessible through ssh for administration and updates.
Services can then be installed by using NixOS options directly or through [Self Host Blocks](https://github.com/ibizaman/selfhostblocks).
The latter, similarly to SkaraboxOS, provides an opinionated way to configure services in a seamless way.
## Caution
Following the steps WILL ERASE THE CONTENT of any disk on that server.
## Demo
This demo will install SkaraboxOS on a VM locally on your computer.
The VM has 3 hard drives, one for the OS
and two in raid 1 for the data.
See the [introduction section](#skaraboxos)
for a screencast of the steps outlined here.
Launch the VM that listens on ports 2222 for normal ssh access
and 2223 for ssh access during boot:
```bash
nix run github:ibizaman/skarabox#demo-beacon 2222 2223
```
_Compared to the real installation, this step replaces installing
the beacon on an USB key and booting on it._
When the installer did boot up and you see the `[nixos@nixos:~]$` prompt,
install SkaraboxOS on the VM with:
```bash
nix run github:ibizaman/skarabox#demo-install-on-beacon 127.0.0.1 2222
```
When you see the line `([email protected]) Password:`, enter `skarabox123`.
Then when the system reboots - actually every time it will boot -
you will be prompted with `Enter passphrase for 'root'` which
waits for the passphrase to decrypt the root partition.
Enter `rootpassphrase` (yes, I know, it's original :D).
When that's done, the boot up will continue and you will see the prompt
`skarabox login`. Enter `skarabox` as username and `skarabox123` as password.
Now you're logged into the VM on a brand new SkaraboxOS installation!
You can test accessing through ssh with:
```
nix run github:ibizaman/skarabox#demo-ssh 127.0.0.1 2222
```
## Installation
1. Create a directory and download the template.
```bash
$ mkdir myskarabox
$ cd myskarabox
$ nix flake init --template github:ibizaman/skarabox
```
2. Boot on the NixOS installer. You just need to boot, there is nothing to install just yet.
1. First, create the .iso file.
```bash
$ nix build .#beacon
```
2. Copy the .iso file to a USB key. This WILL ERASE THE CONTENT of the USB key.
```bash
$ nix run .#usbimager
```
- Select `./result/iso/beacon.iso` file in row 1 (`...`).
- Select USB key in row 3.
- Click write (arrow down) in row 2.
3. Plug the USB stick in the server. Choose to boot on it.
You will be logged in automatically with user `nixos`.
4. Note down the IP address and disk layout of the server.
For that, follow the steps that appeared when booting on the USB stick.
To reprint the steps, run the command `skarabox-help`.
5. Open the `configuration.nix` file and tweak values to match you hardware.
Also, open the other files and see how to generate them too.
All the instructions are included.
Note the `root_passphrase` file will contain a passphrase that will need to be provided every time the server boots up.
3. Run the installation process
1. Run the following command replacing `` with the IP address you got in the previous step.
```bash
$ nix run .#install-on-beacon skarabox
```
You will be prompted for a password, enter "skarabox123" without the double quotes.
2. The server will reboot into NixOS on its own.
3. Decrypt the SSD and the Hard Drives.
Run the following command.
```bash
$ ssh -p 2222 root@ -o IdentitiesOnly=yes -i ssh_skarabox
```
It will prompt you a first time to verify the key fingerprint.
```bash
The authenticity of host '[]:2222 ([]:2222)' can't be established.
ED25519 key fingerprint is SHA256:.
This key is not known by any other names.
Are you sure you want to continue connecting (yes/no/[fingerprint])?
```
Just enter `"yes"` followed by pressing on the Enter key.
Next time the server will boot, you will not need to do this step.
```bash
Are you sure you want to continue connecting (yes/no/[fingerprint])? yes
Warning: Permanently added '[]:2222' (ED25519) to the list of known hosts.
```
You will be prompted a second time, this time to enter the root passphrase.
Copy the content of the `root_passphrase` file and paste it and press Enter.
No `*` will appear upon pasting but just press Enter.
```bash
Enter passphrase for 'root':
```
The connection will disconnect automatically.
This is normal behavior.
```bash
Connection to closed.
```
Now, the hard drives are decrypted and the server continues to boot.
It's a good idea to make sure you can login correctly, at least the first time.
See next section.
## Normal Operations
Those can be found in the template's [readme](./template/README.md).
## Contribute
Contributions are very welcomed!
## Links
- https://github.com/NixOS/nixpkgs/blob/master/nixos/modules/profiles/installation-device.nix
- https://github.com/NixOS/nixpkgs/blob/master/nixos/modules/installer/cd-dvd/installation-cd-base.nix
- https://github.com/nix-community/nixos-anywhere/blob/main/docs/howtos/no-os.md#installing-on-a-machine-with-no-operating-system