https://github.com/icemap/tiara
Tiara - TiDB Intelligent and Reliability Assistant
https://github.com/icemap/tiara
Last synced: 8 months ago
JSON representation
Tiara - TiDB Intelligent and Reliability Assistant
- Host: GitHub
- URL: https://github.com/icemap/tiara
- Owner: Icemap
- Created: 2025-06-26T18:16:55.000Z (12 months ago)
- Default Branch: main
- Last Pushed: 2025-06-26T18:19:19.000Z (12 months ago)
- Last Synced: 2025-06-26T19:27:36.809Z (12 months ago)
- Language: Python
- Size: 86.9 KB
- Stars: 0
- Watchers: 0
- Forks: 0
- Open Issues: 0
-
Metadata Files:
- Readme: README.md
Awesome Lists containing this project
README
# Tiara - TiDB Intelligent And Reliability Assistant
> This project is inspired by [Gaby](https://pkg.go.dev/golang.org/x/oscar/internal/gaby).
A Flask-based service that provides GitHub issue tracking and webhook handling capabilities with TiDB vector database integration.
## How to Deploy
### 1. Prerequisites
- A GitHub Repository
- A Server with:
- Docker
- Docker Compose
### 2. Create a GitHub App
1. Go to [Developer Settings](https://github.com/settings/apps) in GitHub.
2. Click the **New GitHub App** button, or click [here](https://github.com/settings/apps/new) directly.
3. Fill in the following information:
- **GitHub App name**: A descriptive application name
- **Homepage URL**: The homepage URL for this application
- **Webhook URL**: The URL where your Tiara instance will be deployed
- **Webhook Secret**: A random string that you'll need to configure in Tiara
- **Permissions**: Expand the **Repository permissions** section:
- **Repository permissions - Issues**: Set access to **Read and write**
- **Repository permissions - Metadata**: This will be selected automatically
- **Subscribe to events**: Check the **Issues** option
- **Where can this GitHub App be installed?**:
- **Only on this account**: Select this if you only want to install it on your own GitHub account
- **Any account**: Select this if you want to install it on other organizations
4. Click the **Create GitHub App** button.
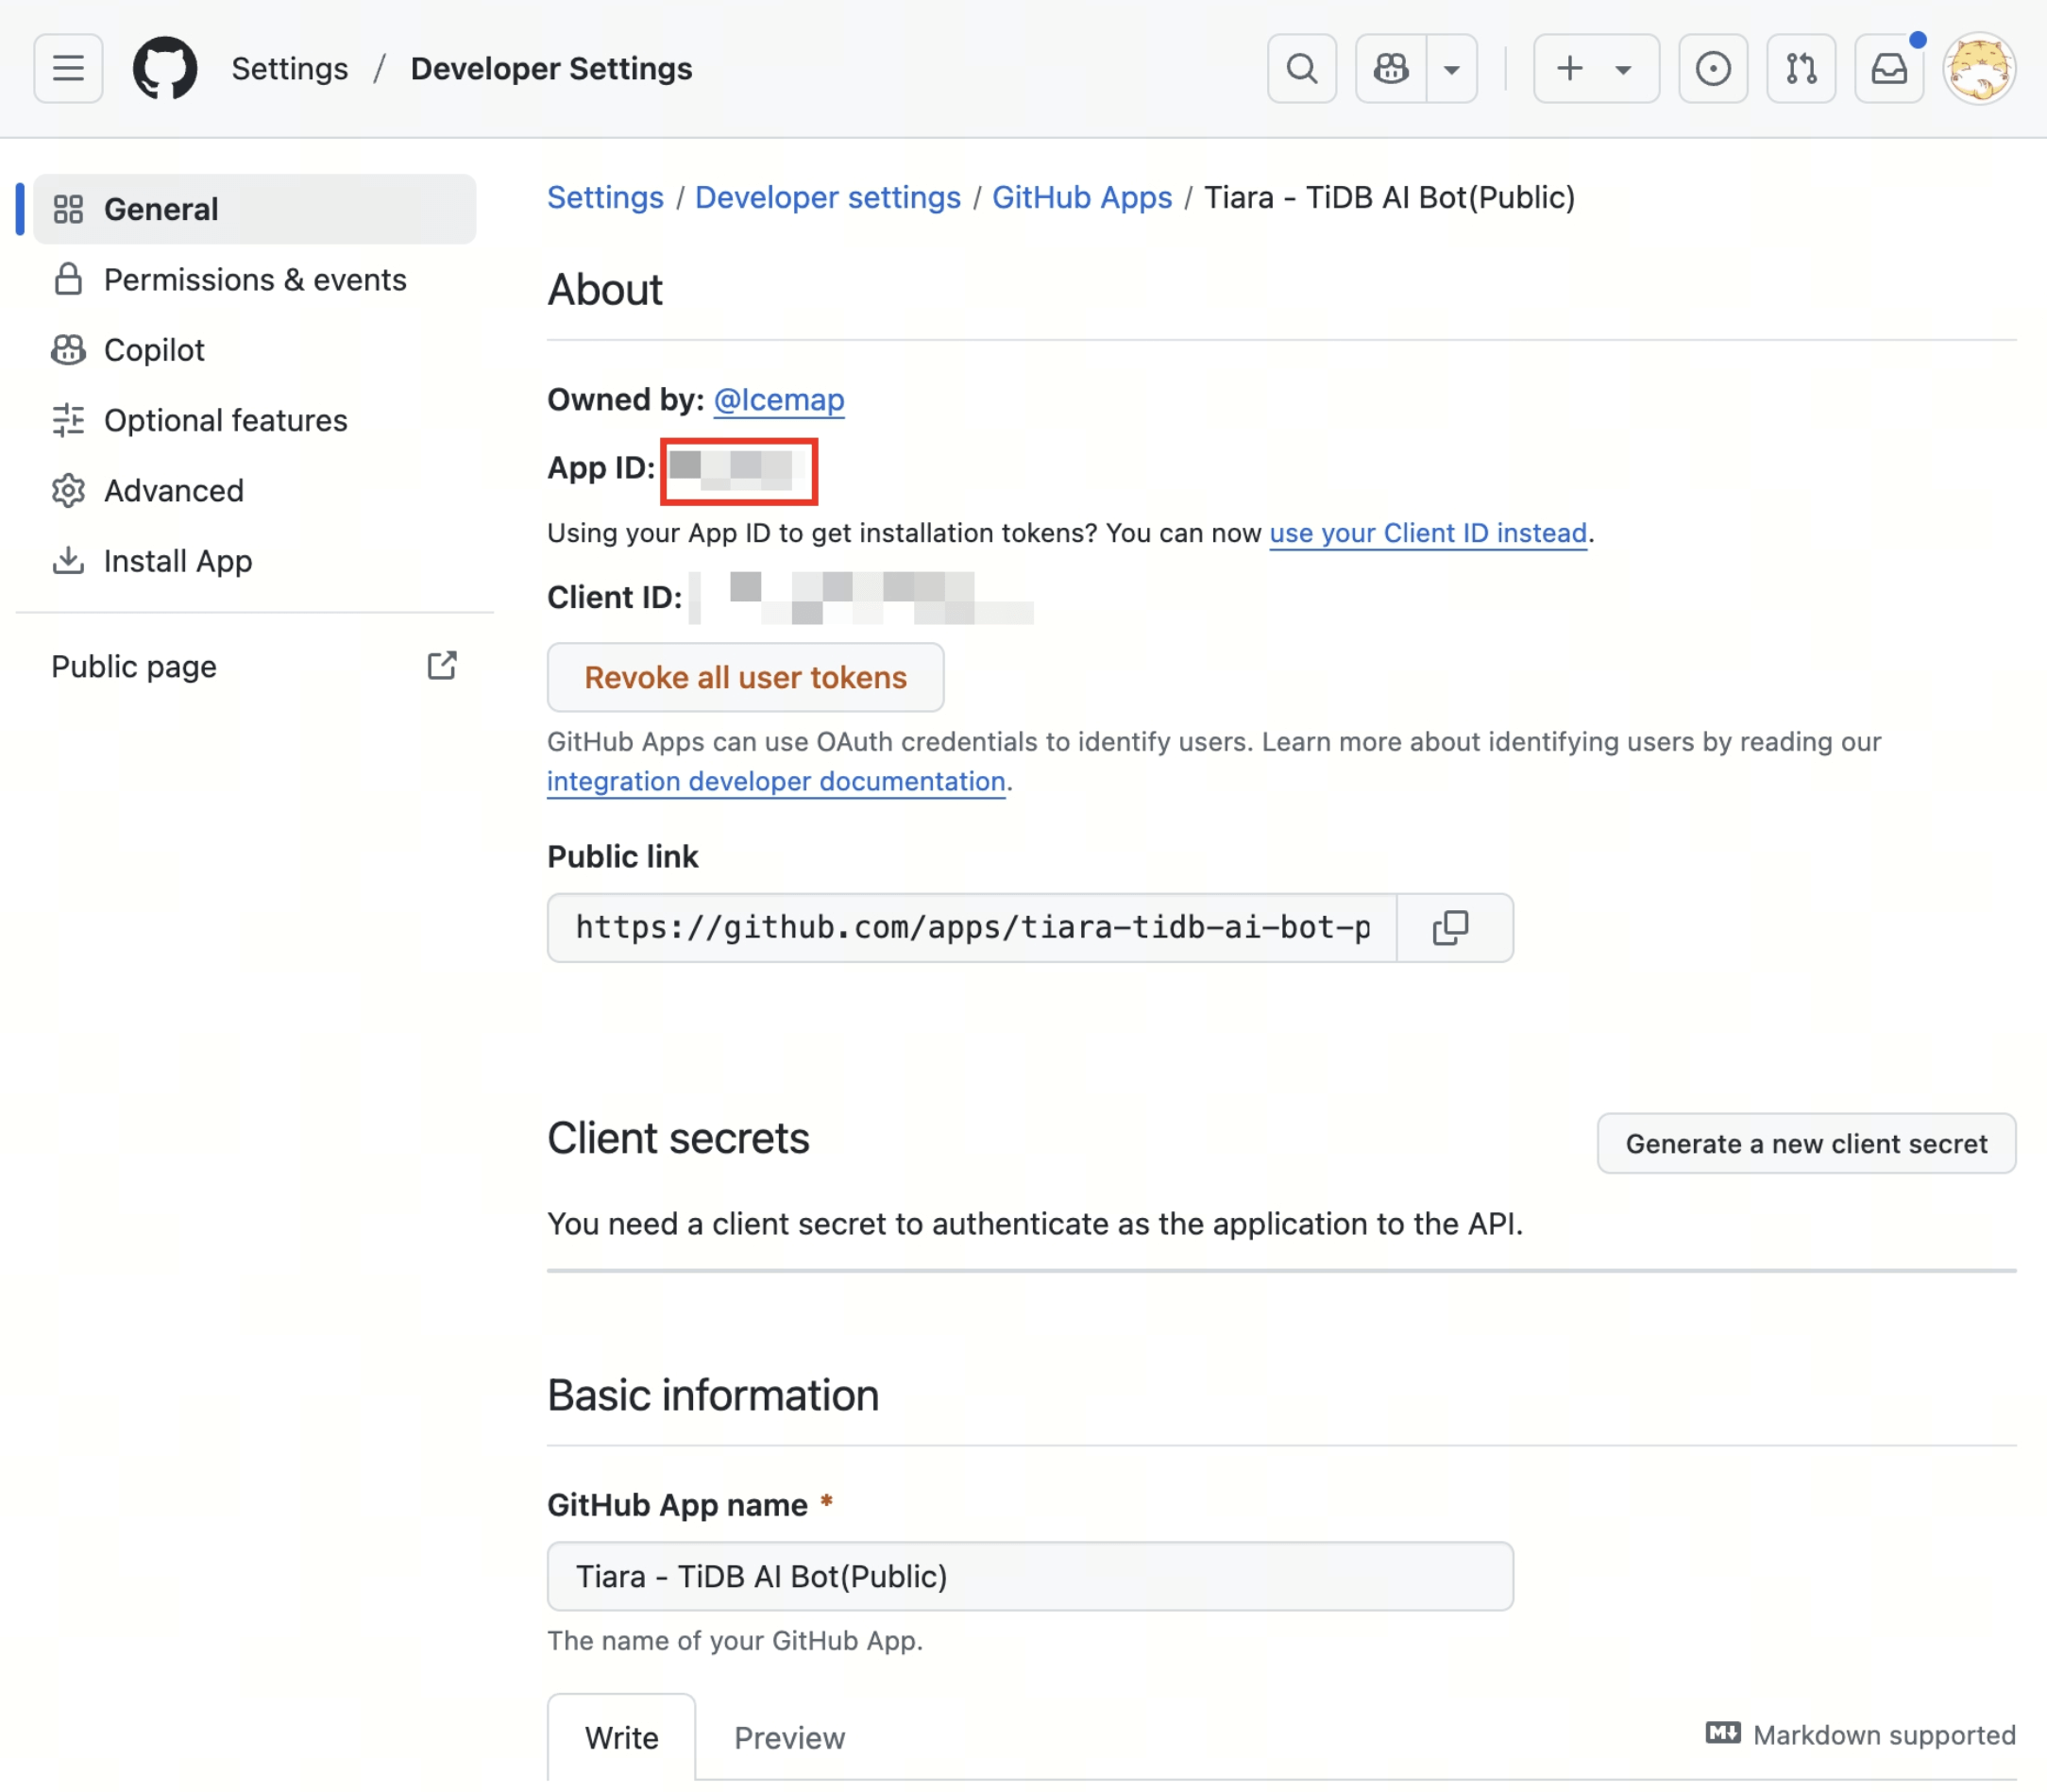
5. After creation, you can find the **App ID** in the General tab.
### 3. Download the Private Key
1. Scroll down to the **Private keys** section in the General tab.
2. Click **Generate a private key** and save the key with a ".pem" extension.
### 4. Install the GitHub App
1. Click the **Install App** tab on the left side.
2. Click the **Install** button next to the organization where you want to install the app.
3. Select **Only select repositories** and choose ONLY ONE repository.
4. Click **Install**.
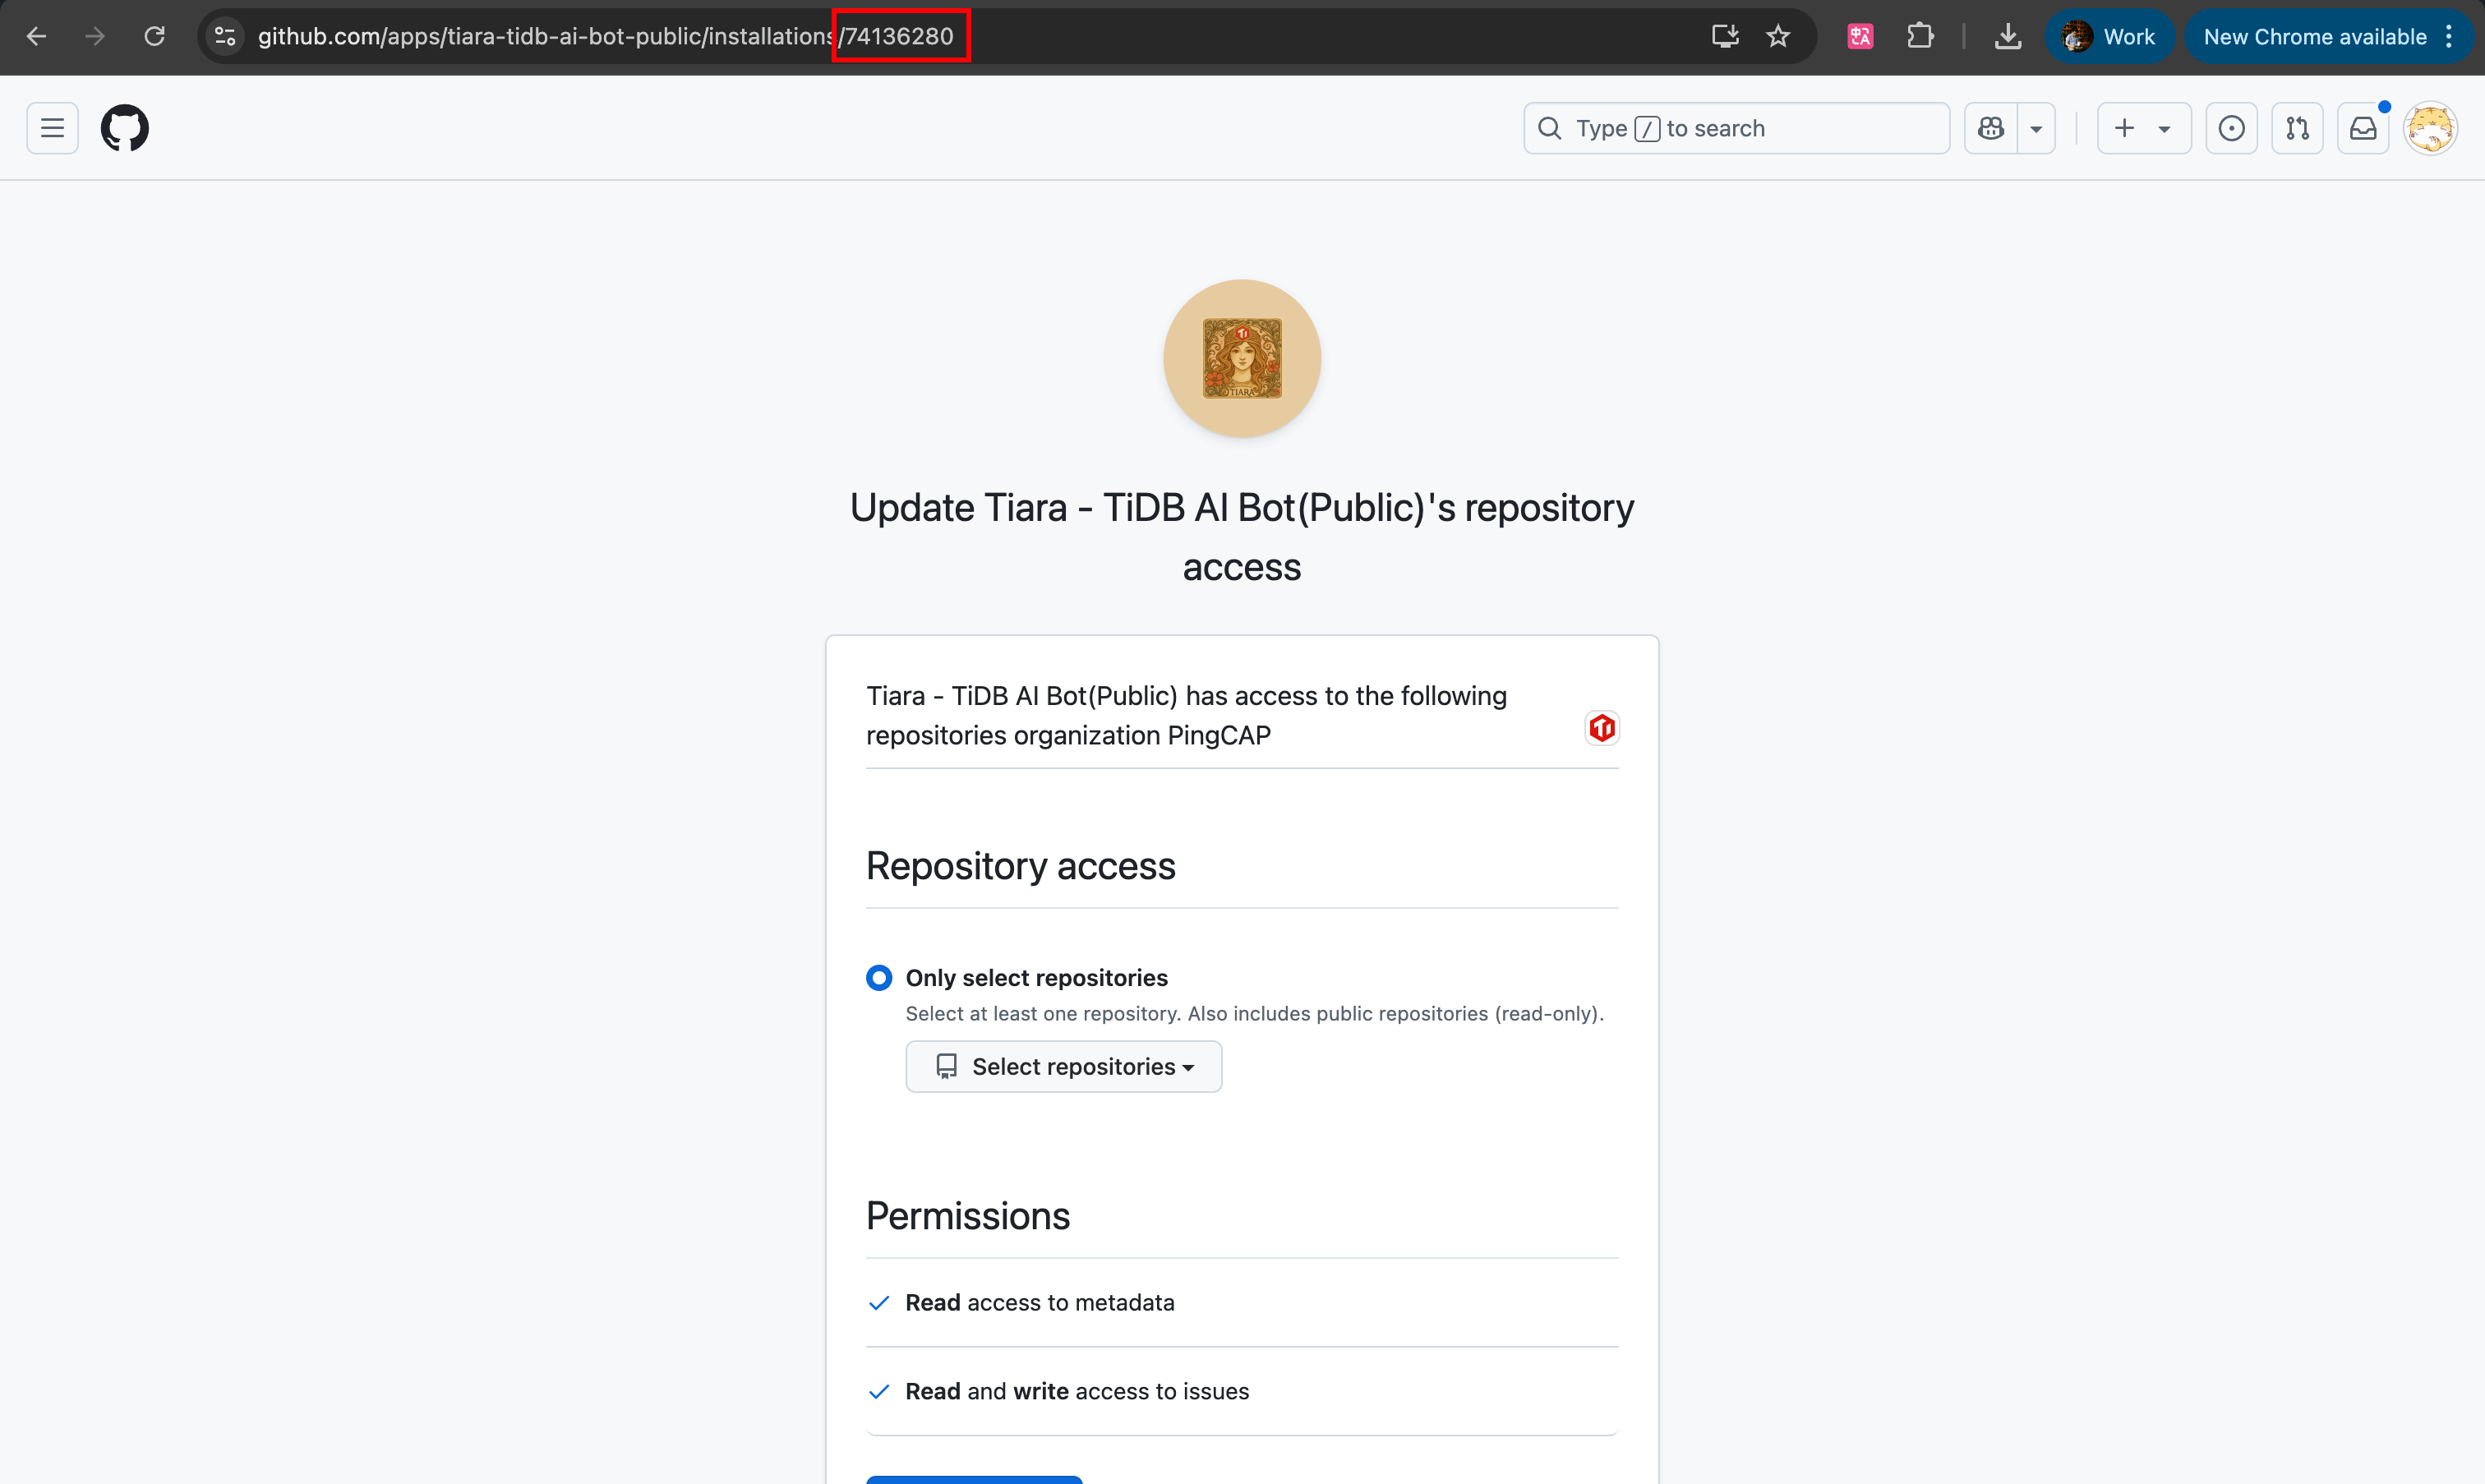
5. After installation, you can get the `GITHUB_APP_INSTALLATION_ID` from the URL of the installation page.
### 5. Deploy the Service
1. Log in to your server with Docker and Docker Compose installed.
2. Clone this repository and navigate to the folder:
```bash
git clone https://github.com/Icemap/tiara.git
cd tiara
```
3. Save your ".pem" private key in the `certs` folder.
4. Create a `.env` file with the following configuration:
```conf
# Reply Label
REPLY_LABEL="tiara"
# TiDB Serverless
SERVERLESS_CLUSTER_HOST=
SERVERLESS_CLUSTER_PORT=
SERVERLESS_CLUSTER_USERNAME=
SERVERLESS_CLUSTER_PASSWORD=
SERVERLESS_CLUSTER_DATABASE_NAME='test'
# Embedding model and minimum related cosine distance
EMBEDDING_MODEL="bedrock/amazon.titan-embed-text-v2:0"
MIN_DISTANCE=0.7
# AWS Access Keys (required if using 'bedrock' as the provider in EMBEDDING_MODEL)
AWS_ACCESS_KEY_ID=
AWS_SECRET_ACCESS_KEY=
# GitHub Parameters
GITHUB_WEBHOOK_SECRET=
GITHUB_REPO_NAME="/"
# GitHub App authentication
GITHUB_APP_ID=
GITHUB_APP_PRIVATE_KEY=""
GITHUB_APP_INSTALLATION_ID=
```
> **Note:**
>
> If you're unsure about the GitHub parameters, please review the previous steps.
### 6. Database Initialization
Initialize the database and fetch existing GitHub issues:
```bash
docker compose run tiara-backend /bin/sh -c "poetry run python -m backend.model.init_database"
```
This command will:
- Create the necessary database tables
- Fetch all existing issues from your GitHub repository
- Save them to the TiDB database
- Can be run multiple times safely (idempotent)
### 7. Start the Docker Compose Service
```bash
docker compose up -d
```
The service will be available at `http://localhost` or the IP address of your server.