https://github.com/ifokeev/telegram-ai-agent
Telegram AI Agent: A powerful Python library for creating AI-powered Telegram bots
https://github.com/ifokeev/telegram-ai-agent
ai-agents telegram telegram-userbot
Last synced: 10 months ago
JSON representation
Telegram AI Agent: A powerful Python library for creating AI-powered Telegram bots
- Host: GitHub
- URL: https://github.com/ifokeev/telegram-ai-agent
- Owner: ifokeev
- Created: 2024-09-28T08:50:11.000Z (almost 2 years ago)
- Default Branch: master
- Last Pushed: 2024-12-23T12:42:29.000Z (over 1 year ago)
- Last Synced: 2024-12-23T12:46:02.763Z (over 1 year ago)
- Topics: ai-agents, telegram, telegram-userbot
- Language: Python
- Homepage:
- Size: 117 KB
- Stars: 13
- Watchers: 1
- Forks: 2
- Open Issues: 0
-
Metadata Files:
- Readme: README.md
Awesome Lists containing this project
README
# Telegram AI Agent Library
[](https://badge.fury.io/py/telegram-ai-agent)
[](https://pypi.org/project/telegram-ai-agent/)
[](https://opensource.org/licenses/MIT)
[](https://pepy.tech/projects/telegram-ai-agent)
This Python library provides a framework for creating AI-powered Telegram bots using the Telegram Core API and the [phi](https://github.com/phidatahq/phidata) library for AI integration.
## Features
- Secure authentication with Telegram servers
- Inbound message processing with AI integration using [phi](https://github.com/phidatahq/phidata)
- Outbound messaging capabilities
- Chat history support for context-aware responses
- Configurable proxy and timeout settings
- Asynchronous operations using asyncio
- Typing indicators for a more natural conversation flow
- Function calling for AI-powered tools
- Customizable logging
- Streamlit UI for easy interaction with the agent
## Installation
You can install the library directly from PyPI:
```sh
pip install telegram-ai-agent
```
### Using Poetry
If you're using Poetry for dependency management:
```sh
poetry add telegram-ai-agent
```
### Install from source
1. Clone the repository:
```sh
git clone https://github.com/ifokeev/telegram-ai-agent.git
cd telegram-ai-agent
```
2. Using Poetry (recommended):
```sh
poetry install
```
This will create a virtual environment and install all dependencies automatically.
3. Or using pip with a virtual environment:
```sh
python -m venv .venv
source .venv/bin/activate # On Windows, use `.venv\Scripts\activate`
pip install -e .
```
Note: Make sure you have Python 3.11 or higher installed on your system before proceeding with the installation.
### Development Installation
For development purposes, install with additional dependencies:
```sh
# Using pip
pip install -e ".[dev]"
# Using Poetry
poetry install --with dev
```
This will install additional packages needed for development, such as:
- pytest for testing
- ruff for linting
- black for code formatting
- pre-commit hooks
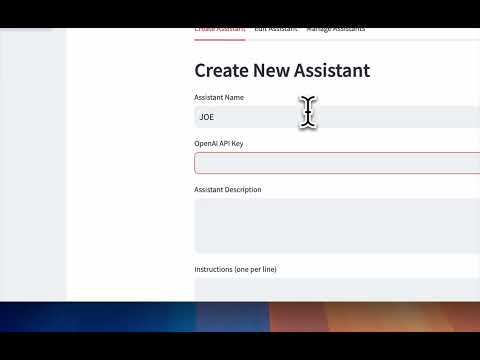
## Streamlit UI
To run the Streamlit UI, run the following command:
```sh
streamlit run streamlit_app/Home.py
```
and navigate to `http://localhost:8501` in your web browser.
### Video Tutorial
Watch our video tutorial to learn how to use the Streamlit UI:
[](https://youtu.be/CxiQi1CnueE)
The video demonstrates:
- Setting up your Telegram account
- Managing AI assistants
- Running and monitoring agents
- Using the chat interface
- Managing user segments and campaigns
This visual guide will help you get started with the Telegram AI Agent's user interface quickly and efficiently.
## Configuration
To configure the Telegram AI Agent library, you need to set up environment variables. You can do this by either creating a `.env` file or copying from the provided `.env.example` file.
### Option 1: Create a new .env file
Create a `.env` file in the root directory of your project with the following content:
```
TELEGRAM_API_ID=your_api_id_here
TELEGRAM_API_HASH=your_api_hash_here
TELEGRAM_PHONE_NUMBER=your_phone_number_here
OPENAI_API_KEY=your_openai_api_key_here
# Optional: Proxy settings
# PROXY_TYPE=socks5
# PROXY_ADDR=1.1.1.1
# PROXY_PORT=5555
# PROXY_USERNAME=username
# PROXY_PASSWORD=password
```
Replace the placeholder values with your actual Telegram API credentials and OpenAI API key.
### Option 2: Copy from .env.example
If you prefer not to create a new file, you can copy the `.env.example` file to `.env` and modify the values as needed.
## Usage
Here's a basic example of how to use the Telegram AI Agent:
```python
import asyncio
import logging
from dotenv import load_dotenv
import os
from telegram_ai_agent import TelegramAIAgent, TelegramConfig
from telegram_ai_agent.utils import setup_logging
from phi.assistant.assistant import Assistant
from phi.llm.openai.chat import OpenAIChat
# Load environment variables and setup logging
load_dotenv()
setup_logging()
logger = logging.getLogger(__name__)
# Optional: Load proxy settings if provided
proxy = None
if (
os.getenv("PROXY_TYPE")
and os.getenv("PROXY_ADDR")
and os.getenv("PROXY_PORT")
):
proxy = {
'proxy_type': os.getenv("PROXY_TYPE"), # socks5, socks4, or http
'addr': os.getenv("PROXY_ADDR"),
'port': int(os.getenv("PROXY_PORT")),
'rdns': True # Use remote DNS resolution
}
# Add proxy authentication if provided
if os.getenv("PROXY_USERNAME") and os.getenv("PROXY_PASSWORD"):
proxy['username'] = os.getenv("PROXY_USERNAME")
proxy['password'] = os.getenv("PROXY_PASSWORD")
# Create OpenAI assistant
openai_chat = OpenAIChat(api_key=os.getenv("OPENAI_API_KEY"))
assistant = Assistant(
llm=openai_chat,
run_id="telegram_ai_agent",
description="Sales representative for a tech company",
instructions=["You are a sales representative for a tech company. You are tasked with selling a product to the user."]
)
# Create Telegram configuration
telegram_config = TelegramConfig(
session_name="session_1",
api_id=int(os.getenv("TELEGRAM_API_ID")),
api_hash=os.getenv("TELEGRAM_API_HASH")),
phone_number=os.getenv("TELEGRAM_PHONE_NUMBER"),
proxy=proxy,
# Optional: Advanced settings
timeout=30,
set_typing=True,
typing_delay_factor=0.05,
typing_delay_max=30.0,
min_typing_speed=100.0,
max_typing_speed=200.0,
chat_history_limit=100,
)
async def get_code():
return input("Enter the code you received: ")
async def get_password():
return input("Enter your password: ")
async def main():
try:
# Create and start the Telegram AI Agent
agent = TelegramAIAgent(
assistant,
telegram_config,
logger=logger,
code_callback=get_code,
twofa_password_callback=get_password,
)
# Run agent inbound processing until disconnected
await agent.run()
except Exception as e:
logger.error(f"An error occurred: {str(e)}")
finally:
if agent.session:
await agent.stop()
if __name__ == "__main__":
asyncio.run(main())
```
For more detailed examples, check the `examples` directory.
## Testing
This project uses pytest for unit testing. To run the tests, first install the development dependencies:
```sh
pip install -e .[dev]
```
Then, you can run the tests using:
```sh
pytest tests/
```
The test suite includes unit tests for the `TelegramAIAgent` class, covering initialization, starting, stopping, sending messages, and processing incoming messages.
To add new tests or modify existing ones, check the `tests/test_agent.py` file.
## Contributing
Contributions are welcome! Please feel free to submit a Pull Request.
## License
This project is licensed under the MIT License.