https://github.com/ihciah/clean-dns-bpf
基于 Rust + eBPF 丢弃 GFW DNS 污染包
https://github.com/ihciah/clean-dns-bpf
Last synced: 8 months ago
JSON representation
基于 Rust + eBPF 丢弃 GFW DNS 污染包
- Host: GitHub
- URL: https://github.com/ihciah/clean-dns-bpf
- Owner: ihciah
- Created: 2021-10-02T18:49:53.000Z (about 4 years ago)
- Default Branch: master
- Last Pushed: 2021-12-05T04:37:26.000Z (almost 4 years ago)
- Last Synced: 2025-04-03T22:11:12.584Z (8 months ago)
- Language: Rust
- Homepage:
- Size: 12.7 KB
- Stars: 1,125
- Watchers: 17
- Forks: 65
- Open Issues: 10
-
Metadata Files:
- Readme: README.md
Awesome Lists containing this project
- my-awesome - ihciah/clean-dns-bpf - 12 star:1.1k fork:0.1k 基于 Rust + eBPF 丢弃 GFW DNS 污染包 (Rust)
- awesome-rust-zh - Clean DNS with eBPF - 基于 Rust + eBPF 丢弃 GFW DNS 污染包
- awesome-hacking-lists - ihciah/clean-dns-bpf - 基于 Rust + eBPF 丢弃 GFW DNS 污染包 (Rust)
README
# Clean DNS with eBPF
基于 Rust + eBPF 丢弃 GFW DNS 污染包
> 注:只在 Linux 上能用,且需要内核支持 XDP。
## How to Use
1. 下载 [最新的 release](https://github.com/ihciah/clean-dns-bpf/releases)
2. 想要加载到内核时(记得修改 eth0 为你的出口网卡名,以及修改 clean-dns.elf 的路径):
```
sudo ip link set dev eth0 xdp obj ./clean-dns.elf
```
正常使用的话,只需要在网卡 ready 后把 elf 挂上去就行了(重启后需再次挂载)。
xdpdrv模式并非每类网卡都可用,多数的Intel网卡、virtio网卡可用xdpdrv模式。若无法使用xdpdrv模式,则可以使用xdpgeneric模式,即:
```
sudo ip link set dev eth0 xdpgeneric obj ./clean-dns.elf
```
> Note:
> xdp有三种模式: 1. xdpoffload,即智能网卡(例如支持Netronome’s nfp 驱动的网卡)实现了xdpoffload模式 ,允许将整个eBPF/xdp程序offload到硬件,因此程序在网卡收到包时就直接在网卡进行处理;2. xdpdrv,即eBPF/xdp程序直接在驱动的接收路径上运行,理论上这是软件层最早可以处理包的位置;3. xdpgeneric,generic xdp hook位于内核协议栈的主接收路径,接受的是skb格式的包,这些hook位于ingress路径的很后面。
3. 当你想从内核卸载这个 bpf 时(同样,记得修改 eth0 为你的网卡名):
```
sudo ip link set dev eth0 xdp off
```
正常使用无需卸载。
## Features
当挂在本 bpf 后,对应网卡上到 `8.8.8.8:53` 的 DNS 请求对应响应上的 GFW 污染会被过滤掉。
即你可以在没有梯子的情况下得到正确的 8.8.8.8 对任意域名的解析结果。所以,如果你使用本程序,请记得将 dns 修改为 8.8.8.8。
## How It Works
本节大致说明工作原理。
GFW 污染 DNS 的方式为抢答,我们只需要丢弃投毒响应即可获得正确的解析结果。通过 eBPF 我们可以在内核中插入代码,相比在用户态启动代理,这样可以获得更好的性能。
要丢弃投毒响应,重点是找到它们的特征。
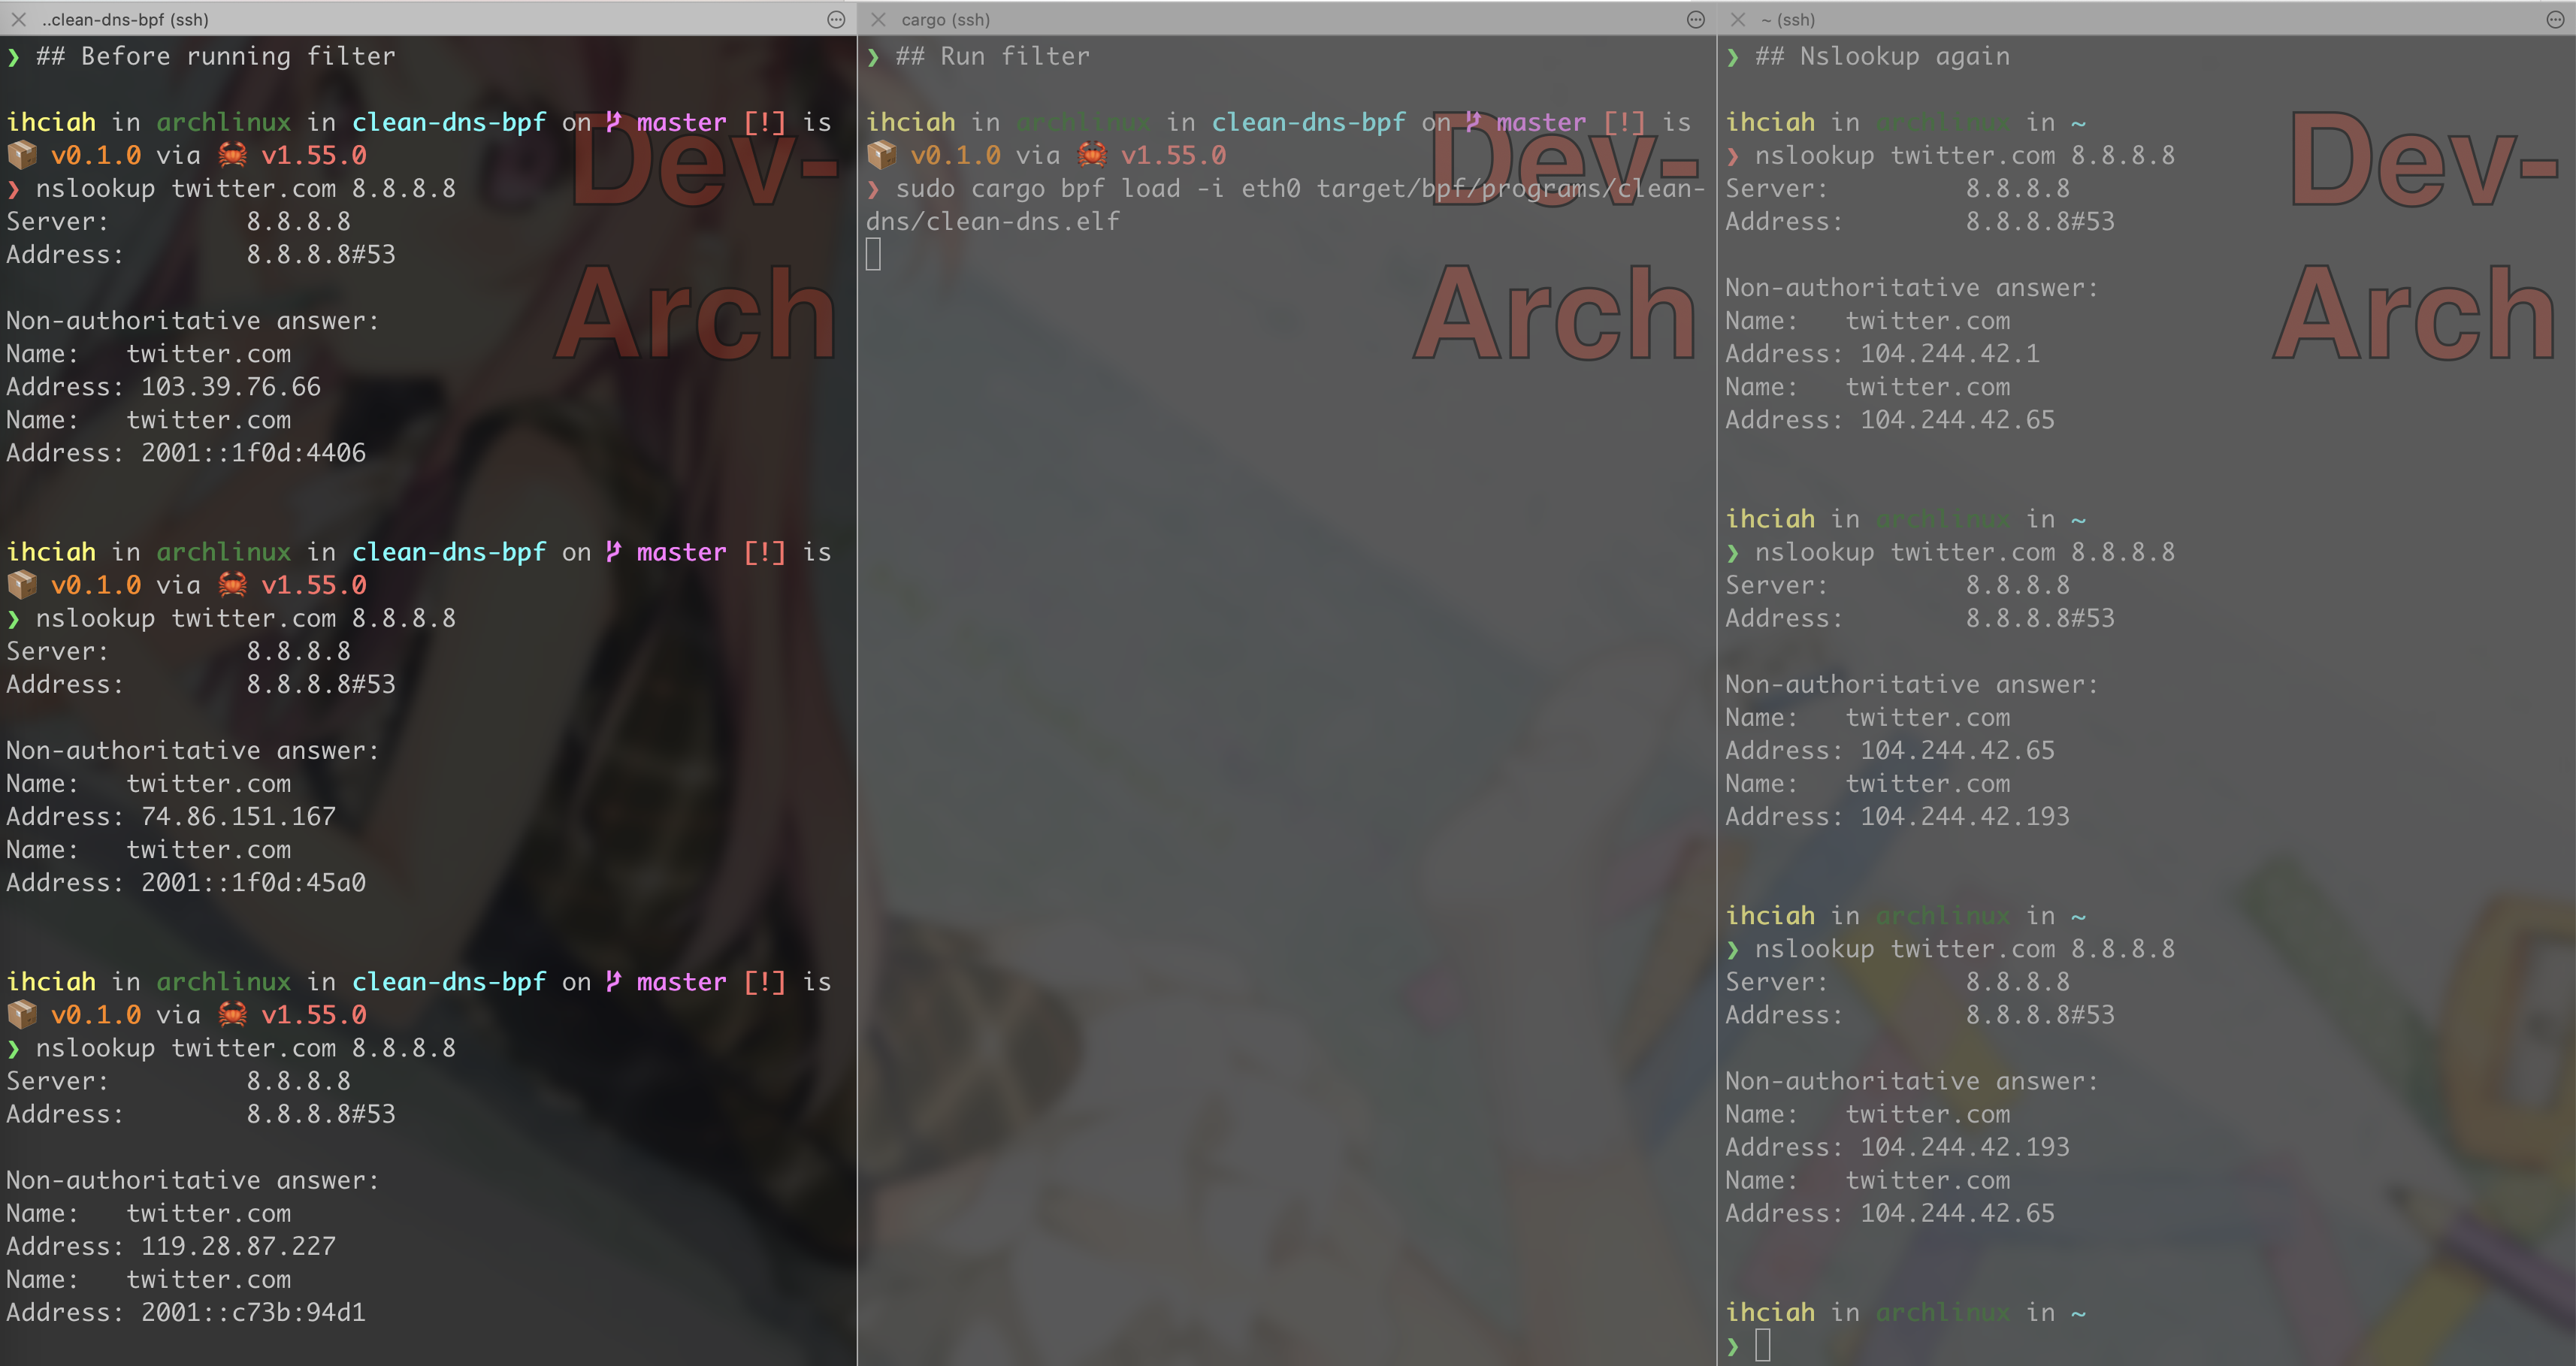
以 twitter.com 为例,当向 8.8.8.8 请求 twitter.com 的 A 记录时,正常的响应会返回 2 条结果(1Q2A);而 GFW 只会返回 1 条,但是使用了 2 次抢答。2 次抢答包其中一个 IP Identification = 0x0000,另一个 IP Flags = 0x40(Don't fragment);而正常的响应 IPID 不会是 0 并且 IP Flags = 0。
我们只要 Drop 掉符合对应特征的包即可。这时我们可以验证,twitter.com 可以正确解析(fb 等非 google 服务也正常)。

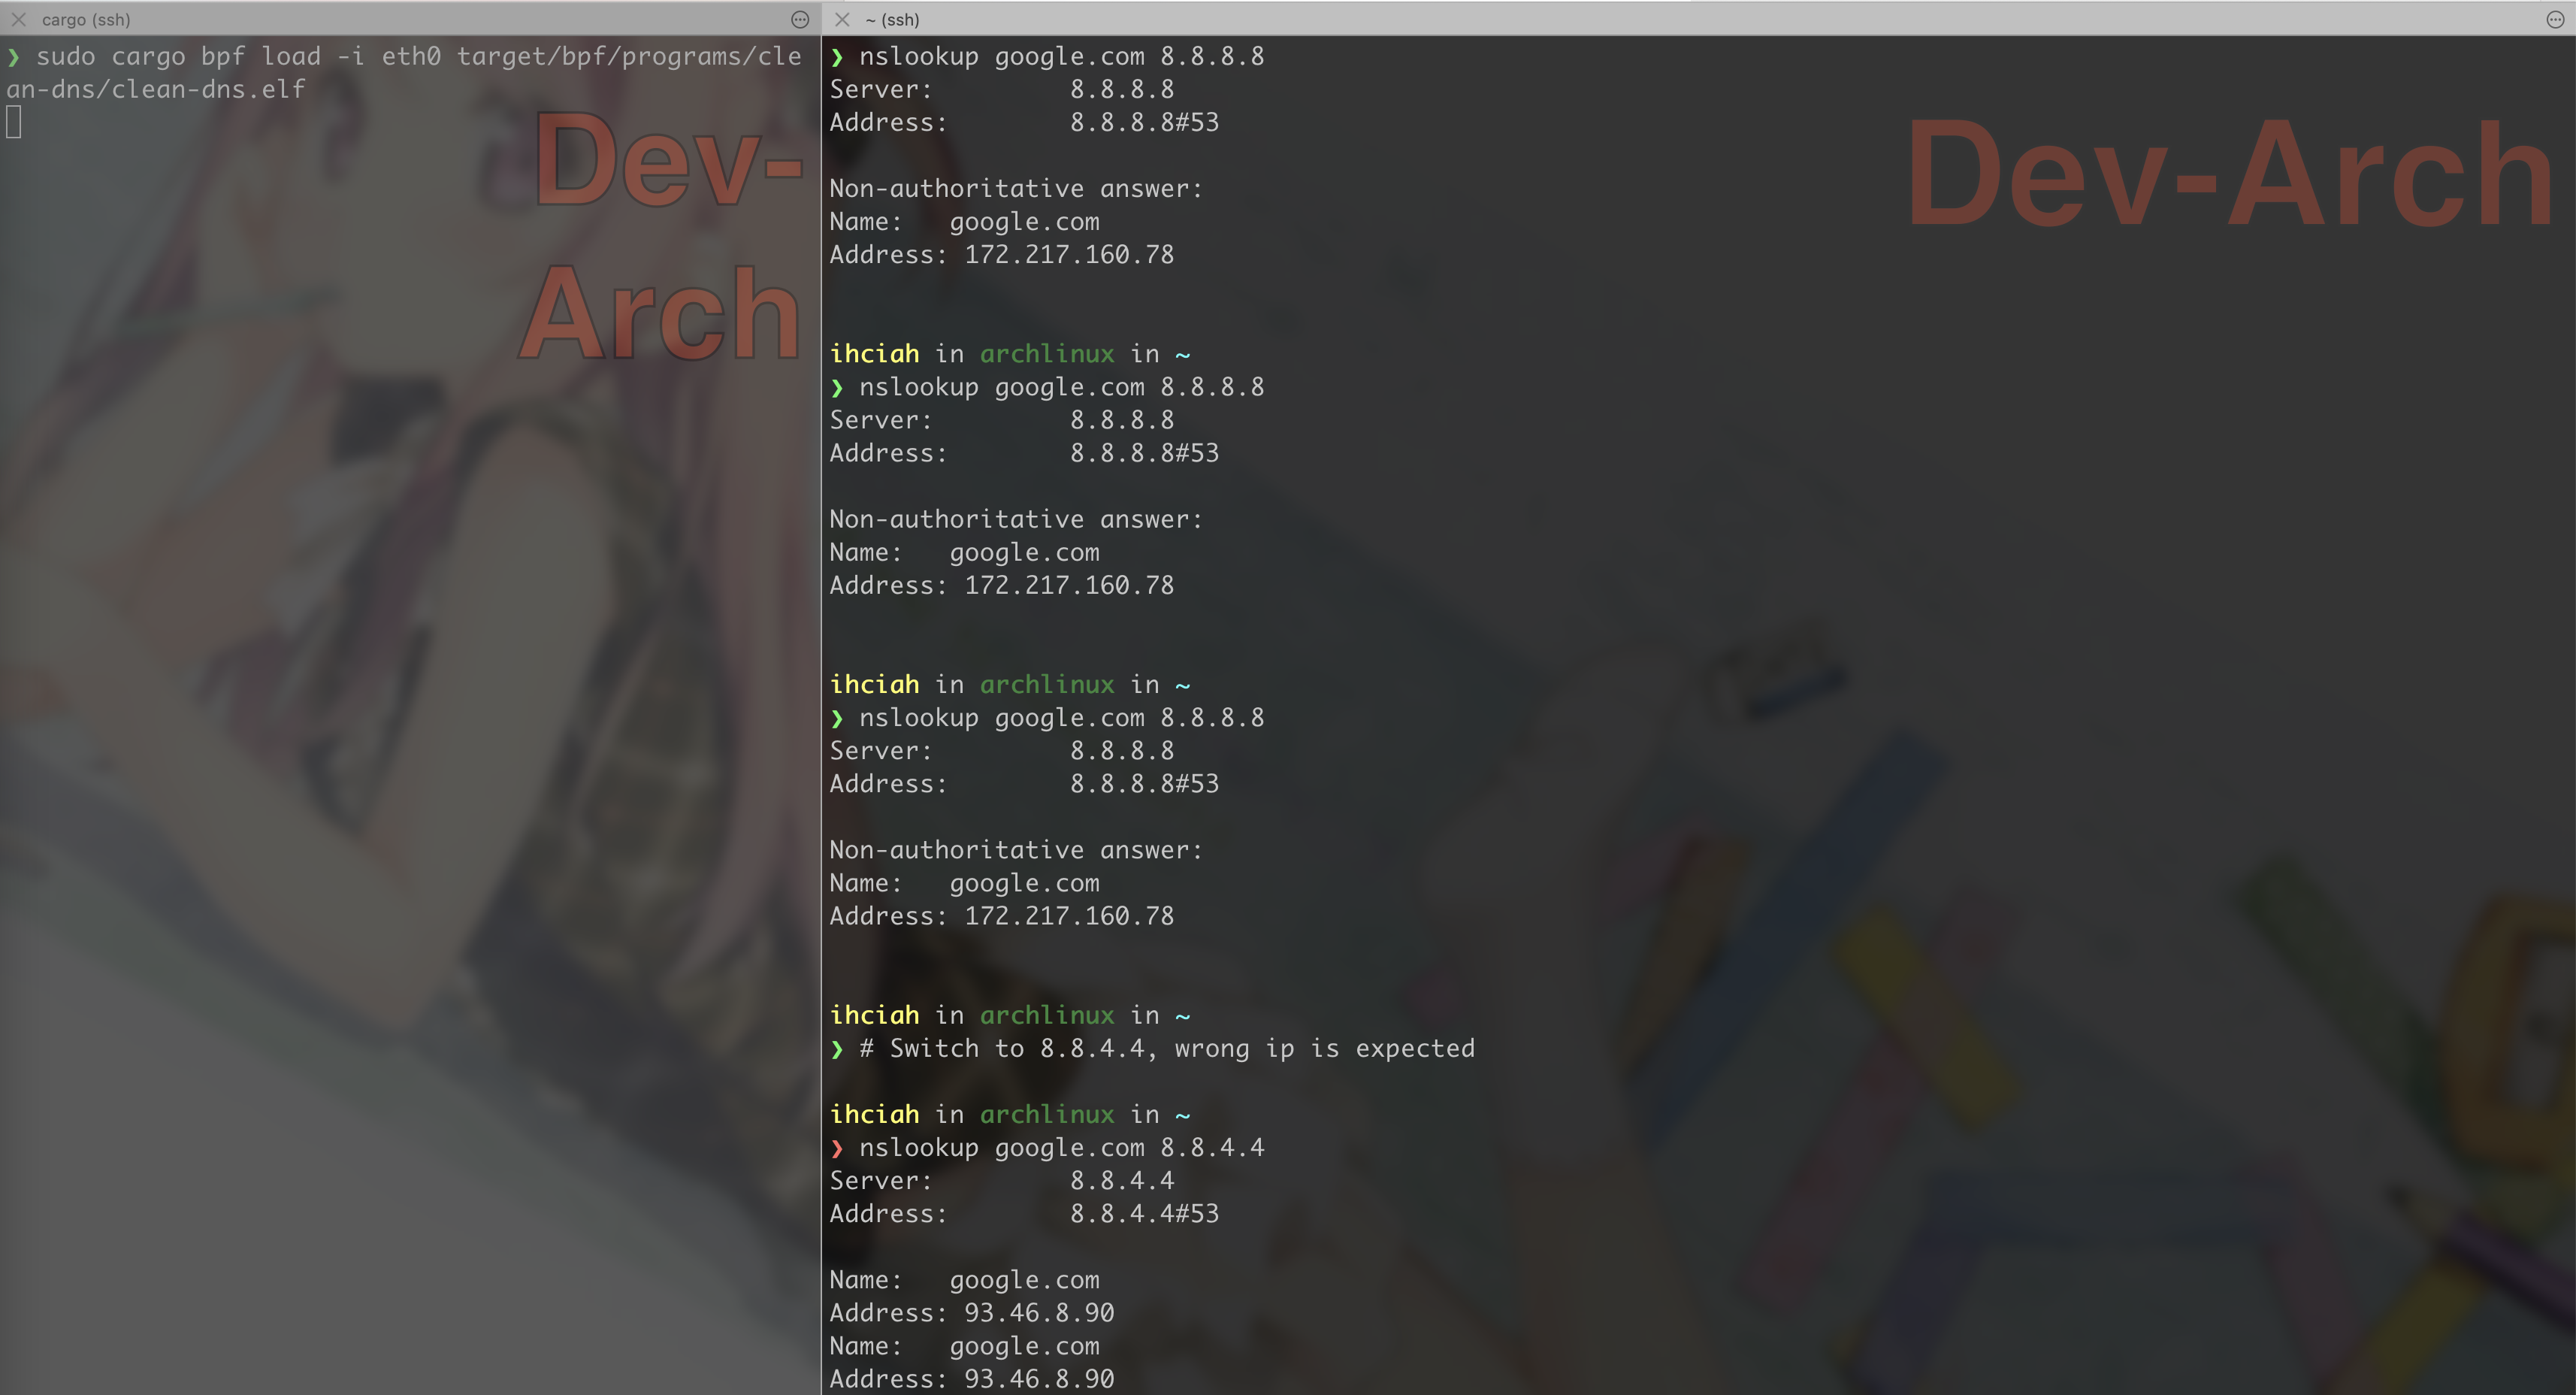
但对于 google.com,这种办法并没有预期的表现。正常的响应 DNS Flags = 0x8180,而抢答包出现了 0x8590(额外标记 Authoritative 和 Answer Authenticated),0x85a0(额外标记 Authoritative 和 Non-authenticated data: Acceptable)和 0x8580(额外标记 Authoritative) 三种;并且,正常的响应 Answer 中使用 c00c(0b11 + offset) 来复用 Query 中的 Name,抢答响应则重复又写了一遍。
为了避免误杀,我们可以先放行多个 Answer 的包(因为观测到抢答包里只有单个 Answer)。
之后如果标记了 Authoritative,但是 Authority RRs = 0(不确定这个字段我是不是理解对了),则 Drop。
c00c 这个特征也可以作为判断依据,但是要做较多解析和计算,暂时不使用。
这些过滤做完就可以正常拿到 google.com 的 A 记录啦~
这时我们可以验证,google 系的域名也可以正确解析。

## For Developers
如果你想二次开发或自行编译,可以参考本节内容。普通用户无需操作。
### Install cargo-bpf
```
cargo install cargo-bpf --git https://github.com/redsift/redbpf
```
### Build
```
cargo bpf build clean-dns
```
### Run
```
sudo cargo bpf load -i eth0 target/bpf/programs/clean-dns/clean-dns.elf
```
### Release
To load elf with `ip` command([ref](https://github.com/aquarhead/protect-the-rabbit/blob/master/Makefile.toml)).
```
llvm-objcopy \
--remove-section .debug_loc \
--remove-section .debug_info \
--remove-section .debug_ranges \
--remove-section .BTF.ext \
--remove-section .eh_frame \
--remove-section .debug_line \
--remove-section .debug_pubnames \
--remove-section .debug_pubtypes \
--remove-section .debug_abbrev \
--remove-section .debug_str \
--remove-section .text \
--remove-section .BTF \
--remove-section .symtab \
--remove-section .rel.BTF \
--rename-section xdp/clean_dns=prog \
./clean-dns.elf
```
### Note
Inspired by [@llcccd](https://twitter.com/gnodeb/status/1443975021840551941)