https://github.com/iml885203/7-segment-clock
7 segment clock with LED's
https://github.com/iml885203/7-segment-clock
7-segment arduino clock eeprom homekit spiffs
Last synced: about 2 months ago
JSON representation
7 segment clock with LED's
- Host: GitHub
- URL: https://github.com/iml885203/7-segment-clock
- Owner: iml885203
- License: mit
- Created: 2021-03-27T16:27:23.000Z (about 5 years ago)
- Default Branch: master
- Last Pushed: 2021-06-21T03:28:24.000Z (about 5 years ago)
- Last Synced: 2025-06-03T19:22:12.287Z (about 1 year ago)
- Topics: 7-segment, arduino, clock, eeprom, homekit, spiffs
- Language: C++
- Homepage:
- Size: 11.3 MB
- Stars: 2
- Watchers: 2
- Forks: 0
- Open Issues: 0
-
Metadata Files:
- Readme: README.md
- License: LICENSE
Awesome Lists containing this project
README
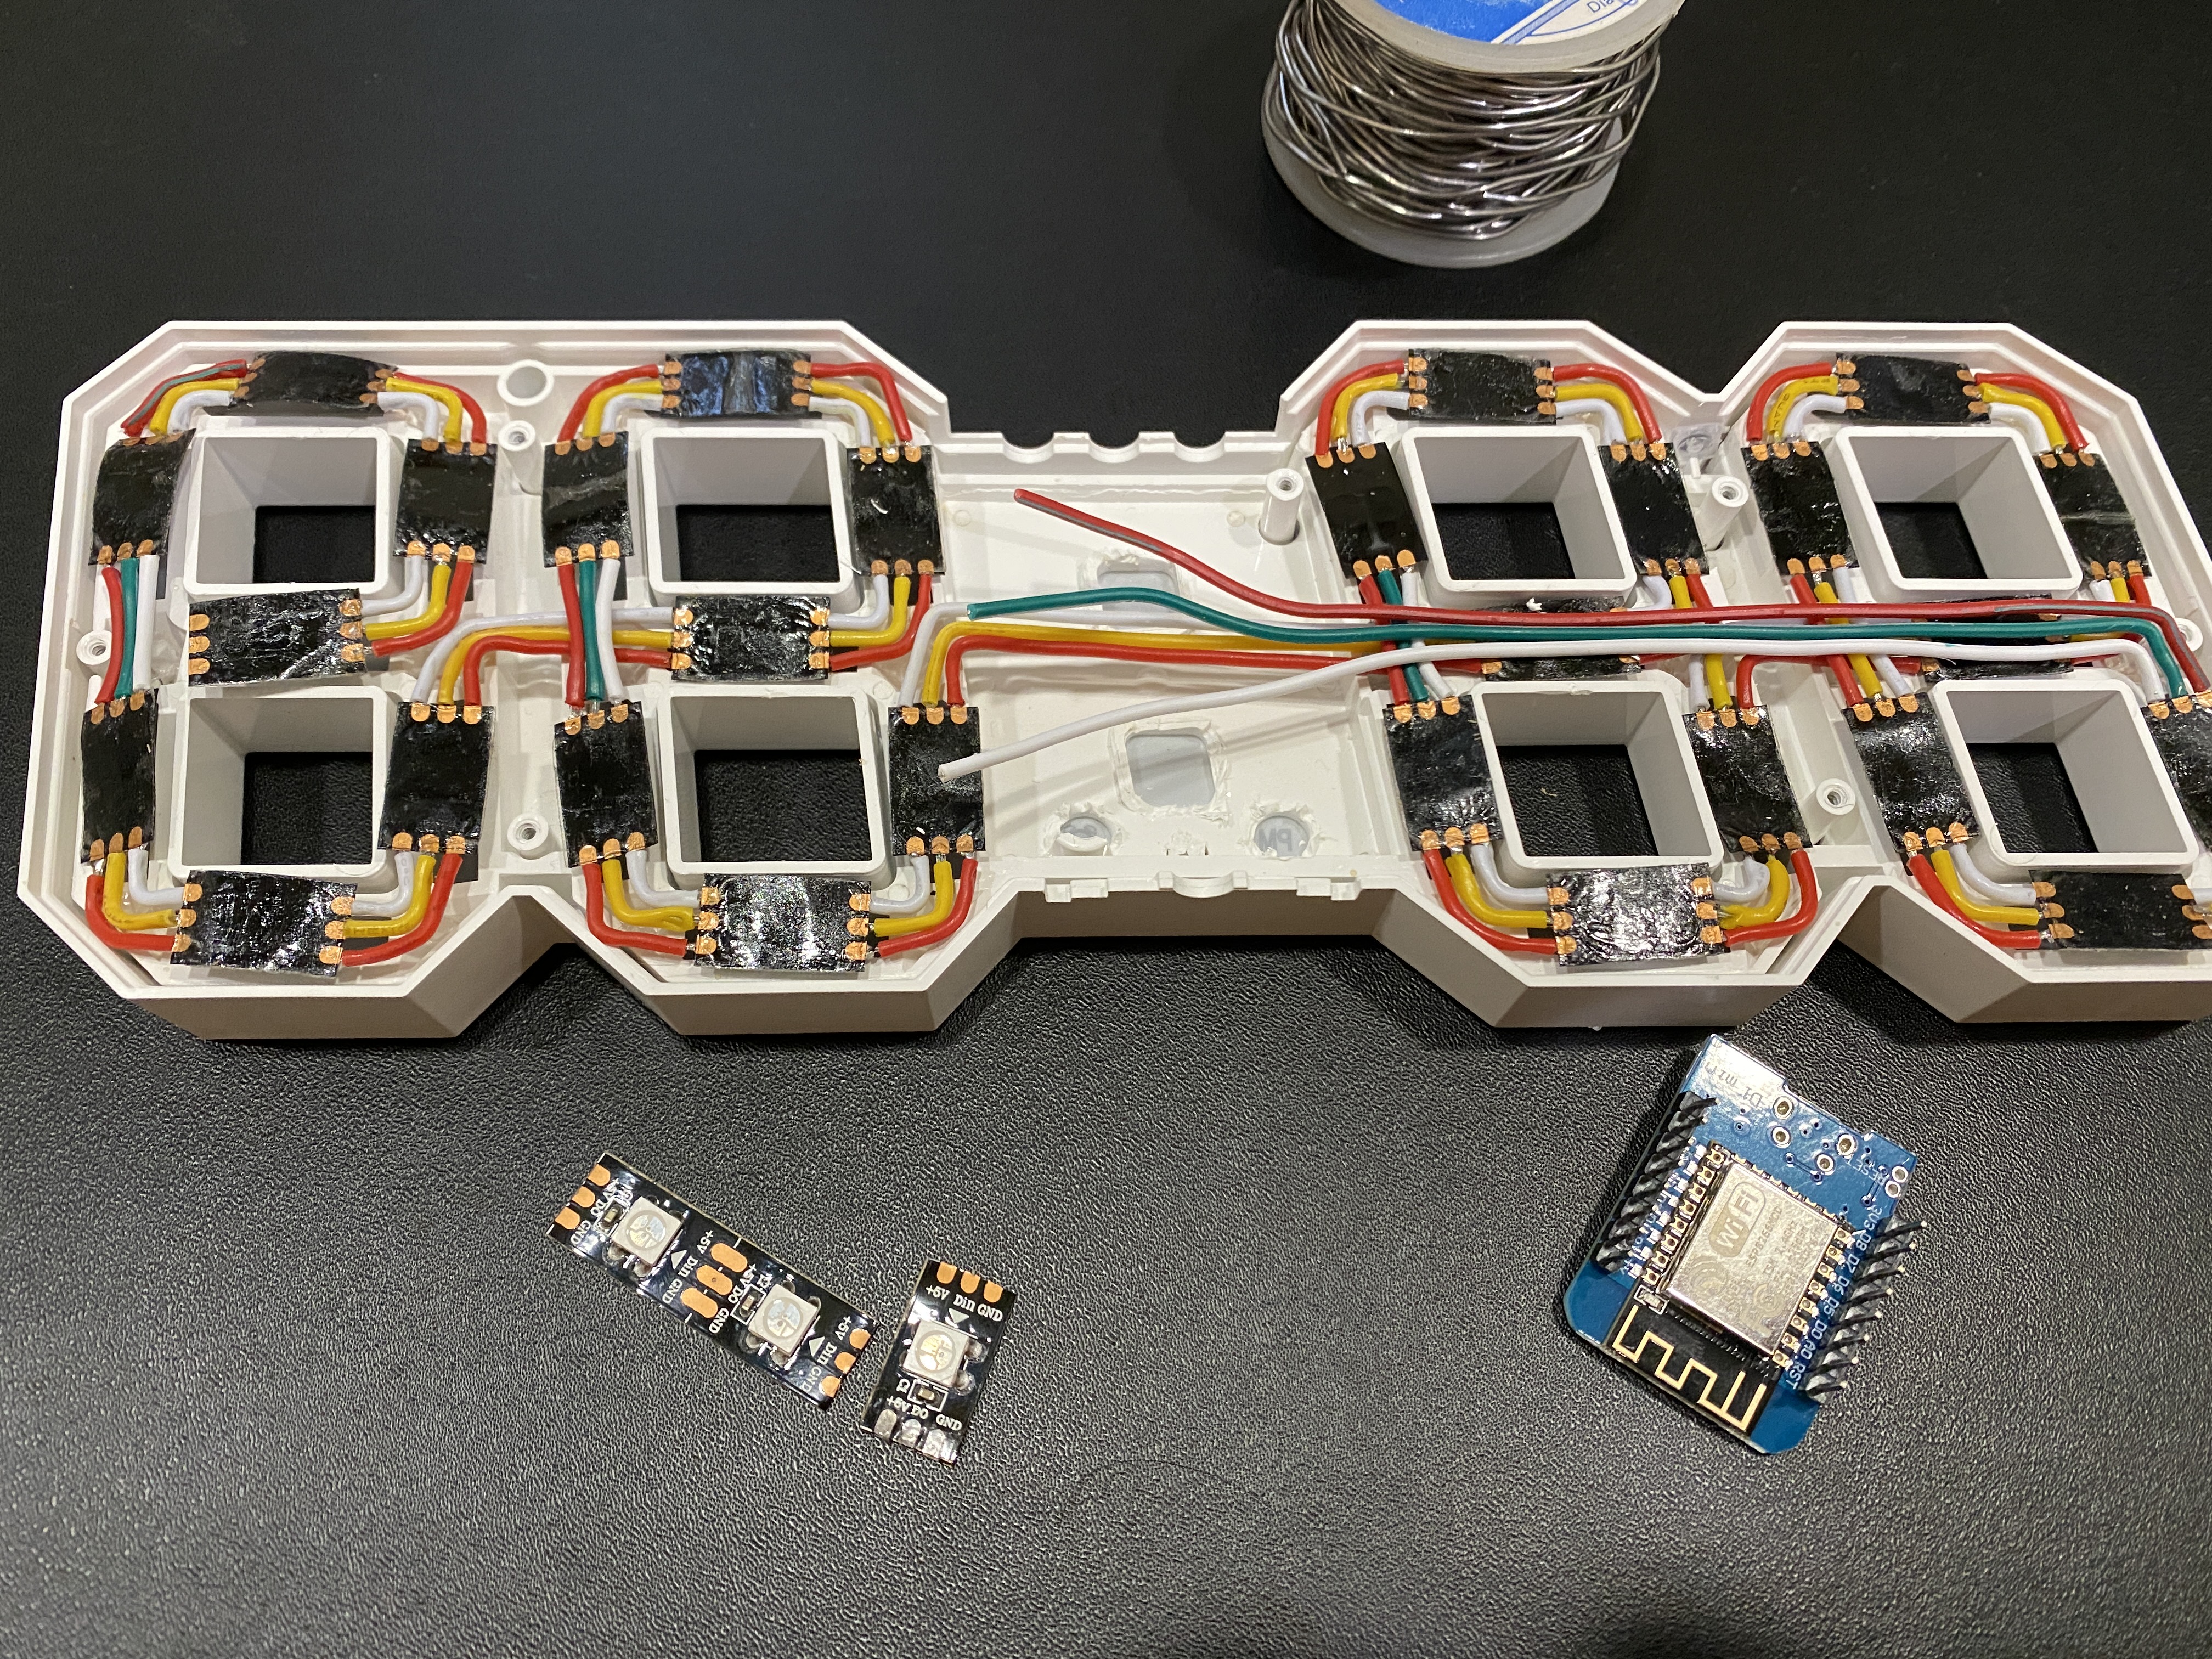
# 7-Segment-Clock
7 segment clock with LED's
使用ESP8266與LED燈條自製的NTP數位時鐘,可透過網頁控制亮度與顏色

# 硬體
|硬體|x|
|:-:|:-:|
|ESP8266 WeMos Mini D1|1x|
|Micro USB cable|1x|
|WS2812B LED Strip 60 LED's per meter |1x|
# 安裝
使用[Arduino IDE](https://www.arduino.cc/en/software)
先上傳SPIFFS再刷.ino檔案
第一次請把`reset_eeprom`設為true,初始化eeprom
根據妳的LED燈條擺放順序調整.ino裡面的設定
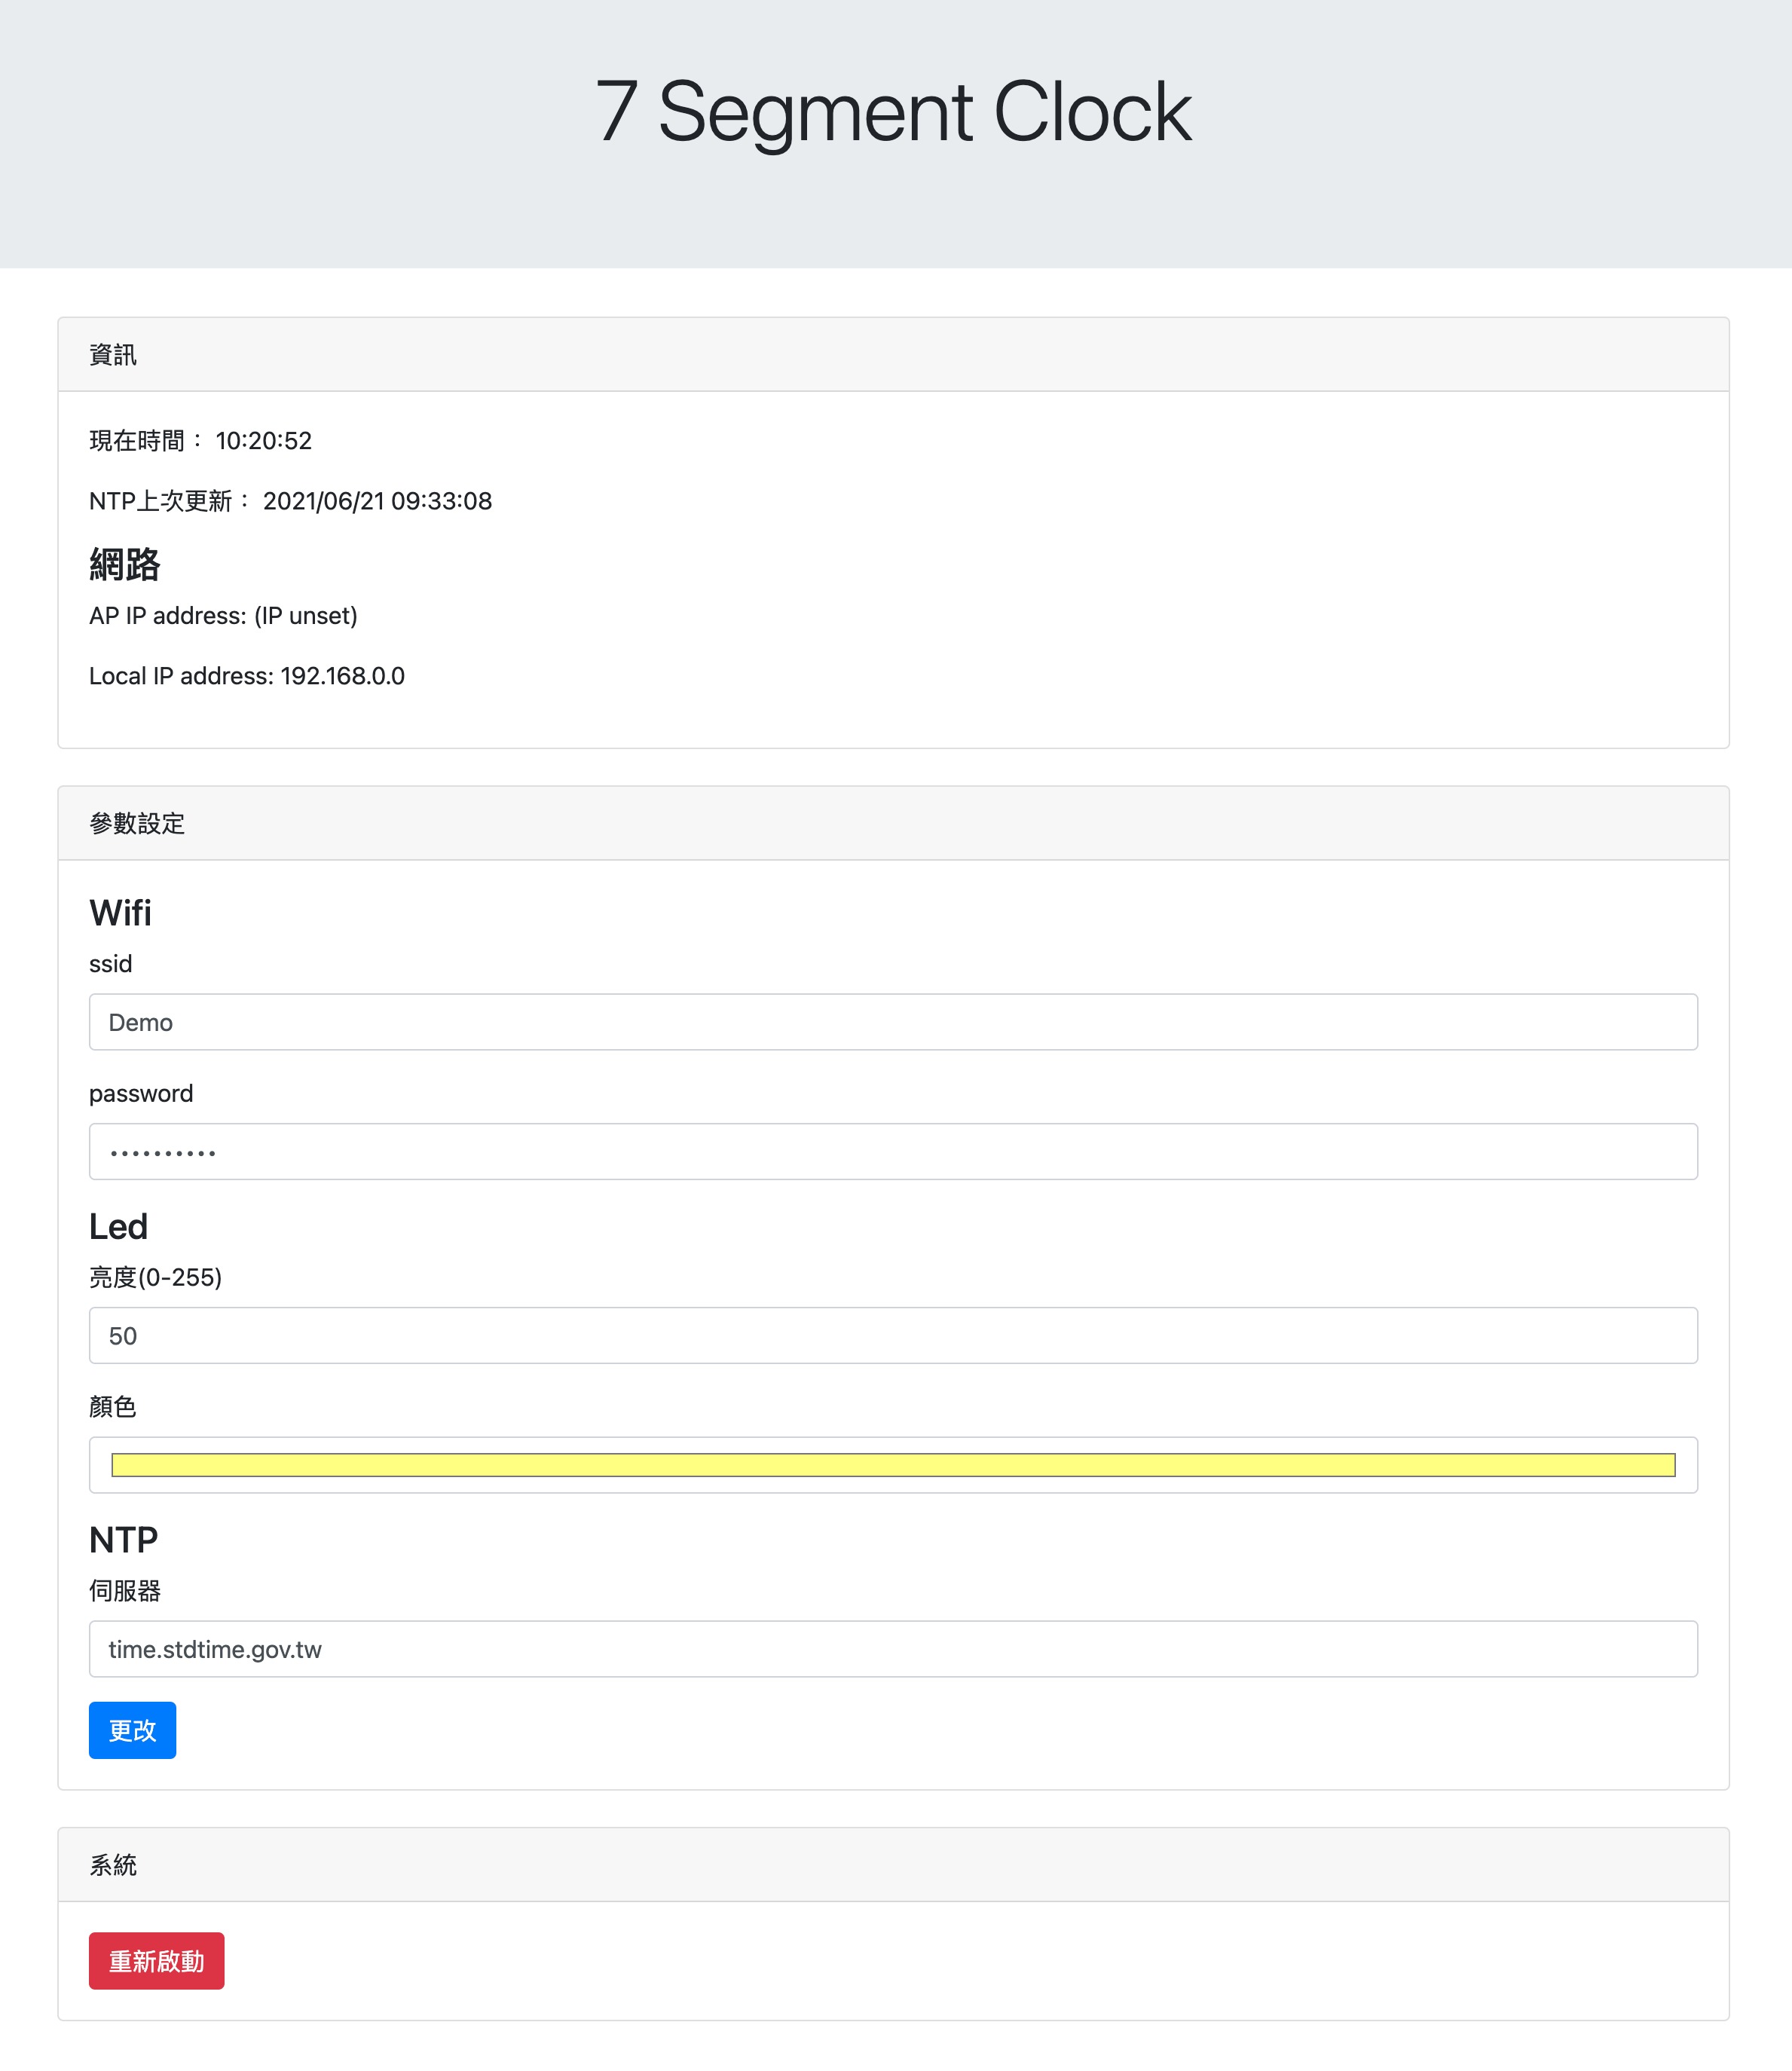
# 設定
## 初次設定
第一次啟動後會有一個wifi為7SegmentClock,連線後打開瀏覽器連到4.3.2.1
透過網頁設定時鐘wifi,更改後裝置會重啟連上網路並顯示時間
之後每5分鐘會自動同步時間
## 自動化
透過curl可以控制時鐘的顏色與亮度
```bash
curl -X POST --data "led_brightness=10&led_color=#ffffaa" http://192.168.0.0/setting
```
搭配HomeAssistant實作成一個按鈕
打開為正常亮度與顏色,關閉則是夜燈模式
```yaml
switch:
- platform: command_line
switches:
led_clock:
command_on: '/usr/bin/curl -X POST --data "led_brightness=20&led_color=#ffffaa" http://192.168.0.0/setting'
command_off: '/usr/bin/curl -X POST --data "led_brightness=5&led_color=#ffff1e" http://192.168.0.0/setting'
friendly_name: 數位時鐘
```
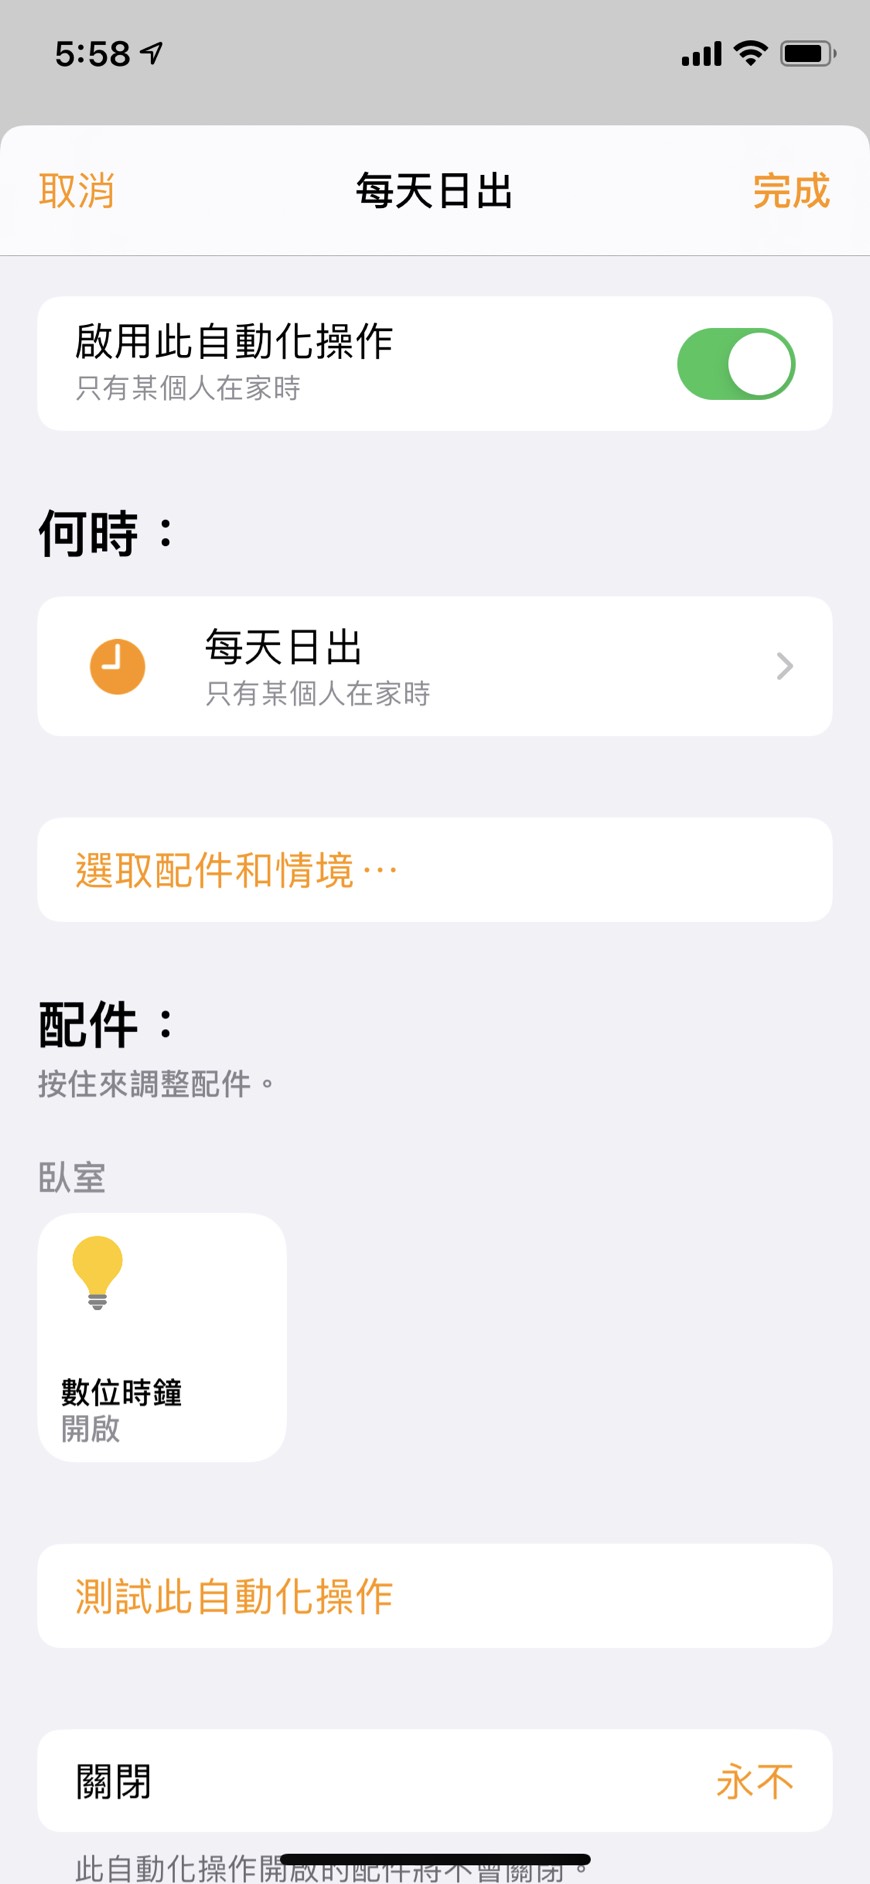
由於我每天會使用Homekit的`晚安`情境,所以透過HomeAssistant串接到Homekit上
|把`數位時鐘`加進去晚安情境|並且增加一個自動化,於早上打開|
|:-:|:-:|
| |
| |
|
