https://github.com/ionic-team/CapacitorWatch
Build apps for watches with Capacitor
https://github.com/ionic-team/CapacitorWatch
Last synced: 11 months ago
JSON representation
Build apps for watches with Capacitor
- Host: GitHub
- URL: https://github.com/ionic-team/CapacitorWatch
- Owner: ionic-team
- License: mit
- Created: 2023-06-29T14:20:32.000Z (almost 3 years ago)
- Default Branch: main
- Last Pushed: 2024-04-08T13:10:59.000Z (about 2 years ago)
- Last Synced: 2024-11-29T13:44:07.742Z (over 1 year ago)
- Language: Swift
- Size: 2.02 MB
- Stars: 44
- Watchers: 8
- Forks: 6
- Open Issues: 5
-
Metadata Files:
- Readme: README.md
- Changelog: CHANGELOG.md
- Contributing: CONTRIBUTING.md
- License: LICENSE
- Code of conduct: CODE_OF_CONDUCT.md
Awesome Lists containing this project
README
# @capacitor/watch


---
_CapacitorLABS_ - This project is experimental. Support is not provided. Please open issues when needed.
---
The Capacitor Watch plugin allows you to define a UI for a watch in your web code and show it on a paired watch.
This currently only supports iOS. This guide assumes you've already added iOS to your capcacitor project.
Also note - all of this will only work with an actual Apple Watch. Simulators don't allow the app<->watch communcation like real devices do.
## Install
Step 1
Add the watch plugin to your capacitor project, and then open the Xcode project:
```bash
npm install @capacitor/watch
npx cap sync
npx cap open ios
```
Step 2
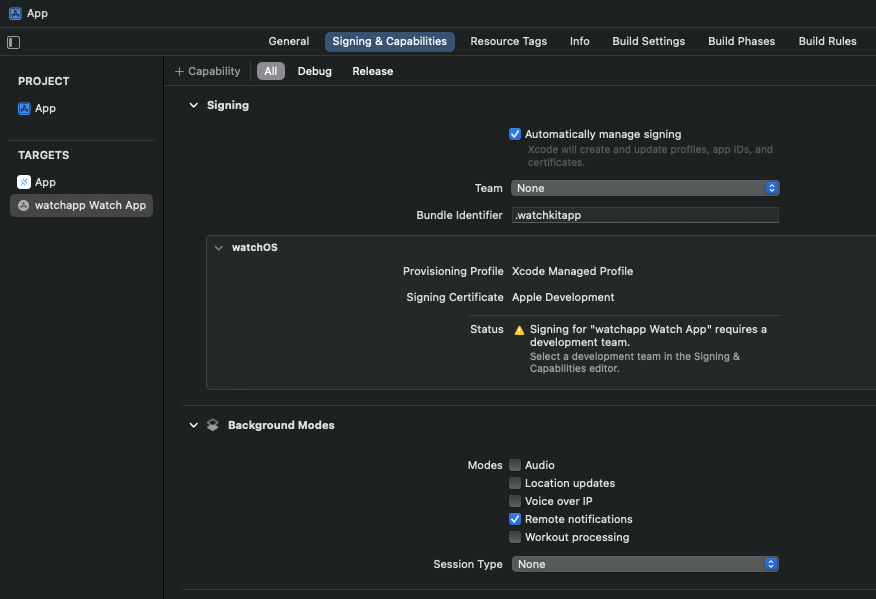
Go to add capabilities:
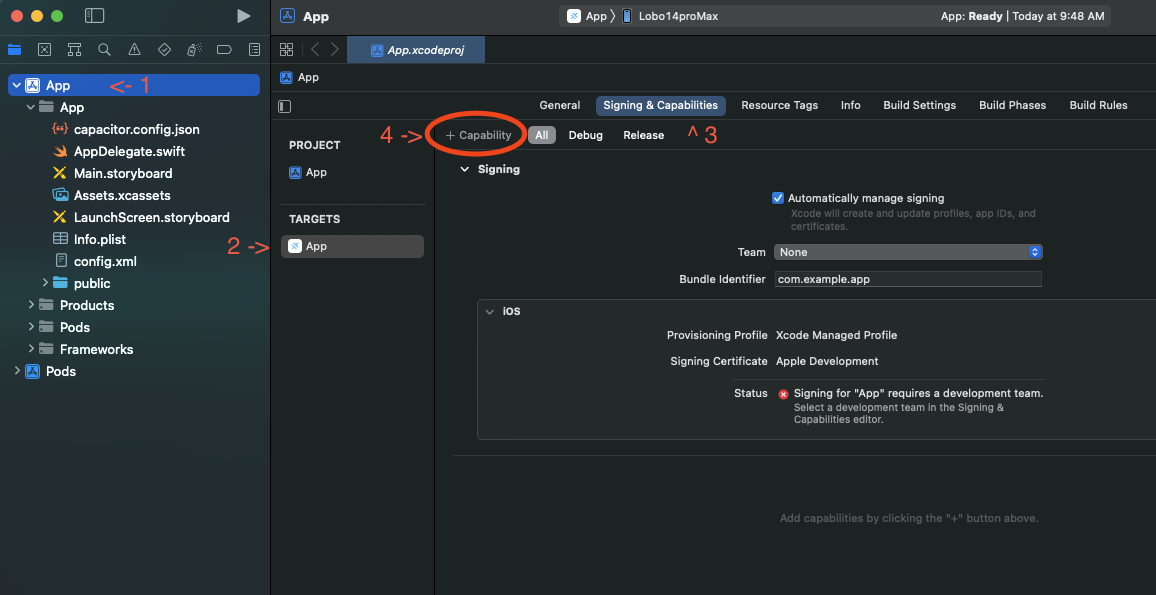
Add the 'Background Modes' and 'Push Notification' capabilities. Then in the Background Modes options, select 'Background Fetch', 'Remote Notifications', and 'Background Processing'. Your App target should look like this:

Step 3
Open `AppDelegate.swift` and add `import WatchConnectivity` and `import CapactiorWatch` to the top of the file, and the following code inside the `application(_ application: UIApplication, didFinishLaunchingWithOptions launchOptions: [UIApplication.LaunchOptionsKey: Any]?)` method:
```swift
assert(WCSession.isSupported(), "This sample requires Watch Connectivity support!")
WCSession.default.delegate = CapWatchSessionDelegate.shared
WCSession.default.activate()
```
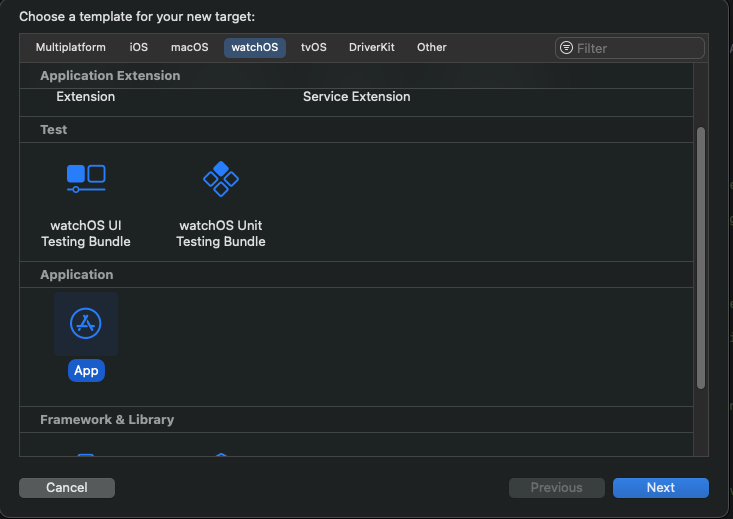
Step 4
Select File -> New -> Target in Xcode, and then the watchOS tab, and 'App':
Click 'Next' then fill out the options like so:
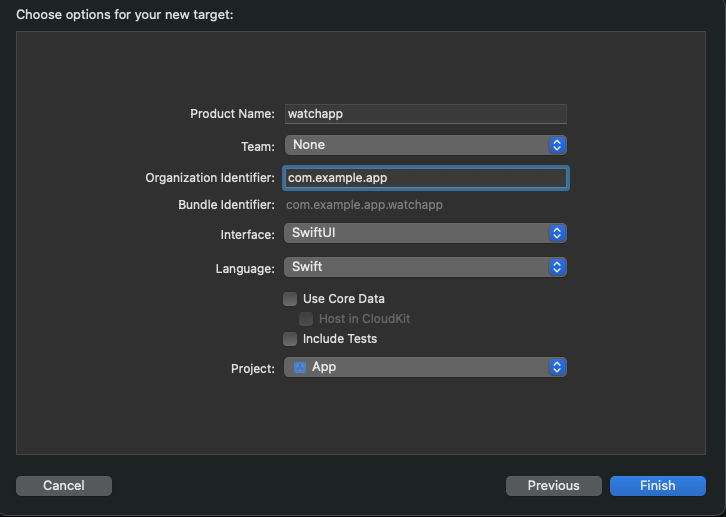
This dialog can be a little confusing, the key thing is your 'Bundle Identifier' must be `[your apps bundle ID].watchapp` for the watch<->app pairing to work. You must also pick SwiftUI for the Interface and Swift for the language. The project should be `App`.
Step 5
We're going to add the code that makes Capacitor Watch work in the watch application.
---
If you are using Xcode 15 or beyond you then need to add the Capacitor Watch Swift Package from your node_modules:
First go to the project package dependancies

Then choose 'Add Local'
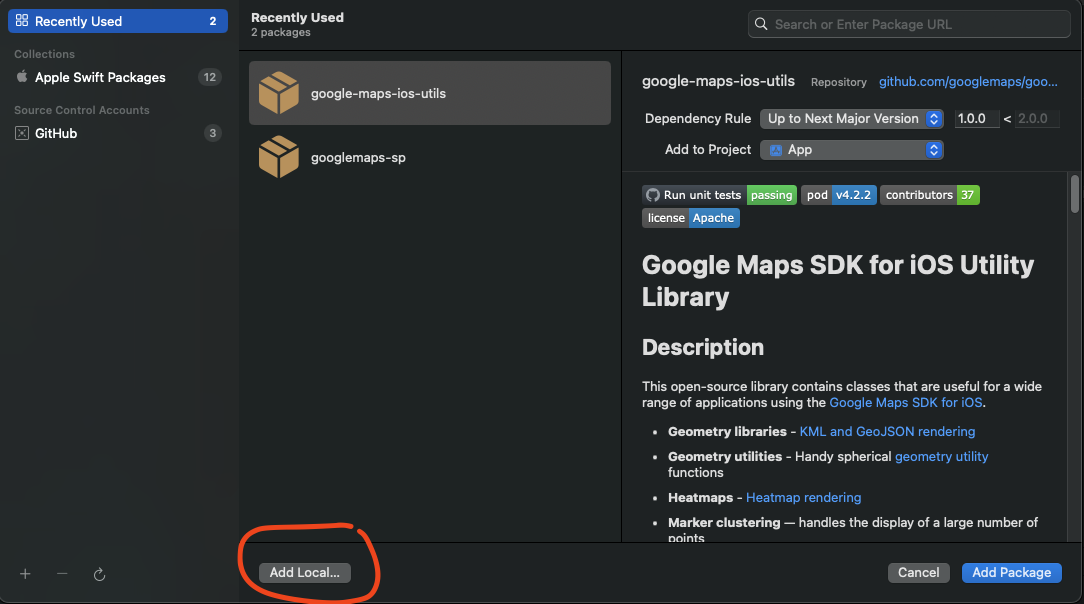
Then navigate into the `node_modules/@capacitor/watch/CapWatch-Watch-SPM` folder and click 'Add Package'
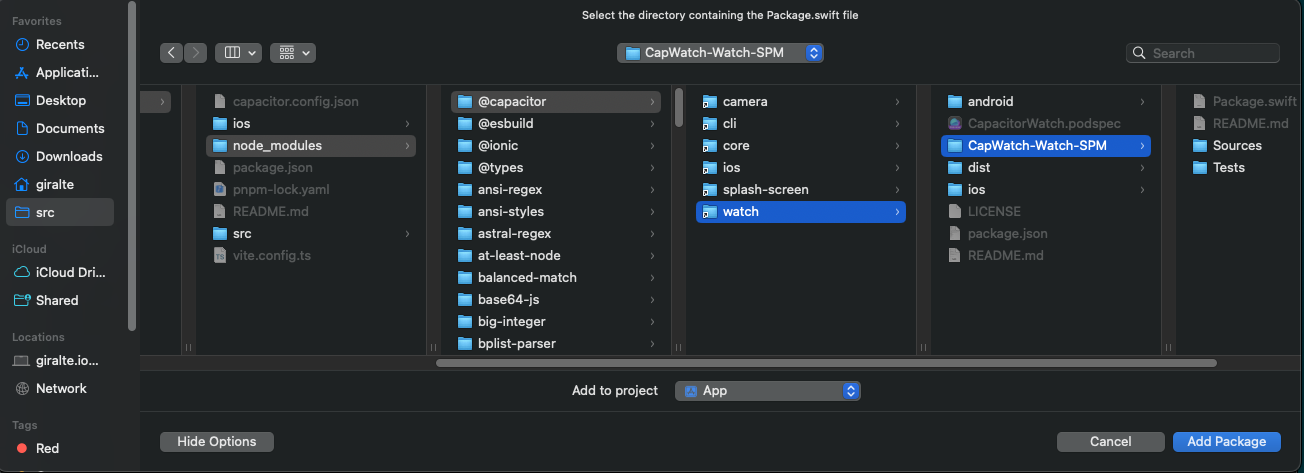
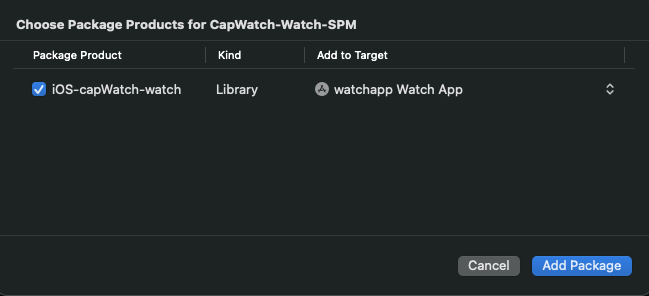
Then in the column on the right pick your watch app to be the target and click 'Add Package'
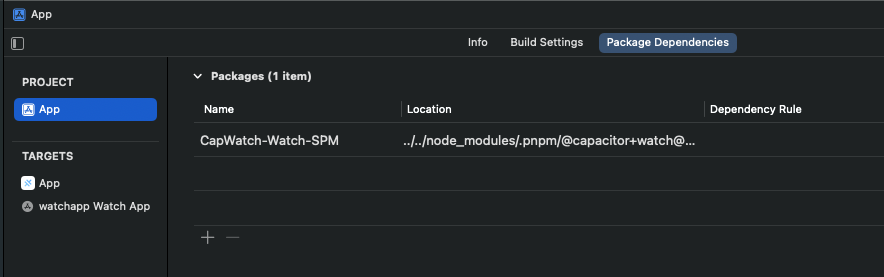
Once this is done your Package Dependancies should look like this:
---
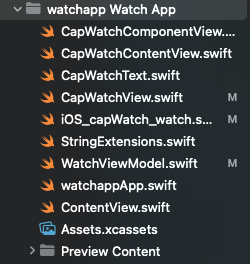
With Xcode 14 you will need to go here https://github.com/ionic-team/CapacitorWatch/tree/main/packages/iOS-capWatch-watch/Sources/iOS-capWatch-watch and copy all the files into your Watch project and make sure the target selected is your watch app. It should look like so:
Step 6
Then open the watch app's 'Main' file which should be `watchappApp.swift`. Add the lines `import WatchConnectivity` and `import iOS_capWatch_watch` above the `@main` statement. Then replace the line that says `ContentView()` with this:
The finished file should look like this:
```swift
import SwiftUI
import WatchConnectivity
import iOS_capWatch_watch
@main
struct watchddgg_Watch_AppApp: App {
var body: some Scene {
WindowGroup {
CapWatchContentView()
.onAppear {
assert(WCSession.isSupported(), "This sample requires Watch Connectivity support!")
WCSession.default.delegate = WatchViewModel.shared
WCSession.default.activate()
}
}
}
}
```
Step 7
Add the 'Background Modes' capability to the watch app target, and enable 'Remote Notifications':
You should be ready to develop for Capcacitor Watch now!
## Development workflow
You can still develop your iOS app like a normal capacitor app, but getting things to run on the watch requires you to change the target and destination in Xcode. You can change this with the 'Target Dropdown' near the center-top of Xcode:
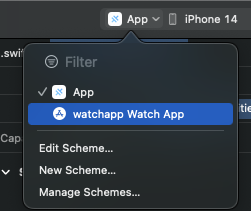
The right half of this bar lets you pick the destination device or simulator. You will need to pick the watch paired with the phone and then hit the 'Run' button or use the 'cmd+r' run shortcut.
There can be some challenges in syncing the watch and phone apps. Sometimes you will get an error in the xcode console complaining the compainion app is not present. The best solution in this case is to re-build and re-install the apps on both devices.
## Building the watch UI and sending it to the watch
You will use a long string to define the watch UI. A newline delimits components. Currently this plugin only supports a vertical scroll view of either Text or Button components.
Once you've defined your UI you can send it to the watch using the `updateWatchUI()` method:
```typescript
async uploadMyWatchUI() {
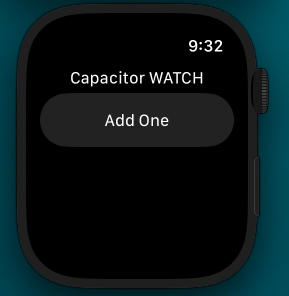
const watchUI =
`Text("Capacitor WATCH")
Button("Add One", "inc")`;
await Watch.updateWatchUI({"watchUI": watchUI});
}
```
Will produce this:
## Communicating with the watch
This article provides a great summary on the native methods and their implications: https://alexanderweiss.dev/blog/2023-01-18-three-ways-to-communicate-via-watchconnectivity
On the phone side, you can implement these methods using the Capacitor Background Runner Plugin (https://github.com/ionic-team/capacitor-background-runner). Currently the watch plugin will mainly handle the `didReceiveUserInfo` method, and you can recieve envents from the watch while your app is in the background using the following code in your runner.js:
```javascript
addEventListener("WatchConnectivity_didReceiveUserInfo", (args) => {
console.log(args.message.jsCommand);
})
```
You can also implment the `runCommand` event listener for foreground procesing:
```typescript
Watch.addListener("runCommand", (data: {command: string}) => {
console.log("PHONE got command - " + data.command);
})
```
The commands are the 2nd paramter in the `Button()` definition of the watch UI. This can be any string.
## Updating watch data
You can add variables to `Text()` elements by using a `$` variable and updating with the `updateWatchData` command:
```
Text("Show my $number")
```
This example will update `$number` when executed:
```typescript
var stateData = {
number: 0
}
async function counterIncrement() {
stateData.counter++
await Watch.updateWatchData({"data": convertValuesOfObjectToStringValues(stateData)})
}
```
# Persistance on the Watch
Capacitor Watch will persist the last UI you sent with `updateWatchUI()`. State from `updateWatchData()` is NOT preserved.