https://github.com/izzypt/drf-guide
Guide to learn and remember DRF concepts and technicals
https://github.com/izzypt/drf-guide
Last synced: 30 days ago
JSON representation
Guide to learn and remember DRF concepts and technicals
- Host: GitHub
- URL: https://github.com/izzypt/drf-guide
- Owner: izzypt
- License: mit
- Created: 2023-03-03T18:07:48.000Z (over 3 years ago)
- Default Branch: main
- Last Pushed: 2023-03-08T01:09:14.000Z (over 3 years ago)
- Last Synced: 2025-12-08T13:43:40.721Z (7 months ago)
- Language: Python
- Size: 239 KB
- Stars: 0
- Watchers: 1
- Forks: 0
- Open Issues: 0
-
Metadata Files:
- Readme: README.md
- License: LICENSE
Awesome Lists containing this project
README
# DRF-Guide
This repo will cover the following topics and concepts about Django and , specifically, DRF:
- Serializers
- serializers.Serializer
- serializers.ModelSerializer
- serializers.HyperlinkedModelSerializer
- Function Based View
- @api_view()
- Class Based View
- APIView
- Generics Views
- Mixins
- Concrete View Classes
- Viewsets and Routers
- Permissions
- IsAuthenticated
- IsAdminUser
- IsAuthenticatedOrReadOnly
- CustomPermissions
- Authentication
- Basic Authentication
- Token Authentication
- JWT Authentication
- Throttling
- AnonRateThrottle
- UserRateThrottle
- ScopedRateThrottle
- Custom Throttle
- Filtering
- Filter
- Search
- Ordering
- Pagination
- Page Number
- Limit Offset
- Cursor
- Automated API Testing
# Index By Topic
- [Installation](#install)
- [DRF Imtroduction](#drf_intro)
- [Creating JSON Response with vanilla Django](#response_vanilla_django)
# What we will build ?
In order to cover all those topics , we will build an API that will serve movie data , like an IMDB or WatchMate clone.
In order to use DRF , first we need to start a Django project. We can do it very simply, by following those steps:
1) Create a project folder for your app, let's call it ```DRF-Guide```
2) Create a virtual environment inside it , in order to keep our project packages isolated : ```python -m venv venv```
3) Activate virtual env by running ```.\venv\Scripts\activate``` or ```source venv/bin/activate``` if you are on Mac.
4) If the virtual env is installed and we run ```pip freeze``` we will be able to see that there are no packages installed in our virtualenv. So we will install everything from fresh.
5) So with a blank project and environment , let's install Django: ```pip install Django```.
# Starting project
1) Let's start our project inside the ```DRF-Guide```, running the command ```django-admin startproject IMDB```
2) Let's create a new app inside our project, to have our project's code dividide into modules : ```python manage.py startapp watchlist```
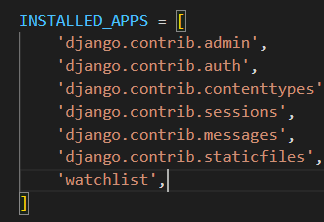
3) Add the newly create app in our ```settings.py``` file, in the ```INSTALLED_APPS```.
4) Let's apply our migrations in order to create the first tables in our project DB: ```python manage.py makemigrations``` and then ```python manage.py migrate```
5) Next , let's create our superuser in order to access the admin panel: ```python manage.py createsuperuser```.
6) You check everything works fine by acessing the /admin endpoint on your running server.
# Models and Migrations
1) Let's start by creating a simple model in our ```models.py```, inside our ```watchlist``` app:
```
class Movie(models.Model):
name = models.CharField(max_length=100)
description = models.CharField(max_length=255)
active = models.BooleanField(default=True)
def __str__(self):
return self.name
```
2) Run the migrations for the newly created model : ```python manage.py makemigrations``` and then ```python manage.py migrate```
3) In order to access our newly created model from the admin panel, we need to register it in the ```admin.py``` file
```
from django.contrib import admin
from .models import Movie
# Register your models here.
admin.site.register(Movie)
```
4) We are now able to add new movies from the admin panel.
Let's implement DRF into our project.
1) Start by installing it : ```pip install djangorestframework```.
2) Add ```rest_framework``` to your ```INSTALLED_APPS``` in ```settings.py```.
2 important concepts to keep about DRF:
- Serialization
- Deserialization
> Serialization is the process through which we transfor complex data types (like Model Objects) into Python Native DataType ( like dictionary) and then into JSON. Basically is an easier way of converting QuerySets , like I showed above, into JSON that we can send to the client.
> Deserialization is just the opposite. Getting information from the user and then transforming into complex data type like Model Objects.
# Serializers - GET Request
Let's rewrite the views that we have wrote in the previous chapter with Vanilla Django, but this time using serializers.
There are a couple of different types of serializers , but we will start using the most basic : ```serializers.Serializer```.
On a file called ```serializers.py```, we will add :
```
from rest_framework import serializers
class MovieSerializer(serializers.Serializer):
id = serializers.IntegerField(read_only=True)
name = serializers.CharField()
active = serializers.BooleanField()
```
Now that we have a serializer and we can automatically convert our Model's complex data type into JSON. Let's see how our views will change:
```
from watchlist.models import Movie
from watchlist.api.serializers import MovieSerializer
from rest_framework.response import Response
from rest_framework.decorators import api_view # <- This is the decorator that we need to use in function based views, it takes a list of acceptable methods for that view.
@api_view(['GET'])
def movie_list(request):
movies = Movie.objects.all()
serializer = MovieSerializer(movies, many=True)
return Response(serializer.data)
@api_view(['GET'])
def movie_detail(request, movie_id):
movie = Movie.objects.get(pk=movie_id)
serializer = MovieSerializer(movie)
return Response(serializer.data)
```
# Serializers - POST Request
If we receive a POST request, our serializers needs to handle those methods by implementing the function "create(validated_data)".
We also need to add the acceptable method to our ```@api_view()``` list.
So , if we what we are dealing with , is a POST request, we would have to make the following changes to the serializer:
```
from rest_framework import serializers
from watchlist.models import Movie
class MovieSerializer(serializers.Serializer):
id = serializers.IntegerField(read_only=True)
name = serializers.CharField()
description = serializers.CharField()
active = serializers.BooleanField()
def create(self, validated_data):
"""Create a new movie"""
return Movie.objects.create(**validated_data)
```
And we also would have to change the view logic to something like this :
```
from watchlist.models import Movie
from watchlist.api.serializers import MovieSerializer
from rest_framework.response import Response
from rest_framework.decorators import api_view
from rest_framework import status
@api_view(['GET', 'POST'])
def movie_list(request):
if request.method == 'GET':
movies = Movie.objects.all()
serializer = MovieSerializer(movies, many=True)
return Response(serializer.data)
if request.method == 'POST':
serializer = MovieSerializer(data=request.data)
if serializer.is_valid():
serializer.save()
return Response(serializer.data, status=status.HTTP_201_CREATED)
else:
return Response(serializer.errors, status=status.HTTP_400_BAD_REQUEST)
```
# Serializers - PUT Request
If it is a PUT request, we need to do the same thing.
First of all, add the PUT request to our list of aceptable methods in out ```@api_view()``` .
Second , we need to add the "update(instance, validated_data)" method to our ```MovieSerializer```.
This is our modified serializer :
```
from rest_framework import serializers
from watchlist.models import Movie
class MovieSerializer(serializers.Serializer):
id = serializers.IntegerField(read_only=True)
name = serializers.CharField()
description = serializers.CharField()
active = serializers.BooleanField()
def create(self, validated_data):
"""Create a new movie"""
return Movie.objects.create(**validated_data)
def update(self, instance, validated_data):
# instance carries the old values
# validated_data carries the new values
instance.name = validated_data.get('name', instance.name)
instance.description = validated_data.get('description', instance.description)
instance.active = validated_data.get('active', instance.active)
instance.save()
return instance
```
And this is our modified view :
```
@api_view(['GET', 'PUT'])
def movie_detail(request, movie_id):
if request.method == 'GET':
movie = Movie.objects.get(pk=movie_id)
serializer = MovieSerializer(movie)
return Response(serializer.data)
if request.method == 'PUT':
movie = Movie.objects.get(pk=movie_id)
serializer = MovieSerializer(movie, data=request.data)
if serializer.is_valid():
serializer.save()
return Response(serializer.data, status=status.HTTP_200_OK)
else:
return Response(serializer.errors, status=status.HTTP_400_BAD_REQUEST)
```
# Serializers - DELETE Request
To handle the DELETE method, take a look at the changes.
No changes required in the serializer, only change the view to :
```
@api_view(['GET', 'PUT', 'DELETE'])
def movie_detail(request, movie_id):
if request.method == 'GET':
movie = Movie.objects.get(pk=movie_id)
serializer = MovieSerializer(movie)
return Response(serializer.data)
if request.method == 'PUT':
movie = Movie.objects.get(pk=movie_id)
serializer = MovieSerializer(movie, data=request.data)
if serializer.is_valid():
serializer.save()
return Response(serializer.data, status=status.HTTP_200_OK)
else:
return Response(serializer.errors, status=status.HTTP_400_BAD_REQUEST)
if request.method == 'DELETE':
movie = Movie.objects.get(pk=movie_id)
movie.delete()
return Response(status=status.HTTP_204_NO_CONTENT)
```
# Status codes
You might have noticed in the examples above, that I have imported ```status``` from ```rest_framework```.
```status``` simply provides an easier and more readable way to write http codes. If you want to look more into in , follow this link.
It provides all the available codes and what they mean.
# APIView Class
DRF has 2 types of views :
- Function Based View (we used above with ```@api_view()```)
- Class Based Views (there are different types of class Based Views)
We have already seen a function base view approach, now we'll start with a class based view: ```APIView``` , importing it from ```rest_framework.views```.
With ```APIView``` , the incoming request is dispatched to an appropriate handler method such as .get() or .post().
Refactoring our previous code :
```
from watchlist.models import Movie
from watchlist.api.serializers import MovieSerializer
from rest_framework.response import Response
from rest_framework.views import APIView
from rest_framework import status
class MovieList(APIView):
def get(self, request, format=None):
movies = Movie.objects.all()
serializer = MovieSerializer(movies, many=True)
return Response(serializer.data)
def post(self, request, format=None):
serializer = MovieSerializer(data=request.data)
if serializer.is_valid():
serializer.save()
return Response(serializer.data, status=status.HTTP_201_CREATED)
else:
return Response(serializer.errors, status=status.HTTP_400_BAD_REQUEST)
class MovieDetail(APIView):
def get(self, request, pk):
movie = Movie.objects.get(pk=pk)
serializer = MovieSerializer(movie)
return Response(serializer.data)
def put(self, request, pk):
movie = Movie.objects.get(pk=pk)
serializer = MovieSerializer(movie, data=request.data)
if serializer.is_valid():
serializer.save()
return Response(serializer.data, status=status.HTTP_200_OK)
else:
return Response(serializer.errors, status=status.HTTP_400_BAD_REQUEST)
def delete(self, request, pk):
movie = Movie.objects.get(pk=pk)
movie.delete()
return Response(status=status.HTTP_204_NO_CONTENT)
```
So , as you can see we reused the entire logic, we just save some time but not haveing to identify the request method or the acceptable methods, since the class automatically does it for us.
# Serializers Validation
Serializers validation is used to validate the data submitted in a request. The purpose of a validator is to ensure that the data submitted in a request is valid and meets certain requirements or constraints before it is processed further.
There are 3 different types of validation we can add on our serializers:
- Field level validation
- Object level validation
- Validators
Let's take a look at each one...
## Field Level Validation
Field level validation consists on checking only a particular field of our serializers. According to the documentation:
> You can specify custom field-level validation by adding validate_ methods to your Serializer subclass.
Docs example :
```
from rest_framework import serializers
class BlogPostSerializer(serializers.Serializer):
title = serializers.CharField(max_length=100)
content = serializers.CharField()
def validate_title(self, value):
"""
Check that the blog post is about Django.
"""
if 'django' not in value.lower():
raise serializers.ValidationError("Blog post is not about Django")
return value
```
So, if we wanted to add some level validation to our ```MovieSerializer```, let's say the name , we would do something like this :
```
class MovieSerializer(serializers.Serializer):
id = serializers.IntegerField(read_only=True)
name = serializers.CharField()
description = serializers.CharField()
active = serializers.BooleanField()
def validate_name(self, value):
if len(value) < 3:
raise serializers.ValidationError("Name must be at least 3 characters long")
return value
```
## Object Level Validation
With object level validation , we are able to check multiple fields at once. According to the documentation :
> To do any other validation that requires access to multiple fields, add a method called ```validate()``` to your Serializer subclass. This method takes a single argument, which is a dictionary of field values. It should raise a serializers.ValidationError if necessary, or just return the validated values. For example:
```
from rest_framework import serializers
class EventSerializer(serializers.Serializer):
description = serializers.CharField(max_length=100)
start = serializers.DateTimeField()
finish = serializers.DateTimeField()
def validate(self, data):
"""
Check that start is before finish.
"""
if data['start'] > data['finish']:
raise serializers.ValidationError("finish must occur after start")
return data
```
So, if we wanted to add some Object level Validation to our ```MovieSerializer```, it would look something like this:
```
class MovieSerializer(serializers.Serializer):
id = serializers.IntegerField(read_only=True)
name = serializers.CharField()
description = serializers.CharField()
active = serializers.BooleanField()
def validate(self, data):
if data["name"] == data["description"]:
raise serializers.ValidationError("Title and description should be different")
else:
return data
```
## Validators
Official documentation says about validators :
> Individual fields on a serializer can include validators, by declaring them on the field instance, for example:
```
def multiple_of_ten(value):
if value % 10 != 0:
raise serializers.ValidationError('Not a multiple of ten')
class GameRecord(serializers.Serializer):
score = IntegerField(validators=[multiple_of_ten])
...
```
# Serializer fields Core Arguments
Each field in a serializer can take several core arguments that further define or constraint the data that the field can receive. For example :
```
from rest_framework import serializers
from myapp.models import MyModel
class MySerializer(serializers.Serializer):
my_field = serializers.CharField(
source='my_model_field',
max_length=100,
required=True,
help_text='Enter a value for my_field'
)
def create(self, validated_data):
return MyModel.objects.create(**validated_data)
def update(self, instance, validated_data):
instance.my_model_field = validated_data.get('my_field', instance.my_model_field)
instance.save()
return instance
```
Some of the most common core arguments for a serializer field , include :
- source
> Specifies the attribute or method on the model instance that should be used to populate the field. For example, source='my_model_field' would map the field to the my_model_field attribute on the model.
- read_only
> Specifies whether the field is read-only or not. If set to True, the field cannot be updated via the serializer.
- write_only
> Specifies whether the field is write-only or not. If set to True, the field cannot be retrieved via the serializer.
- required
> Specifies whether the field is required or not. If set to True, the field must be included in the input data.
- allow_null
> Specifies whether the field can be set to None or not.
- default
> Specifies the default value for the field if no value is provided in the input data.
- validators
> Specifies a list of validator functions to apply to the field value.
- error_messages
> Specifies a dictionary of error messages to use for different types of validation errors.
- help_text
> Specifies help text for the field that can be displayed in the API documentation.
- label
> Specifies a human-readable label for the field that can be displayed in the API documentation.
Click here to check the official docs on serializer field core arguments.
# Model Serializer
As stated above, there are other ways to write Serializers. One of them is extending ```serializer.ModelSerializer```.
```ModelSerializer``` is just like a regular ```Serializer```, except some work is already done for us, like :
- A set of default fields are automatically populated
- A set of default validators are automatically populated
- Default ```create()``` and ```update()``` implementations are already provided.
If the ModelSerializer doesn't generate the set of fields we need, we should declare the field explicitly on the class, or simply use a ```Serializer``` class.
So, if we want to implement ```ModelSerializer``` into our pre-existing code, we refactor the ```MovieSerializer``` to :
```
from rest_framework import serializers
from watchlist.models import Movie
class MovieSerializer(serializers.ModelSerializer):
class Meta:
model = Movie
fields = "__all__"
# Field level validation
def validate_name(self, value):
if len(value) < 3:
raise serializers.ValidationError("Name must be at least 3 characters long")
else:
return value
# Object level validation
def validate(self, data):
if data["name"] == data["description"]:
raise serializers.ValidationError("Title and description should be different")
else:
return data
```
So, as you can see , we didn't have to specify ```create()``` or ```update()``` and we didn't need to specify the serializer fields, since ModelSerializer is getting those from the model.
In order to change the fields that you want your serializer to send back , there are 2 ways you can do it:
1) By specifying which fields you want in a field list , something like : ```fields = ['id', 'name', 'description']```
2) By defining the fields you want to exclude , adding this field to your class ```Meta``` : ```exclude = ["active"]```
# Custom Serializer Fields
If we want to send back some field in our serializer that requires some type of calculation or that does not exist in our models.
Let's say we wanted to send back the length of the movie name. We can achieve that result by declaring a new type of field, a ```serializers.MethodField```.
This is the official docs description:
> SerializerMethodField is a read-only field. It gets its value by calling a method on the serializer class it is attached to. It can be used to add any sort of data to the serialized representation of your object.
Example :
```
class MovieSerializer(serializers.ModelSerializer):
len_name = serializers.SerializerMethodField()
class Meta:
model = Movie
exclude = ["active"]
def get_len_name(self, obj):
return len(obj.name)
```
So, basically there are 2 important steps to create a ```SerializerMethodField()```
- Declare the field and the name as we did with ```len_name = serializers.SerializerMethodField()``` inside your serializer.
- Define the mthod that will return the value for that field. It is important to name the method following the style : ```get_```
# Updating Models
In order to progress with our IMDB clone and touch on other topics , we need to change our models and create new ones. Let's work with those models from now on:
```
class StreamPlatorm(models.Model):
name = models.CharField(max_length=100)
about = models.CharField(max_length=100)
website = models.URLField(max_length=100)
def __str__(self):
return self.name
class WatchList(models.Model):
title = models.CharField(max_length=150)
storyline = models.CharField(max_length=150)
active = models.BooleanField(default=True)
created = models.DateTimeField(auto_now_add=True)
def __str__(self):
return self.title
```
I have also refactored the code to change from "Movie" to watchlist and added views and serializers for the new model ```StreamPlatform```
# Django Models Relationships
It is important to know the most basic relationships we can establish between Django models.
- One to One RelationShip
- One to Many
- Many to Many
Click here to check Django documentation
Let's also add a relationship to our current ```WatchList``` model :
```
class WatchList(models.Model):
(...)
platform = models.ForeignKey(StreamPlatorm, on_delete=models.CASCADE, related_name="watchlist")
(...)
```
Above we create a ```many-to-one``` relationship between WatchList and StreamPlatform, which means that each WatchList instance can be associated with only one StreamPlatform instance, but each StreamPlatform instance can be associated with many WatchList instances.
Now an explanation on what each parameter of the field means:
- ```StreamPlatform```: This is the model that the platform field is referring to.
- ```on_delete=models.CASCADE```: This parameter specifies what should happen to the WatchList instances if the StreamPlatform instance they are associated with is deleted. In this case, CASCADE means that if a StreamPlatform instance is deleted, all WatchList instances associated with it will also be deleted.
- ```related_name="watchlist"```: This parameter specifies the name of the reverse relation from StreamPlatform to WatchList. This means that each StreamPlatform instance will have a reverse relation to all associated WatchList instances, and the name of this relation will be "watchlist".
>Each WatchList instance represents a single movie or TV show, and each WatchList instance is associated with one StreamPlatform instance that represents the platform where that movie or TV show can be streamed. Multiple WatchList instances can be associated with the same StreamPlatform instance, because multiple movies or TV shows can be available on the same streaming platform.
# Nested Serializers
Our goal for this section is to have a field in our serializers ```StreamPlatformSerializer``` which displays all of the linked ```watchlist```'s for that platform.
We will do this by adding the following line to our ```StreamPlatformSerializer```:
```
class StreamPlatformSerializer(serializers.ModelSerializer):
watchlist = WatchListSerializer(many=True, read_only=True)
class Meta:
model = StreamPlatorm
fields = "__all__"
```
> Important note to keep is that the field name matches the ```related_name``` we defined in the ```WatchList``` model, because we are doing a reverse relation from StreamPlatform to WatchList.
In the current start, our ```watchlist``` field returns the entire watchlist object, just like it would return a normal a watchlist instance from the ```WatchListSerializer```. But what if we want to customize that return of ```watchlist``` ?
Well, instead of using ```WatchListSerializer``` as a return to our watchlist, we can use Relational fields, which I will discuss in the next section...
# Serializer Relations
Documentation official description:
> Relational fields are used to represent model relationships. They can be applied to ForeignKey, ManyToManyField and OneToOneField relationships, as well as to reverse relationships, and custom relationships such as GenericForeignKey.
### Inspecting Relationships
When using the ModelSerializer class, serializer fields and relationships will be automatically generated for you. Inspecting these automatically generated fields can be a useful tool for determining how to customize the relationship style.
To do so, open the Django shell, using python manage.py shell, then import the serializer class, instantiate it, and print the object representation…
```
>>> from myapp.serializers import AccountSerializer
>>> serializer = AccountSerializer()
>>> print(repr(serializer))
AccountSerializer():
id = IntegerField(label='ID', read_only=True)
name = CharField(allow_blank=True, max_length=100, required=False)
owner = PrimaryKeyRelatedField(queryset=User.objects.all())
```
### Example Models
Let's take the models and examples from the official docs :
```
class Album(models.Model):
album_name = models.CharField(max_length=100)
artist = models.CharField(max_length=100)
class Track(models.Model):
album = models.ForeignKey(Album, related_name='tracks', on_delete=models.CASCADE)
order = models.IntegerField()
title = models.CharField(max_length=100)
duration = models.IntegerField()
class Meta:
unique_together = ['album', 'order']
ordering = ['order']
def __str__(self):
return '%d: %s' % (self.order, self.title)
```
The ```unique_together``` field in Django's Meta class specifies that certain fields in a model should be unique together, meaning that the combination of values for those fields must be unique in the database.
Additionally, the ordering field in the Meta class specifies the default ordering for the Track model. In this case, it is set to order the tracks by their order field.
### StringRelatedField
> ```StringRelatedField``` may be used to represent the target of the relationship using its __str__ method.
For example, the following serializer:
```
class AlbumSerializer(serializers.ModelSerializer):
tracks = serializers.StringRelatedField(many=True)
class Meta:
model = Album
fields = ['album_name', 'artist', 'tracks']
```
Would serialize to the following representation:
```
{
'album_name': 'Things We Lost In The Fire',
'artist': 'Low',
'tracks': [
'1: Sunflower',
'2: Whitetail',
'3: Dinosaur Act',
...
]
}
```
This field is read only.
Arguments:
- many - If applied to a to-many relationship, you should set this argument to True.
### PrimaryKeyRelatedField
> ```PrimaryKeyRelatedField``` may be used to represent the target of the relationship using its primary key.
For example, the following serializer:
```
class AlbumSerializer(serializers.ModelSerializer):
tracks = serializers.PrimaryKeyRelatedField(many=True, read_only=True)
class Meta:
model = Album
fields = ['album_name', 'artist', 'tracks']
```
Would serialize to a representation like this:
```
{
'album_name': 'Undun',
'artist': 'The Roots',
'tracks': [
89,
90,
91,
...
]
}
```
By default this field is read-write, although you can change this behavior using the read_only flag.
Arguments:
- queryset - The queryset used for model instance lookups when validating the field input. Relationships must either set a queryset explicitly, or set read_only=True.
- many - If applied to a to-many relationship, you should set this argument to True.
- allow_null - If set to True, the field will accept values of None or the empty string for nullable relationships. Defaults to False.
- pk_field - Set to a field to control serialization/deserialization of the primary key's value. For example, pk_field=UUIDField(format='hex') would serialize a UUID primary key into its compact hex representation.
### SlugRelatedField
> ```SlugRelatedField``` may be used to represent the target of the relationship using a field on the target.
For example, the following serializer:
```
class AlbumSerializer(serializers.ModelSerializer):
tracks = serializers.SlugRelatedField(
many=True,
read_only=True,
slug_field='title'
)
class Meta:
model = Album
fields = ['album_name', 'artist', 'tracks']
```
Would serialize to a representation like this:
```
{
'album_name': 'Dear John',
'artist': 'Loney Dear',
'tracks': [
'Airport Surroundings',
'Everything Turns to You',
'I Was Only Going Out',
...
]
}
```
By default this field is read-write, although you can change this behavior using the read_only flag.
When using SlugRelatedField as a read-write field, you will normally want to ensure that the slug field corresponds to a model field with unique=True.
Arguments:
- slug_field - The field on the target that should be used to represent it. This should be a field that uniquely identifies any given instance. For example, username. required
- queryset - The queryset used for model instance lookups when validating the field input. Relationships must either set a queryset explicitly, or set read_only=True.
- many - If applied to a to-many relationship, you should set this argument to True.
- allow_null - If set to True, the field will accept values of None or the empty string for nullable relationships. Defaults to False.
### Custom relational fields
- To implement a custom relational field, you should override RelatedField, and implement the ```.to_representation(self, value)``` method.
- This method takes the target of the field as the value argument, and should return the representation that should be used to serialize the target. The value argument will typically be a model instance.
- If you want to implement a read-write relational field, you must also implement the ```.to_internal_value(self, data)``` method.
To provide a dynamic queryset based on the context, you can also override ```.get_queryset(self)``` instead of specifying .queryset on the class or when initializing the field.
For example:
We could define a relational field to serialize a track to a custom string representation, using its ordering, title, and duration:
```
import time
class TrackListingField(serializers.RelatedField):
def to_representation(self, value):
duration = time.strftime('%M:%S', time.gmtime(value.duration))
return 'Track %d: %s (%s)' % (value.order, value.name, duration)
class AlbumSerializer(serializers.ModelSerializer):
tracks = TrackListingField(many=True)
class Meta:
model = Album
fields = ['album_name', 'artist', 'tracks']
```
This custom field would then serialize to the following representation:
```
{
'album_name': 'Sometimes I Wish We Were an Eagle',
'artist': 'Bill Callahan',
'tracks': [
'Track 1: Jim Cain (04:39)',
'Track 2: Eid Ma Clack Shaw (04:19)',
'Track 3: The Wind and the Dove (04:34)',
...
]
}
```
# The N+1 Problem in the context of Django and DRF
>The N+1 Problem is a common performance issue that arises when using an ORM (Object-Relational Mapping) tool like Django's ORM. It occurs when you make N database queries to fetch N objects, where each query fetches data for a single object. This can lead to a significant increase in the number of queries executed by your application and can slow down its performance.
- The N+1 Problem often arises when serializing data that involves relationships between models.
- For example, let's say you have two models in your Django application, "Author" and "Book", with a one-to-many relationship between them. If you want to serialize a list of books with their associated authors, you might end up with an N+1 Problem if you use a serializer that queries the author for each book in the list. This is because the serializer would have to execute one query to fetch the list of books, and then N additional queries to fetch the associated authors.
- To avoid the N+1 Problem in this scenario, you can use the ```select_related``` and ```prefetch_related``` methods in your queryset to tell Django to fetch the related objects in a more efficient way.
- ```select_related``` is used to fetch data from a related model in a single query, while ```prefetch_related``` is used to fetch data from a related model in a separate query and cache the results. By using these methods, you can reduce the number of queries executed by your application and improve its performance.
# Identifying the N+1 Problem
- One way is to use Django Debug Toolbar :
- It's a third-party package that provides a set of panels displaying various debug information about the current request/response cycle, including the number of database queries executed and the time spent on each query. The SQL panel in the toolbar is especially useful for identifying N+1 problems, as it shows the SQL queries executed by Django's ORM and can help you pinpoint which queries are causing performance issues.
- Another way is to use the ```django.db.connection.queries``` attribute :
- This attribute is a list of all the SQL queries executed during the request/response cycle, and you can print it out in your view or middleware to see the queries being executed. By inspecting this list, you can look for patterns that indicate an N+1 problem, such as multiple queries being executed for the same model or related model.
# Generic Views - Docs
Documentation description :
> The generic views provided by REST framework allow you to quickly build API views that map closely to your database models.
> If the generic views don't suit the needs of your API, you can drop down to using the regular APIView class, or reuse the mixins and base classes used by the generic views to compose your own set of reusable generic views.
### GenericAPIView
Base class for all other generic views.
This class extends REST framework's APIView class, adding commonly required behavior for standard list and detail views.
Each of the concrete generic views provided is built by combining GenericAPIView, with one or more mixin classes.
```
class GenericAPIView(views.APIView):
# You'll need to either set these attributes,
# or override `get_queryset()`/`get_serializer_class()`.
# If you are overriding a view method, it is important that you call
# `get_queryset()` instead of accessing the `queryset` property directly,
# as `queryset` will get evaluated only once, and those results are cached
# for all subsequent requests.
queryset = None
serializer_class = None
# If you want to use object lookups other than pk, set 'lookup_field'.
# For more complex lookup requirements override `get_object()`.
lookup_field = 'pk'
lookup_url_kwarg = None
# The filter backend classes to use for queryset filtering
filter_backends = api_settings.DEFAULT_FILTER_BACKENDS
# The style to use for queryset pagination.
pagination_class = api_settings.DEFAULT_PAGINATION_CLASS
```
### Attributes
Basic settings:
- ```queryset```
- ```serializer_class```
- ```lookup_field```
- ```lookup_url_kwarg```
Pagination:
- ```pagination_class``` : The pagination class that should be used when paginating list results. Defaults to the same value as the DEFAULT_PAGINATION_CLASS setting, which is 'rest_framework.pagination.PageNumberPagination'. Setting pagination_class=None will disable pagination on this view.
Filtering:
- ```filter_backends``` : A list of filter backend classes that should be used for filtering the queryset. Defaults to the same value as the DEFAULT_FILTER_BACKENDS setting.
### Methods
- ```get_queryset(self)```
> Returns the queryset that should be used for list views, and that should be used as the base for lookups in detail views. Defaults to returning the queryset specified by the queryset attribute.
This method should always be used rather than accessing self.queryset directly, as self.queryset gets evaluated only once, and those results are cached for all subsequent requests.
For example:
```
def get_queryset(self):
user = self.request.user
return user.accounts.all()
```
- ```get_object(self)```
> Returns an object instance that should be used for detail views. Defaults to using the lookup_field parameter to filter the base queryset.
May be overridden to provide more complex behavior, such as object lookups based on more than one URL kwarg.
For example:
```
def get_object(self):
queryset = self.get_queryset()
filter = {}
for field in self.multiple_lookup_fields:
filter[field] = self.kwargs[field]
obj = get_object_or_404(queryset, **filter)
self.check_object_permissions(self.request, obj)
return obj
```
# Mixins - Docs
> The mixin classes provide the actions that are used to provide the basic view behavior. Note that the mixin classes provide action methods rather than defining the handler methods, such as .get() and .post(), directly. This allows for more flexible composition of behavior.
The mixin classes can be imported from ```rest_framework.mixins```. Each mixin provides a method/action that implements some type of common functionality.
Mixins list :
- ListModelMixin
> Provides a ```.create(request, *args, **kwargs)``` method, that implements creating and saving a new model instance.
- CreateModelMixin
> Provides a ```.list(request, *args, **kwargs)``` method, that implements listing a queryset.
- RetrieveModelMixin
> Provides a ```.retrieve(request, *args, **kwargs)``` method, that implements returning an existing model instance in a response.
- UpdateModelMixin
> Provides a ```.update(request, *args, **kwargs)``` method, that implements updating and saving an existing model instance.
- DestroyModelMixin
> Provides a ```destroy(request, *args, **kwargs)``` method, that implements deletion of an existing model instance.
These mixins are designed to be used together with generics.GenericAPIView to provide common functionality that you can use across multiple views. By combining these mixins with GenericAPIView and your own custom code, you can create powerful and flexible class-based views in DRF.
# Applying Generics and Mixins to our project
Taking into account the previous topics, let's write 2 class that utilize the ```generics.GenericAPIView``` and some mixins.
# Concrete View Classes - Docs
>The following classes are the concrete generic views. If you're using generic views this is normally the level you'll be working at unless you need heavily customized behavior.
The view classes can be imported from ```rest_framework.generics```.
- CreateAPIView -> Used for create-only endpoints.
- ListAPIView -> Used for read-only endpoints to represent a collection of model instances.
- RetrieveAPIView -> Used for read-only endpoints to represent a single model instance.
- DestroyAPIView -> Used for delete-only endpoints for a single model instance.
- UpdateAPIView -> Used for update-only endpoints for a single model instance.
- ListCreateAPIView -> Used for read-write endpoints to represent a collection of model instances.
- RetrieveUpdateAPIView -> Used for read or update endpoints to represent a single model instance.
- RetrieveDestroyAPIView -> Used for read or delete endpoints to represent a single model instance.
- RetrieveUpdateDestroyAPIView -> Used for read-write-delete endpoints to represent a single model instance.