https://github.com/james01/CardNavigation
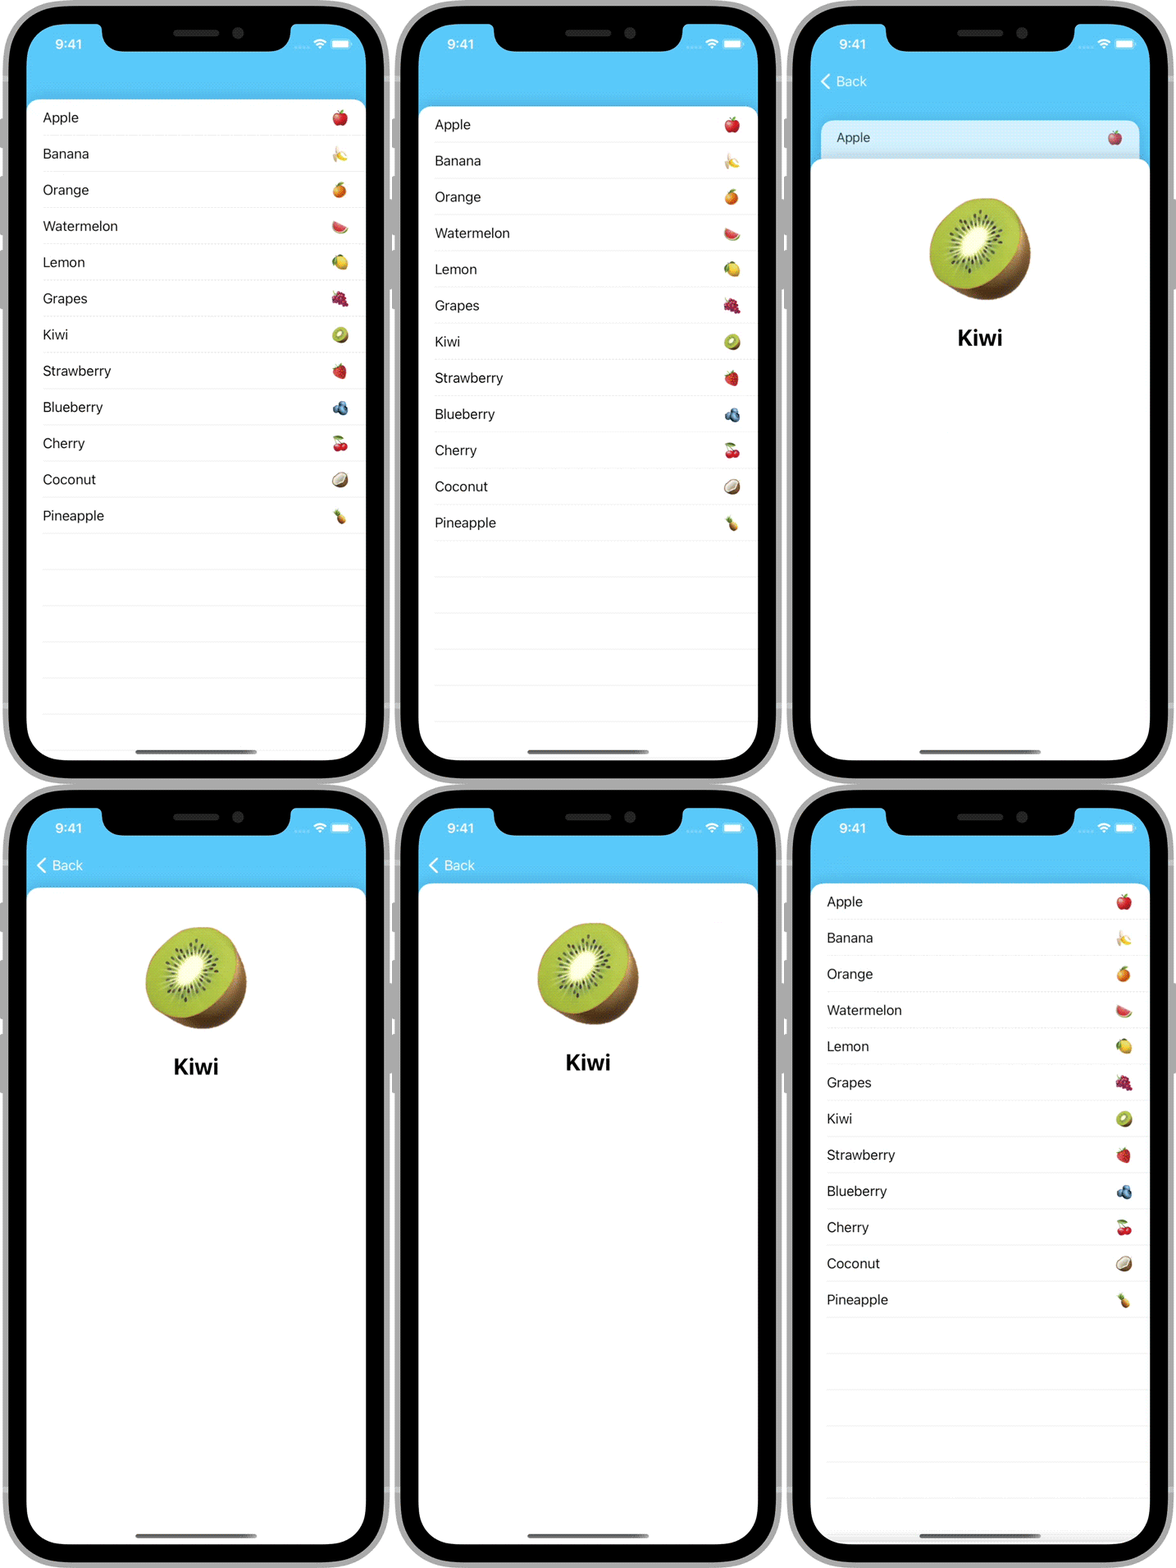
A navigation controller that displays its view controllers as an interactive stack of cards.
https://github.com/james01/CardNavigation
card-appearance cards cocoapods interactive interruptible ios navigation navigation-controller swift transition uikit
Last synced: 11 months ago
JSON representation
A navigation controller that displays its view controllers as an interactive stack of cards.
- Host: GitHub
- URL: https://github.com/james01/CardNavigation
- Owner: james01
- License: mit
- Created: 2020-12-25T05:13:17.000Z (about 5 years ago)
- Default Branch: main
- Last Pushed: 2021-04-19T04:32:59.000Z (almost 5 years ago)
- Last Synced: 2025-03-16T13:01:46.790Z (11 months ago)
- Topics: card-appearance, cards, cocoapods, interactive, interruptible, ios, navigation, navigation-controller, swift, transition, uikit
- Language: Swift
- Homepage:
- Size: 1.31 MB
- Stars: 48
- Watchers: 3
- Forks: 4
- Open Issues: 0
-
Metadata Files:
- Readme: README.md
- License: LICENSE
Awesome Lists containing this project
- fucking-awesome-swift - CardNavigation - A navigation controller that displays its view controllers as an interactive stack of cards. (Libs / UI)
- awesome-swift - CardNavigation - A navigation controller that displays its view controllers as an interactive stack of cards. ` 📝 2 months ago` (UI [🔝](#readme))
- awesome-swift - CardNavigation - A navigation controller that displays its view controllers as an interactive stack of cards. (Libs / UI)
README

# CardNavigation
[](https://cocoapods.org/pods/CardNavigation)

The easiest way to turn a navigation controller into an interactive stack of cards.
## Highlights
- ✅ Fully interactive and interruptible
- ✅ Works seamlessly with scroll views
- ✅ Supports changes in orientation
- ✅ Can be used with or without storyboards
- ✅ Written entirely in Swift using standard UIKit components
## Example

## Installation
### CocoaPods
To install CardNavigation using [CocoaPods](https://cocoapods.org), add the following line to your `Podfile`:
```ruby
pod 'CardNavigation', '~> 1.1'
```
### Swift Package Manager
To install CardNavigation using the [Swift Package Manager](https://swift.org/package-manager/), add the following value to your `Package.swift`:
```swift
dependencies: [
.package(url: "https://github.com/james01/CardNavigation.git", .upToNextMajor(from: "1.1.0"))
]
```
## Usage
### Getting Started
CardNavigation consists of a single class: `CardNavigationController`. It behaves like a standard `UINavigationController`.
At the top of the file where you'd like to use a `CardNavigationController`, import `CardNavigation`.
```swift
import CardNavigation
```
Create an instance of `CardNavigationController` the way you would a regular `UINavigationController`.
```swift
let navController = CardNavigationController(rootViewController: SomeViewController())
```
When you push a view controller, it will automatically be displayed as an interactive card.
```swift
navController.pushViewController(AnotherViewController(), animated: true)
```
### Background Color
The `CardNavigationController`'s `navigationBar` is transparent by default. This allows the controller's background color to show through.
You may want to change the background color to reflect the theme of your app.
```swift
navController.view.backgroundColor = .systemTeal
```
### Card Appearance
To change the card appearance, create a custom view class.
```swift
import UIKit
class MyCardBackgroundView: UIView {
override init(frame: CGRect) {
super.init(frame: frame)
backgroundColor = .white
layer.cornerRadius = 32
layer.maskedCorners = [.layerMinXMinYCorner, .layerMaxXMinYCorner]
layer.cornerCurve = .continuous
layer.borderColor = UIColor.black.cgColor
layer.borderWidth = 4
}
required init?(coder: NSCoder) {
fatalError("init(coder:) has not been implemented")
}
}
```
Then, create a subclass of `CardNavigationController` and override the `cardBackgroundViewClass` property to return your custom class.
```swift
import UIKit
import CardNavigation
class MyCardNavigationController: CardNavigationController {
override var cardBackgroundViewClass: UIView.Type {
return MyCardBackgroundView.self
}
}
```
## Author
James Randolph ([@jamesrandolph01](https://twitter.com/jamesrandolph01))
## License
CardNavigation is released under the MIT license. See [LICENSE](LICENSE) for details.