https://github.com/jason-fox/fox.jason.pretty-dita
DITA prettifier plug-in which formats DITA XML in an aesthetically pleasing manner
https://github.com/jason-fox/fox.jason.pretty-dita
dita dita-ot dita-ot-plugin formatter prettifier
Last synced: over 1 year ago
JSON representation
DITA prettifier plug-in which formats DITA XML in an aesthetically pleasing manner
- Host: GitHub
- URL: https://github.com/jason-fox/fox.jason.pretty-dita
- Owner: jason-fox
- License: apache-2.0
- Created: 2019-03-11T13:57:17.000Z (over 7 years ago)
- Default Branch: master
- Last Pushed: 2024-02-18T07:40:01.000Z (over 2 years ago)
- Last Synced: 2025-02-04T13:27:24.794Z (over 1 year ago)
- Topics: dita, dita-ot, dita-ot-plugin, formatter, prettifier
- Language: Java
- Homepage: https://jason-fox.github.io/dita-ot-plugins/pretty-dita
- Size: 446 KB
- Stars: 1
- Watchers: 1
- Forks: 0
- Open Issues: 0
-
Metadata Files:
- Readme: README.md
- License: LICENSE
Awesome Lists containing this project
README
# Pretty DITA for DITA-OT [ ](https://pretty-dita-ot.rtfd.io/)
[](http://www.apache.org/licenses/LICENSE-2.0)
[](http://www.dita-ot.org/4.2)
[](https://github.com/jason-fox/fox.jason.pretty-dita/actions?query=workflow%3ACI)
[](https://coveralls.io/github/jason-fox/fox.jason.pretty-dita?branch=master)
[](https://sonarcloud.io/dashboard?id=fox.jason.pretty-dita)
This is a DITA prettifier [DITA-OT Plug-in](https://www.dita-ot.org/plugins) which formats DITA XML in an aesthetically
pleasing manner. `` elements, `` elements, `
` elements etc are regularly indented so the raw DITA XML
files can be scanned by humans:
### Unformatted DITA
A typical DITA file can contain long lines, missing carriage returns and un-aligned elements:
```xml
Basic usage
You will need to include the prism.css and prism.js files you downloaded in your page. Example:
<!DOCTYPE html>
<html>
<head>
...
<link href="themes/prism.css" rel="stylesheet" />
></head>
<body>
...
<script src="prism.js"></script>
</body>
</html>
Prism does its best to encourage good authoring practices. Therefore,it only works with <code> elements, since marking upcode without a <code> element is semantically invalid.According to the HTML5 spec, the recommended way to define a code language is a language-xxxx class, which is what Prism uses. Alternatively, Prism also supports a shorter version: lang-xxxx.
To make things easier however, Prism assumes that this language definition is inherited. Therefore, if multiple <code> elements have the same language, you can add the language-xxxx class on one of their common ancestors. This way, you can also define a document-wide default language, by adding a language-xxxx class on the <body> or <html> element.
If you want to opt-out of highlighting for a <code> element that is a descendant of an element with a declared code language, you can add the class language-none to it (or any non-existing language, really).
The recommended way to mark up a code block (both for semantics and for Prism) is a <pre> element with a <code> element inside, like so:
<pre><code class="language-css">p { color: red }</code></pre>
If you use that pattern, the <pre> will automatically get the language-xxxx class (if it doesn’t already have it) and will be styled as a code block.
If you want to prevent any elements from being automatically highlighted, you can use the attribute data-manual on the <script> element you used for prism and use the API. Example:
Usage with Webpack, Browserify, & Other BundlersIf you want to use Prism with a bundler, install Prism with npm:
$ npm install prismjsYou can then import into your bundle
import Prism from 'prismjs';To make it easy to configure your Prism instance with only thelanguages and plugins you need, use the babel plugin, babel-plugin-prismjs. This will allow you to load the minimum number of languages and plugins to satisfy your needs. See that plugin's documentation for configuration details
```
### Formatted DITA
After running `pretty-dita` the same file will have all its elements aligned, each block element on a new line and text
should not overrun the side of a typical view screen (approx 120 characters)
```xml
Basic usage
You will need to include the prism.css and prism.js
files you downloaded in your page. Example:
<!DOCTYPE html>
<html>
<head>
...
<link href="themes/prism.css" rel="stylesheet" />
></head>
<body>
...
<script src="prism.js"></script>
</body>
</html>
Prism does its best to encourage good authoring practices. Therefore,it only
works with <code> elements, since marking upcode
without a <code> element is semantically invalid.According
to the HTML5 spec, the recommended way to define a code language is a language-xxxx
class, which is what Prism uses. Alternatively, Prism also supports a shorter version: lang-xxxx.
To make things easier however, Prism assumes that this language definition is
inherited. Therefore, if multiple <code> elements have
the same language, you can add the language-xxxx class on one
of their common ancestors. This way, you can also define a document-wide
default language, by adding a language-xxxx class on the <body>
or <html> element.
If you want to opt-out of highlighting for a <code>
element that is a descendant of an element with a declared code language, you
can add the class language-none to it (or any non-existing
language, really).
The recommended
way to mark up a code block (both for semantics and for Prism) is a <pre>
element with a <code> element inside, like so:
<pre><code class="language-css">p { color: red }</code></pre>
If you use that pattern, the <pre> will automatically get
the language-xxxx class (if it doesn’t already have it) and
will be styled as a code block.
If you want to prevent any elements from being automatically highlighted, you
can use the attribute data-manual on the <script>
element you used for prism and use the API. Example:
Usage with Webpack, Browserify, & Other Bundlers
If you want to use Prism with a bundler, install Prism with npm:
$ npm install prismjs
You can then import into your bundle
import Prism from 'prismjs';
To make it easy to configure your Prism instance with only thelanguages and
plugins you need, use the babel plugin, babel-plugin-prismjs.
This will allow you to load the minimum number of languages and plugins to
satisfy your needs. See that plugin's documentation for configuration details
```
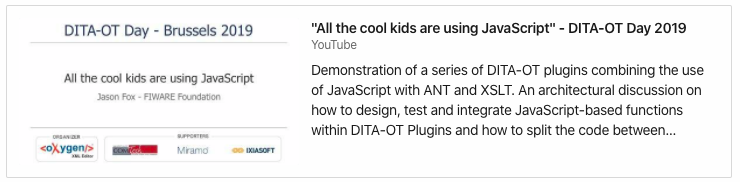
:arrow_forward: [Video from DITA-OT Day 2019](https://youtu.be/vobY_ha5nd0)
[](https://youtu.be/vobY_ha5nd0)
Table of Contents
- [Install](#install)
- [Installing DITA-OT](#installing-dita-ot)
- [Installing the Plug-in](#installing-the-plug-in)
- [Usage](#usage)
- [Prettifying DITA files for a document](#prettifying-dita-files-for-a-document)
- [Prettifying a single DITA file](#prettifying-a-single-dita-file)
- [Parameter Reference](#parameter-reference)
- [Ignoring DITA files](#ignoring-dita-files)
- [Formatting Rules](#formatting-rules)
- [Basic Block Elements](#basic-block-elements)
- [Indented Block Elements](#indented-block-elements)
- [Inline Elements](#inline-elements)
- [Text Elements](#text-elements)
- [Whitespace sensitive elements](#whitespace-sensitive-elements)
- [Contribute](#contribute)
- [License](#license)
## Install
The Pretty DITA for DITA-OT has been tested against [DITA-OT 4.x](http://www.dita-ot.org/download). It is recommended
that you upgrade to the latest version.
### Installing DITA-OT

The Pretty DITA for DITA-OT is a plug-in for the DITA Open Toolkit.
- Full installation instructions for downloading DITA-OT can be found
[here](https://www.dita-ot.org/4.0/topics/installing-client.html).
1. Download the `dita-ot-4.2.zip` package from the project website at
[dita-ot.org/download](https://www.dita-ot.org/download)
2. Extract the contents of the package to the directory where you want to install DITA-OT.
3. **Optional**: Add the absolute path for the `bin` directory to the _PATH_ system variable. This defines the
necessary environment variable to run the `dita` command from the command line.
```console
curl -LO https://github.com/dita-ot/dita-ot/releases/download/4.2/dita-ot-4.2.zip
unzip -q dita-ot-4.2.zip
rm dita-ot-4.2.zip
```
### Installing the Plug-in
- Run the plug-in installation command:
```console
dita install https://github.com/jason-fox/fox.jason.pretty-dita/archive/master.zip
```
The `dita` command line tool requires no additional configuration.
## Usage
Like any other transform, when invoked directly, the prettier requires an input document
### Prettifying DITA files for a document
To prettify DITA files for a document, use the `pretty-dita` transform, set the `--input` parameter to point to a
`*.ditamap` file:
```console
PATH_TO_DITA_OT/bin/dita -f pretty-dita -i document.ditamap
```
All `*.dita` and `*.ditamap` files **under that directory** will be updated in place.
### Prettifying DITA files under a directory
To prettify DITA files within a directory, use the `pretty-dita` transform, set the `--input` parameter to point to the
directory :
```console
PATH_TO_DITA_OT/bin/dita -f pretty-dita -i /path-to-directory
```
All `*.dita` and `*.ditamap` files **under that directory** will be updated in place.
### Prettifying a single DITA file
Alternatively, to prettify a single DITA file, set the `--input` parameter to point to a `*.dita` file:
```console
PATH_TO_DITA_OT/bin/dita -f pretty-dita -i topic.dita
```
The specified file will be updated in place.
### Parameter Reference
- `args.indent` - How many characters to indent (default `4`)
- `args.style` - Whether to indent using tabs or spaces (default `spaces`)
- `args.print-width` - Specify the line length that the printer will wrap on (default `80`)
- `args.require-pragma` - Restrict the plug-in to only format files that contain a special comment, called a pragma,
at the top of the file (default `false`)
This is very useful when gradually transitioning large, unformatted codebases to pretty-dita.
For example, a file containing either of the following comments will be formatted when `args.require-pragma` is
supplied:
```xml
```
```xml
```
- `args.insert-pragma` - Insert a special `@format` marker at the top of files specifying that the file has been
formatted with the plugin (default `false`)
### Ignoring DITA files
The prettifier will ignore any DITA file containing a comment starting `prettier-ignore` - the file will not be updated.
```xml
...
Basic usage
This file really doesn't need formatting
We want it to look this way.
This will also be left alone.
This will be left as well
```
## Formatting Rules
The pretty-dita DITA-OT Plug-in is an **opinionated** code formatter, DITA files are formatted to according to a
well-defined set of rules.
### Basic Block Elements
By default all DITA elements (not listed in the categories below) are indented one level further than the containing
DITA element
#### Example
```xml
Basic usage
...etc
```
### Indented Block Elements
The following elements frequently contain a large body of text within them. The opening and closing tags are therefore
always placed on a separate line before displaying the text found within them:
- Topic elements: ``, ``
- Body elements: `
`, `
#### Example
```xml
-
This is an item in an unordered list.
-
To separate it from other items in the list, the formatter puts a bullet beside it.
-
The following paragraph, contained in the list item element, is part of the list
item which contains it.
This is the contained paragraph.
-
This is the last list item in our unordered list.
```
### Inline Elements
The following elements are treated as inline elements, they do not warrant an additional line and are kept within the
surrounding text
- Body elements: ``, ``, ``, ``, ``, ``, ``, ``, ``, ``, ``, ``,
``, ``
- Programming elements: ``, ``
- Typographic elements: ``, ``, ``, ``, ``, ``
- Software elements: ``, ``, ``, ``, ``, ``, ``
- Userinteface elements: ``, ``, ``
- XML Mention Domain: ``, ``, ``, ``, ``, ``, ``
#### Example
```xml
STOP! This is very important! Unplug the unit before placing the
metal screwdriver against the terminal screw.
```
### Text Elements
Text elements on a single line are kept within the containing element Text element on multiple lines are indented one
level further than the surrounding text. Long lines of text are truncated to approximately 80 characters length by
default before adding a carriage return. Carriage returns are usually placed so as not to split inline elements, but
this is sometimes not feasable within the line limits, so a line break may occur before an inline attribute.
#### Example
```xml
The recommended
way to mark up a code block (both for semantics and for Prism) is a <pre>
element with a <code> element inside, like so:
```
### Whitespace sensitive elements
The following elements are whitespace sensitive and require special processing:
- ``, ``, ``, `
`, ``The opening tag of a `` is indented normally, the text within a `` (if any) is not indented
```xml
Basic usage
You will need to include the prism.css and prism.js
files you downloaded in your page. Example:
<!DOCTYPE html>
<html>
<head>
...
<link href="themes/prism.css" rel="stylesheet" />
></head>
<body>
...
<script src="prism.js"></script>
</body>
</html>
...etc
````` elements containing `` elements are indented as shown:
```xml
```
Other white-space sensitive elements such as `` are supported in a similar manner. If processing is found to be
incorrect due to embedded elements, it is suggested that the author uses the `pretty-ignore` directive to maintain
whitespace.## Contribute
PRs accepted.
## License
[Apache 2.0](LICENSE) © 2019 - 2024 Jason Fox