https://github.com/jenkinsci/casdoor-auth-plugin
Jenkins authentication / SSO plugin based on Casdoor
https://github.com/jenkinsci/casdoor-auth-plugin
auth cas casdoor jenkins oauth oidc plugin saml sso
Last synced: 9 months ago
JSON representation
Jenkins authentication / SSO plugin based on Casdoor
- Host: GitHub
- URL: https://github.com/jenkinsci/casdoor-auth-plugin
- Owner: jenkinsci
- License: apache-2.0
- Created: 2022-10-26T19:50:42.000Z (over 3 years ago)
- Default Branch: master
- Last Pushed: 2025-02-14T07:30:18.000Z (over 1 year ago)
- Last Synced: 2025-02-14T08:29:42.382Z (over 1 year ago)
- Topics: auth, cas, casdoor, jenkins, oauth, oidc, plugin, saml, sso
- Language: Java
- Homepage: https://plugins.jenkins.io/casdoor-auth
- Size: 33.2 KB
- Stars: 2
- Watchers: 3
- Forks: 3
- Open Issues: 4
-
Metadata Files:
- Readme: README.md
- License: LICENSE
Awesome Lists containing this project
README
# jenkins-casdoor-auth
## About
This plugin incorporates SSO in [Jenkins](https://jenkins.io) with [Casdoor](https://casdoor.org/)
## Installation
TODO
## Usage
You can refer to [Casdoor Official Doc](https://casdoor.org/docs/integration/java/jenkins-plugin/).
The following are some of the names in the configuration:
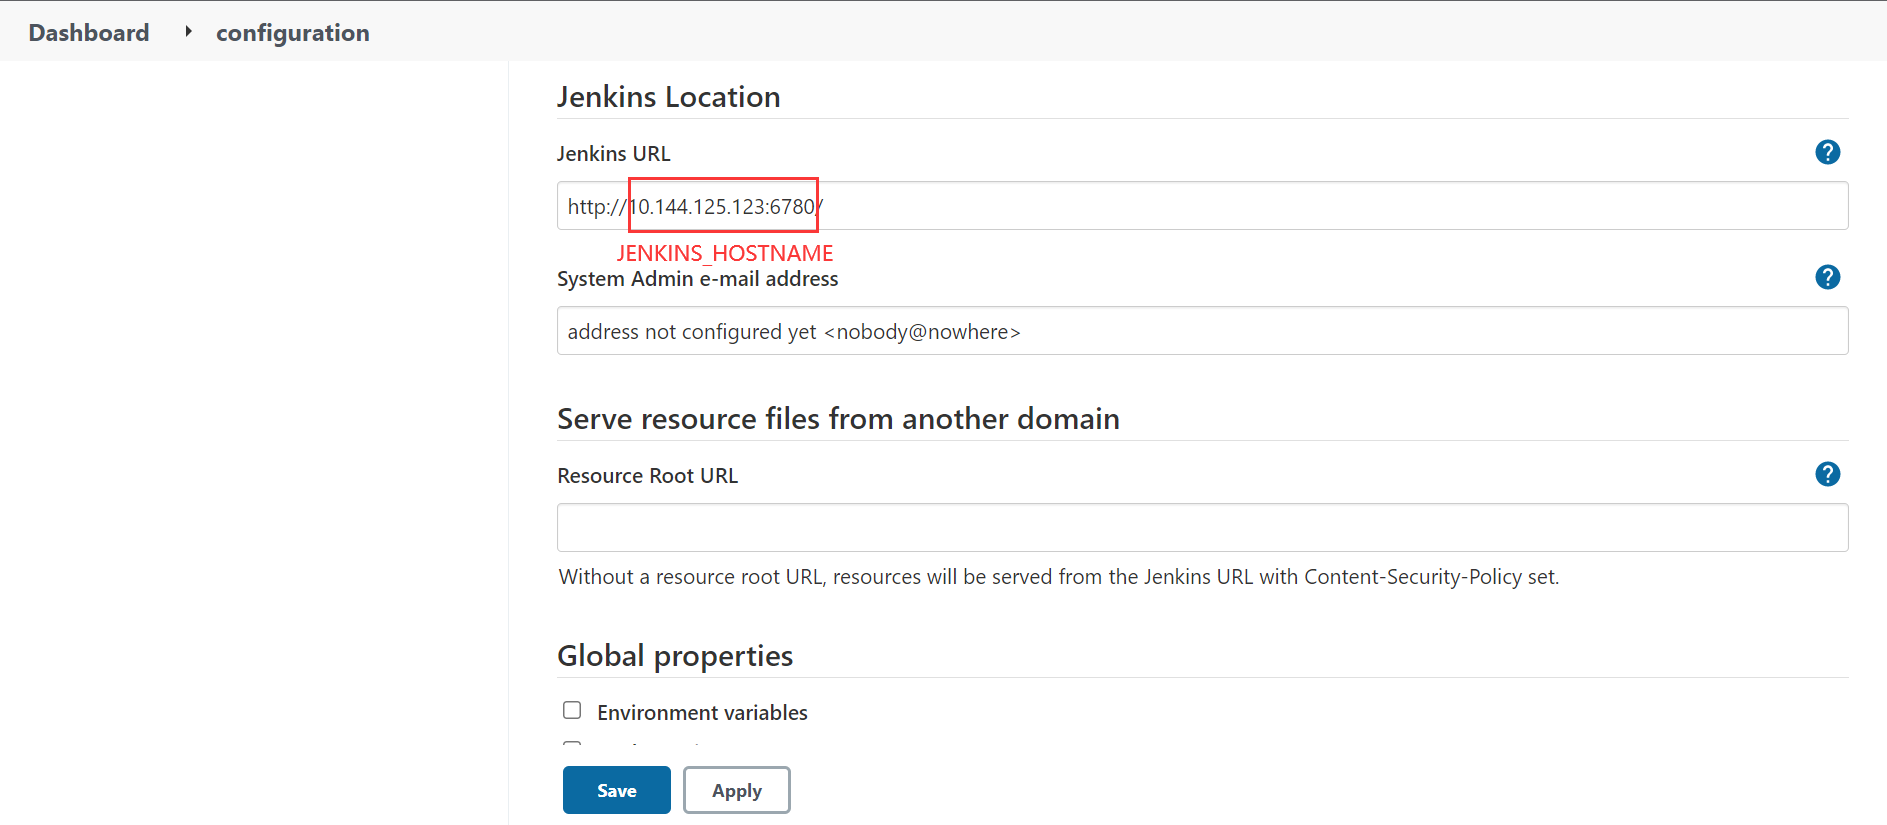
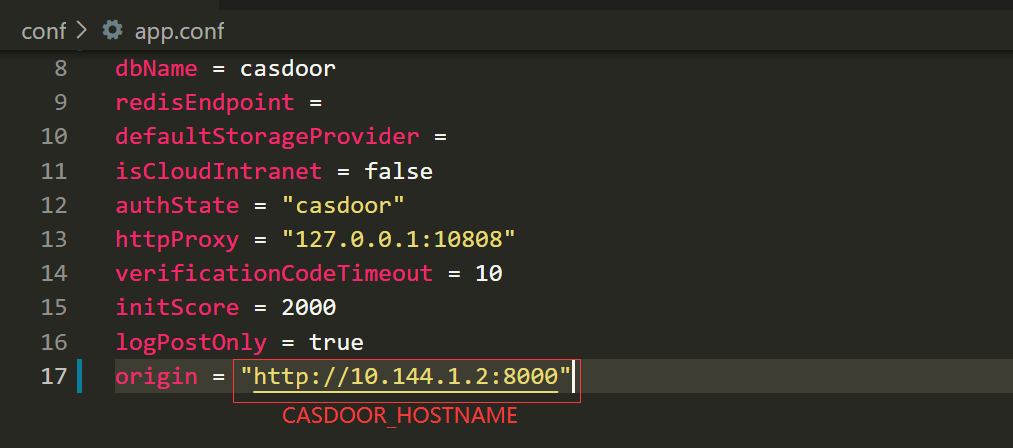
`CASDOOR_HOSTNAME`: Domain name or IP where Casdoor server is deployed.
`JENKINS_HOSTNAME`: Domain name or IP where Jenkins is deployed.
### Step1. Deploy Casdoor and Jenkins
Firstly, the [Casdoor](https://casdoor.org/docs/basic/server-installation) and [Jenkins](https://www.jenkins.io/doc/book/installing/) should be deployed.
After a successful deployment, you need to ensure:
1. Set Jenkins URL(Manage Jenkins -> Configure System -> Jenkins Location) to `JENKINS_HOSTNAME`.
2. Casdoor can be logged in and used normally.
3. Set Casdoor's `origin` value (conf/app.conf) to `CASDOOR_HOSTNAME`.
### Step2. Configure Casdoor application
1. Create or use an existing Casdoor application.
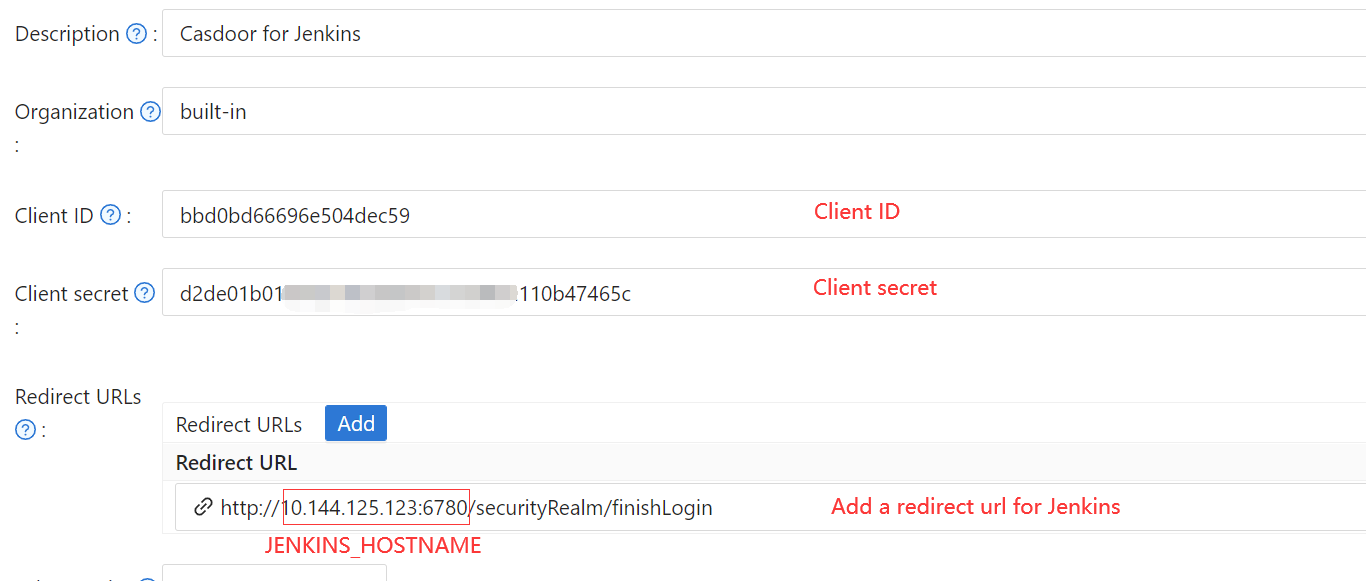
2. Add a redirect url: `http://JENKINS_HOSTNAME/securityRealm/finishLogin`
3. Add provider you want and supplement other settings.
Not surprisingly, you can get two values on the application settings page: `Client ID` and `Client secret` like the picture above, we will use them in next step.
Open your favorite browser and visit: **http://`CASDOOR_HOSTNAME`/.well-known/openid-configuration**, you will see the OIDC configure of Casdoor.
### Step3. Configure Jenkins
Now, you can install [Casdoor plugin](https://plugins.jenkins.io/casdoor-auth/) from the plugin manager by searching for "Casdoor"
After completing the installation, go to Manage Jenkins -> Configure Global Security.
**Suggestion**: Back up the Jenkins `config.xml` file, and use it to recover in case of setup errors.
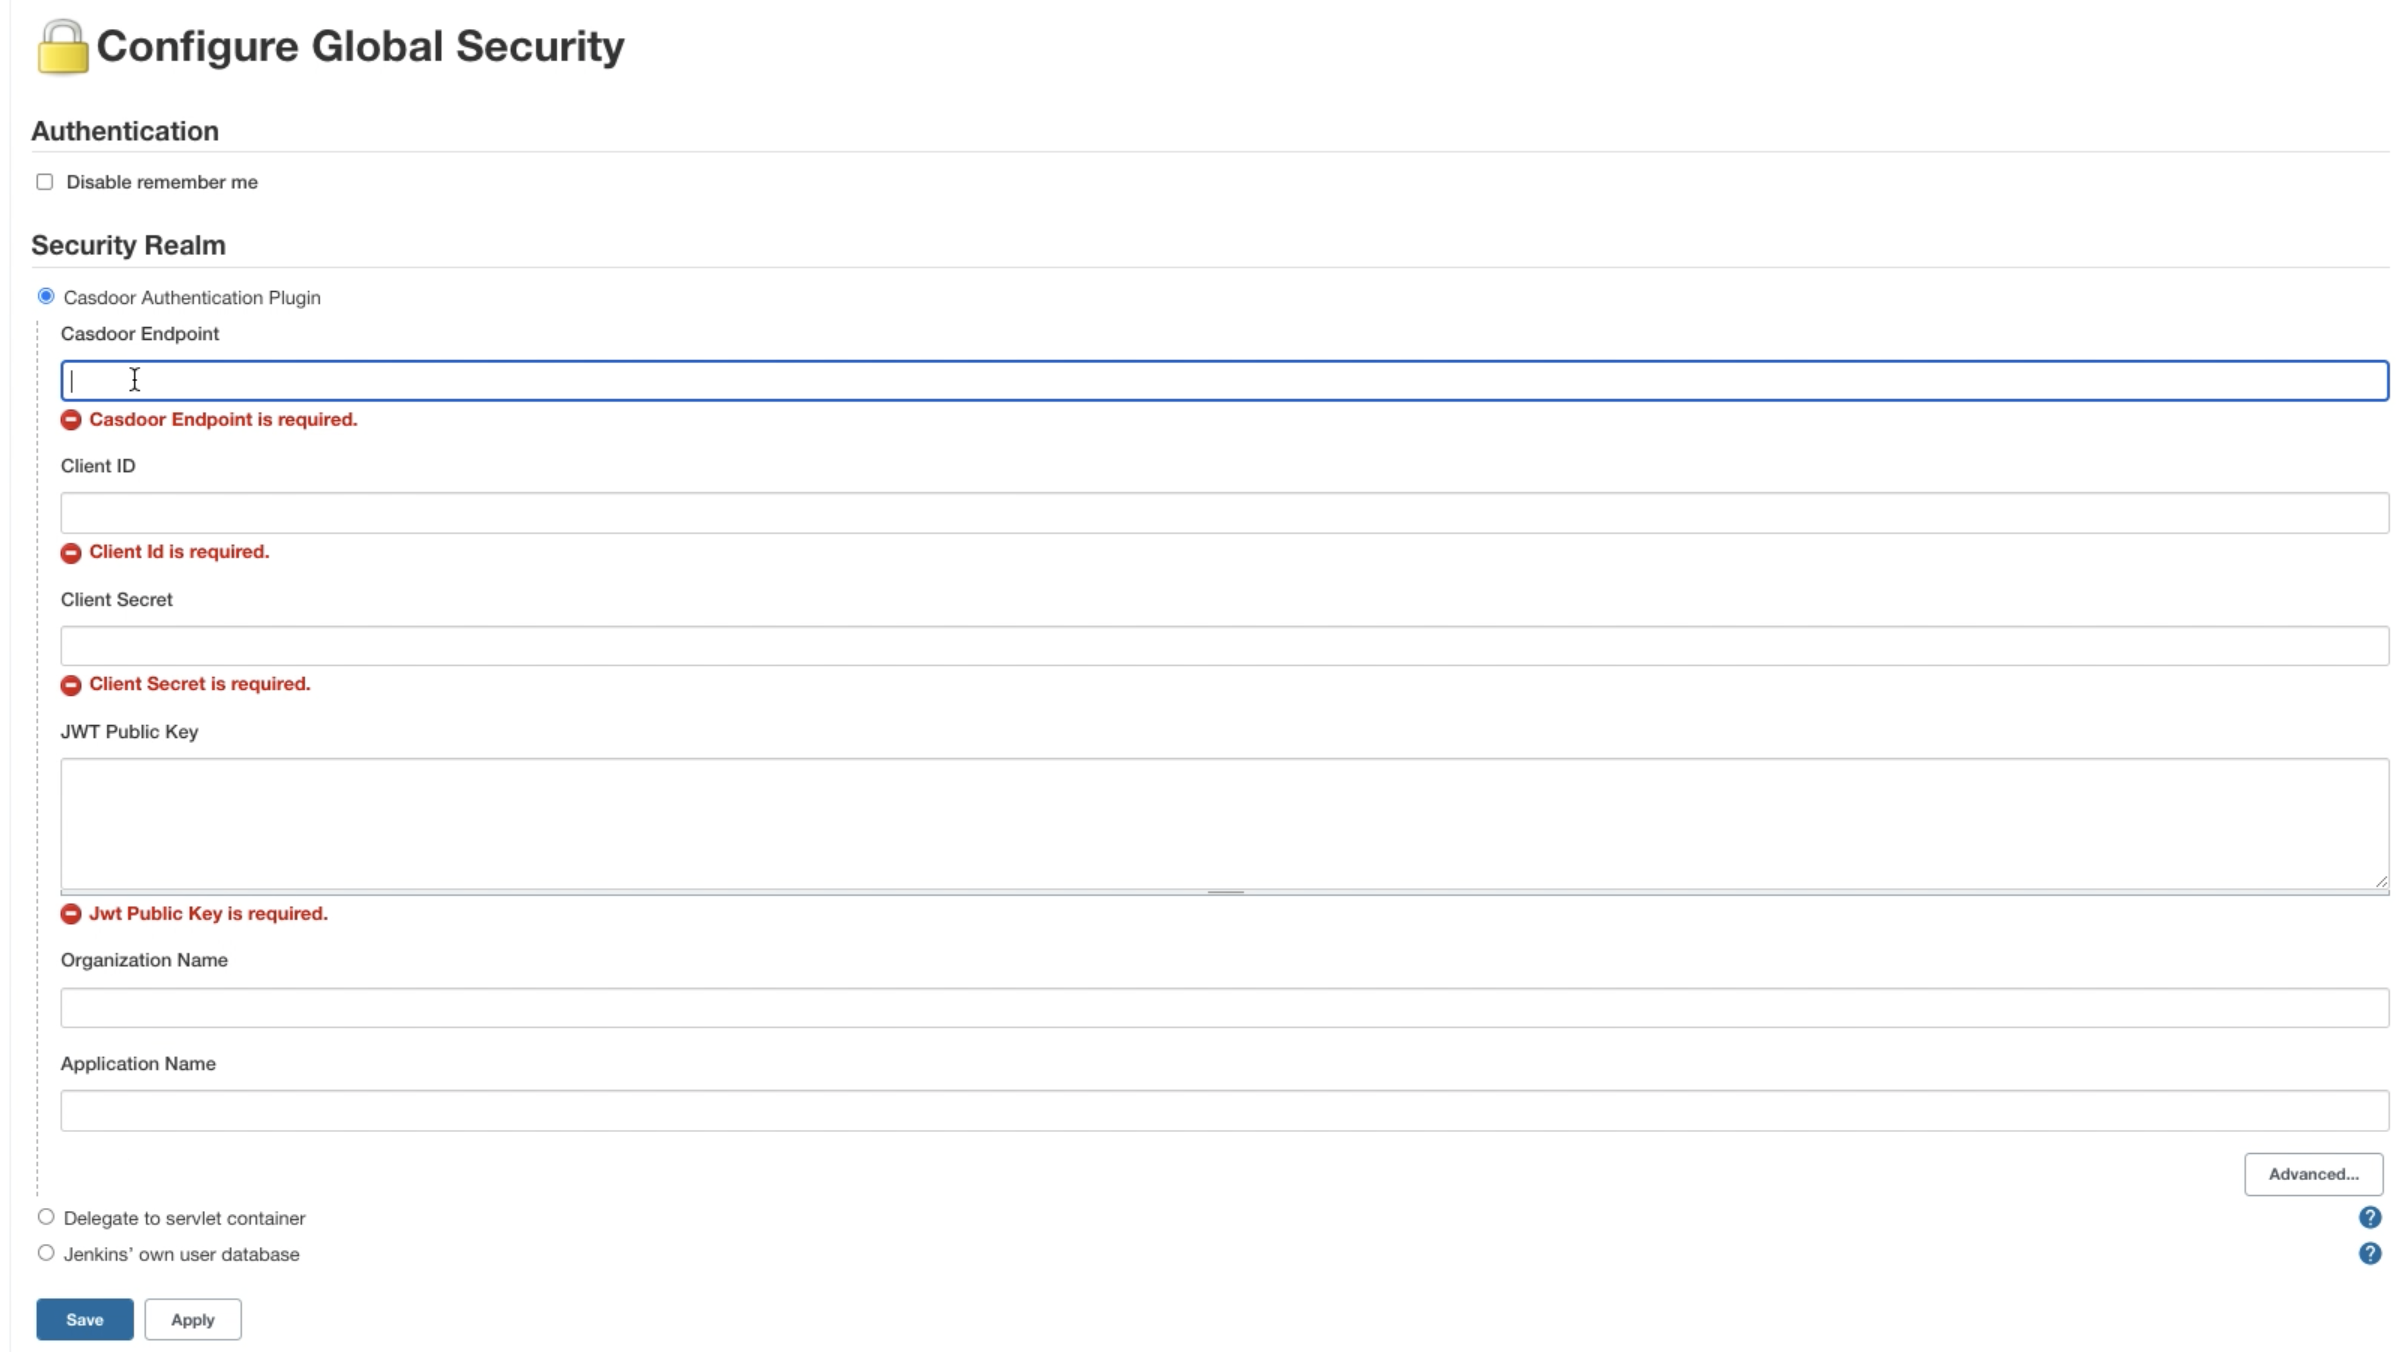
1. In Security Realm, select "Casdoor Authentication Plugin".
2. In Casdoor Endpoint, specify the `CASDOOR_HOSTNAME` noted above.
2. In Client ID, specify the `Client ID` noted above.
3. In Client secret, specify the `Client secret` noted above.
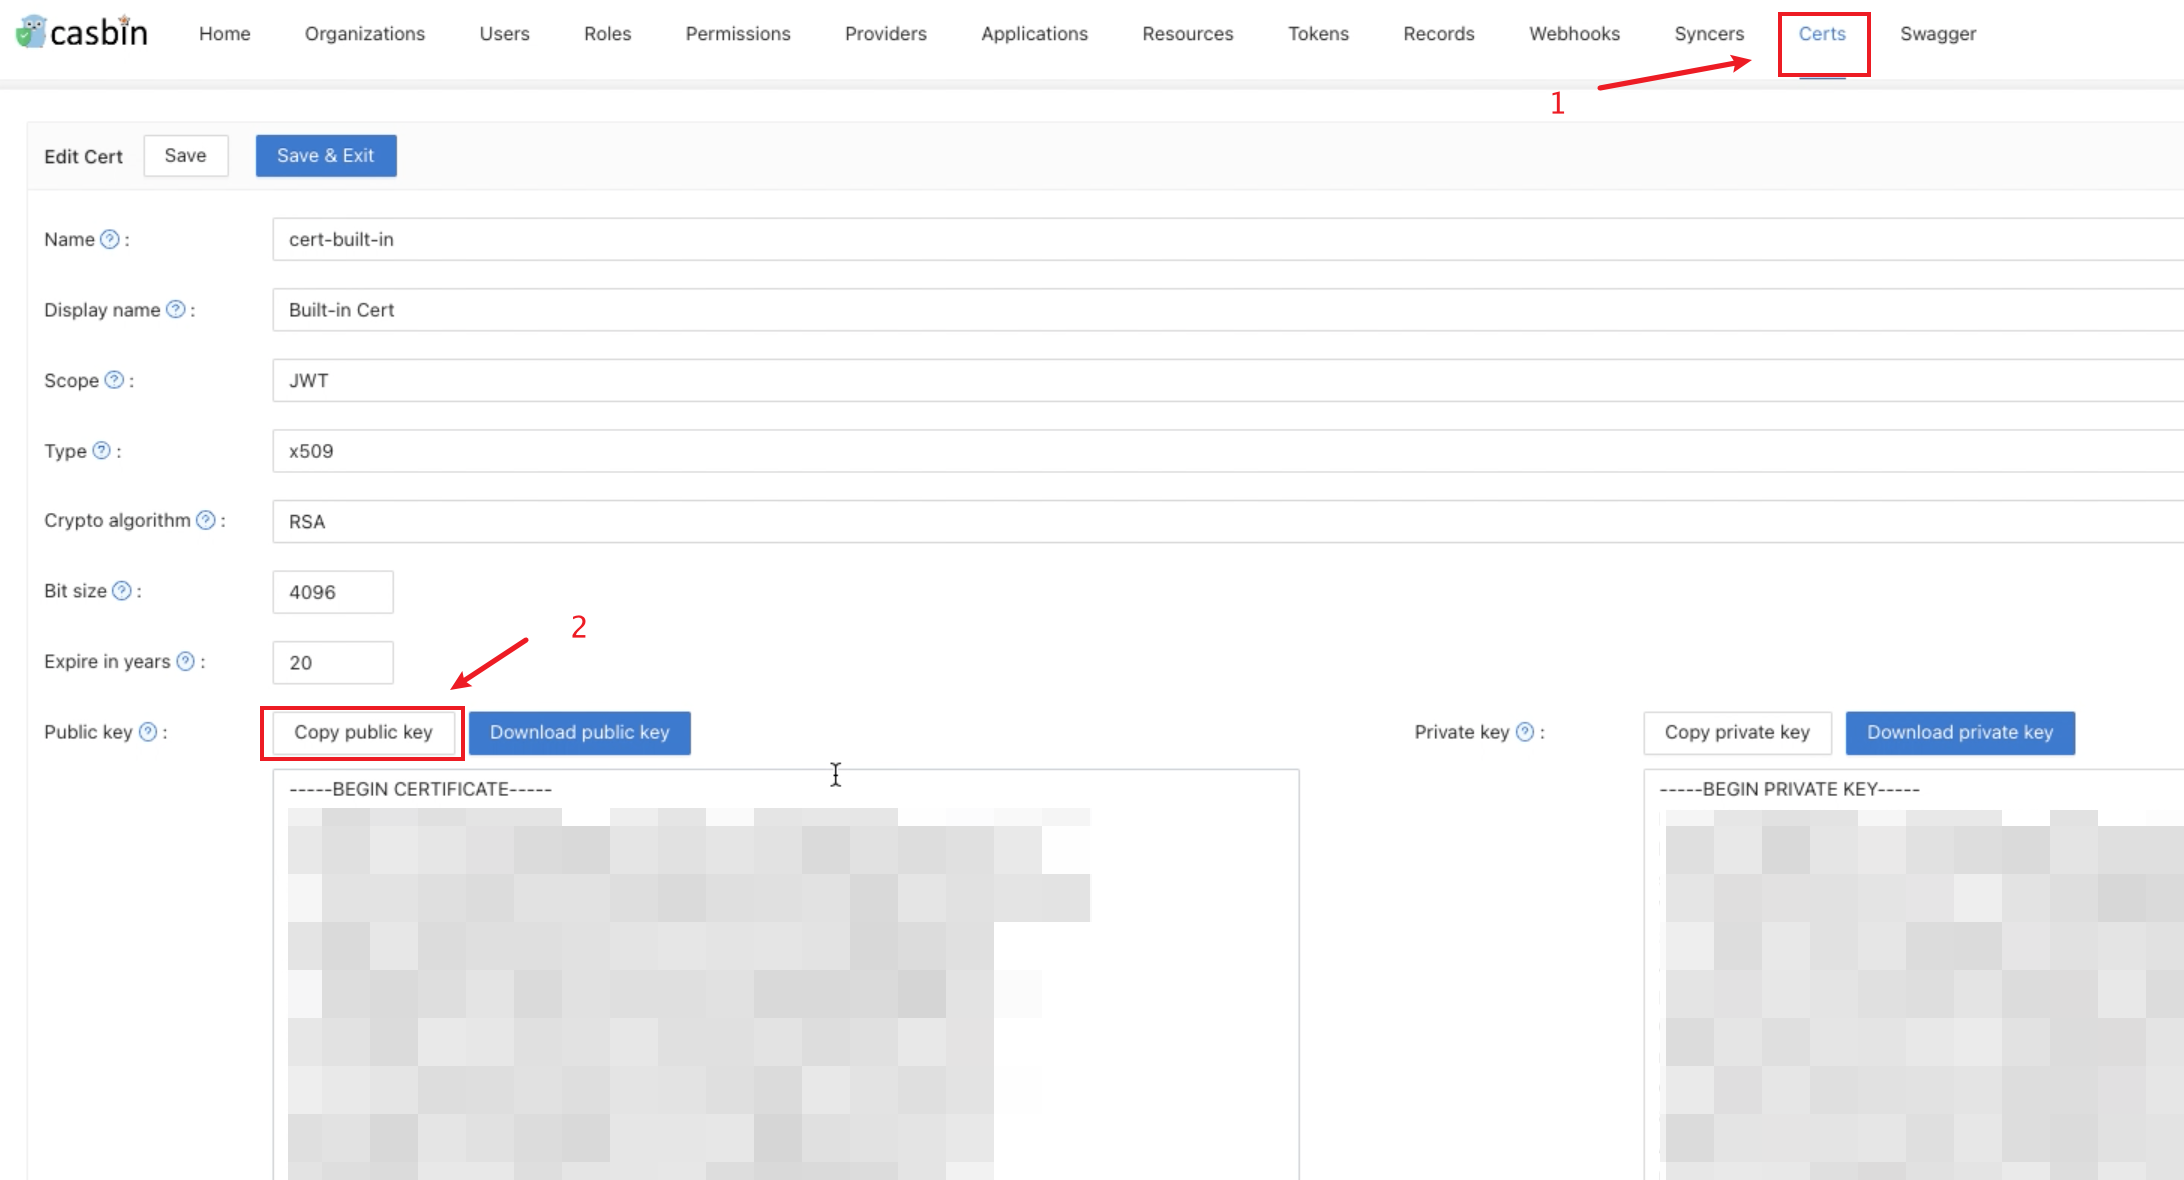
4. In JWT Public Key, specify the public key used to validate JWT token. You can find the public key in Casdoor by clicking `Cert` at the top. After clicking `edit` your application, you can copy your public key in the following page.
5. Organization Name and Application Name is optional. You can specify your organization and application to verify users in other organizations and applications. If they are empty, the plugin will use the default organization and application.
6. In the Authorization section, check “Logged-in users can do anything”. Disable “Allow anonymous read access”.
7. Click `save`.
Now, Jenkins will automatically redirect you to Casdoor for authentication.