https://github.com/johnno1962/Remote
Control your iPhone from inside Xcode for end-to-end testing.
https://github.com/johnno1962/Remote
xcode-plugin
Last synced: 7 months ago
JSON representation
Control your iPhone from inside Xcode for end-to-end testing.
- Host: GitHub
- URL: https://github.com/johnno1962/Remote
- Owner: johnno1962
- License: mit
- Created: 2014-12-29T18:15:56.000Z (over 10 years ago)
- Default Branch: main
- Last Pushed: 2022-09-18T08:49:16.000Z (almost 3 years ago)
- Last Synced: 2024-05-02T00:54:30.674Z (about 1 year ago)
- Topics: xcode-plugin
- Language: Objective-C
- Size: 375 KB
- Stars: 810
- Watchers: 21
- Forks: 52
- Open Issues: 0
-
Metadata Files:
- Readme: README.md
- License: LICENSE
Awesome Lists containing this project
- awesome-ios - Remote - Control your iPhone from inside Xcode for end-to-end testing. (Testing / UI Testing)
- awesome-ios-star - Remote - Control your iPhone from inside Xcode for end-to-end testing. (Testing / UI Testing)
- awesome-rainmana - johnno1962/Remote - Control your iPhone from inside Xcode for end-to-end testing. (Objective-C)
README
## Remote - Control your iPhone from Xcode
"Remote" is a plugin for Xcode that allows you to control an iPhone
from a window on your Mac during development. Originally created to avoid
having to pick up a device during testing you can record "macros"
of device touches and replay them. It will also compare the resulting screen
output against a snapshot for end-to-end testing. The Macro log is an
editable WebView that can be modified at will. Finally, you can now
record and save all display output into a quicktime movie.
**Update:** This former Xcode plugin has been re-organised into a
Swift Package for use in other apps. To use `Remote`, simply add this
project as a Swift package and the `RemoteCapture` target to your app.
It will connect automatically using the hostname of your desktop. You
also need to be running an application containg the `RemoteUI` target
such as [InjectionIII](https://github.com/johnno1962/InjectionIII) or the
[HotReloading](https://github.com/johnno1962/HotReloading) daemon with
"Remote Control" enabled to receive connections and render your device's
screen. By default, adding the package to a project will have it try to
connect to a process running the remote UI. The package manifest
compiles your hostname into the package so it should be able to
connect from a device.

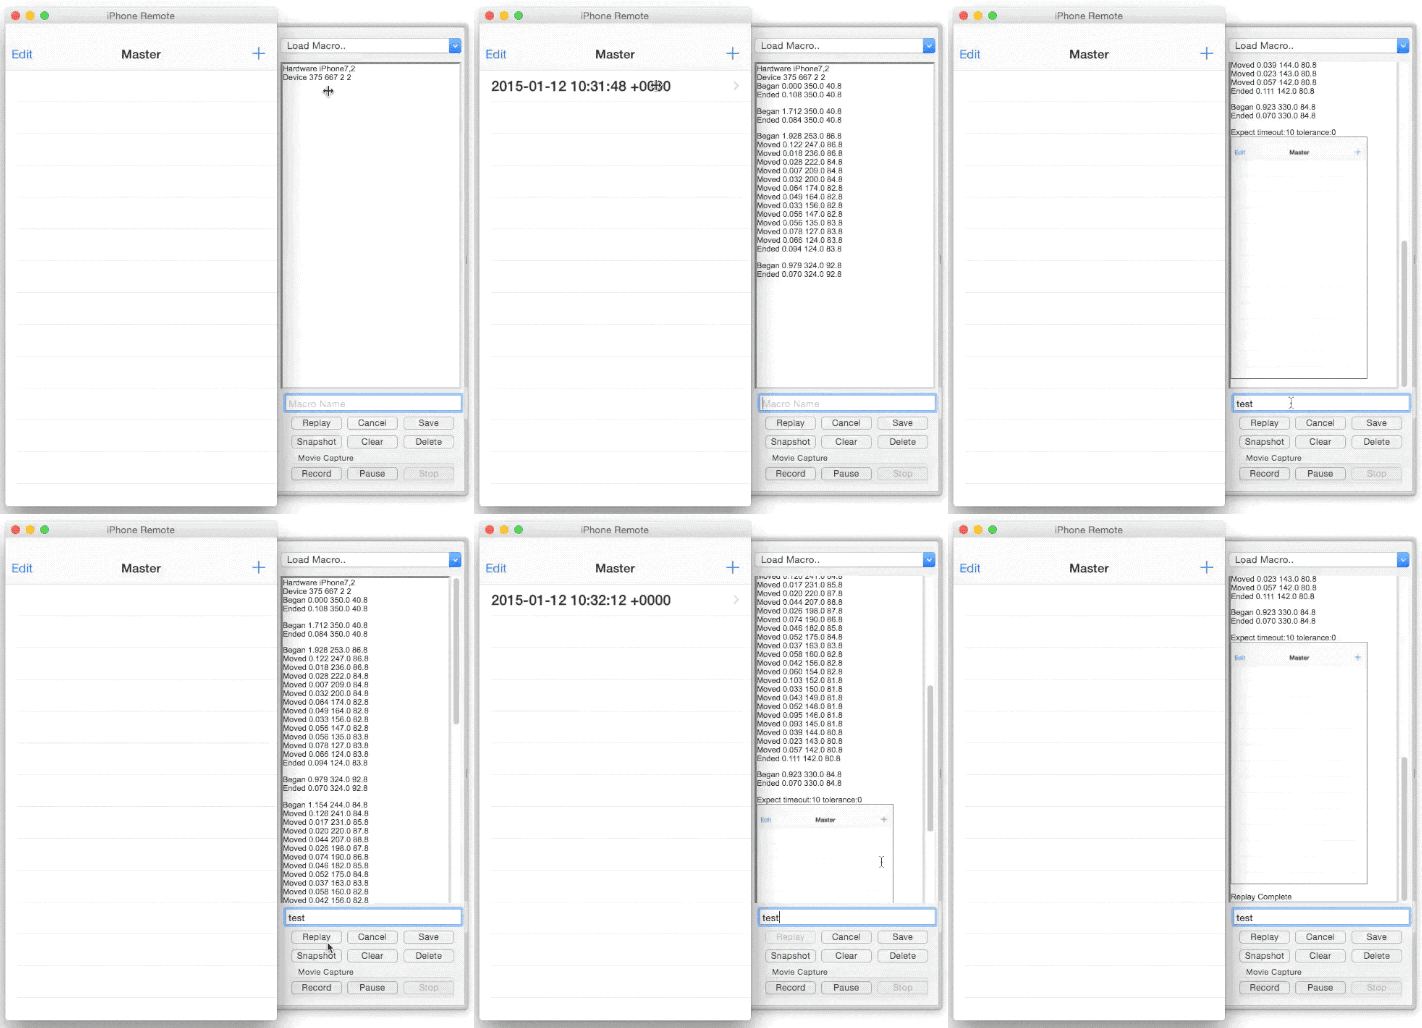
(The gif shows the recording of a macro, saving it and then playing it
back - testing the screen is as expected in the snapshot.)
To use, download the zipped source for this plugin, build and restart
Xcode. You can then patch your project's main.m to include the Remote
client header using "Product/Remote/Patch App" or it can load from a
bundle on the fly if using the simulator. When using a device check that
the correct IP address has been patched into main.m so the device can connect.
To use with Swift, add an empty main.m to your project so it can be patched.
The display shadowing window will not display by default. Use the
Menu item "Product/Remote/Load" to have it appear. Thereafter, touches
on the shadow display or device applied and recorded. To save a macro
or a sequence of touches, enter a name into the textfield towards the
bottom of the touch display and click the save button. You can then
replay the macro either by loading it using the pulldown menu
at the top of the touch display and clicking replay or directly from
the "Product/Remote/" Menu.
For end-to-end testing, include a snapshot in a macro by clicking
the "Snapshot" button. On replay, the macro will pause until the screen
matches the snapshot within the specified tolerance or it will timeout
asking if you would like to update the snapshot or the tolerance used
(remember to save the updated macro.) The units of tolerance are the
number of bytes the screen image differs after the run length encoding
of simular pixel values.
### Macro entries logged/replayed:
- Hardware <hw.machine> - device type from sysctlbyname()
- Device <screen width> <screen height> <snapshot scale> <device scale>
- Begin <wait time> <x> <y> [<x2> <y2>] - touch(s) start
- Moved/Ended <ditto> touches moved/ended - two touches maximum
- Expect timeout:<seconds> tolerance:<bytes different>.. <snapshot>
### Implementation Classes
UI:
- RMPluginController - interface between the Remote display and Xcode
- RMWindowController - macro re-player and overall nib controller
- RMMacroManager - controls display, saving and loading of macros
Internal (connected by protocol RMDeviceDelegate):
- RMImageView - subclass of NSImageView for event capture/device display
- RMDeviceController - interface between remote display and device
- RemoteCapture.h - #imported into application's main.m to connect to Xcode
RemoteCapture.h requires a patched main.m to be compiled using ARC.
### Limitations
Remote uses [UIWindow.layer renderInContext:] so most activity on the device is
captured including the keyboard but excepting video replay and openGL layers.
UIAlertView prompts are also not captured as they seem to render outside the window
hierarchy. Finally, UIDatePickers are not rendered correctly at all although they will
respond to events. To preserve network bandwidth to the device animations are not played.
Remote performs better with swipe events if you make an initial tap on the device.
Please note: for some reason it takes about a minute before Xcode will accept remote
connections on it's server socket (firewall complications?). After restarting Xcode
you may need to wait a while before being able to use the Remote plugin from a device.
### Thanks
AVFoundation code for video capture adapted from:
[https://github.com/acj/TimeLapseBuilder-Swift](https://github.com/acj/TimeLapseBuilder-Swift)
MIT license. Please see the LICENSE file for the particulars.