https://github.com/kasukur/auto-scale-ec2-using-sqs
https://github.com/kasukur/auto-scale-ec2-using-sqs
Last synced: about 1 year ago
JSON representation
- Host: GitHub
- URL: https://github.com/kasukur/auto-scale-ec2-using-sqs
- Owner: kasukur
- Created: 2023-01-01T06:18:44.000Z (over 3 years ago)
- Default Branch: main
- Last Pushed: 2023-01-02T04:21:39.000Z (over 3 years ago)
- Last Synced: 2024-08-02T22:23:04.521Z (almost 2 years ago)
- Language: Shell
- Size: 9.77 KB
- Stars: 2
- Watchers: 1
- Forks: 0
- Open Issues: 0
-
Metadata Files:
- Readme: README.md
Awesome Lists containing this project
- awesome-github-repos - kasukur/auto-scale-ec2-using-sqs - (Shell)
README
# Auto Scale EC2 using SQS
## Table of Contents
1. [Introduction](#Intro)
2. [Create an EC2 Instance Role](#Role)
3. [Create a Key pair](#KP)
4. [Create a Security Group](#SG)
5. [Create an S3 Bucket](#S3)
6. [Create an SQS queue](#sqs)
7. [Create a Cloud9 instance](#cloud9)
8. [Create CloudWatch Alarms](#cw)
7. [Create a Launch Template](#template)
8. [Create an Auto Scaling Group](#ASG)
9. [Verification and Monitoring](#verify)
10. [Clean Up](#cleanup)
11. [Summary](#summary)
12. [Referrals](#referrals)
### Introduction
In this blog we are going to set up auto scaling of EC2 instances using the SQS ApproximateNumberOfMessagesVisible metric.
AWS Auto Scaling monitors your applications and automatically adjusts capacity to maintain steady, predictable performance at the lowest possible cost. Using AWS Auto Scaling, it’s easy to set up application scaling for multiple resources across multiple services in minutes.
#### Benefits
- Set up Scaling quickly.
- Make SMART scaling decisions.
- Automatically maintain performance.
- Pay only for what you need.
---
### Demo
Let's get started with the demo.
#### Step 1. Create an EC2 Instance Role
1. Navigate to IAM > Roles > Click on **Create role**.
2. Select **EC2** under Common use case and Click **Next**.
3. Select **AmazonS3ReadOnlyAccess** and **AmazonSQSFullAccess** and Click **Next**.
4. Enter Role name as **EC2InstanceRoleForSQS** and Click **Create role**.
> Note: you may create a custom policy for SQS with the required permissions instead of using the managed policy **AmazonSQSFullAccess** to provide the least amount of privileges.
_AmazonSQSFullAccess_
```json
{
"Version": "2012-10-17",
"Statement": [
{
"Action": [
"sqs:*"
],
"Effect": "Allow",
"Resource": "*"
}
]
}
```
_AmazonS3ReadOnlyAccess_
```json
{
"Version": "2012-10-17",
"Statement": [
{
"Effect": "Allow",
"Action": [
"s3:Get*",
"s3:List*",
"s3-object-lambda:Get*",
"s3-object-lambda:List*"
],
"Resource": "*"
}
]
}
```
_Trusted entities_
```json
{
"Version": "2012-10-17",
"Statement": [
{
"Effect": "Allow",
"Principal": {
"Service": "ec2.amazonaws.com"
},
"Action": "sts:AssumeRole"
}
]
}
```
---
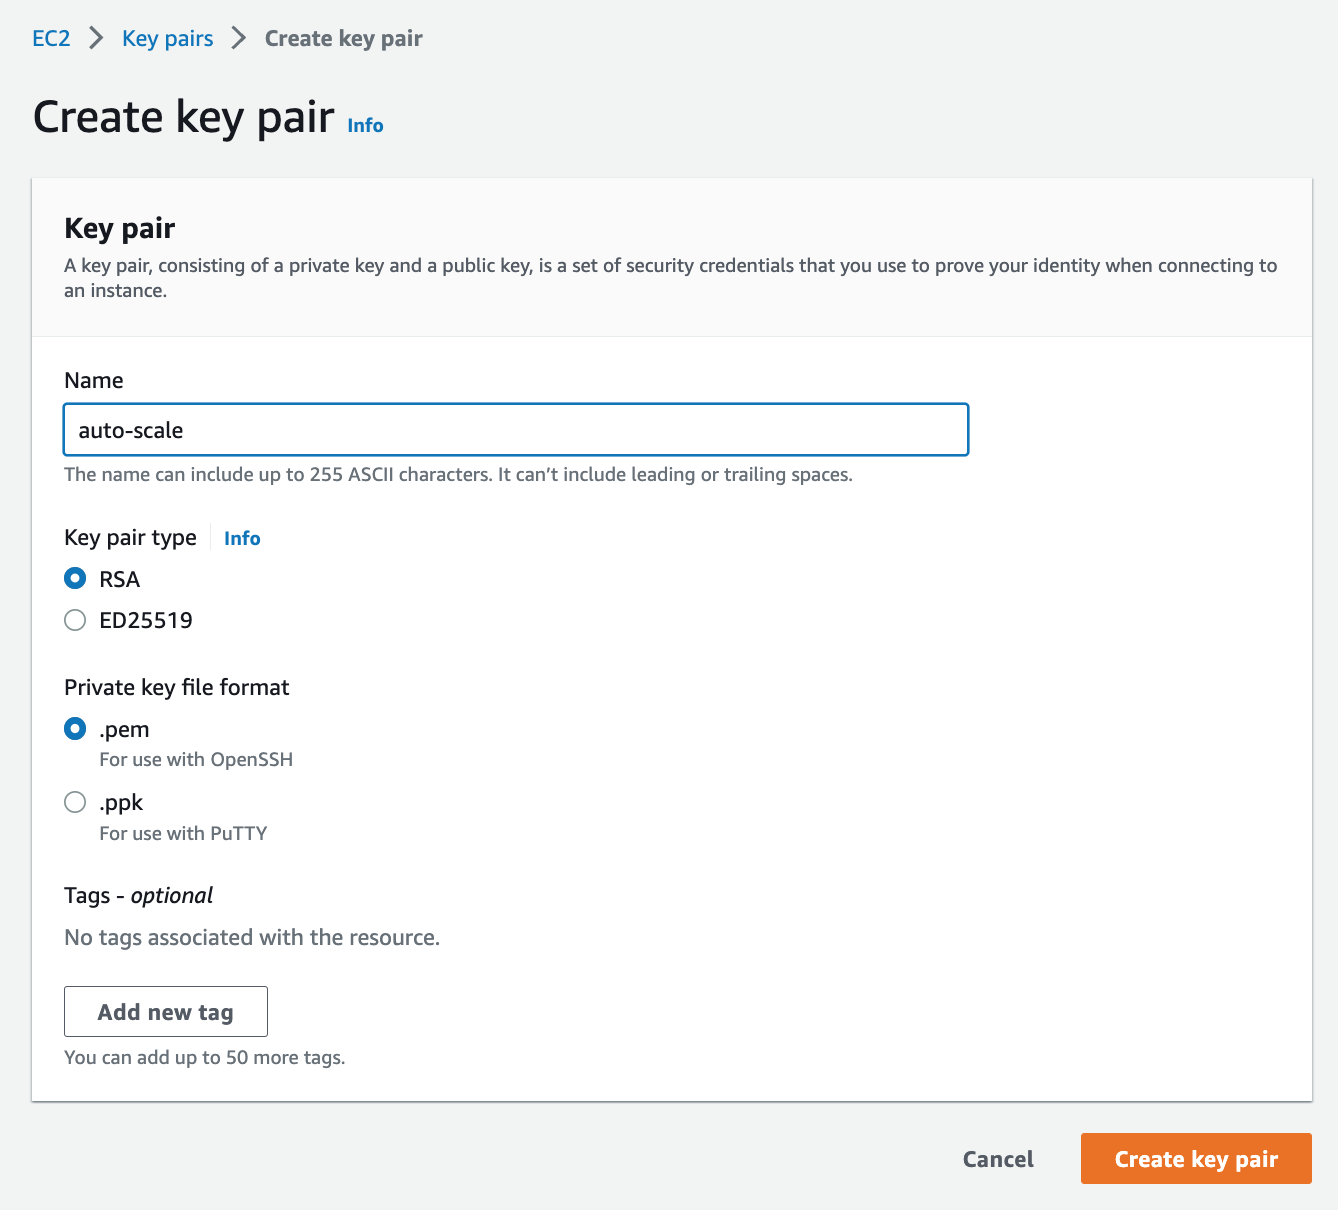
#### Step 2. Create a key pair
1. Navigate to EC2 > Key Pairs (under Network & Security).
2. Click **Create key pair**.
3. Enter Name as `auto-scale`.
4. Navigate to the folder where the key pair is downloaded and run.
```bash
chmod 400 .pem
```
> Auto_Scale_Keypair
---
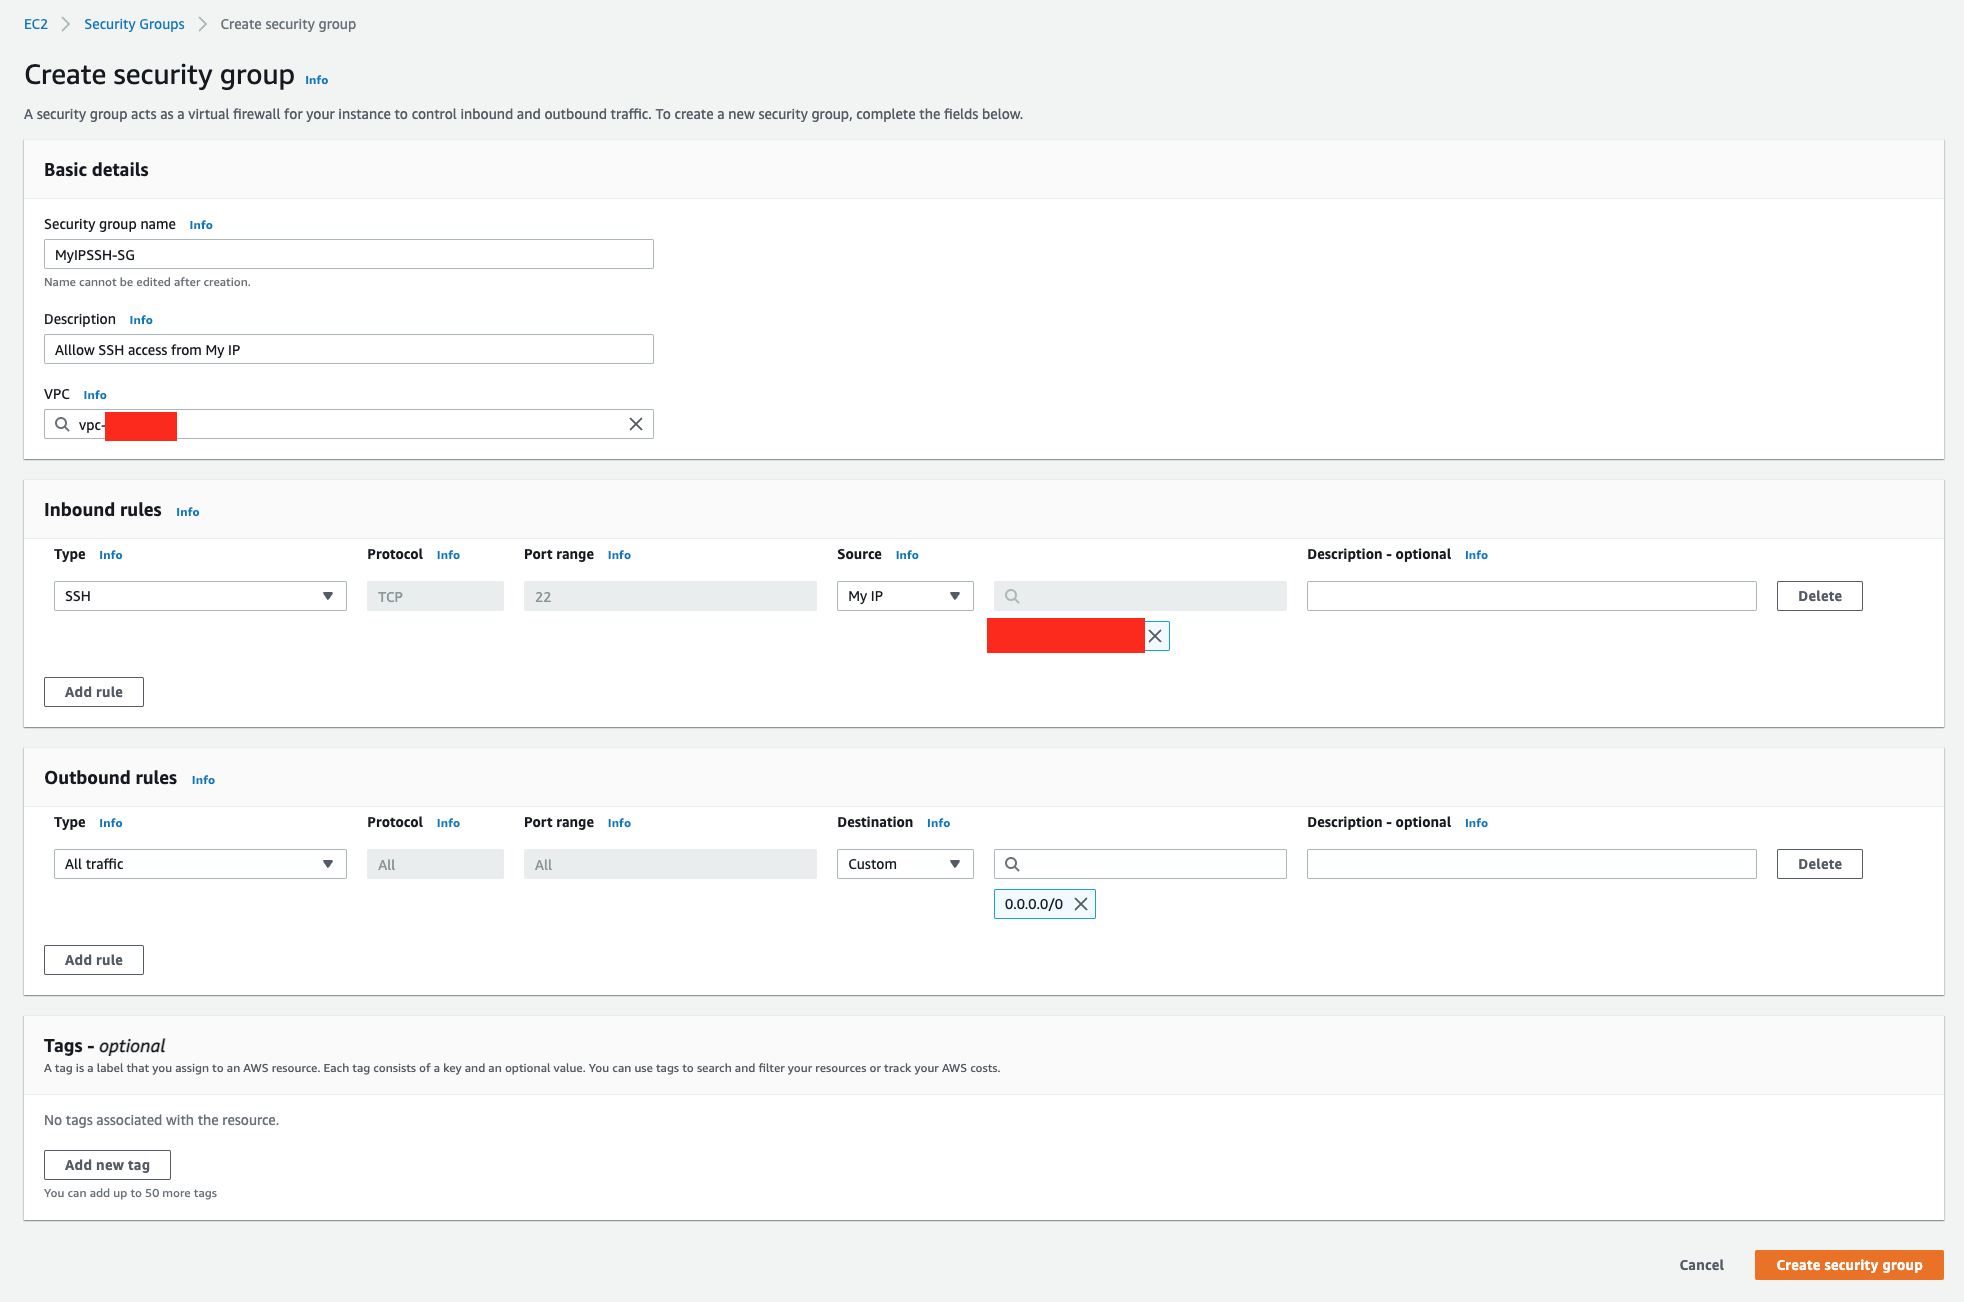
#### Step 3. Create a Security Group
1. We are going to create a Security Group for SSH.
2. Navigate to EC2 > Security Groups > Create a new security group for your ALB, and set the following values:
* Name: `MyIPSSH-SG`.
* Add an Inbound rule to allow `SSH (TCP 22)` traffic from `My IP`.
3. Click **Create security group**.
> MyIPSSH-SG
---
#### Step 4. Create an S3 Bucket
1. Navigate to EC2 > Click **Create Bucket**
2. Enter the Bucket name as `autoscalescripts`, add some random numbers to make the bucket name unique.
3. Leave the rest of the settings as default and click **Create Bucket**
4. Download `sendMessages.sh` and `receiveMessages.sh` from the [github](https://github.com/kasukur/auto-scale-ec2-using-sqs) and upload them to the S3 bucket.
---
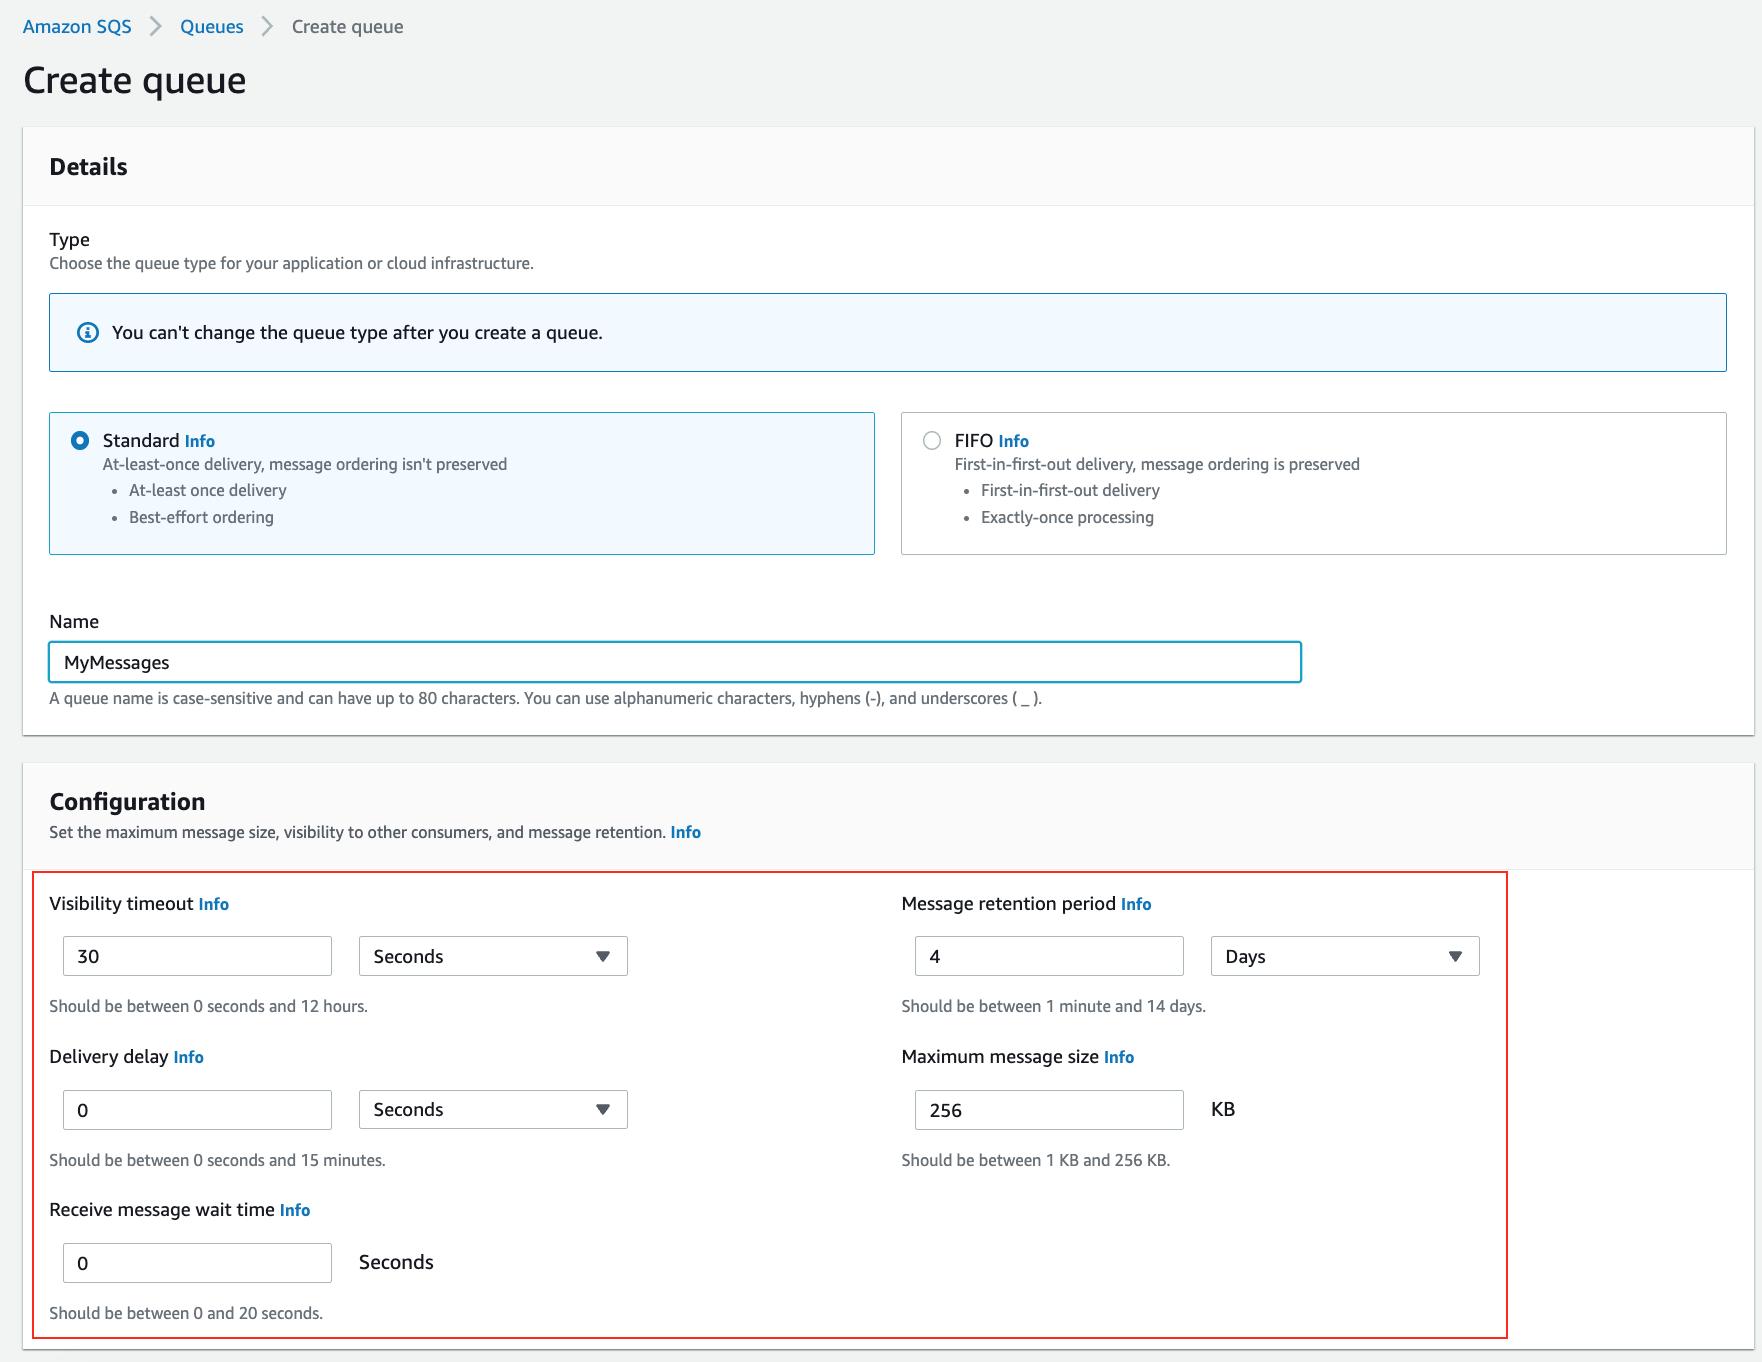
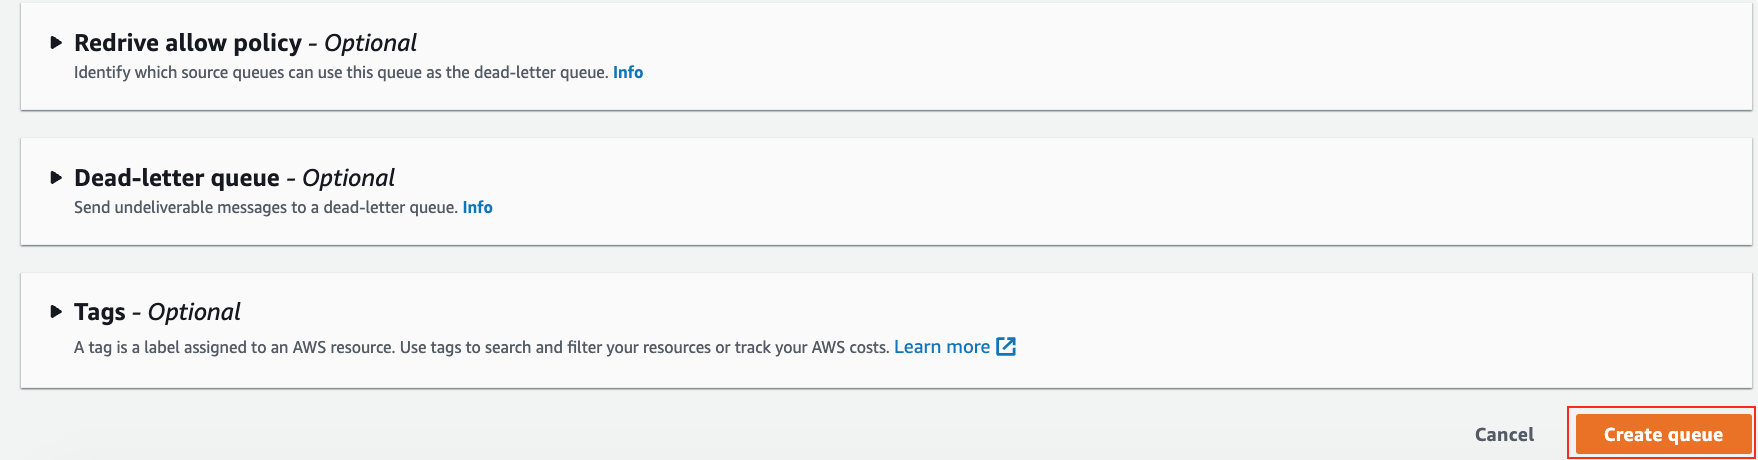
### Step 5. Create an SQS queue
1. Navigate to **Simple Queue Service** and click **Create queue**
2. Enter **Name** as `MyMessages`, leave the rest as defaults and click **Create queue**
> SQS_1

> SQS_2
> SQS_3

> SQS_4
---
### Step 6. Create a Cloud9 instance
1. Navigate to **Cloud9** > **Create Environment**.
2. Enter **Name** as `awscli` and click **Create**.
3. Click **Open** under **AWS Cloud9** > **Environments**.
4. When Cloud9 is ready, Click File > Upload Local Files... and then upload `sendMessages.sh`.
5. Let's check the AWS CLI version.
```bash
Sri:~/environment $ aws --version
aws-cli/1.19.112 Python/2.7.18 Linux/4.14.301-224.520.amzn2.x86_64 botocore/1.20.112
```
6. The script uses `jq`, so we need to install `jq`.
7. Open a Terminal and execute `sudo yum install jq -y`.
8. Execute `chmod +x sendMessages.sh` to provide the execute permissions.
9. Now run the script to send **2000** messages to `MyMessages` queue.
> Note: Alternatively you could use AWS CLI on your personal computer to send the messages.
---
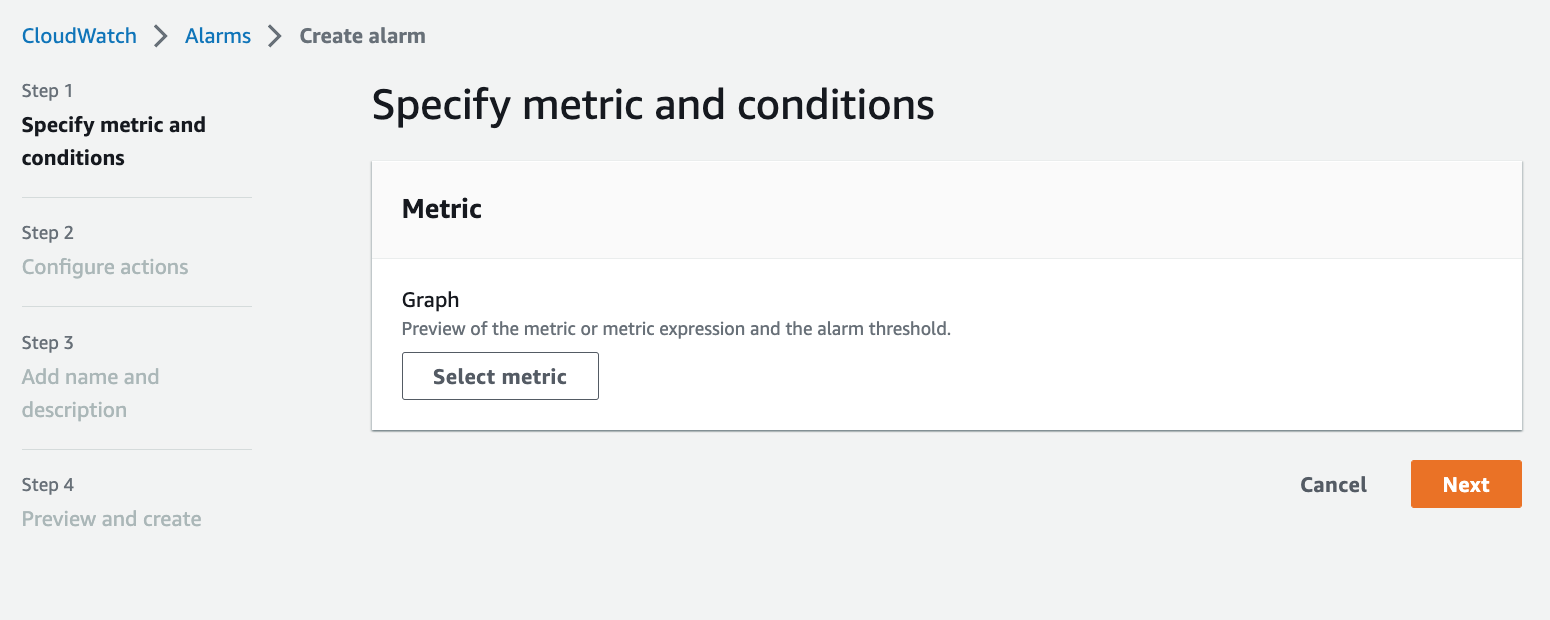
### Step 7. Create CloudWatch Alarms
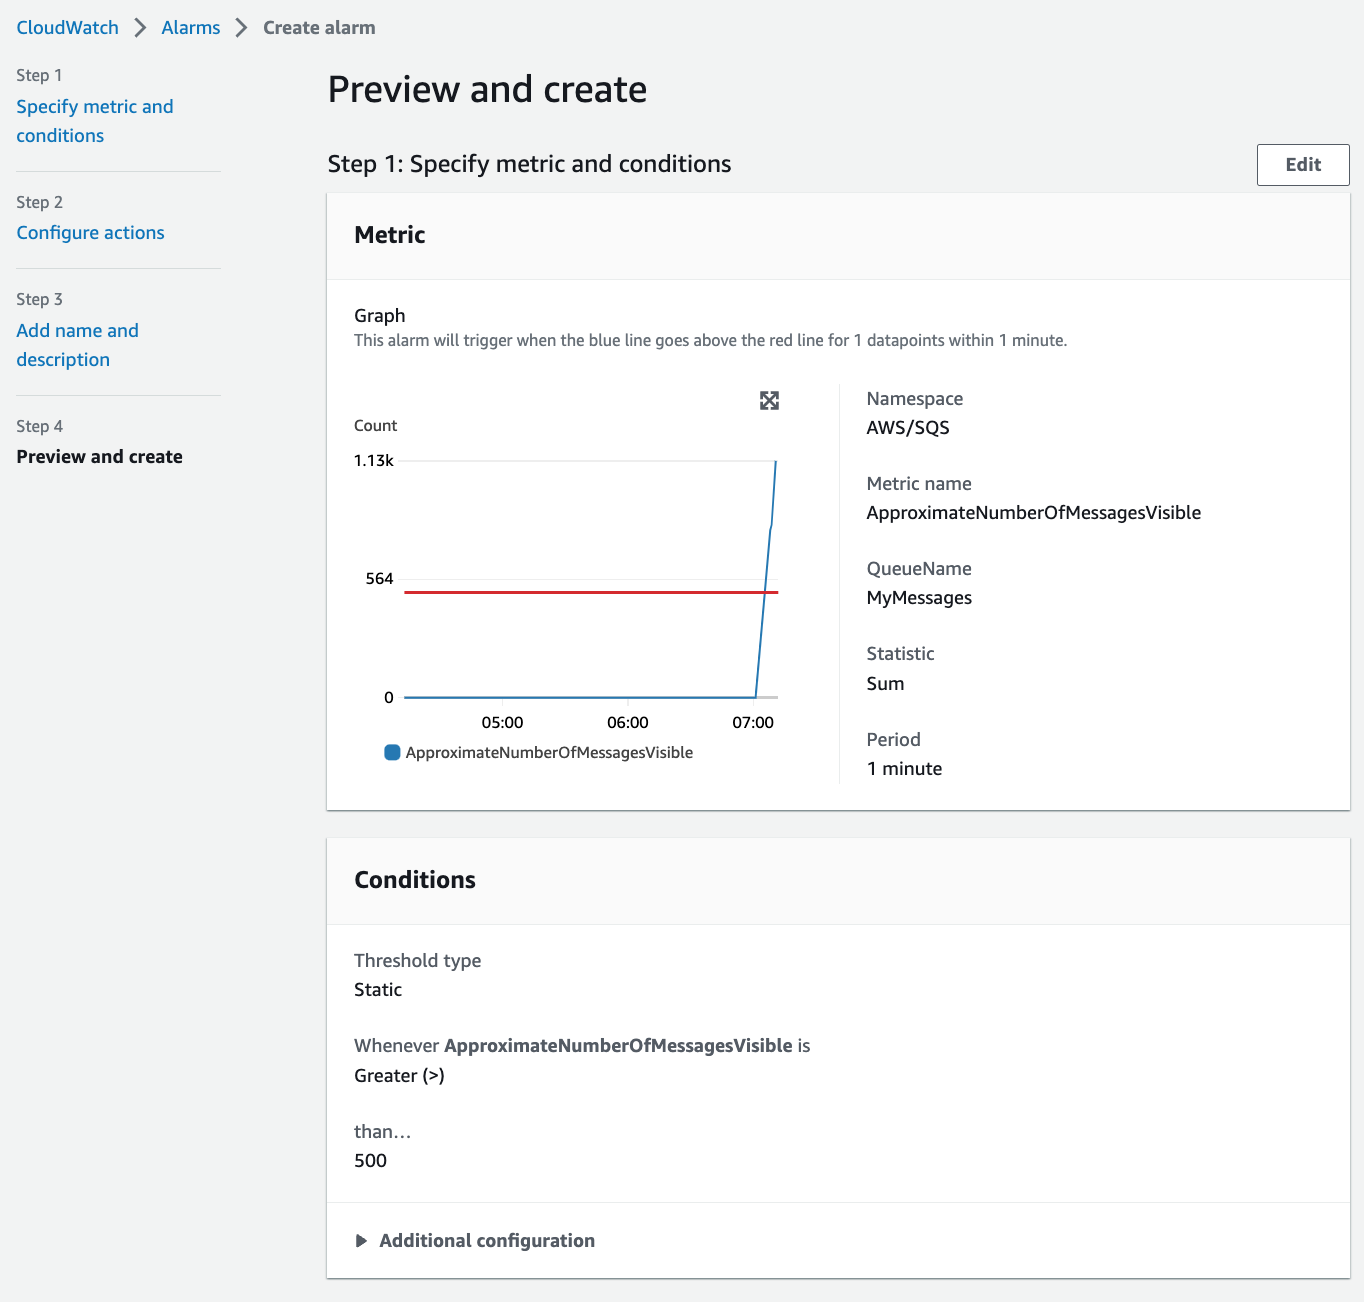
We are going to create a ScaleOut Alarm to launch new instances when the **ApproximateNumberOfMessagesVisible** is greater than **500**.
1. Navigate to CloudWatch > Alarms > Click **Create alarm**.
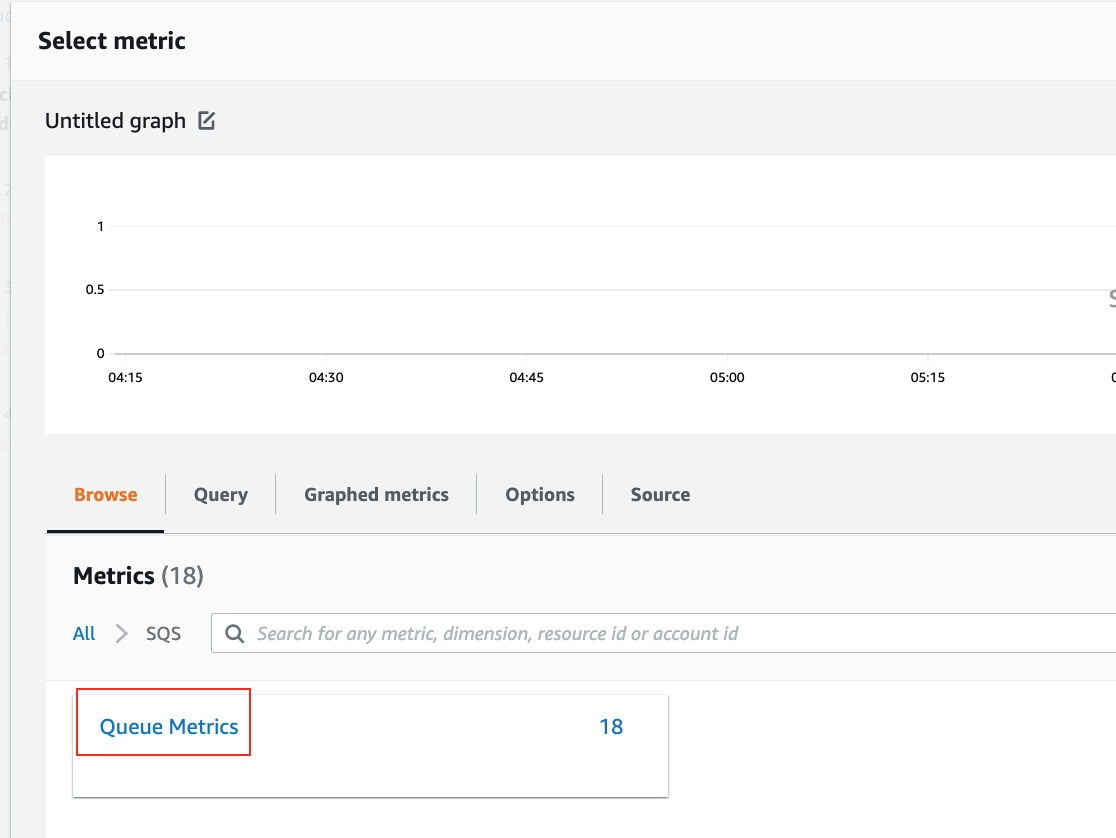
2. Click **Select Metric**, search for **SQS**, select **SQS > Queue Metrics**.
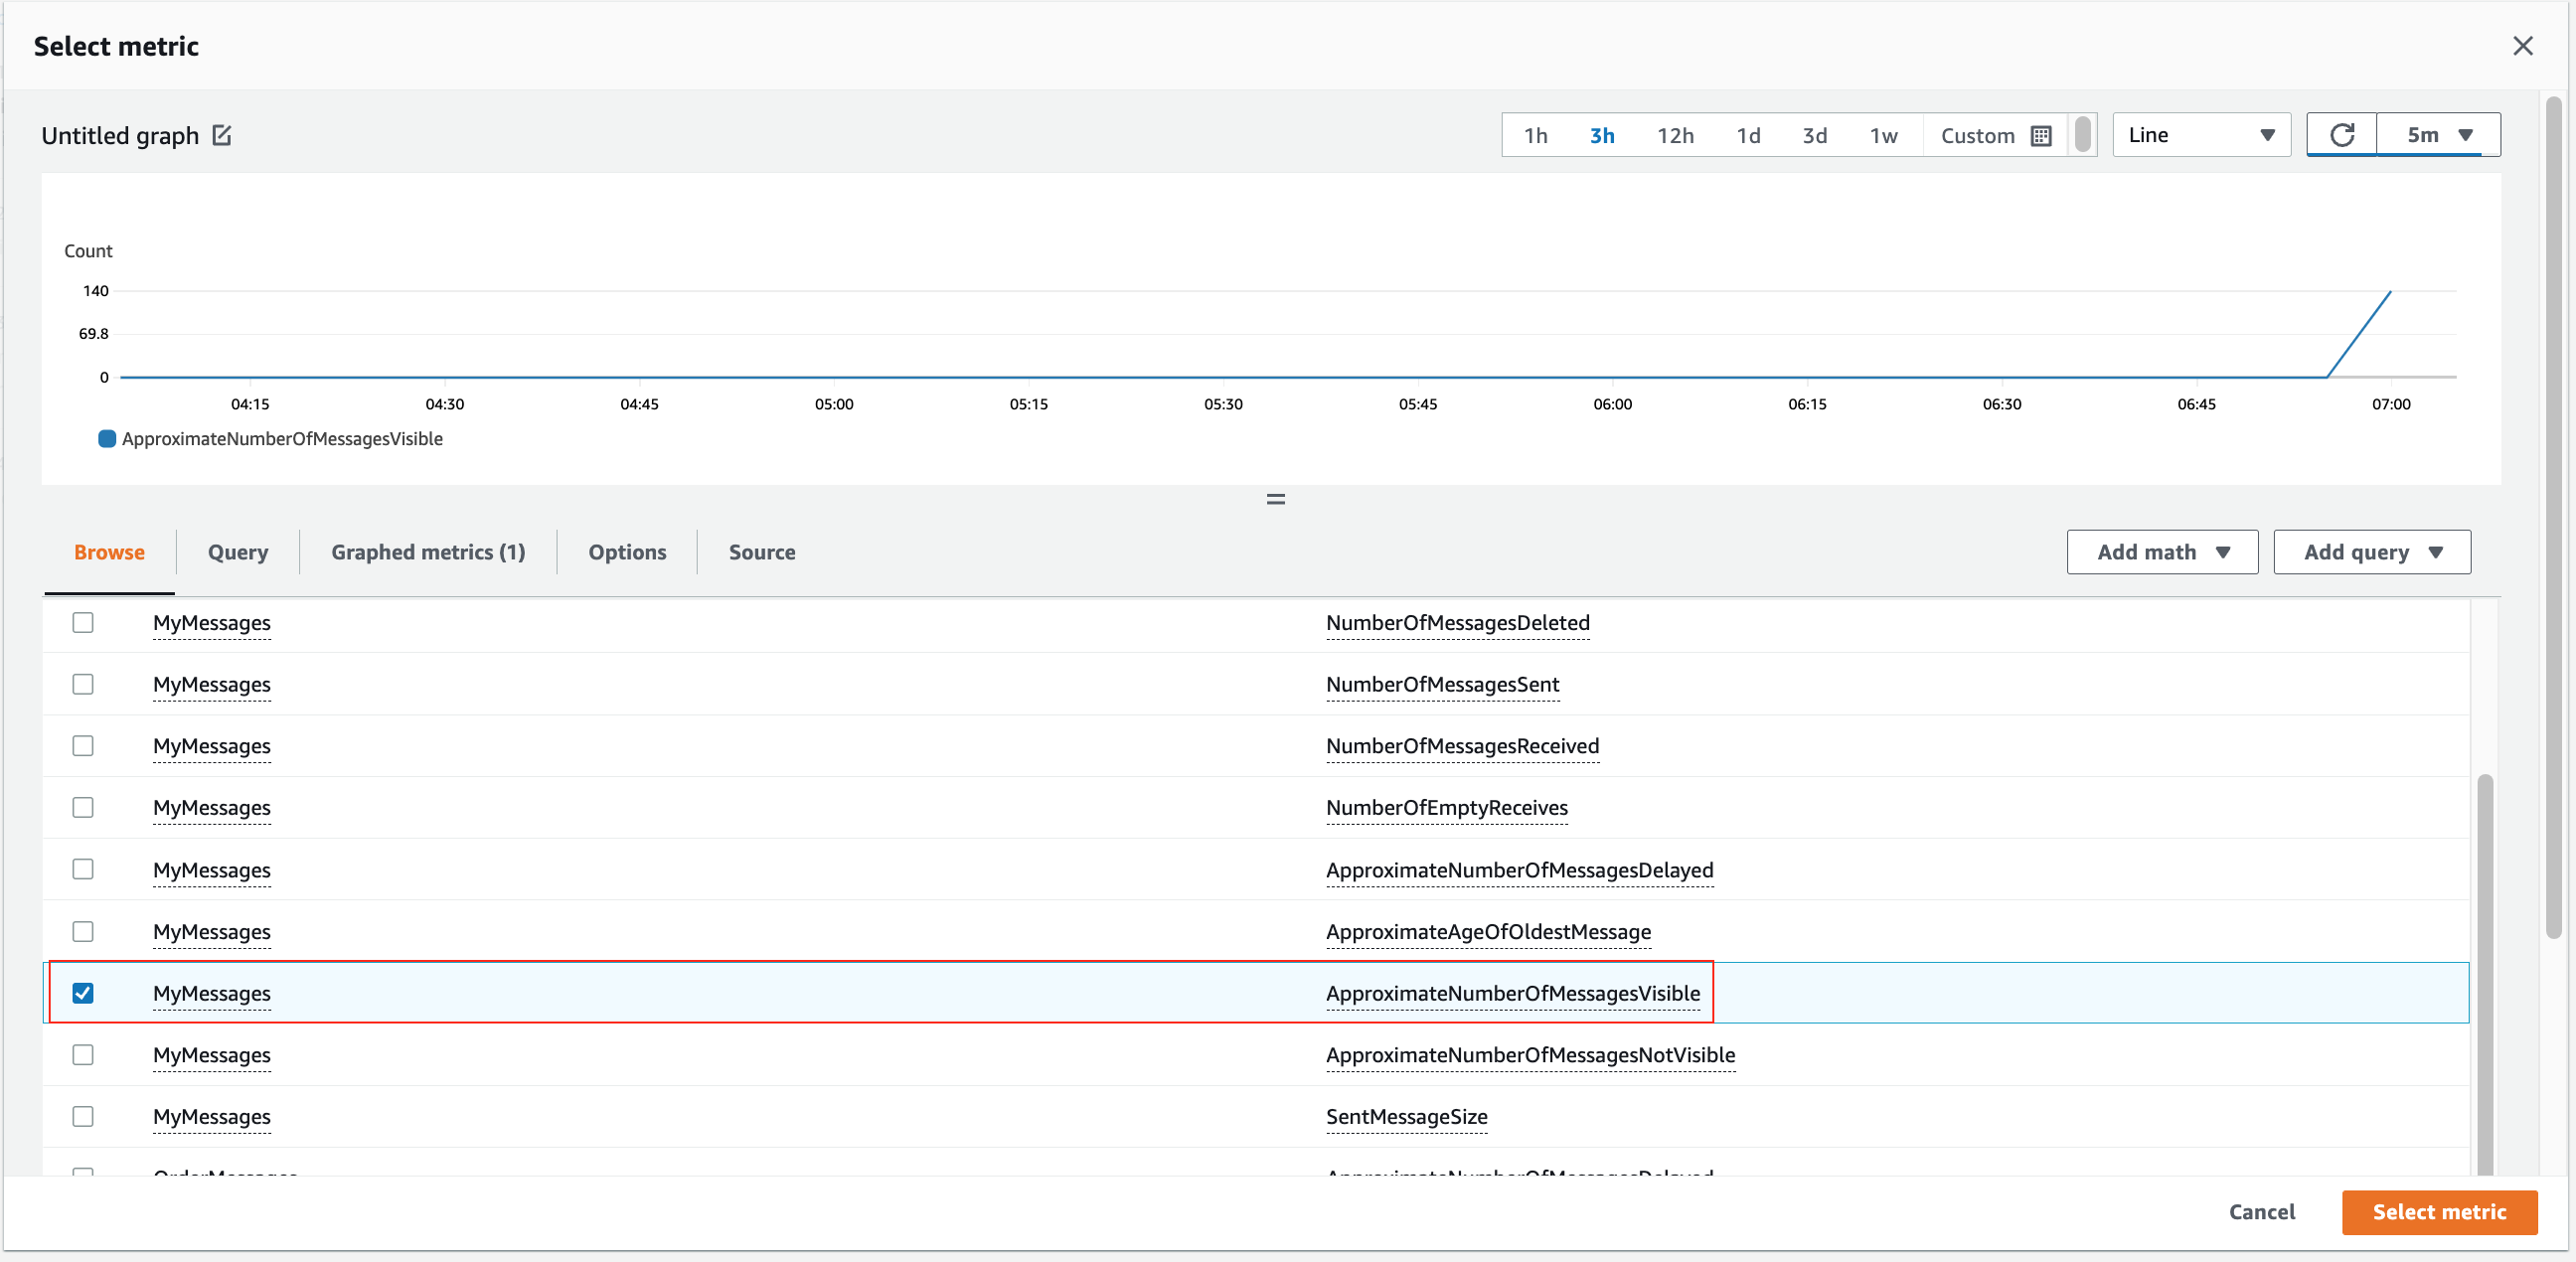
3. Select **MyMessages > ApproximateNumberOfMessagesVisible** and Click **Select Metric**.
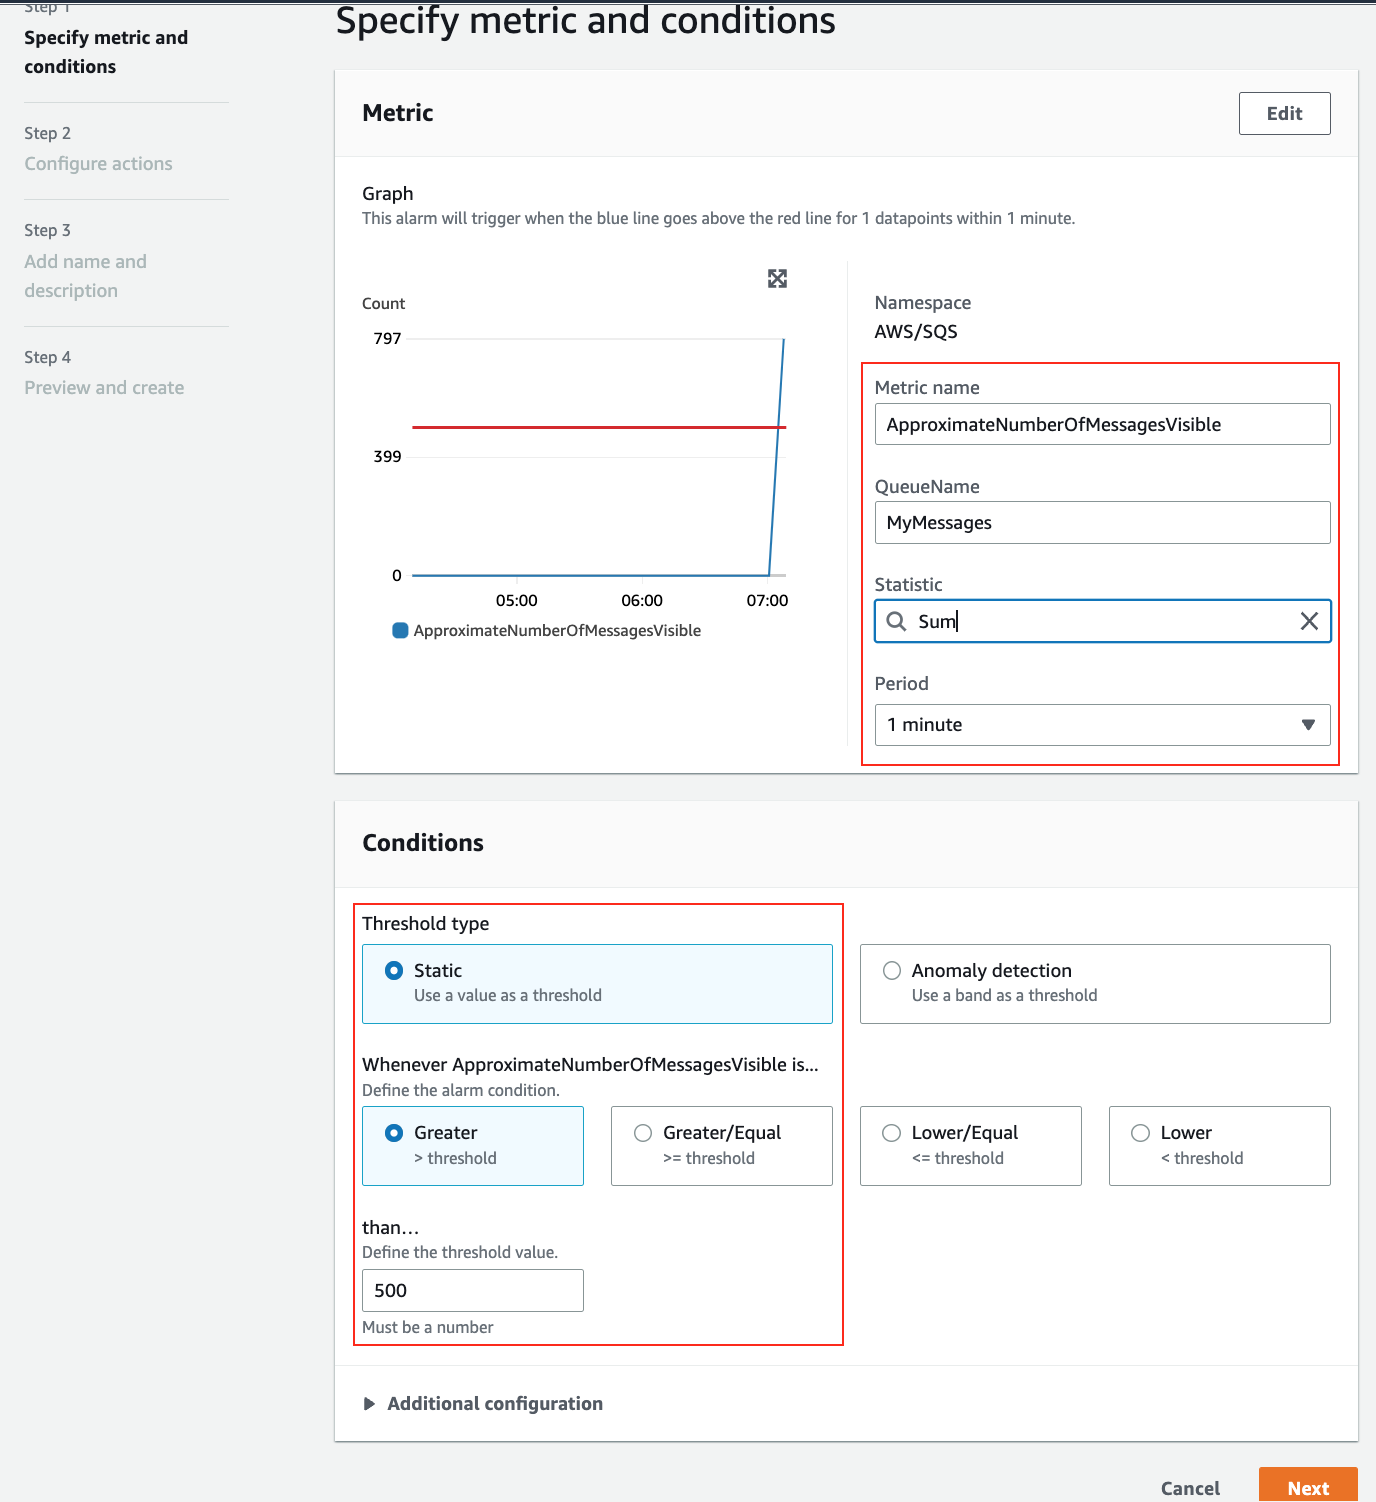
4. Change **Statistic** to **Sum**, **Period** to **1 minute**.
- Threshold type: **Static**.
- Whenever ApproximateNumberOfMessagesVisible is...: **Greater**.
- Define the threshold value: **500**.
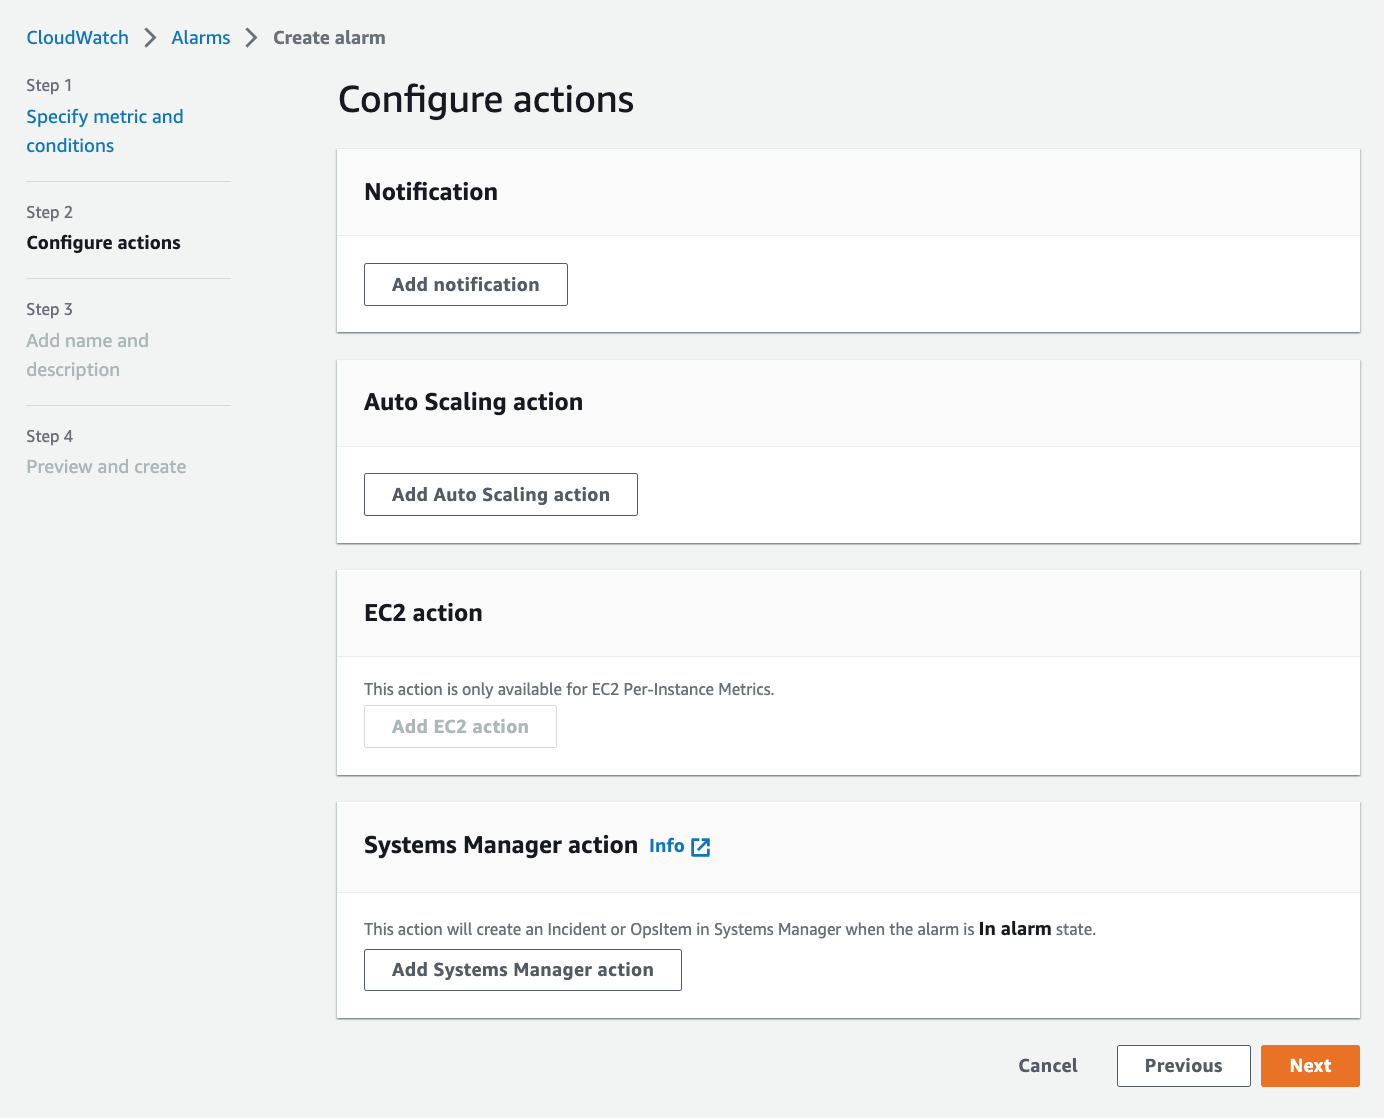
5. Click **Next**.
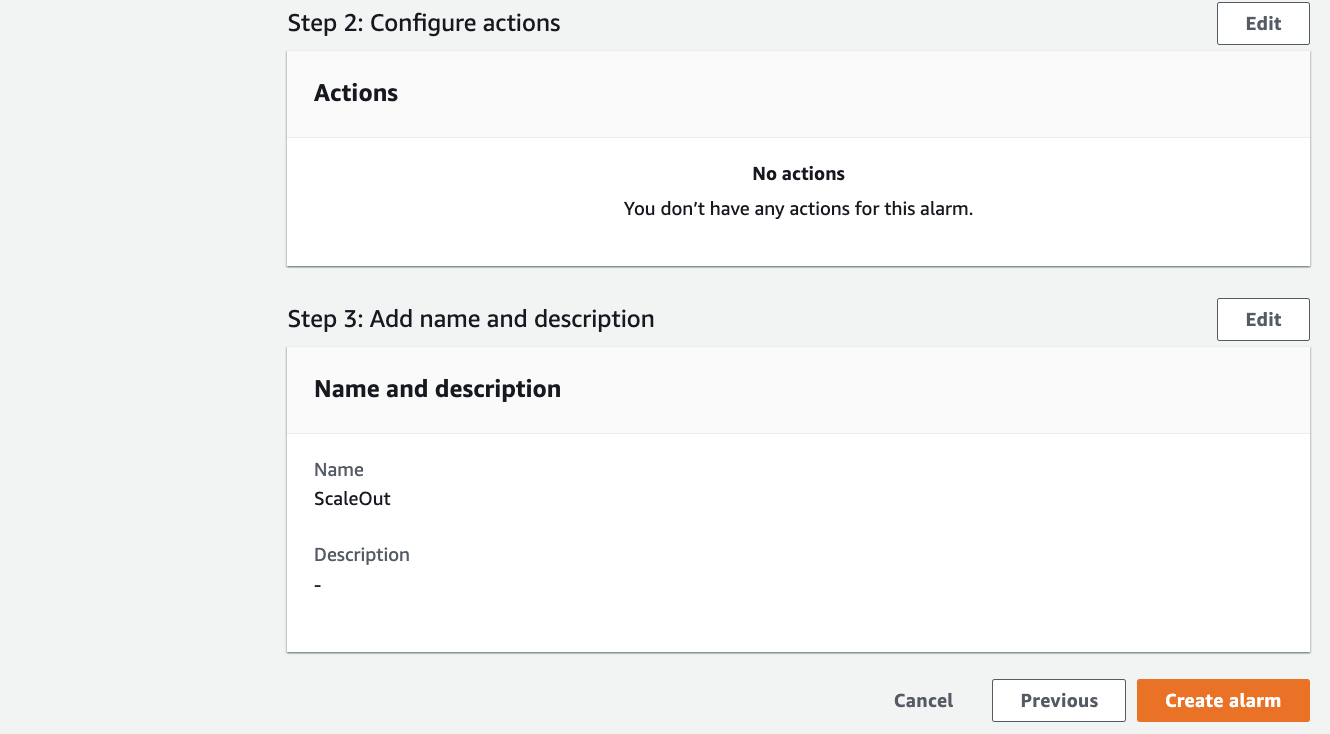
6. Click **Remove** under **Notification** and Click **Next**.
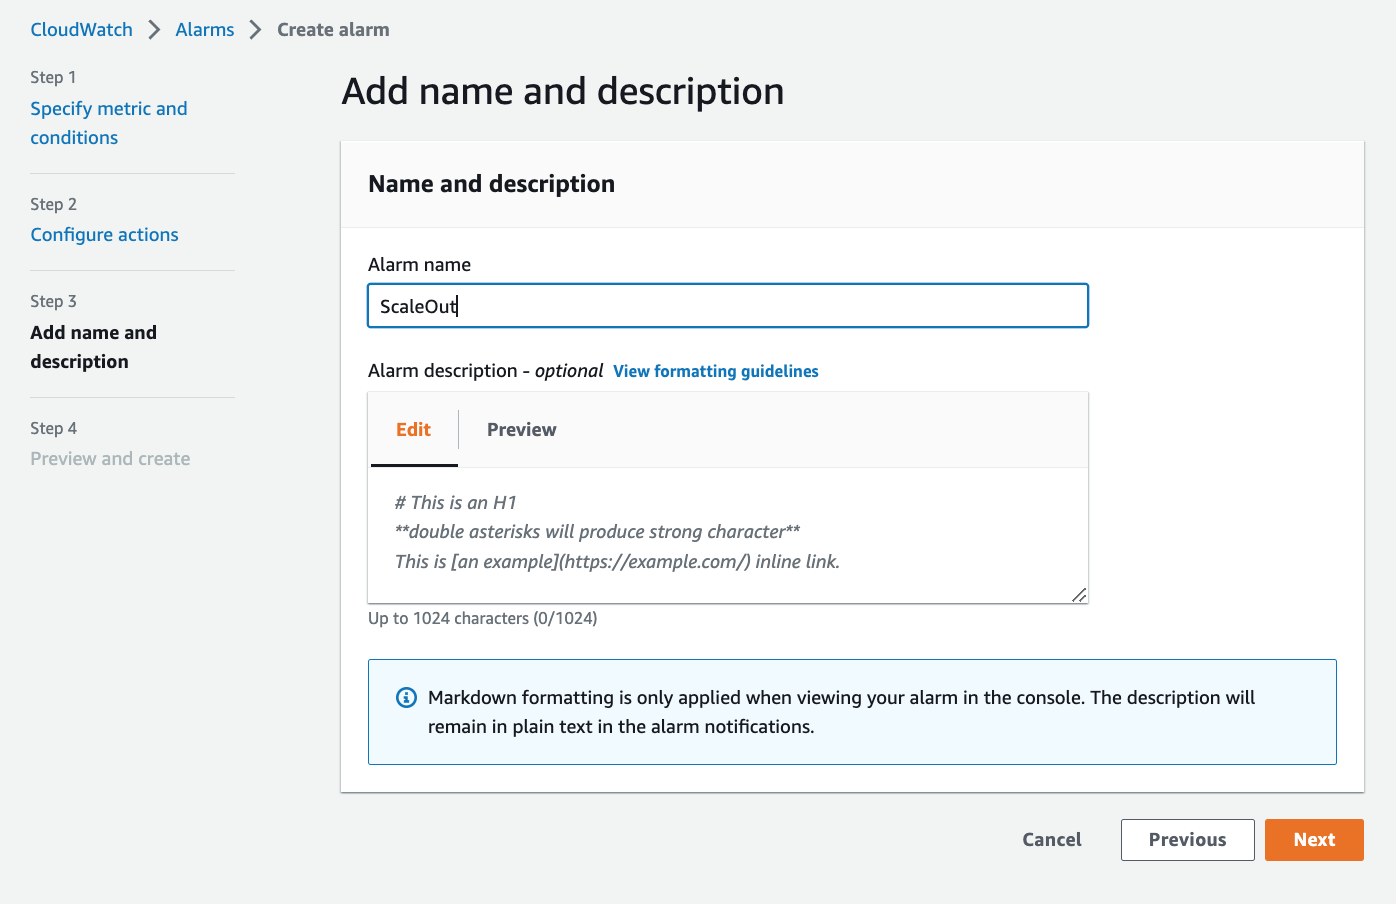
7. Enter Alarm name as **ScaleOut** and Click **Next**.
8. Click **Create Alarm**.
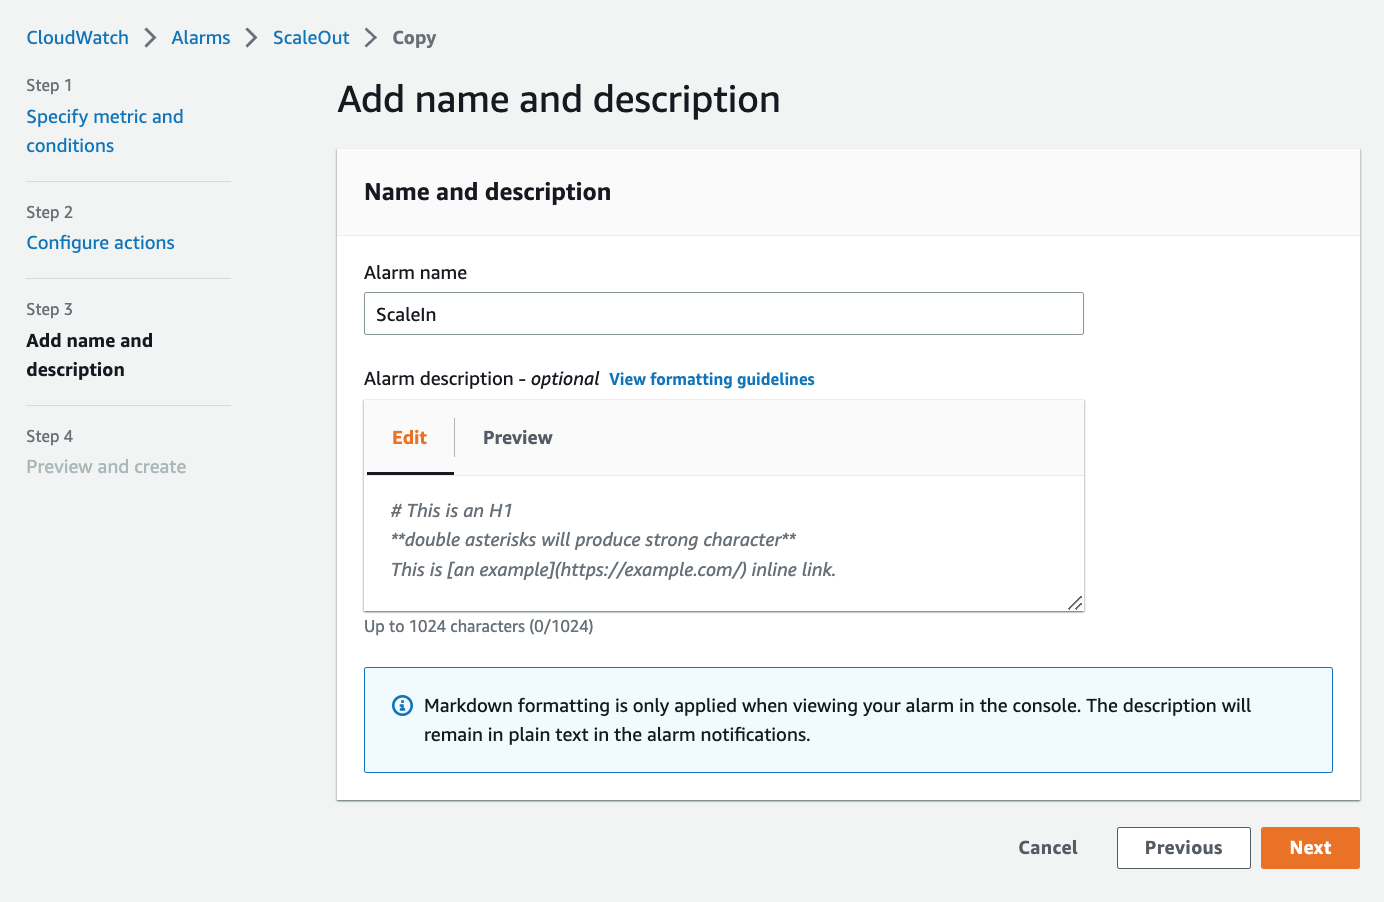
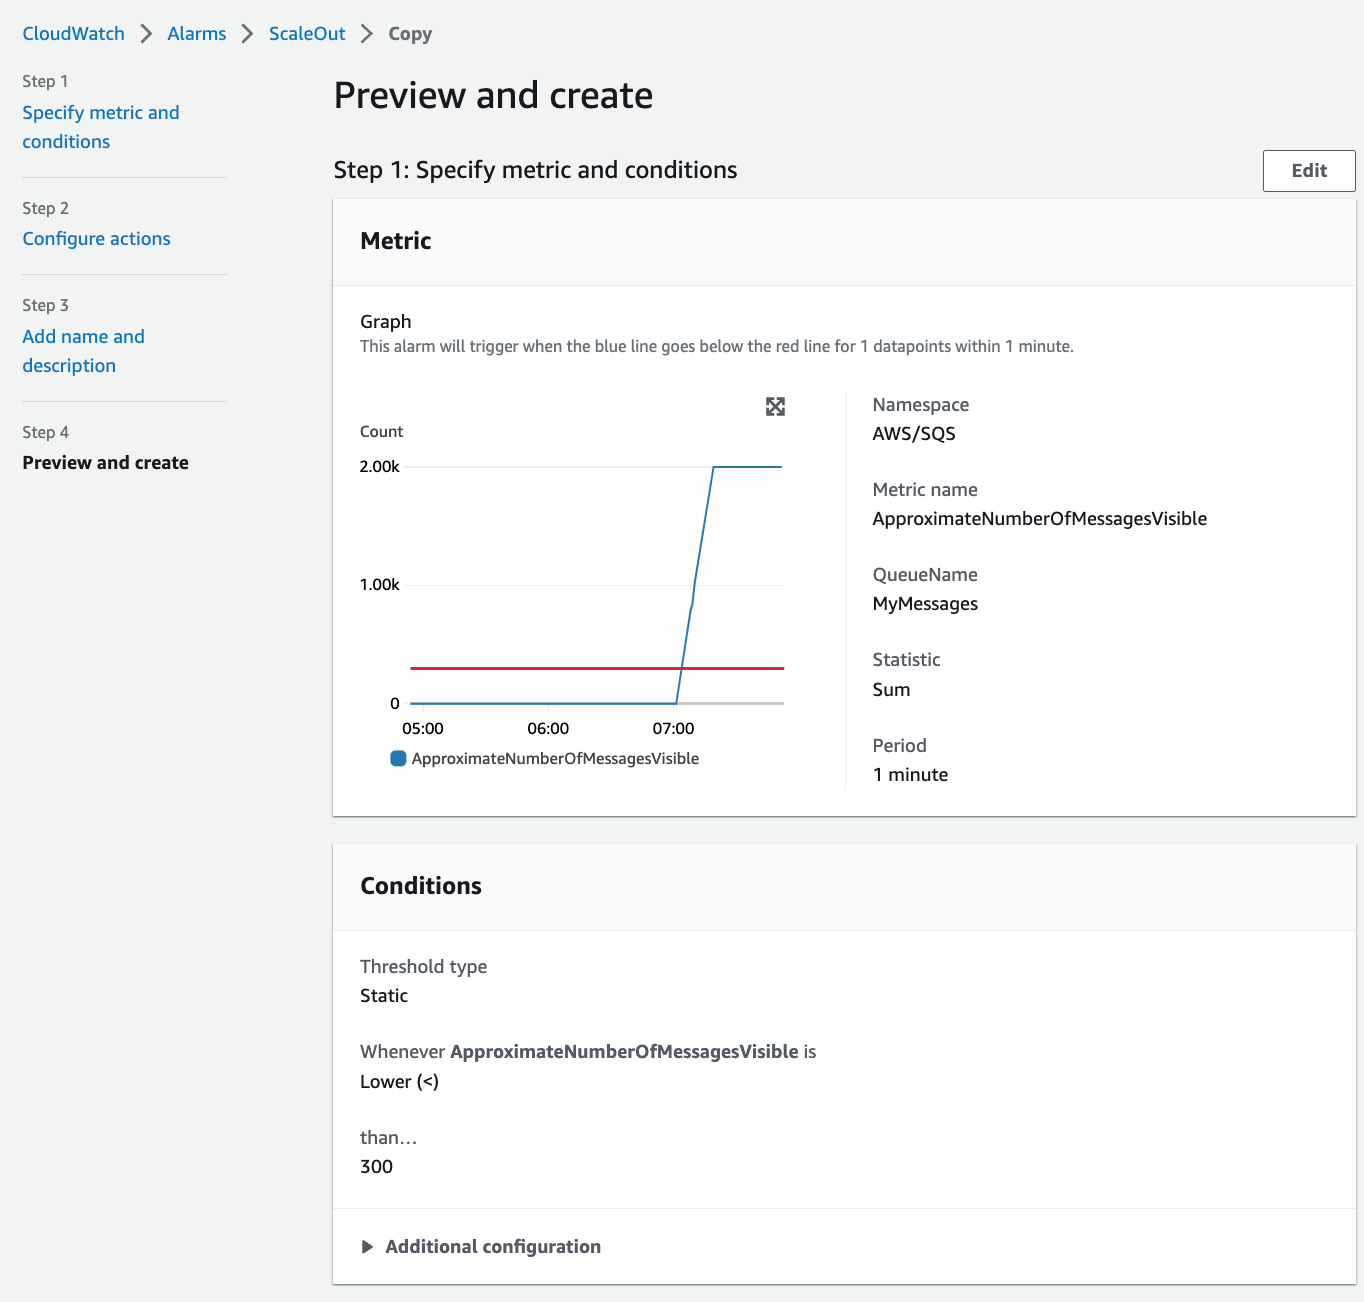
Similar to ScaleOut, we also need to create a ScaleIn Alarm to launch new instances when the **ApproximateNumberOfMessagesVisible** is lesser than **300**.
1. Select **ScaleOut** from CloudWatch > Alarms, Click on **Actions** and **Copy**.
2. Change the following:
- Whenever ApproximateNumberOfMessagesVisible is...: **Lower**.
- Define the threshold value: **300**.
4. Click **Next**.
5. Click **Remove** under **Notification** and Click **Next**.
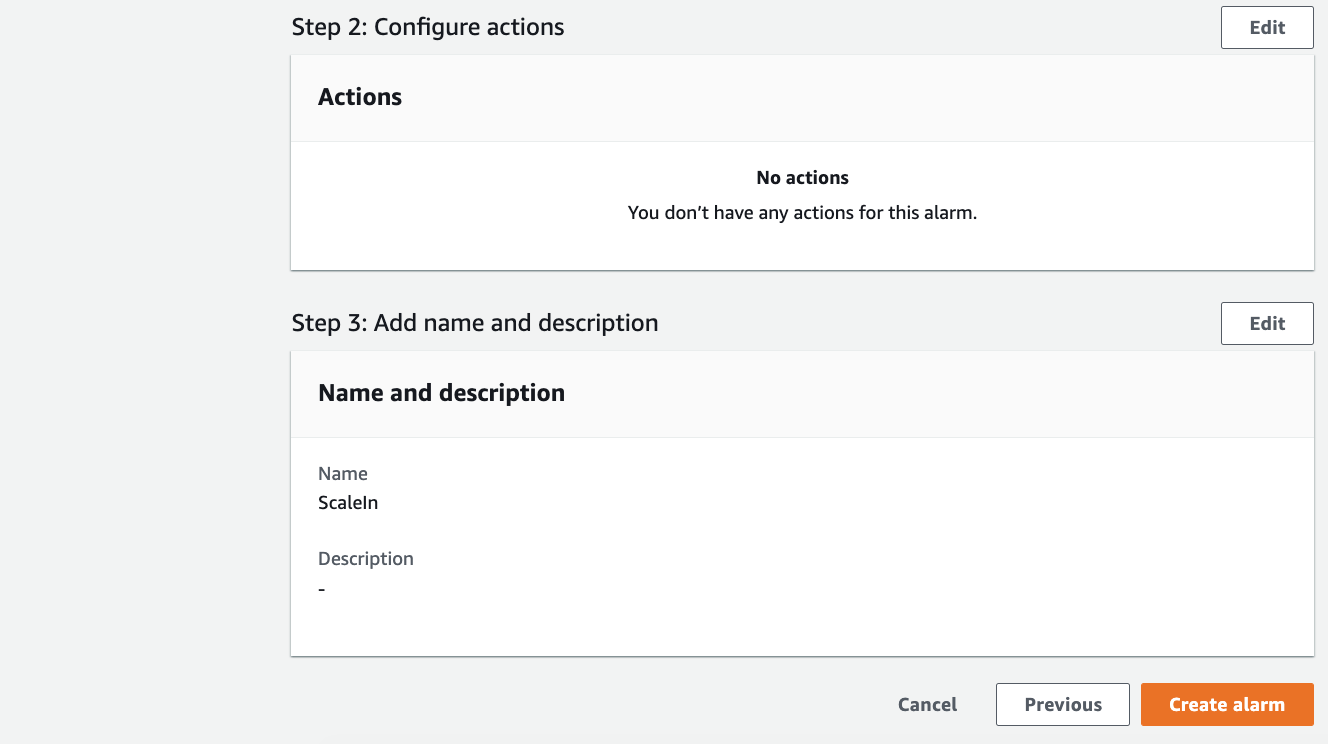
6. Enter Alarm name as **ScaleIn** and Click **Next**.
7. Click **Create Alarm**.
👉 It is important to not have the same value for scale-in and scale-out thresholds. We should leave a gap between them to prevent oscillation.
For example: let's say we have 3 instances, and the CPU goes to 60%, which triggers the +1 step scaling policy. If the load stays constant, it will now be distributed to all 4 instances and the average CPU will drop to around 45% and the scale-in alarm will go off. This will then keep happening in a loop until the load goes up or down sufficiently for one of the alarms to stay in the alarm state and the ASG to reache the min or max.
> ScaleOut_CreateAlarm1
> ScaleOut_CreateAlarm2
> ScaleOut_CreateAlarm3
> ScaleOut_CreateAlarm4
> ScaleOut_CreateAlarm5
> ScaleOut_CreateAlarm6
> ScaleOut_CreateAlarm7
> ScaleOut_CreateAlarm7.1

> ScaleIn_CreateAlarm1

> ScaleIn_CreateAlarm2
> ScaleIn_CreateAlarm3
> ScaleIn_CreateAlarm4
> ScaleIn_CreateAlarm4.1
---
### Step 8. Create a Launch Template
We can use a Launch Template or Launch Configurations. Launch Template is preferred over Launch Configurations as we can have different versions of the template. Also we can't modify a Launch Configuration after we have created it.
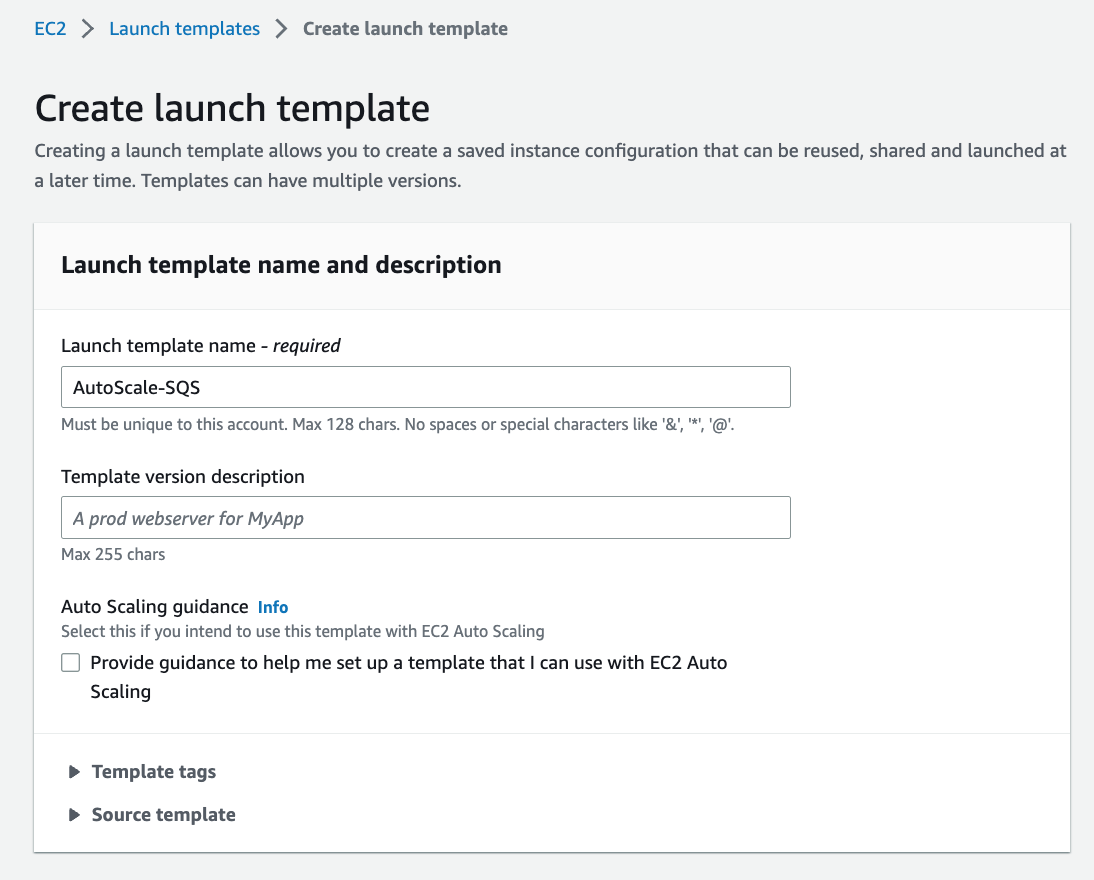
Create a Launch Template that will be used by the Auto Scaling group. The Launch Template defines what the instances are and how they are created.
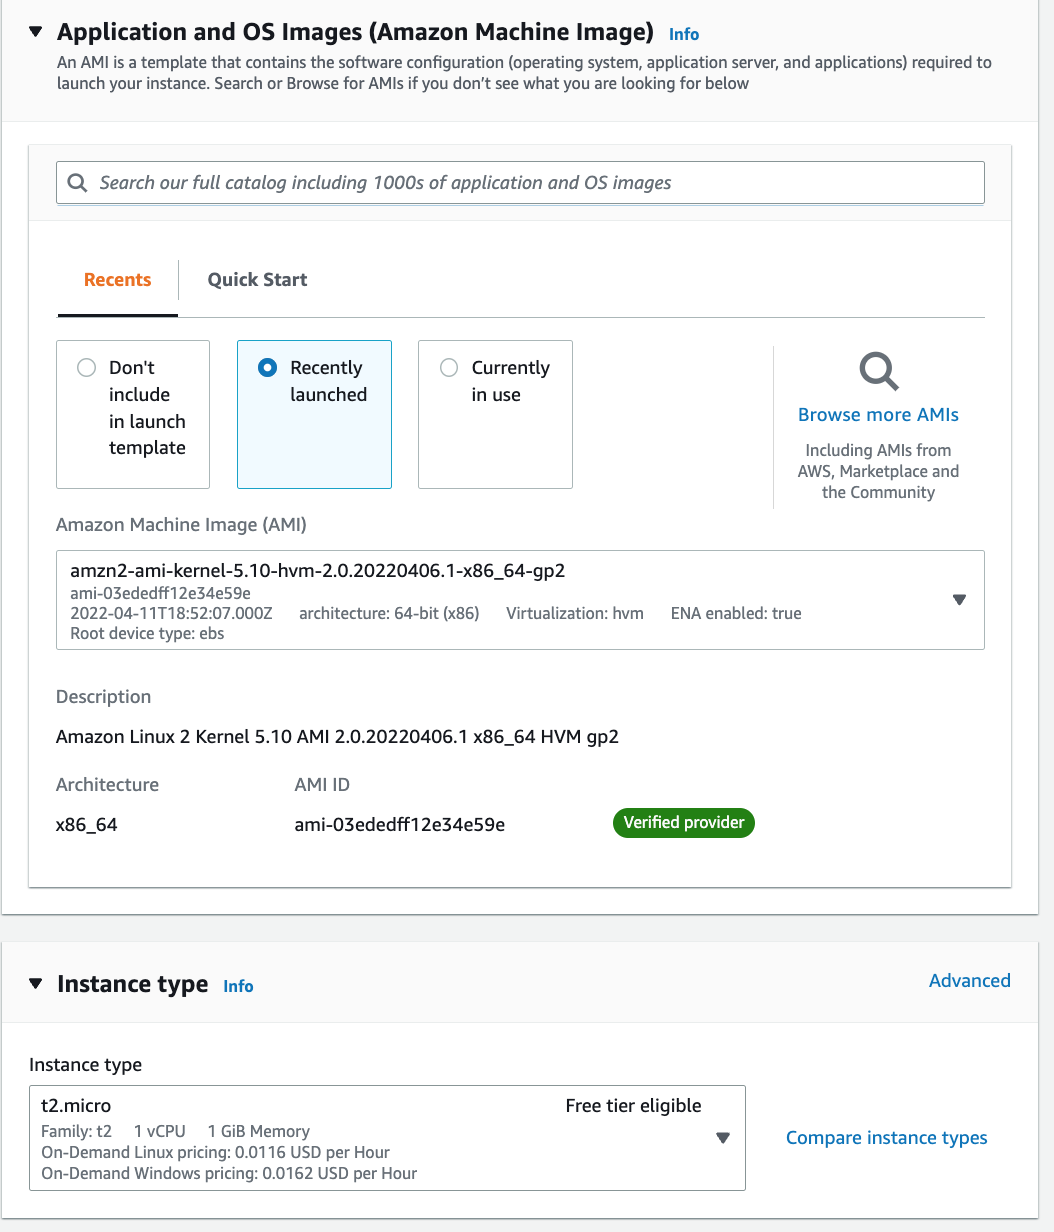
1. Navigate to EC2 > Instances > Launch Templates.
2. Create a new template, and name it `AutoScale-SQS`.
3. Search for `AMI`, and pick the `Amazon Linux`.
4. Set the instance type as `t2.micro`.
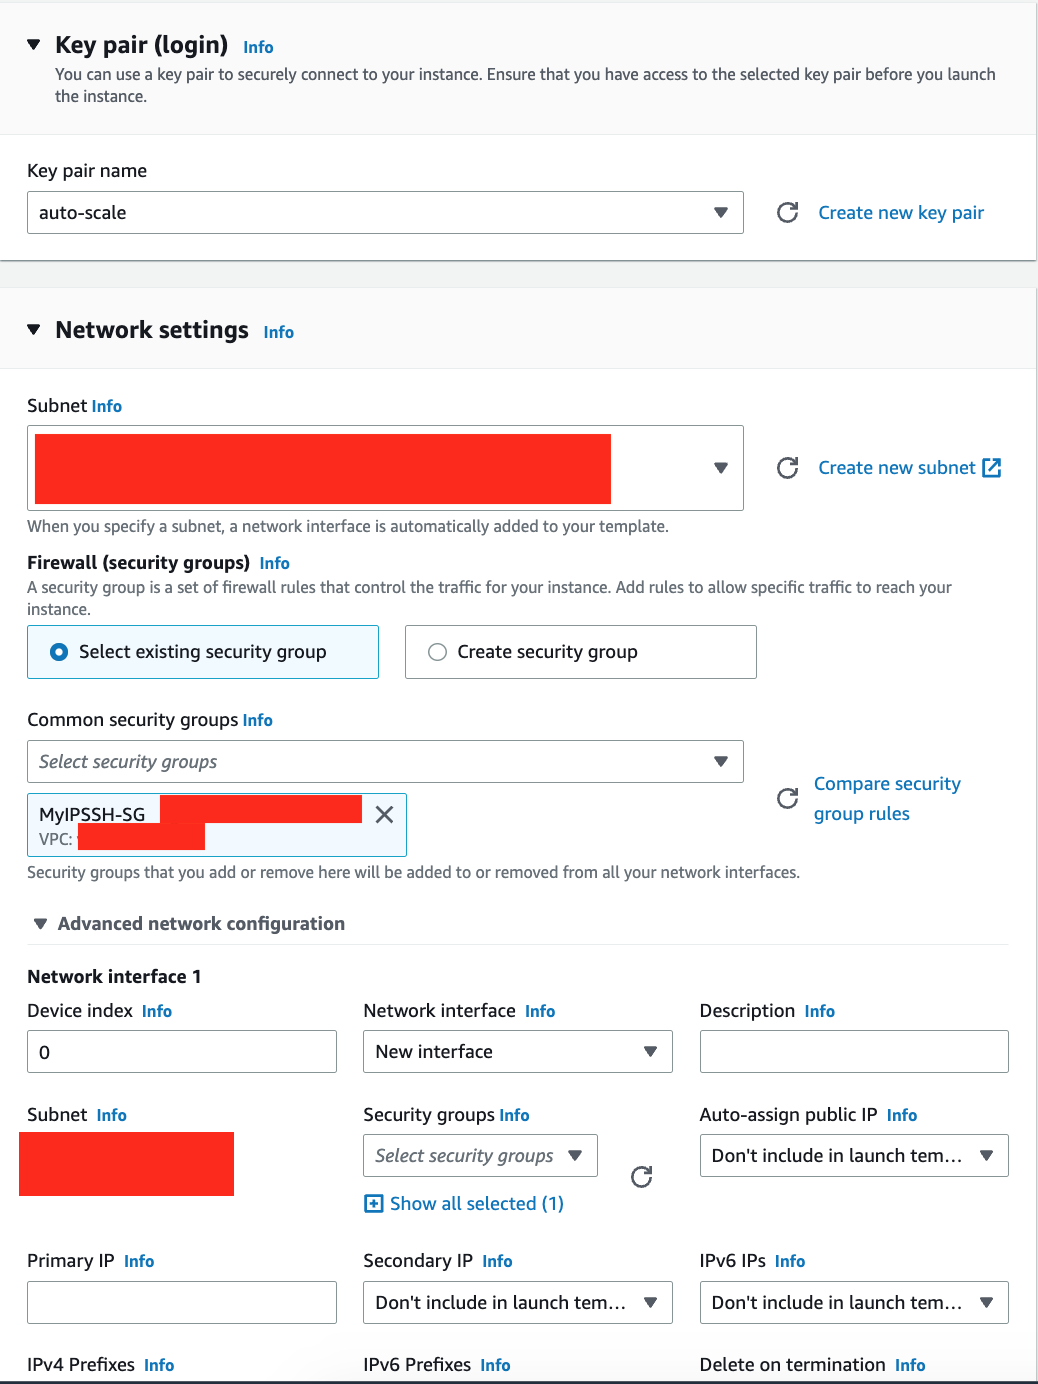
5. Select `key pair` you created earlier.
6. Select the `MyIPSSH-SG` security group you created earlier.
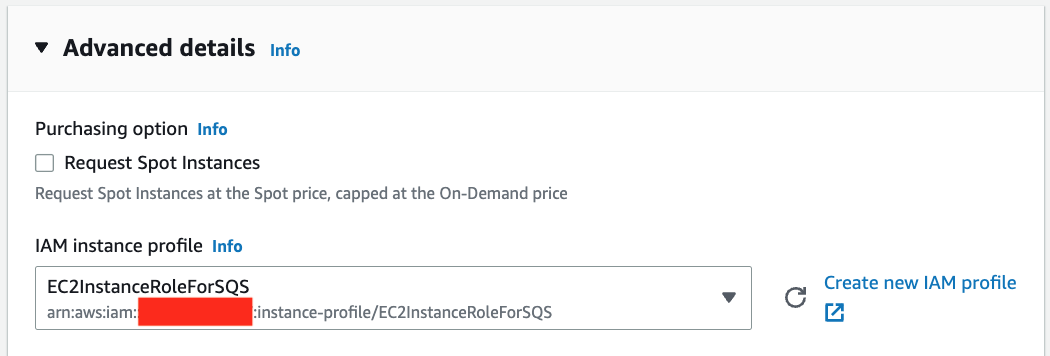
7. Expand Advanced Details, and select `EC2InstanceRoleForSQS` Role under **IAM instance profile**.
8. Paste the following script under **User data**.
* Note: These are commands to install jq, AWS CLI, copy scripts from the S3 bucket and to execute receiveMessages.sh.
9. Click Create Launch Template.
10. Click **View Launch templates**.
**User data**
> Note: Please update the bucket name in the script.
```bash
#!/bin/bash
# install jq
sudo yum install jq -y
# Update aws cli version
cd /home/ec2-user
curl "https://awscli.amazonaws.com/awscli-exe-linux-x86_64.zip" -o "awscliv2.zip"
unzip awscliv2.zip
sudo ./aws/install
sudo ./aws/install --bin-dir /usr/local/bin --install-dir /usr/local/aws-cli --update
which aws
ls -l /usr/local/bin/aws
aws --version
# copy sendMessages.sh and receiveMessages.sh from S3
aws s3 cp s3://sqssri/ . --recursive --exclude "*" --include "*.sh"
sudo chmod +x /home/ec2-user/*.sh
nohup ./receiveMessages.sh &
```
👉 As Launch Templates with User data are slow, it is recommended to create an AMI with the required software to improve the speed of instance initialisation.
> LaunchTemplate1
> LaunchTemplate1.1
> LaunchTemplate1.2
> LaunchTemplate1.3

> LaunchTemplate1.4
---
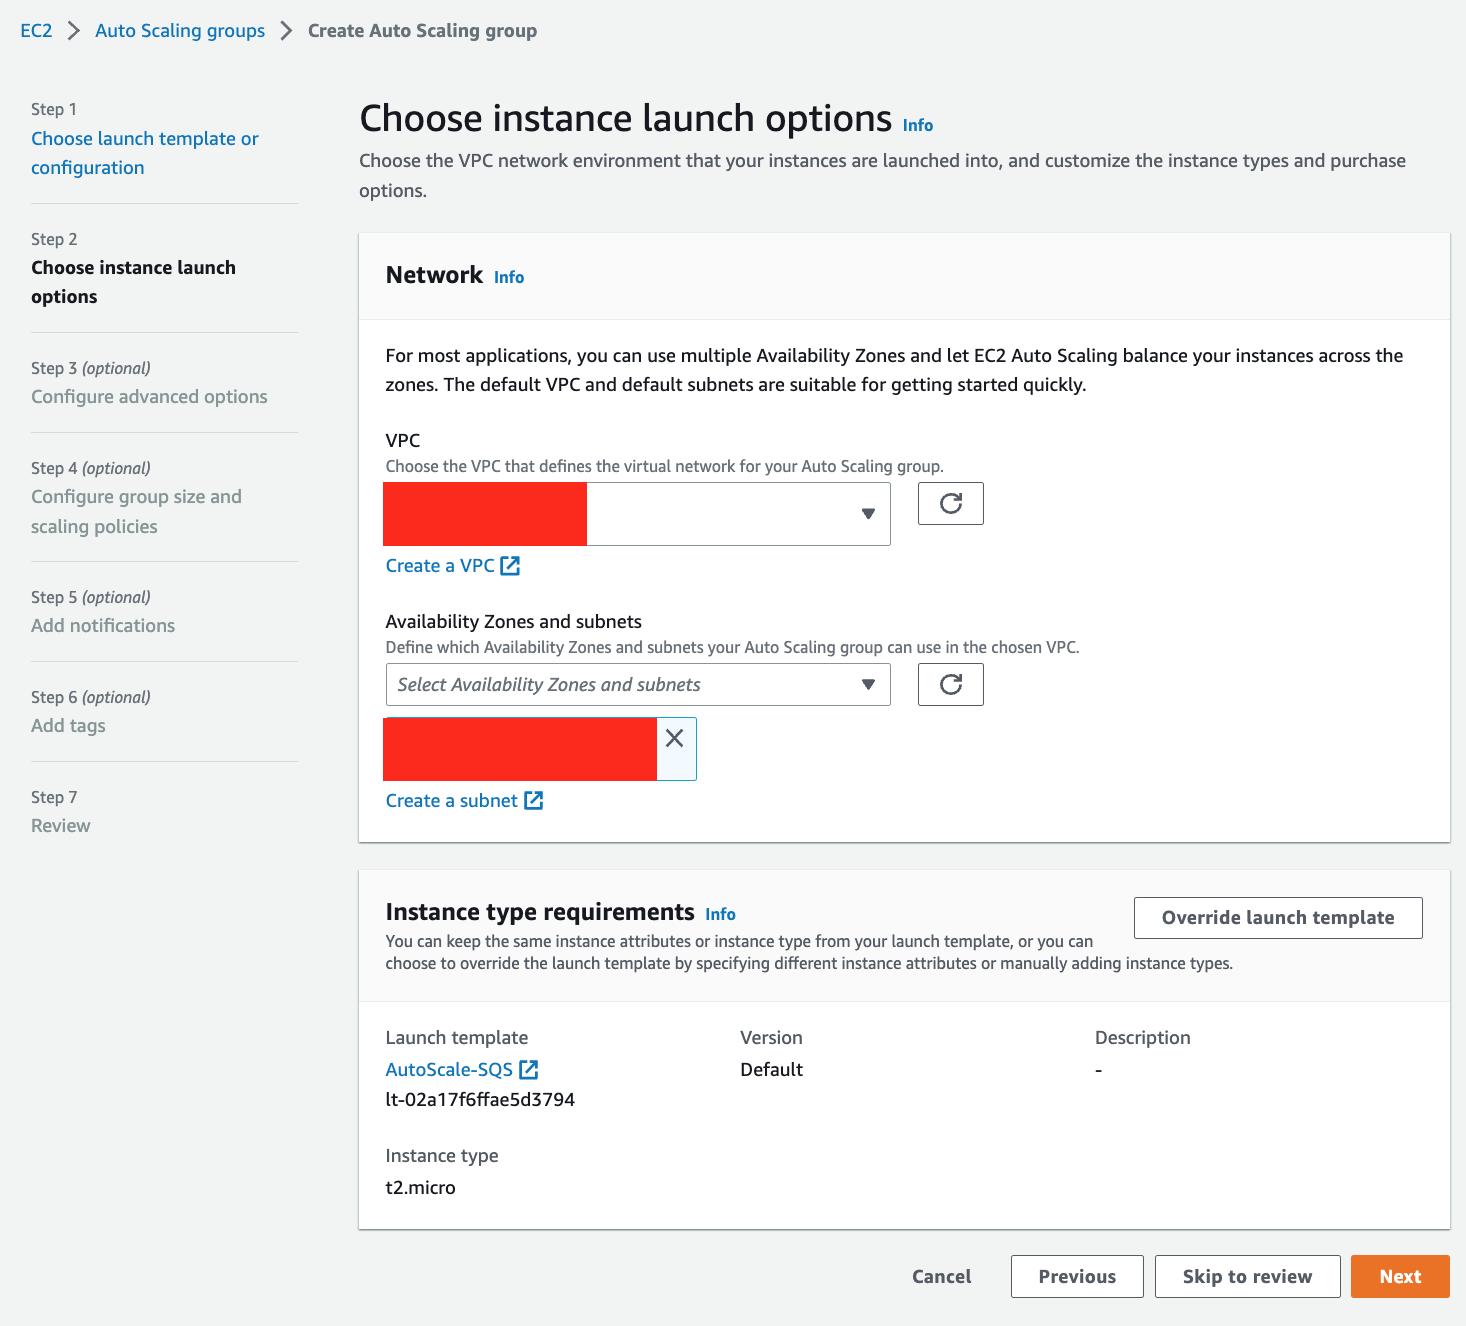
### Step 9. Create an Auto Scaling Group
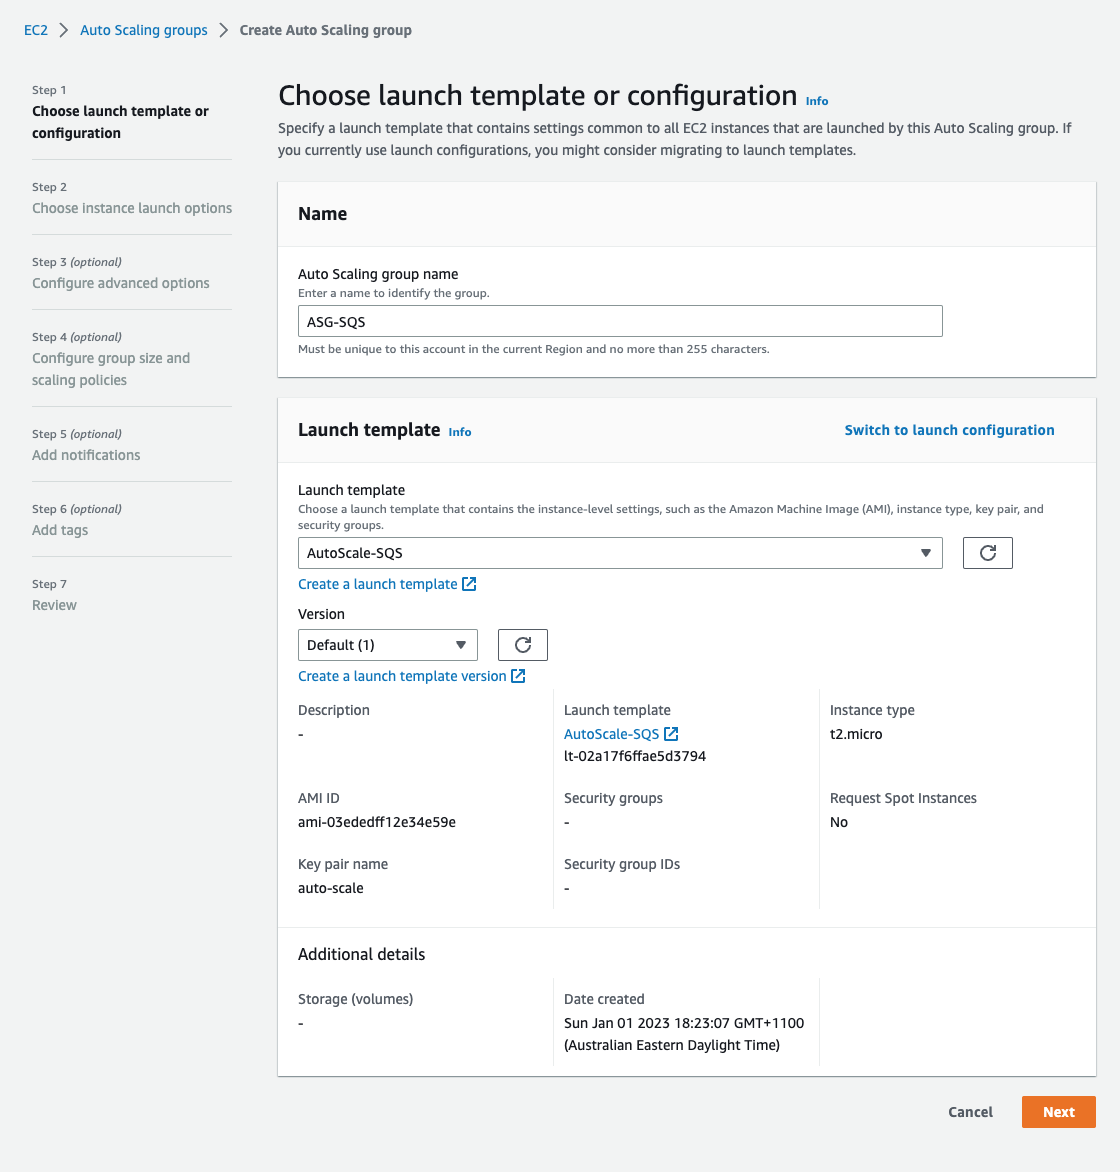
1. Navigate to EC2 > Auto Scaling > Auto Scaling Groups
2. Click **Create Auto Scaling group**.
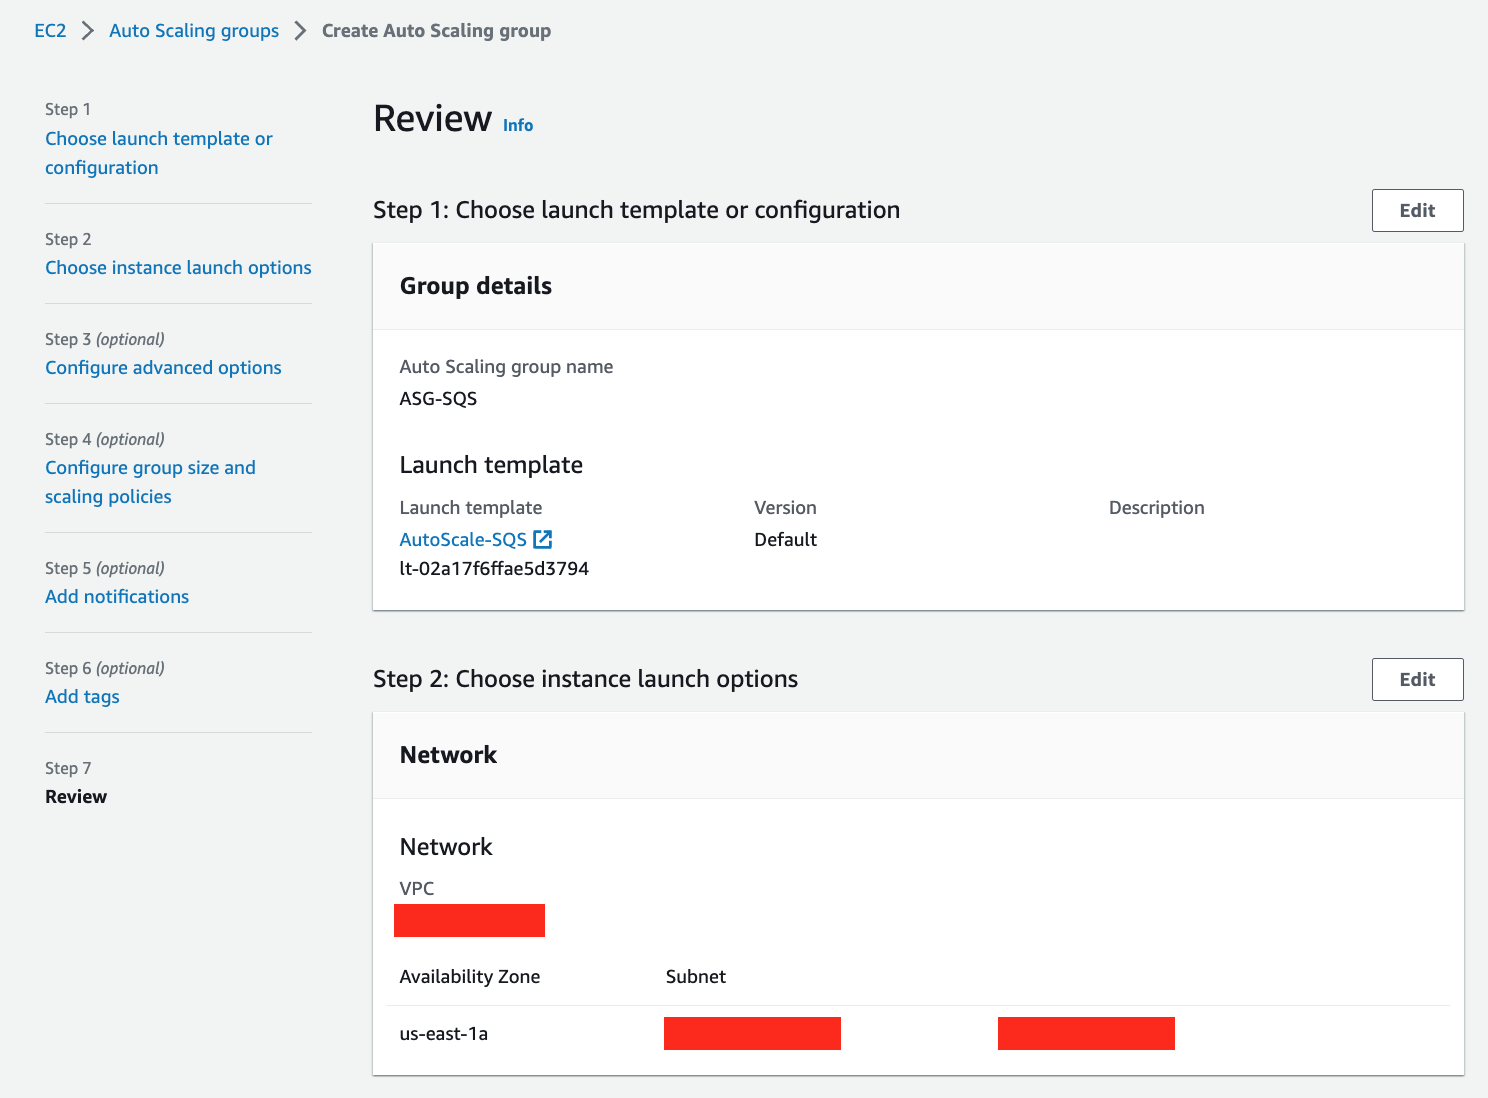
3. Call the group `ASG-SQS`.
4. Select Launch Template, and choose the template named `AutoScale-SQS`.
5. We are using `default VPC`, which will be selected, so select `us-east-1a` as subnet.
7. Click Next.
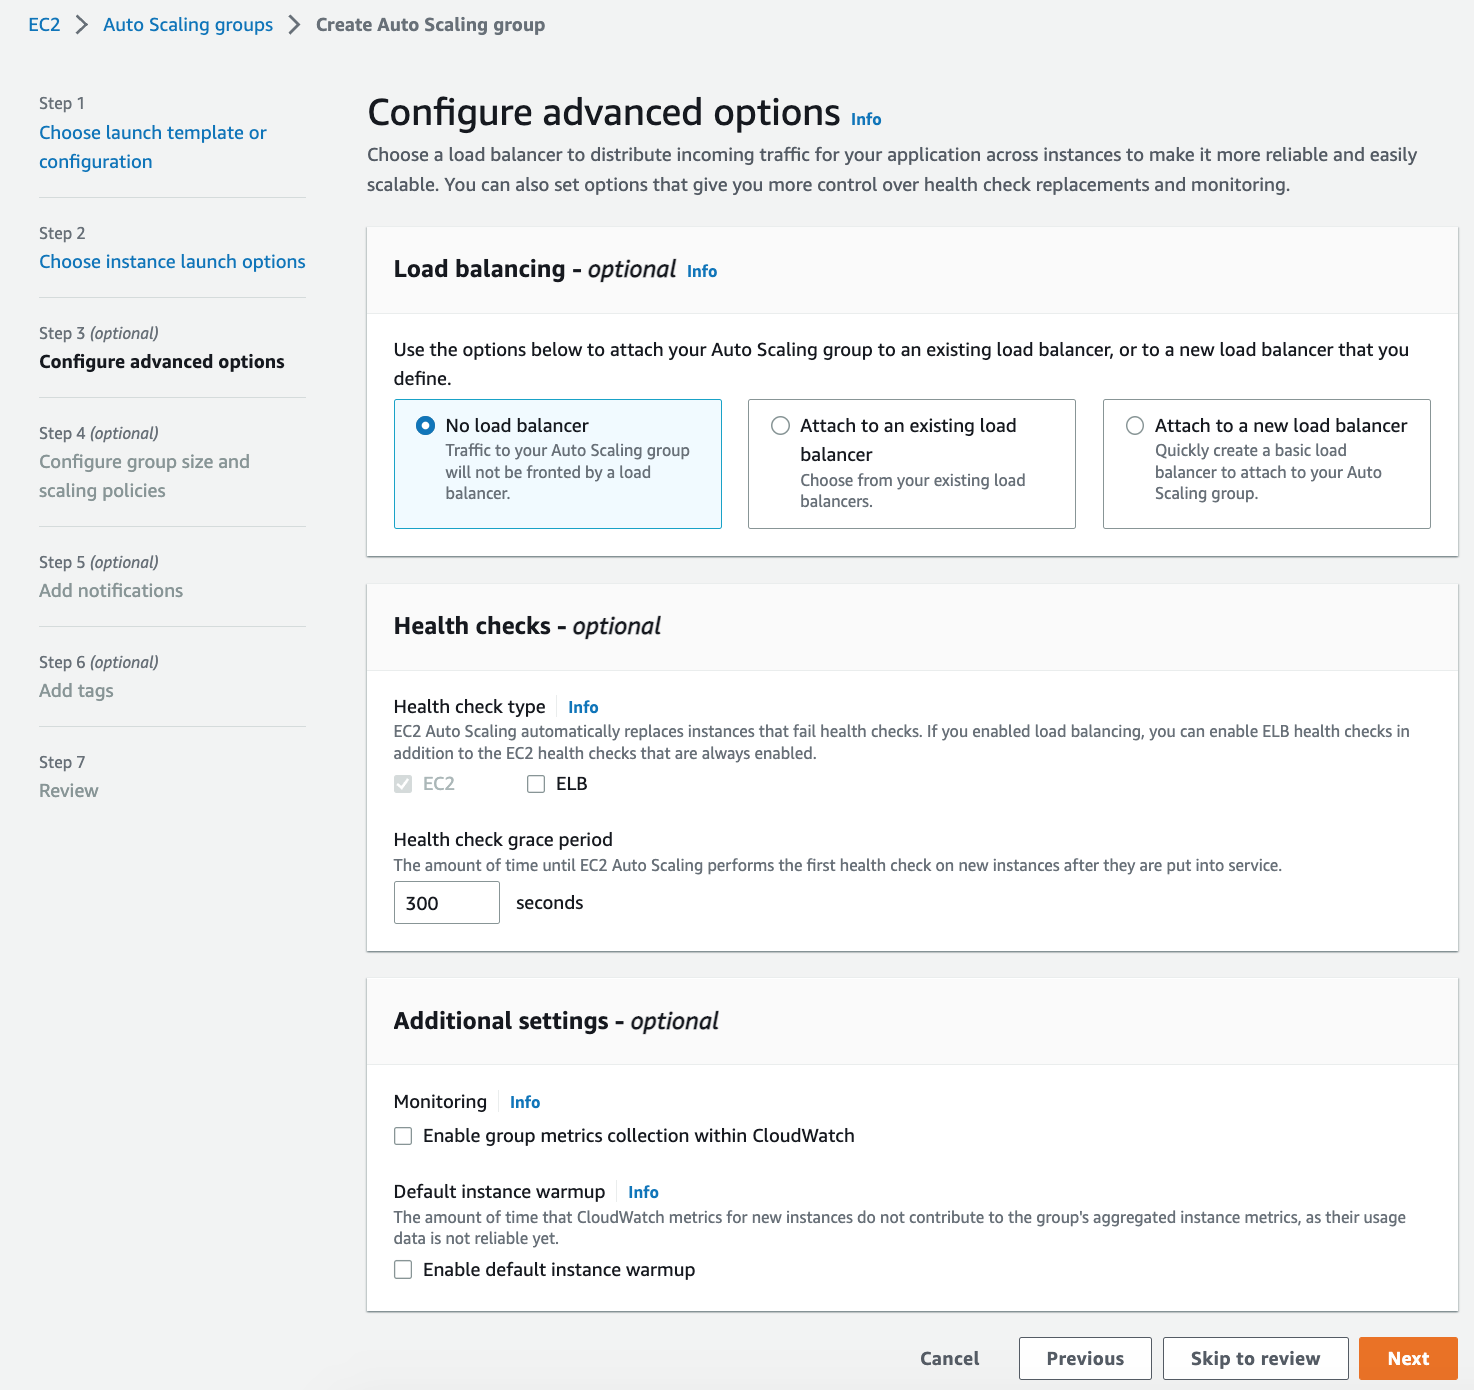
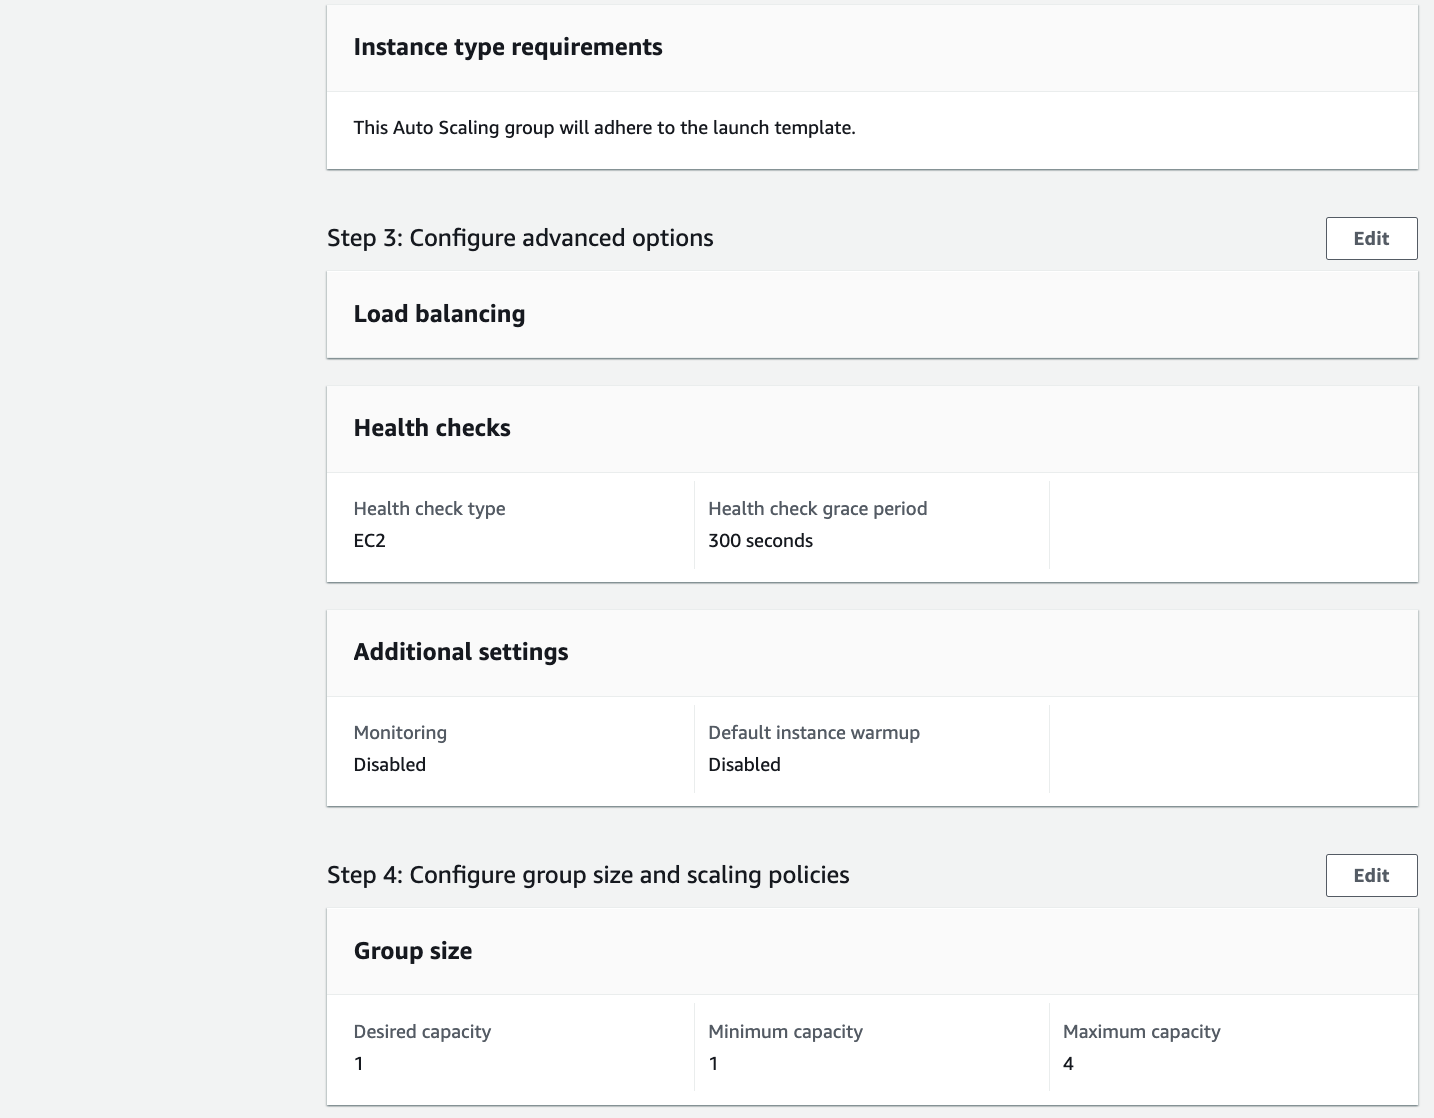
8. Leave the default for Health checks, which is `EC2`.
9. Leave the default for Configure advanced options and Click Next.
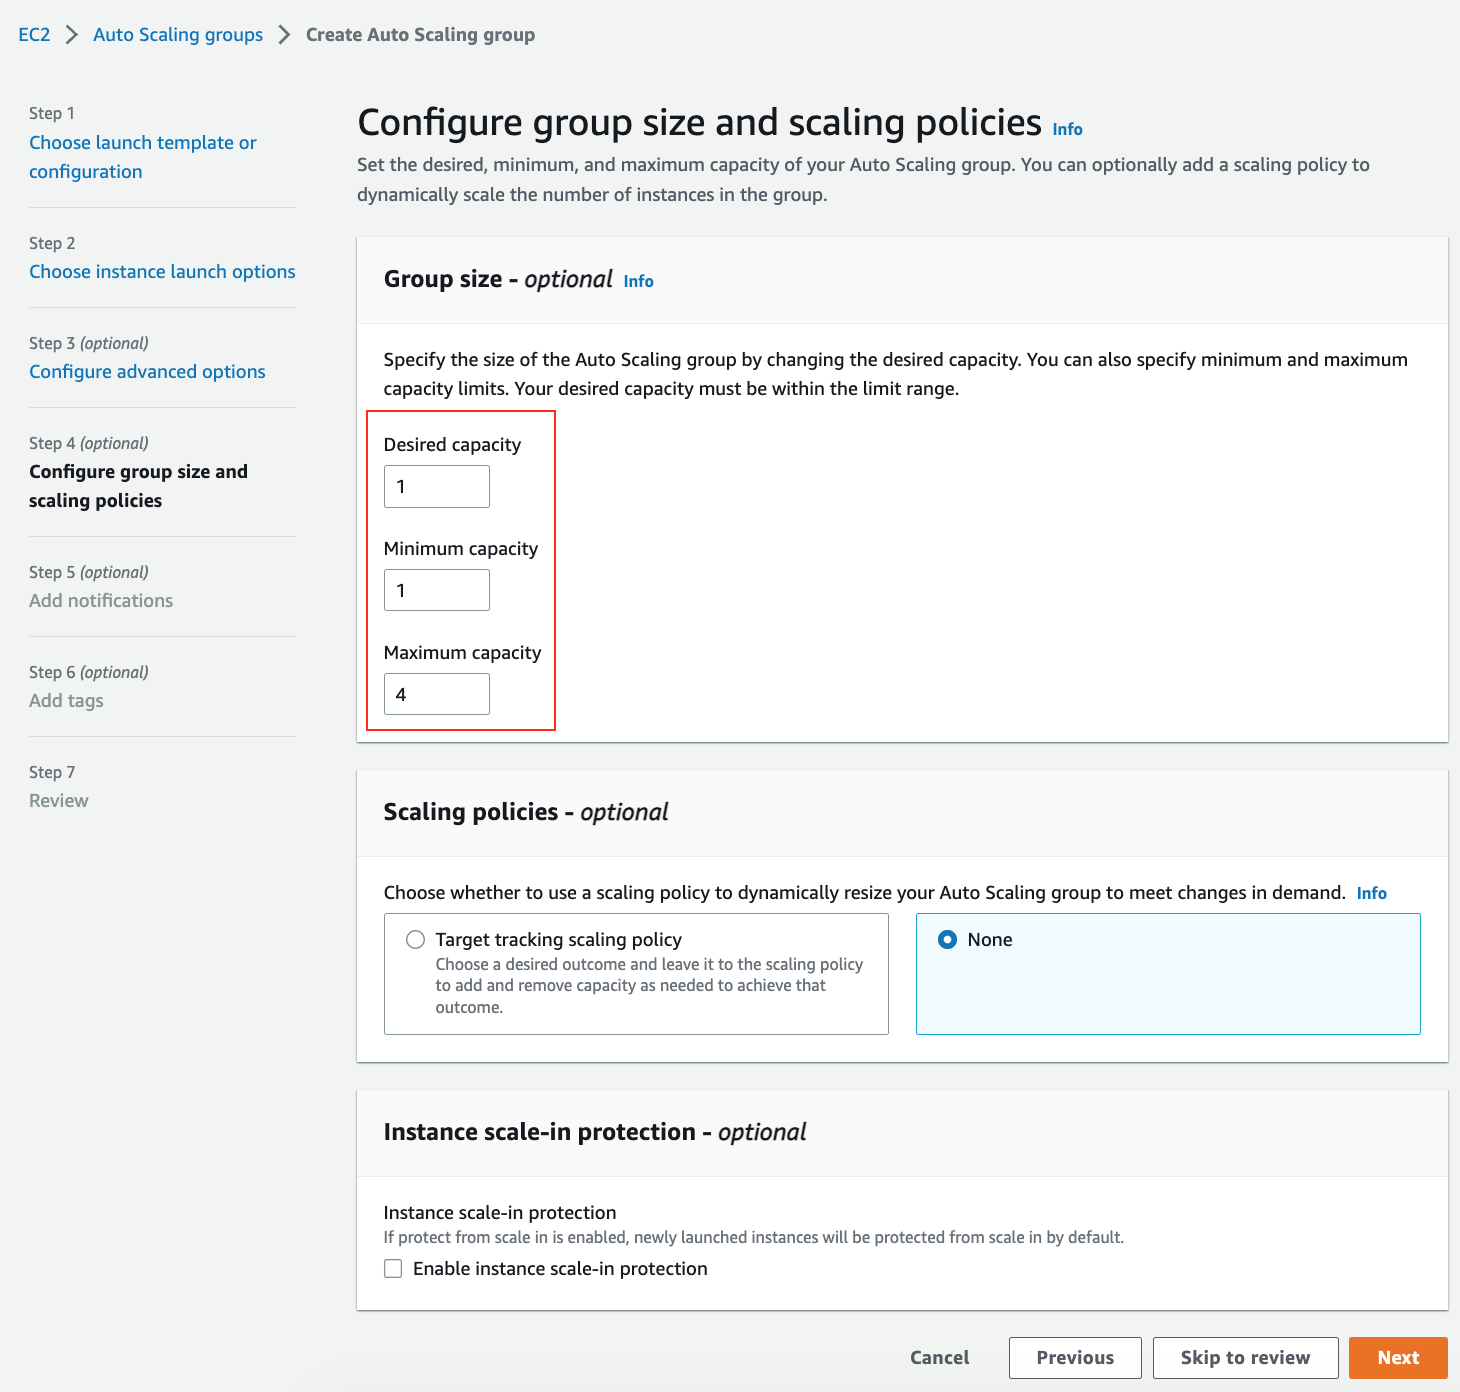
10. For Group Size, enter the following values:
* Desired Capacity: `1`
* Minimum Capacity: `1`
* Maximum Capacity: `4`
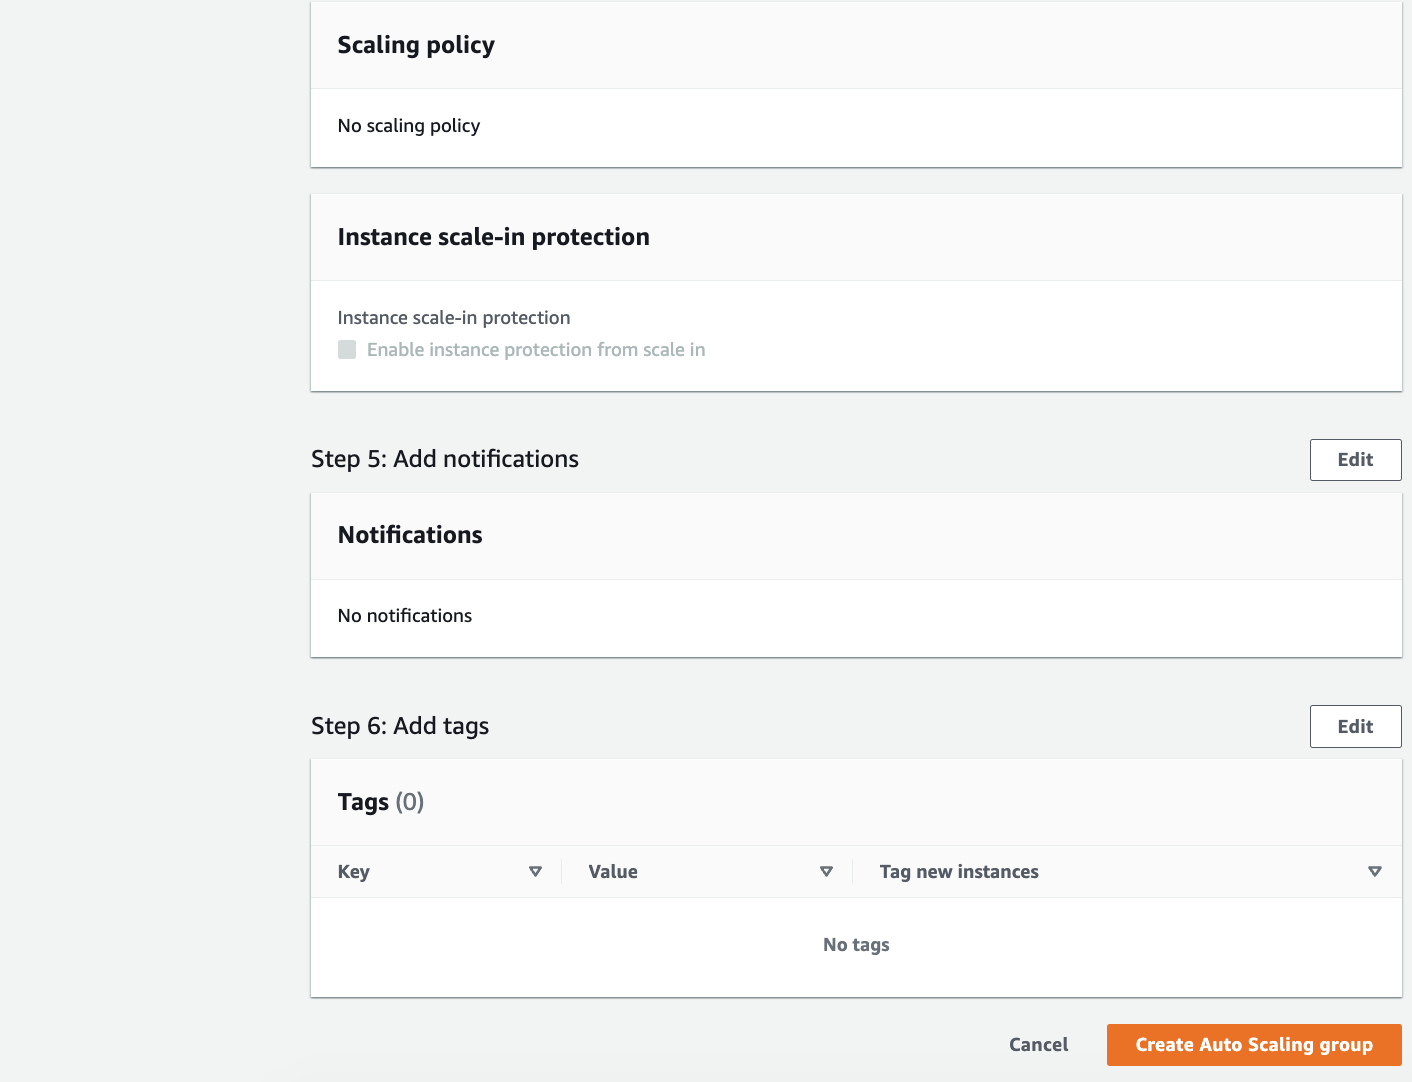
11. We will not be adding Scaling policies here, so leave the default `None` and Click Next.
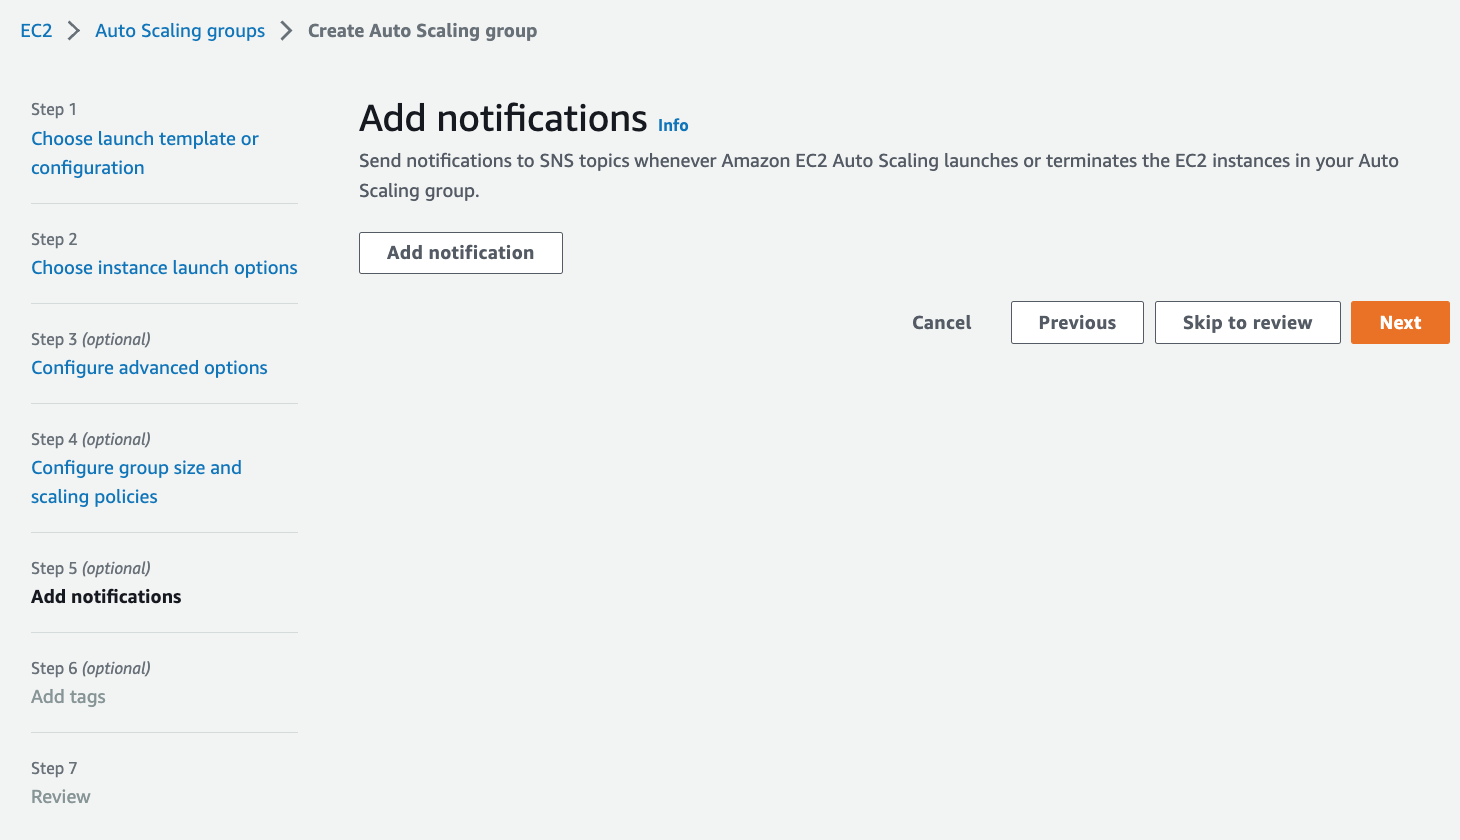
12. Click Next at `Add Notifications`.
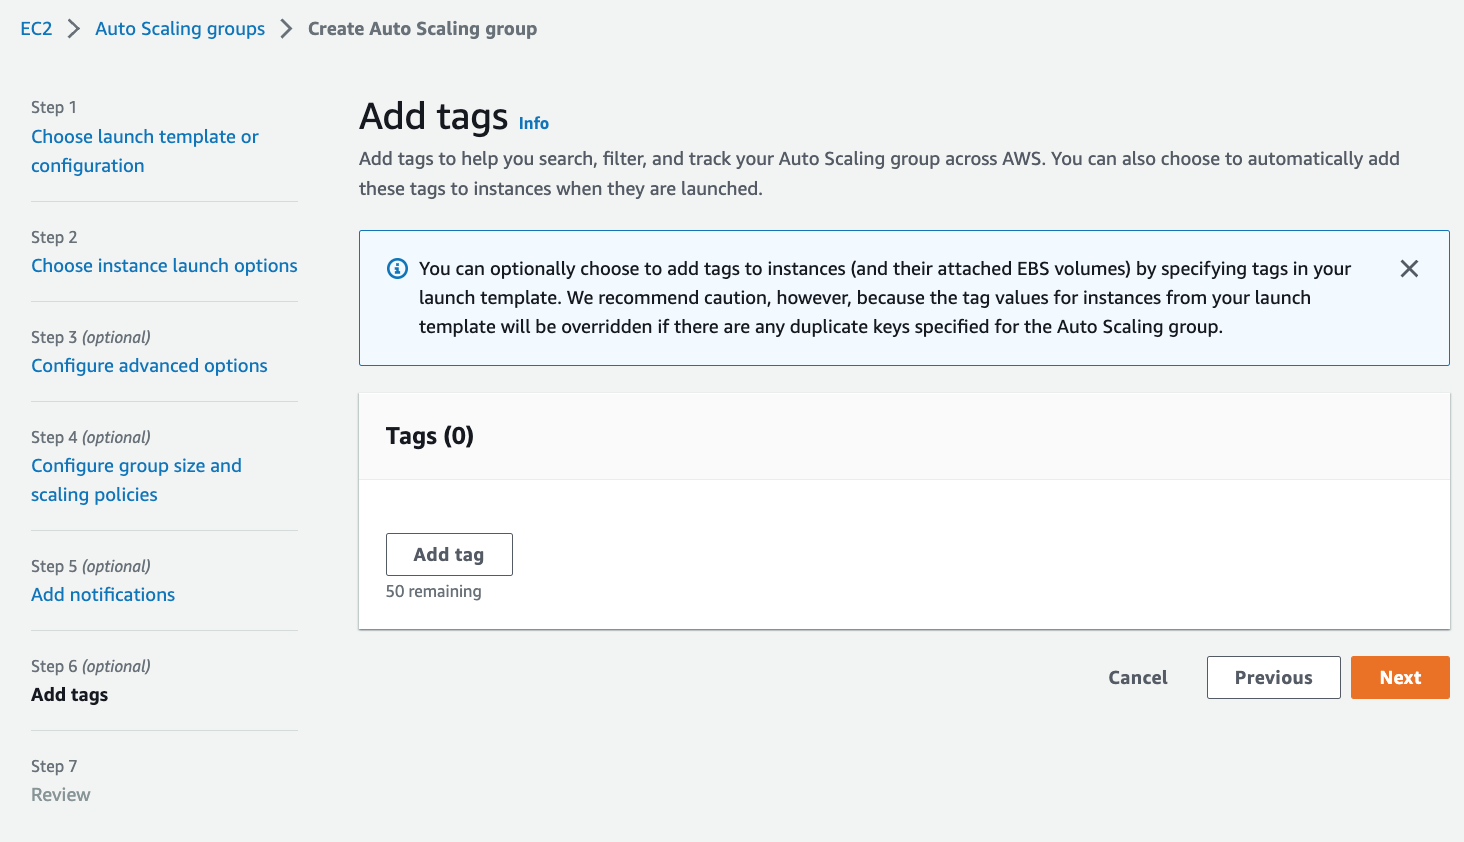
13. Click Next at `Add tags`.
14. Click Create `Auto Scaling Group`.
15. Navigate to EC2 > Auto Scaling > click `ASG-SQS` and then click `Automatic scaling`
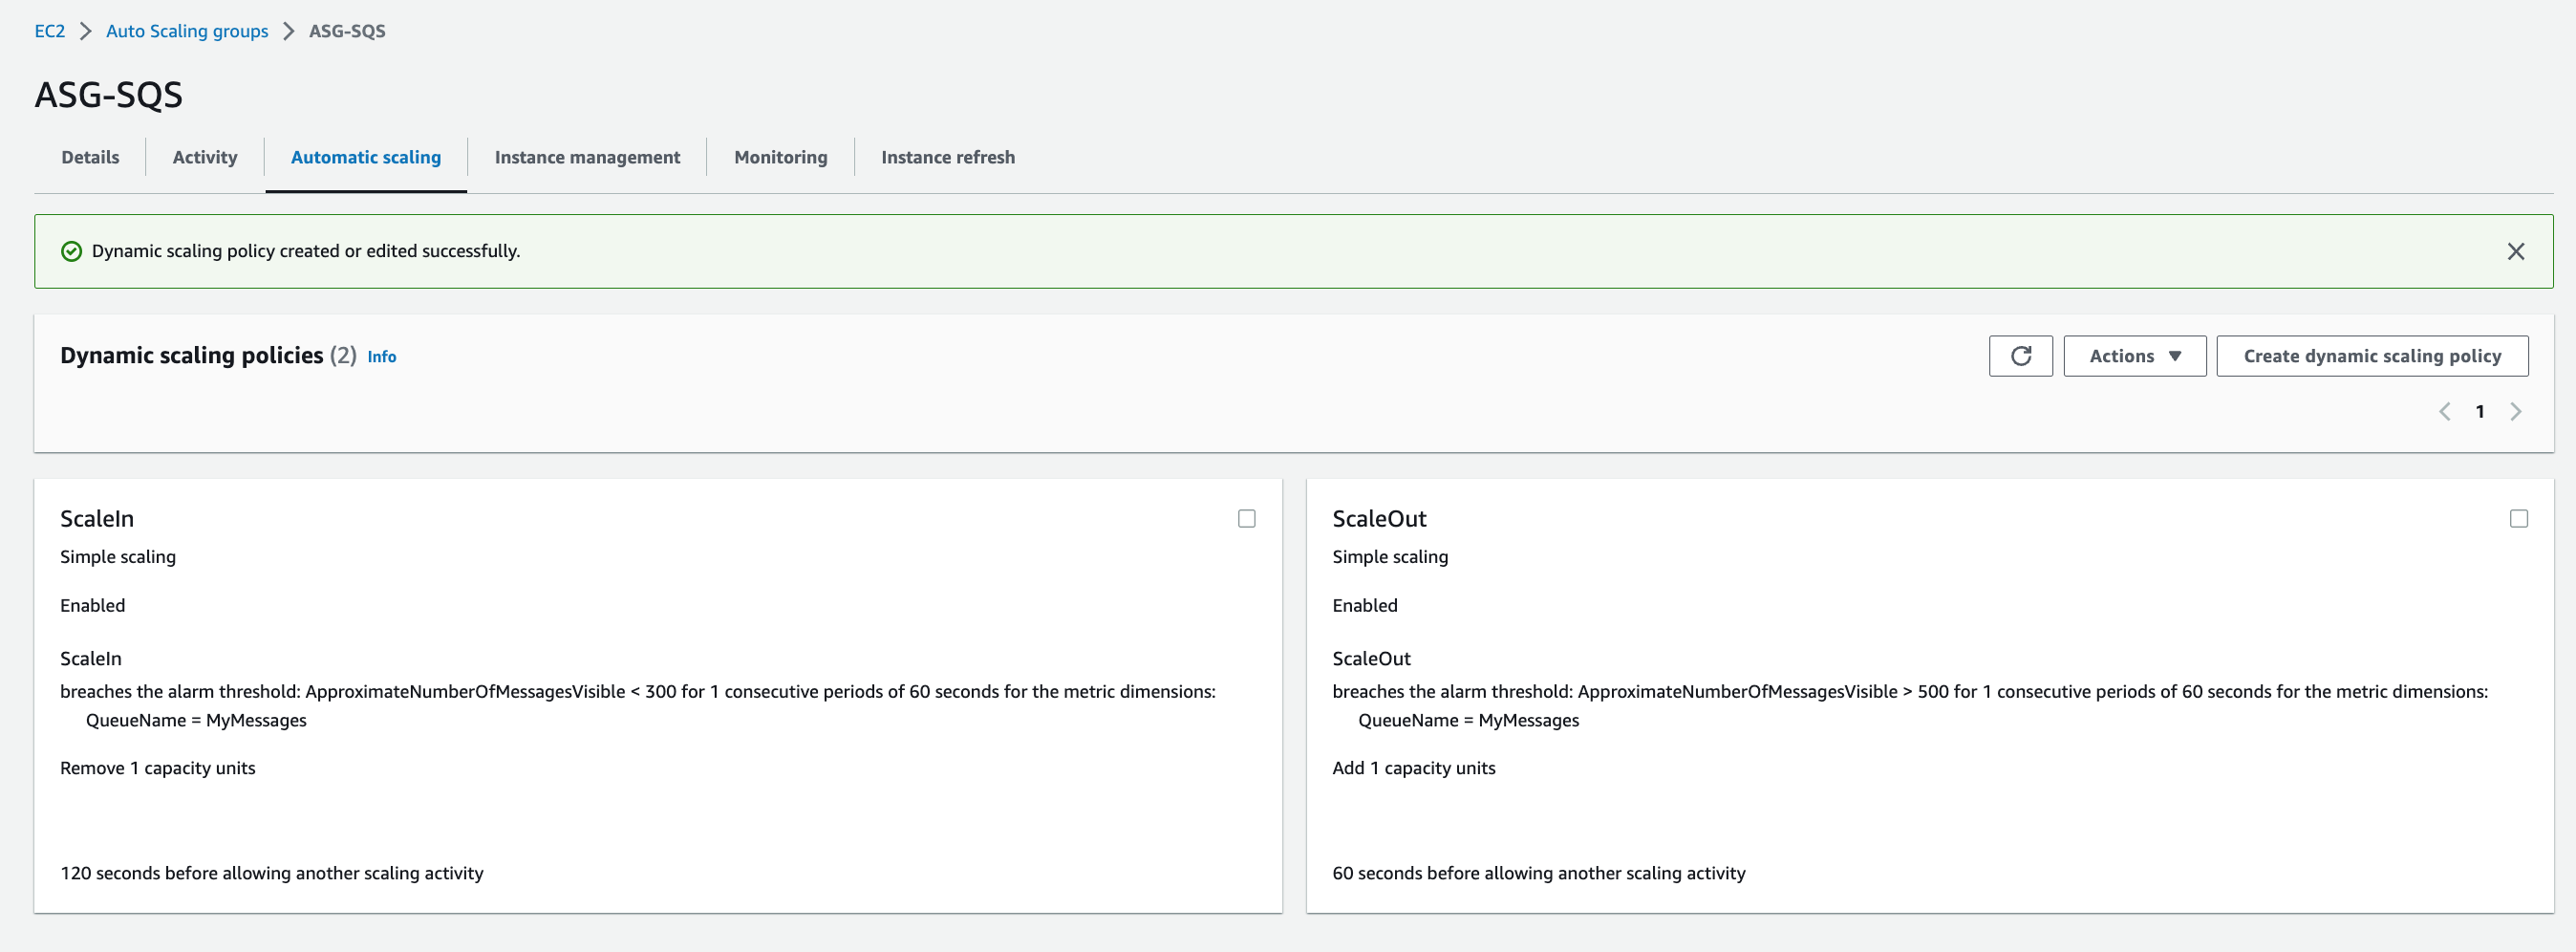
16. We are going to add two dynamic scaling policies, one for scale out and another one for scale in. Click **Create dynamic scaling policy** and enter the following values and then Click **Create**:
* Policy type: `Simple Scaling`
* Scaling policy name: `ScaleOut`
* CloudWatch alarm: `ScaleOut`
* Take the action: `Add` with `1` capacity units
* And then wait `60` seconds before allowing another scaling activity
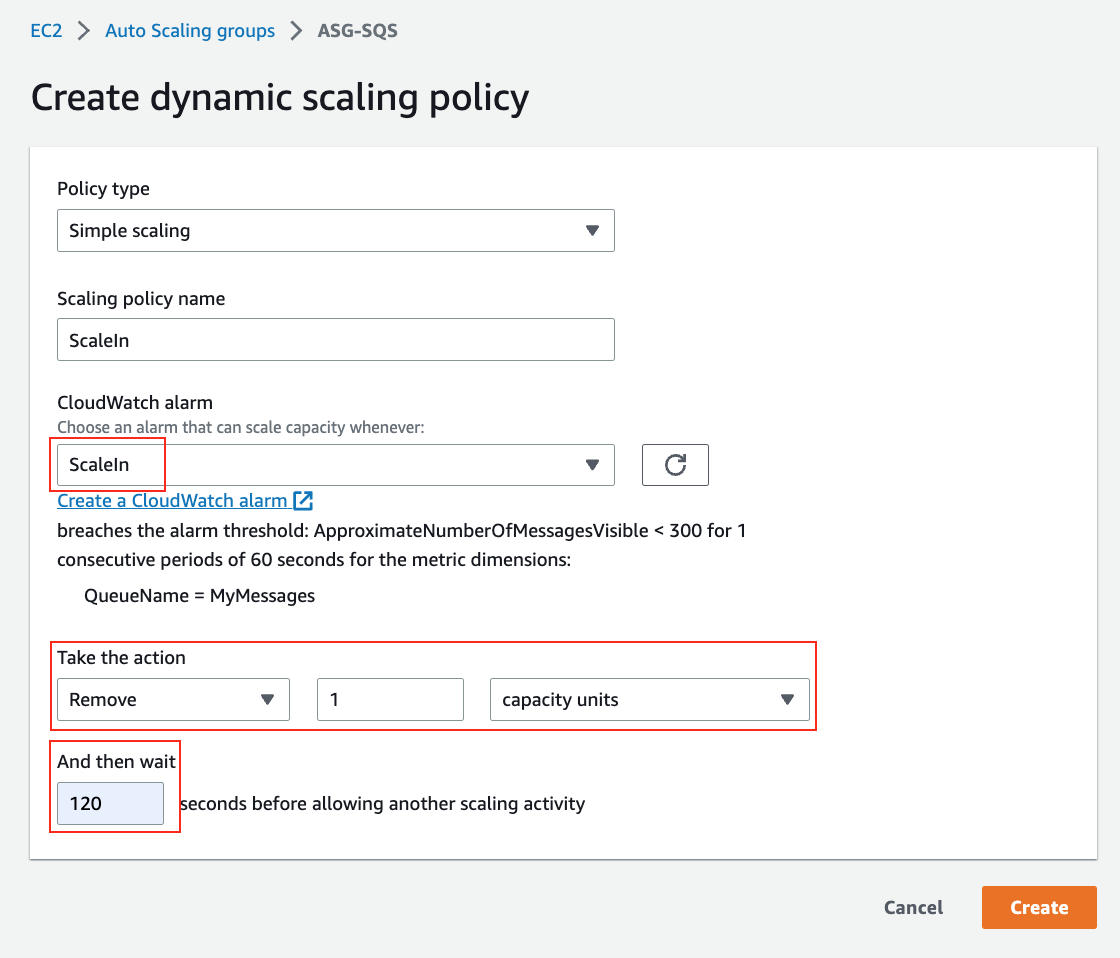
17. Click **Create dynamic scaling policy** and enter the following values and then Click **Create**:
* Policy type: `Simple Scaling`
* Scaling policy name: `ScaleIn`
* CloudWatch alarm: `ScaleIn`
* Take the action: `Remove` with `1` capacity units
* And then wait `120` seconds before allowing another scaling activity
👉 It is best practice to scale up fast and scale down slow. Hence we used 60 seconds to scale out and 120 seconds to scale in.
> ASG1
> ASG2
> ASG3
> ASG4
> ASG5
> ASG6
> ASG7
> ASG7.1
> ASG7.2

> ASG8

> ASG8.1_ScaleOut
> ASG8.2_ScaleIn
> ASG8.3_Dynamic_Scaling
---
### Step 10. Verification and Monitoring
We have populated the queue with 2000 messages and have an auto scaling group launch with a maximum of 4 instances. We will now be verifying it using Cloud Watch Alarms and Auto Scaling group's Activity.
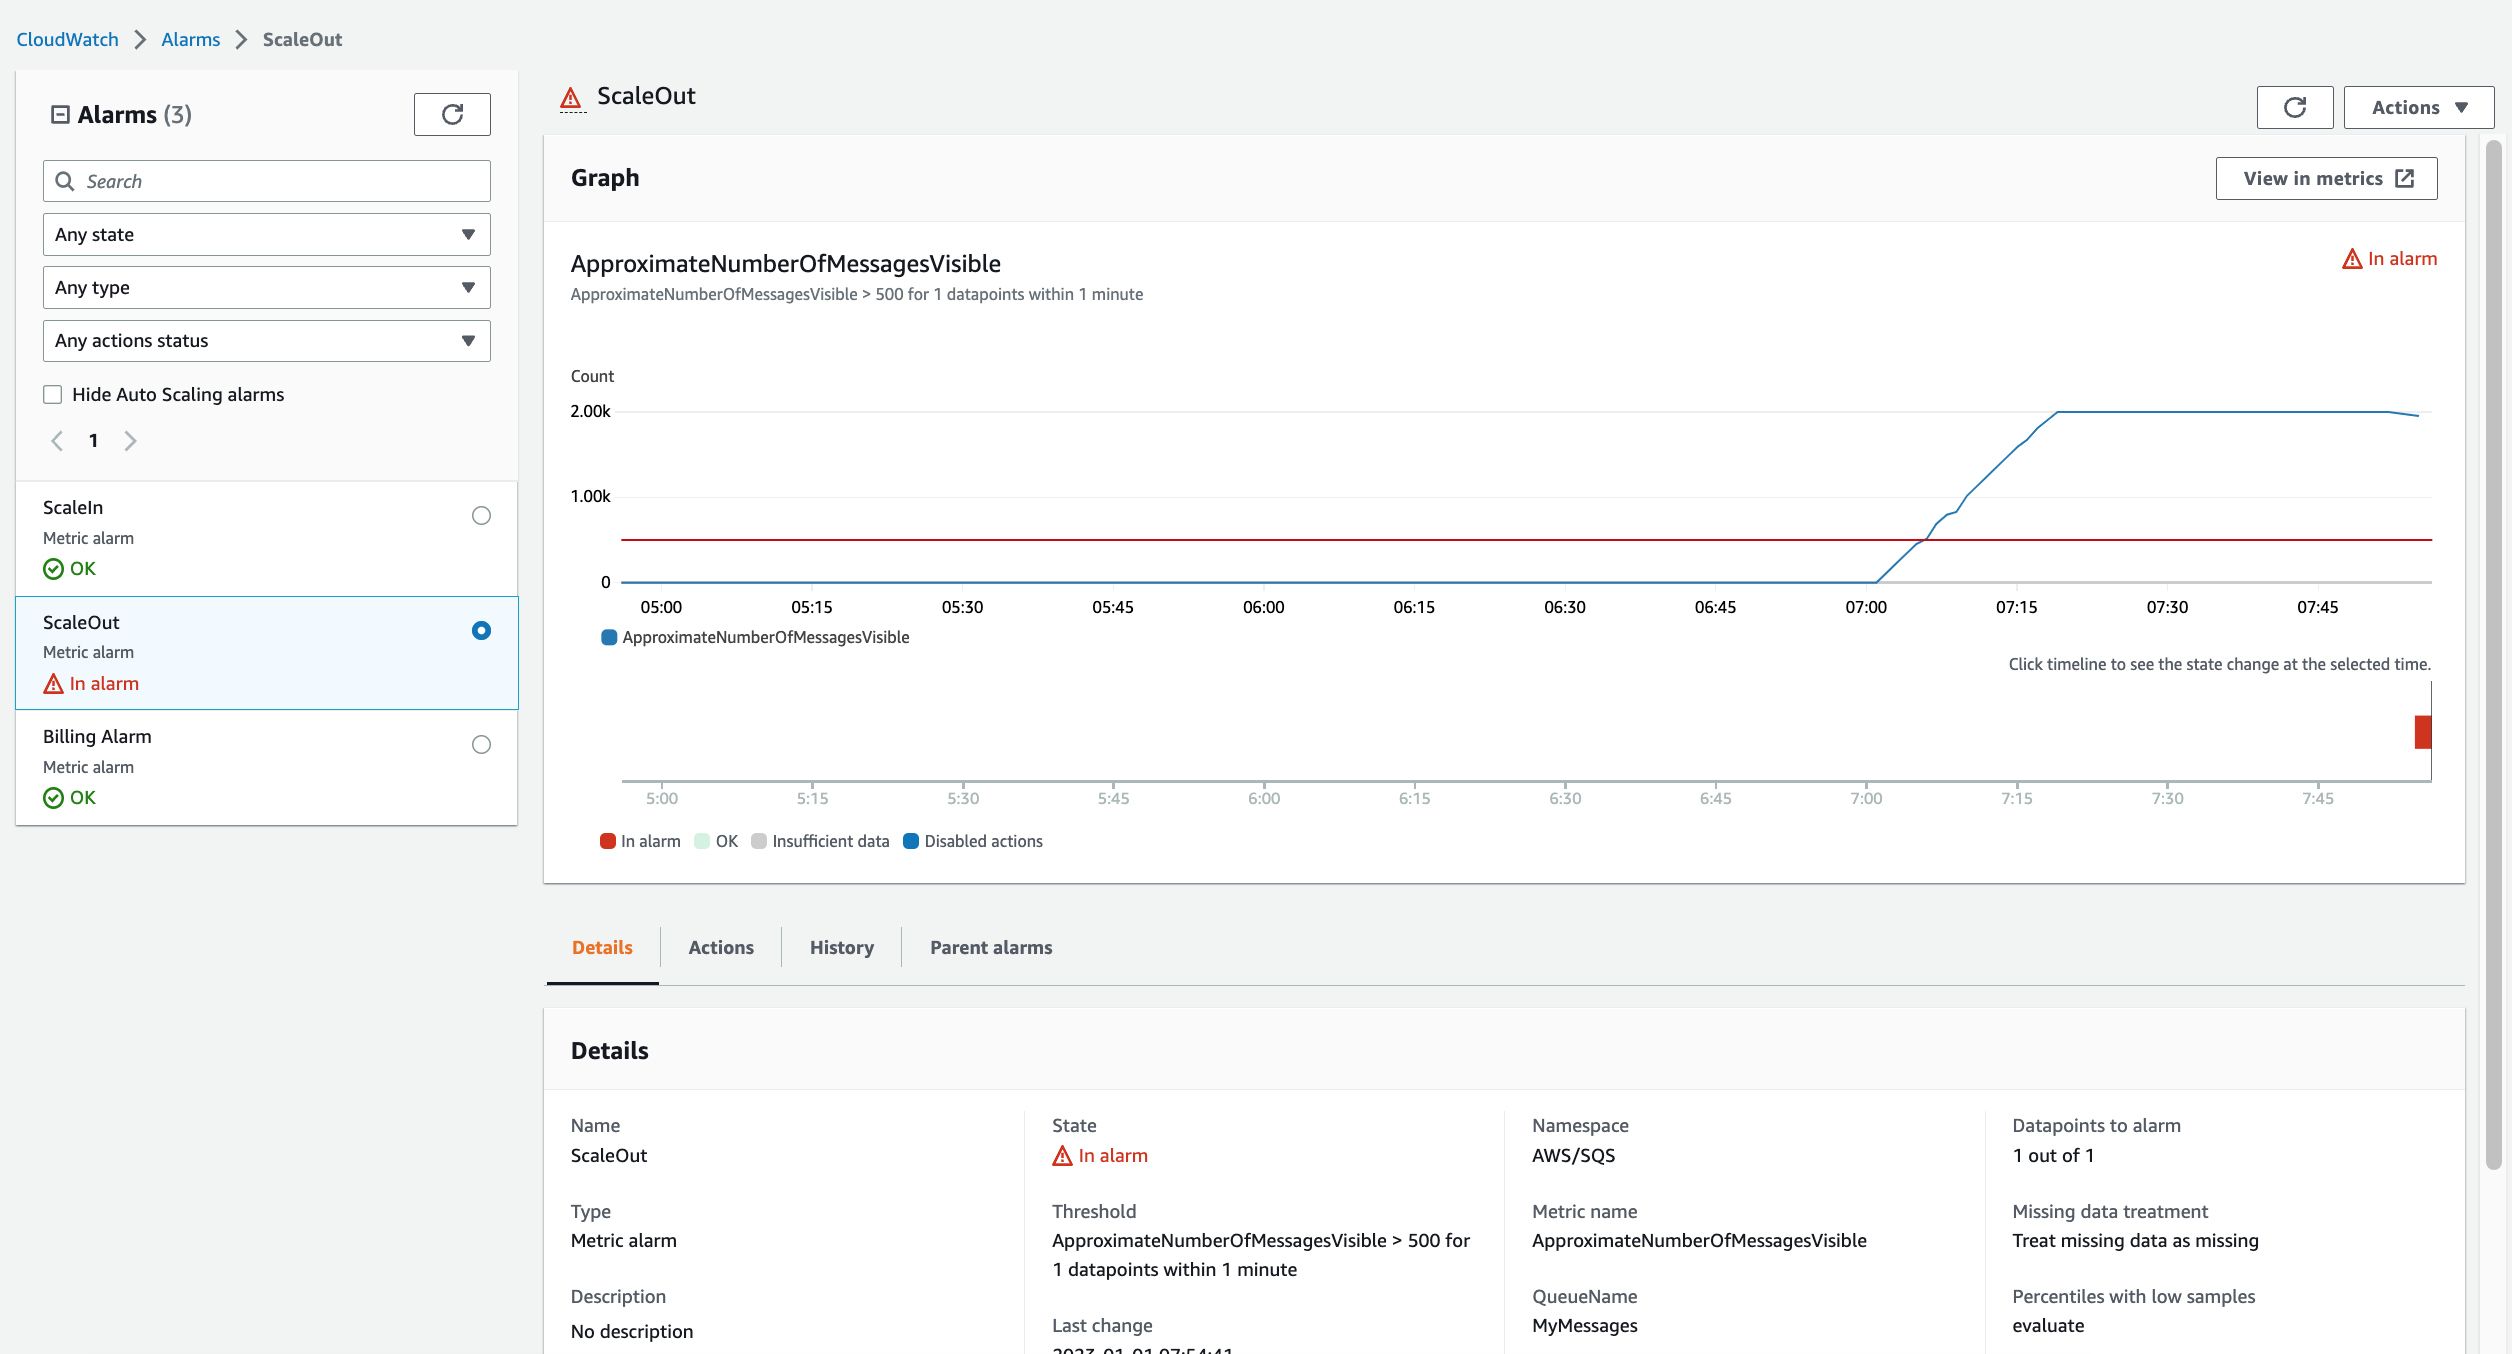
1. Navigate to CloudWatch > Alarms > ScaleOut, the state of ScaleOut Alarm status will be `In alarm` and the ScaleIn Alarm status will be `OK`.
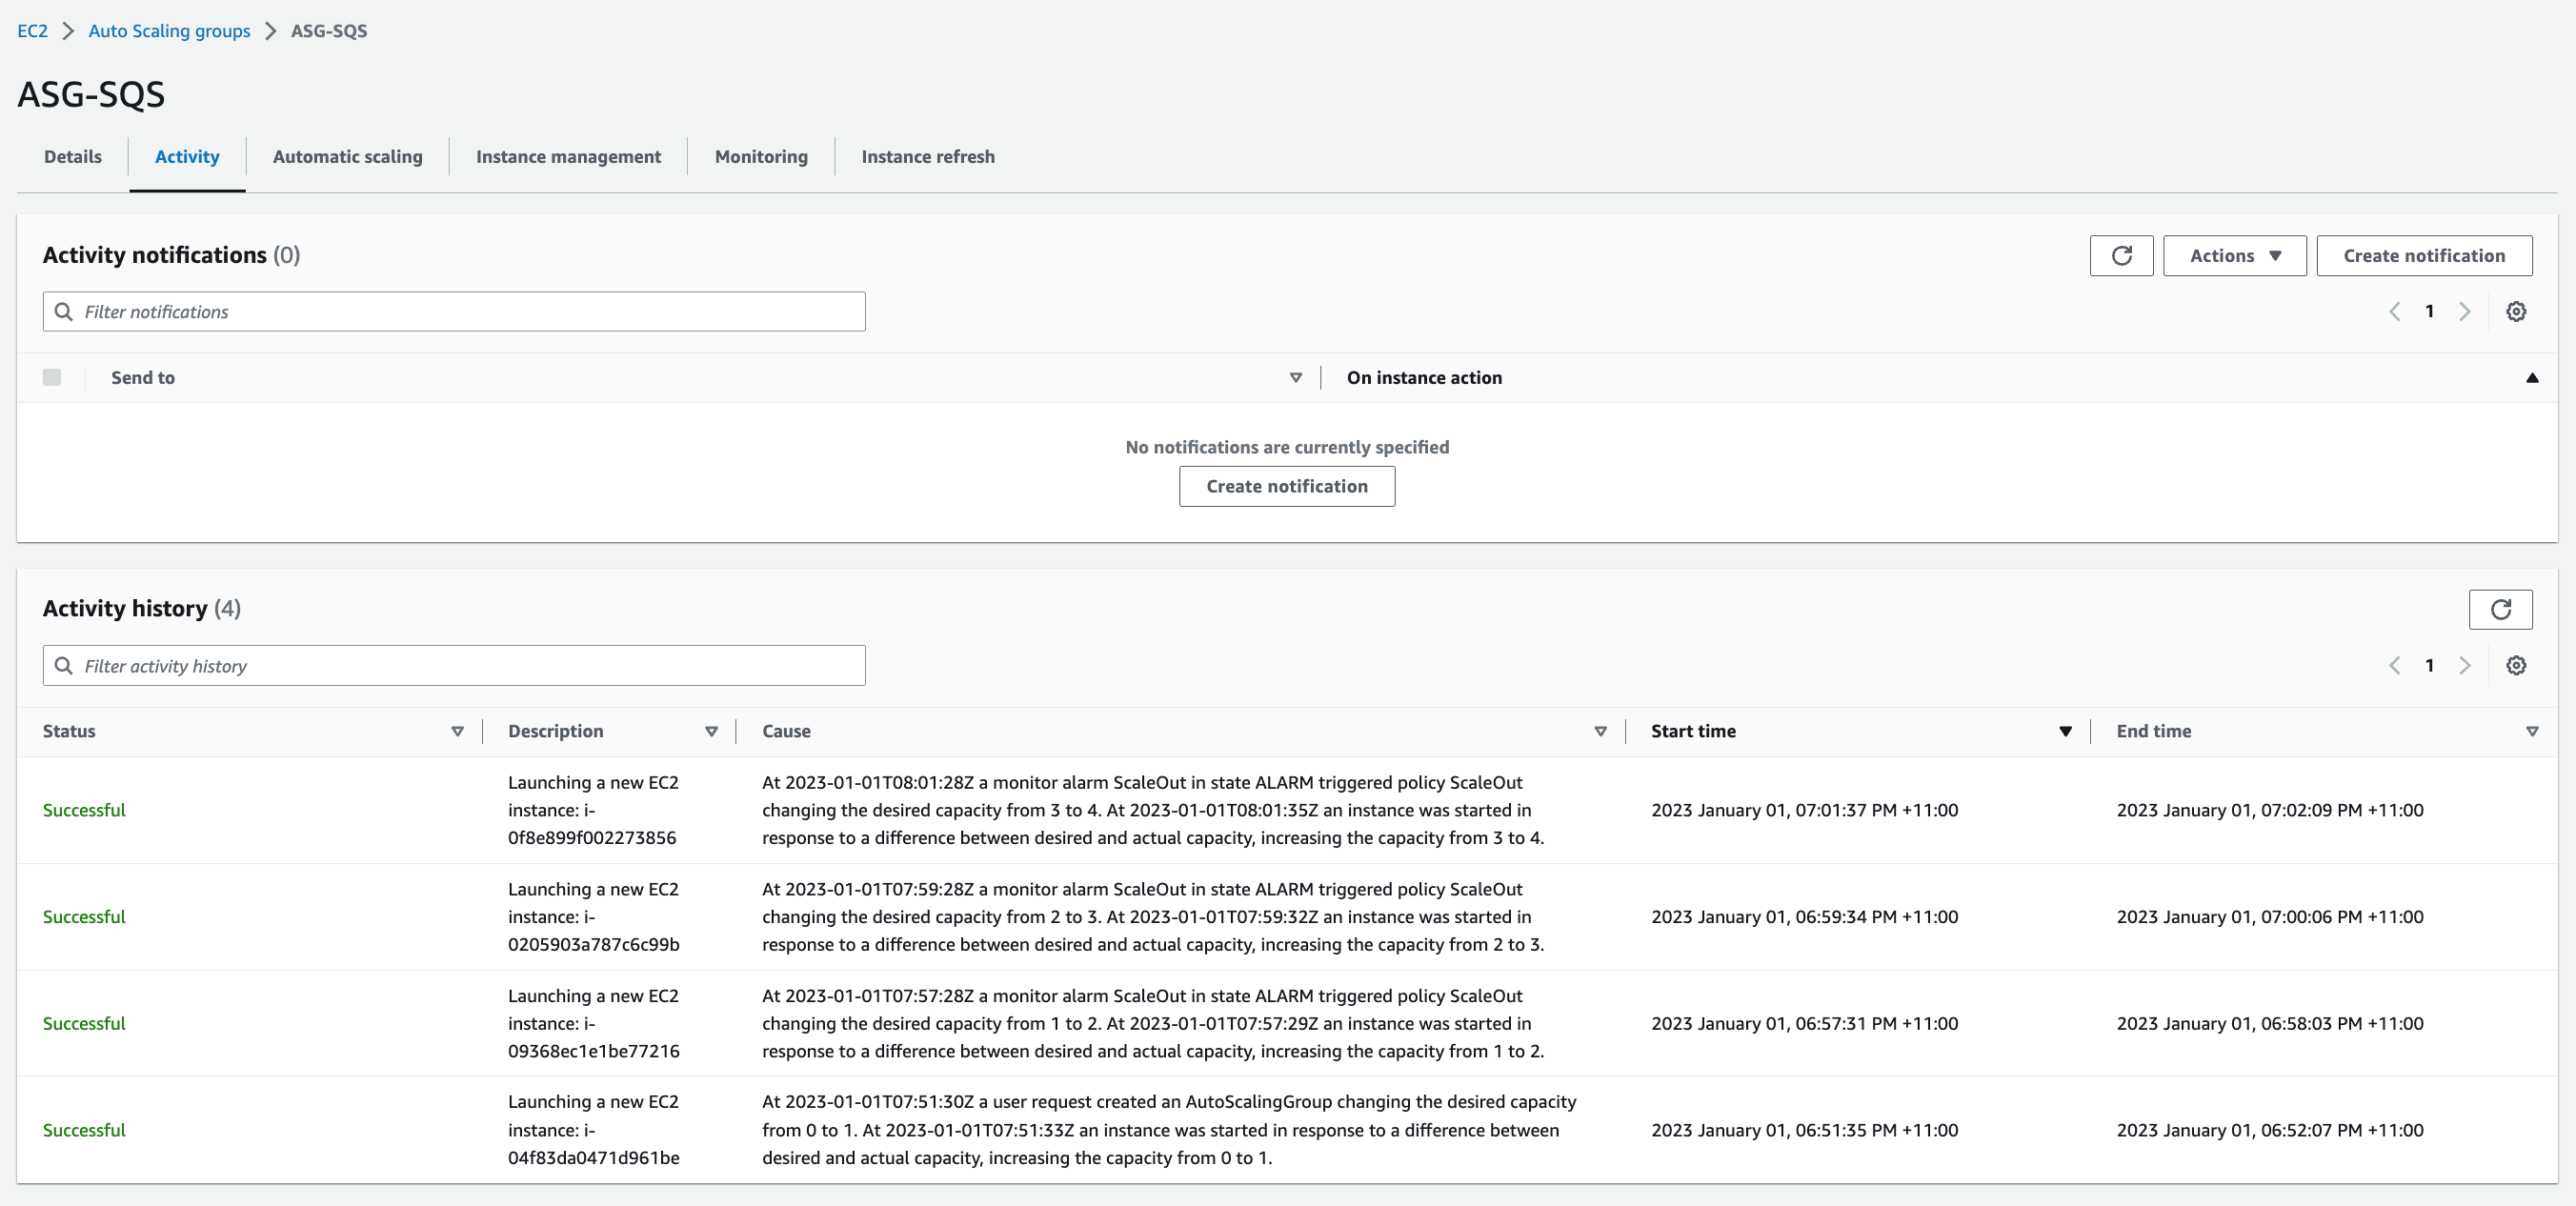
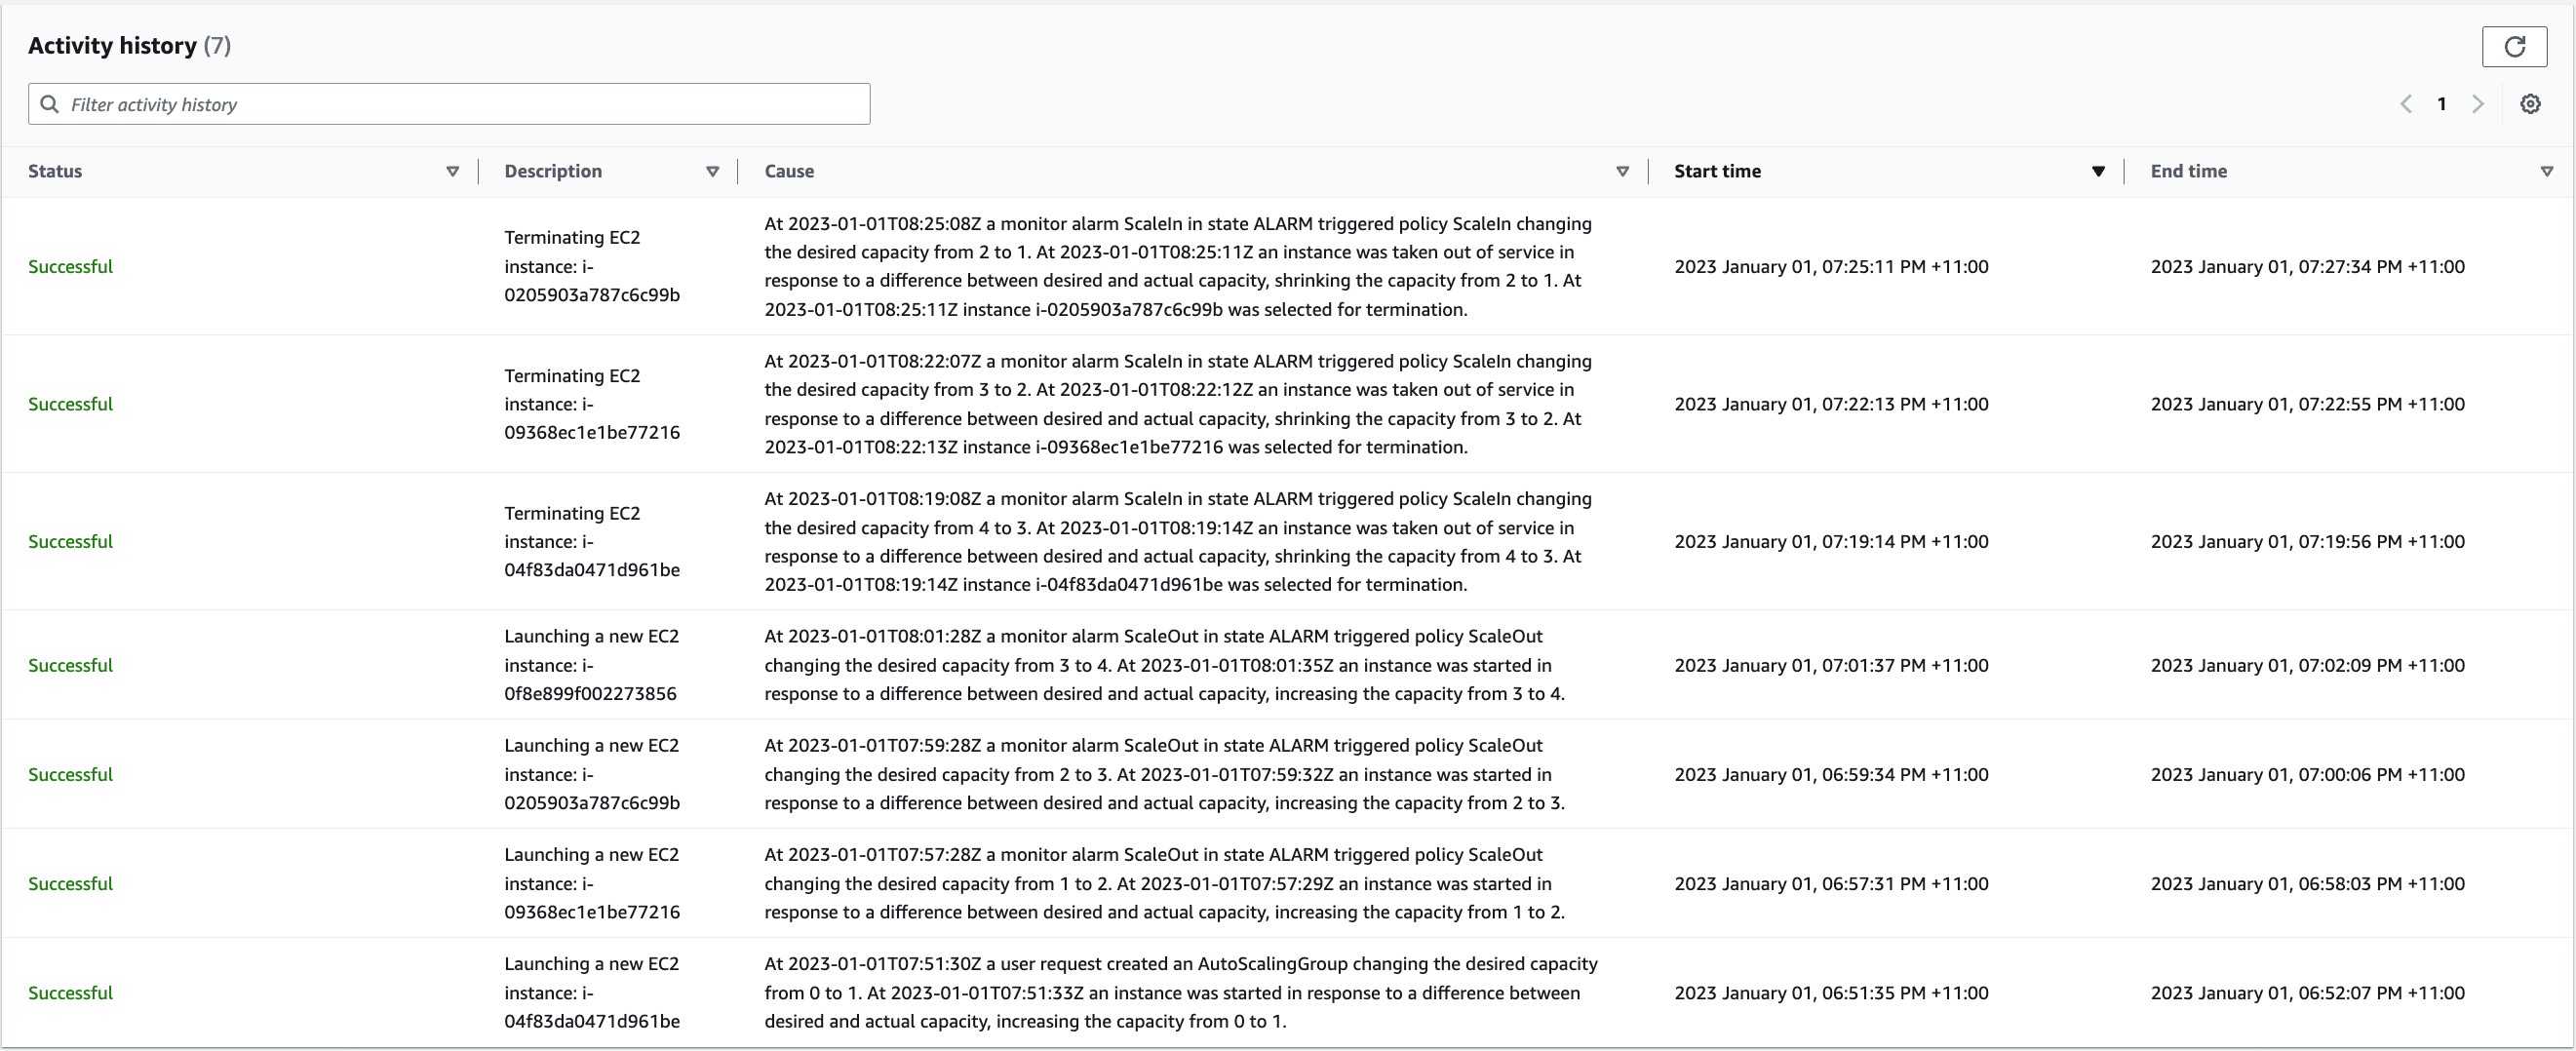
2. After a period of 10 mins or so, you will notice 4 EC2 instances launched under EC2 > Auto Scaling groups > ASG-SQS > Activity.
3. Monitor the messages in `MyMessages` queue, the number of messages will reduce as they are processed by the EC2 instances.
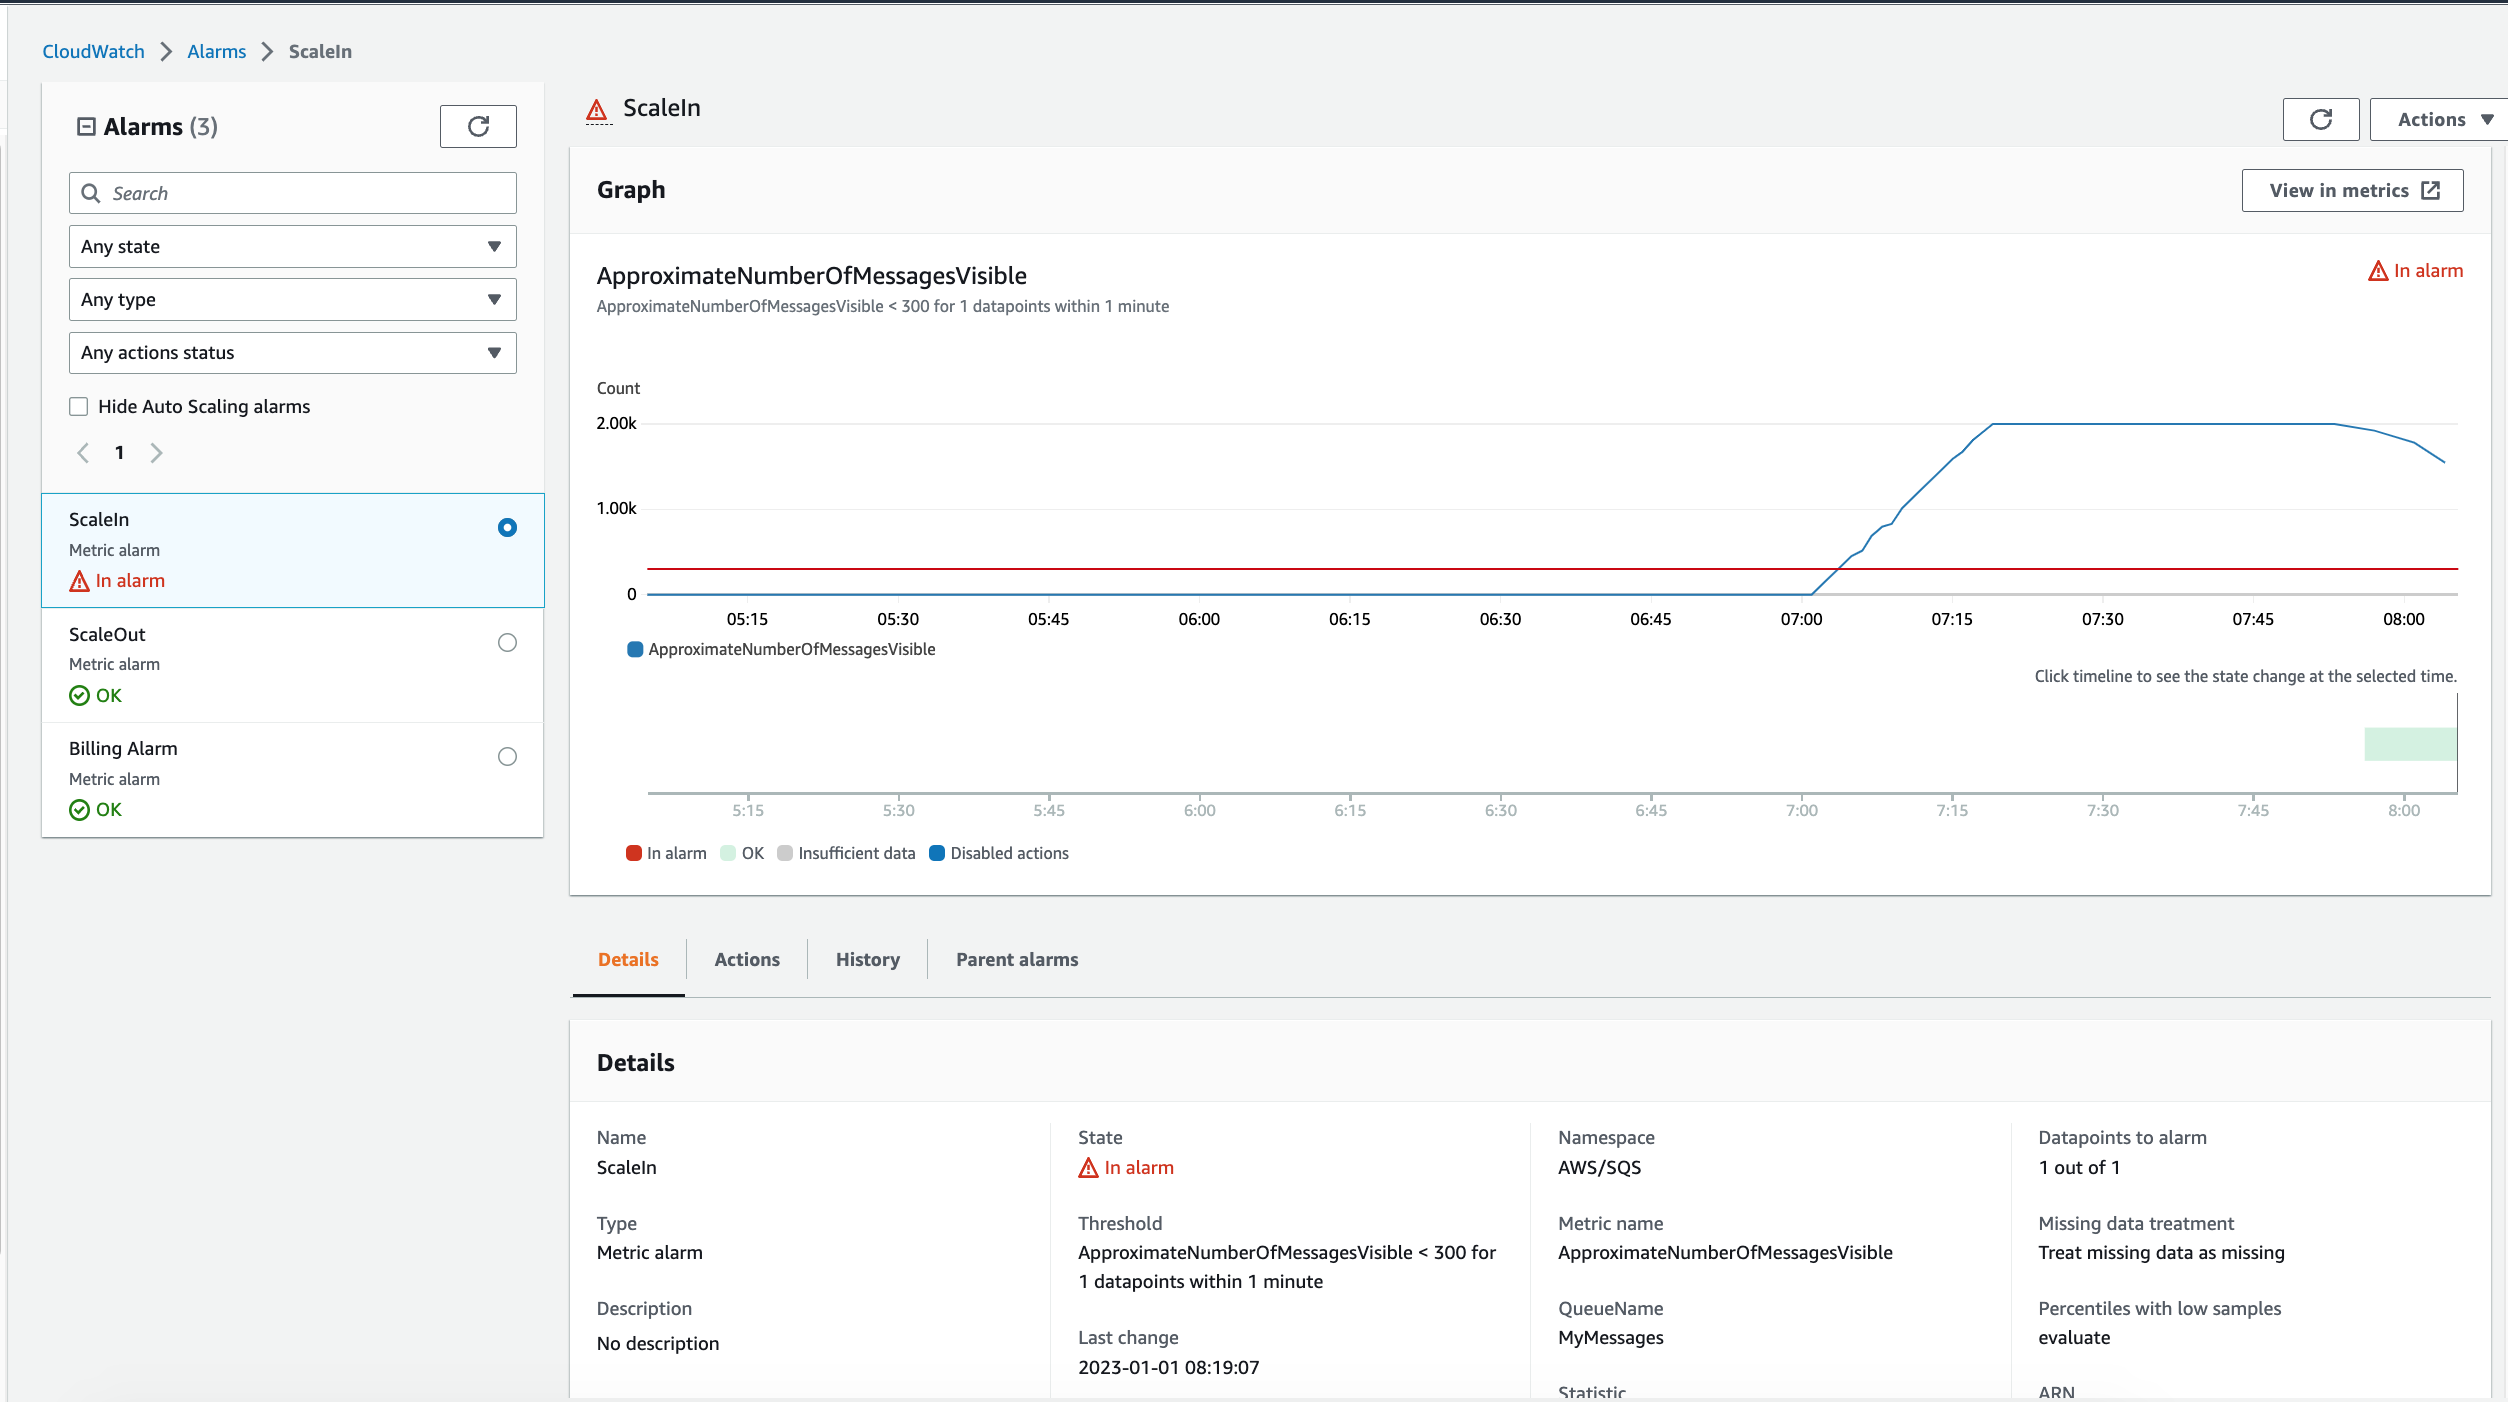
4. Navigate to CloudWatch > Alarms > ScaleIn, the state of ScaleIn Alarm status will be `In alarm` and the ScaleOut Alarm status will be `OK`.
5. You will notice 3 EC2 instances terminated under EC2 > Auto Scaling groups > ASG-SQS > Activity when the messages are less than **300**.
#### How to verify that the SQS messages are being processed
Log on to the EC2 Instance and then switch to the root user.
```bash
[ec2-user@ip-172-31-47-21 ~]$ sudo su -
```
Execute the following command, which will show the log file name.
```bash
ps xf
```
```bash
[root@ip-172-31-47-21 ~]# tail -f /var/log/cloud-init-output.log
Sleep for 1 second...
Sleep for 1 second...
Sleep for 1 second...
Sleep for 1 second...
^C
```

> Messages_in_the_queue
> ScaleOut_Alarm
> ScaleOut_Activity

> Processing_Messages
> ScaleIn_Alarm
> ScaleIn_Activity

> Queue_is_Empty
---
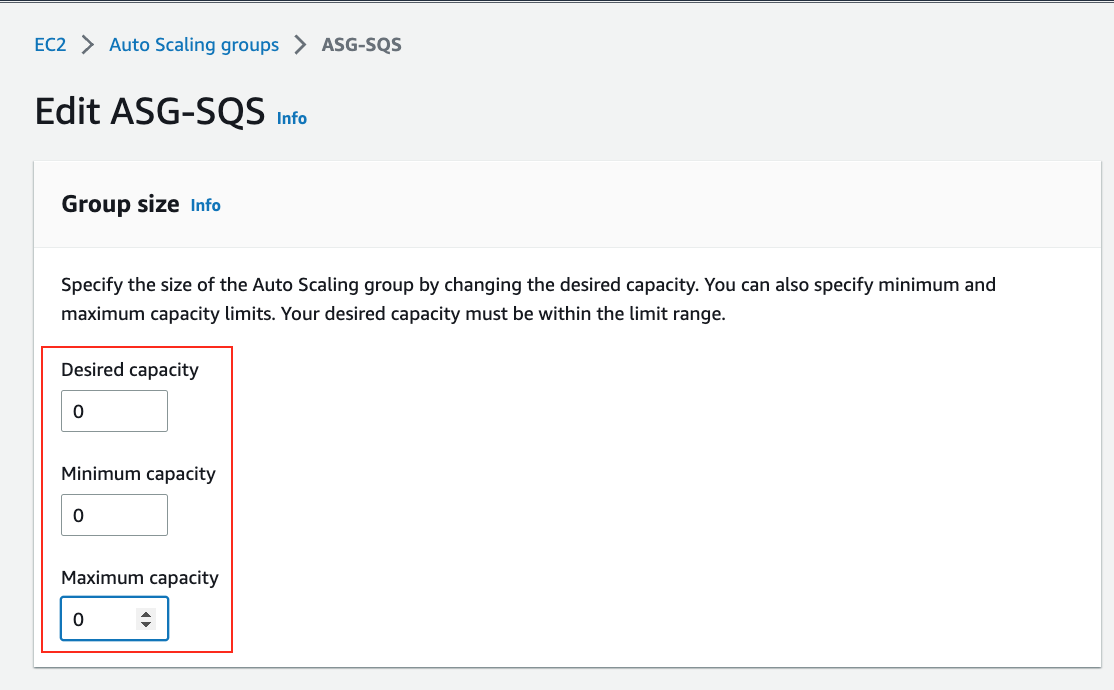
👉 Auto Scaling Group Tip: When you do not want to have instances running or for Disaster Recovery purposes or to save costs, you may set the following inputs to **Zero**.
- Desired Capacity: `0`
- Minimum Capacity: `0`
- Maximum Capacity: `0`
> ASG_Tip
---
### Clean Up
1. Terminate `Cloud9` EC2 instance.
2. Delete `ASG-SQS` under `Auto Scaling groups`.
3. Delete `AutoScale-SQS` under `Launch Templates`
4. Delete `auto-scale` under `Key Pairs`
5. Delete Security Group `MyIPSSH-SG`.
6. Delete `EC2InstanceRoleForSQS` Role under IAM.
7. Delete S3 bucket `autoscalescripts`.
8. Delete SQS queue `MyMessages`.
---
### Summary
👉 It is important to not have the same value for scale-in and scale-out thresholds. We should leave a gap between them to prevent oscillation.
👉 The best practice is to scale up fast, and scale down slow.
👉 Launching an EC2 instance might be slow if we have to install software, configure..etc during the scale out. One way to speed up the process is by creating an AMI with all the required software and then use that AMI in the Launch template.
Hope you learnt something new from the above demo.
See you next time 👋
---
### Referrals
- [Scaling based on Amazon SQS](https://docs.aws.amazon.com/autoscaling/ec2/userguide/as-using-sqs-queue.html)