https://github.com/killerboss2019/touchportal-python-template
A basic TouchPortal Python templete that anyone can use for their own projects.
https://github.com/killerboss2019/touchportal-python-template
Last synced: 2 months ago
JSON representation
A basic TouchPortal Python templete that anyone can use for their own projects.
- Host: GitHub
- URL: https://github.com/killerboss2019/touchportal-python-template
- Owner: KillerBOSS2019
- License: mit
- Created: 2022-08-28T00:18:27.000Z (about 3 years ago)
- Default Branch: main
- Last Pushed: 2023-07-29T00:43:25.000Z (about 2 years ago)
- Last Synced: 2025-06-15T09:37:25.136Z (4 months ago)
- Language: Python
- Size: 12.7 KB
- Stars: 3
- Watchers: 1
- Forks: 2
- Open Issues: 1
-
Metadata Files:
- Readme: README.md
- License: LICENSE
Awesome Lists containing this project
README
# TouchPortal-Python-Template
- [TouchPortal-Python-Template](#TouchPortal-Python-Template)
- [What is this?](#What-is-this?)
- [How do I use this?](#how-do-i-use-this)
- [Setup](#setup)
- [Creating the environment](#creating-the-environment)
- [Activate the environment](#activate-the-environment)
- [Updating Dependencies](#updating-dependencies)
- [Deactivate environment](#deactivate-environment)
- [Github action](#github-action)
## What is this?
This template have basic structure of TouchPortal plugin using [TouchPortal-Python-API](https://github.com/KillerBOSS2019/TouchPortal-API).
It contains
- workflow to build your plugin when creating release using github action matrix.
- `TPPEntry.py` contains infomation to generate a new `entry.tp`.
- `main.py` that shows you how to setup callbacks and logger.
- `build.py` that helps you to build your plugin into `.tpp` file.
- `start.sh` that allows user to run the executable on Mac and Linux system.
## How do I use this?
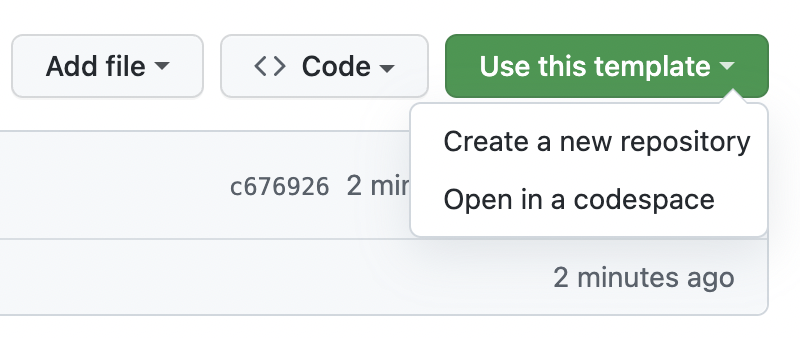
1. In the top right corner of your screen, where **Clone** usually is, you have a **Use this template** button to click.
2. Give the repository a name and a description.
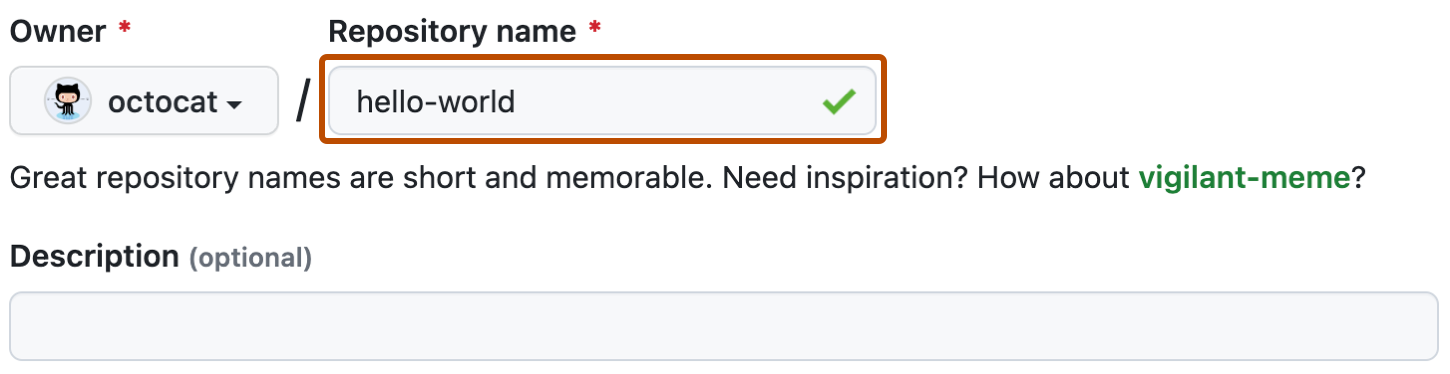
3. Click **Create repository from template**.
### Setup
It is recommanded to use a dependency manager. In this case we will be using a [virtual environment](https://docs.python.org/3/library/venv.html).
#### Creating the environment
Create a virtual environment in the folder `.venv`.
```shell
$ python -m venv .venv
```
#### Activate the environment
It will change based on your operating system and shell.
```shell
# Linux, Bash
$ source .venv/bin/activate
# Linux, Fish
$ source .venv/bin/activate.fish
# Linux, Csh
$ source .venv/bin/activate.csh
# Linux, PowerShell Core
$ .venv/bin/Activate.ps1
# Windows, cmd.exe
> .venv\Scripts\activate.bat
# Windows, PowerShell
> .venv\Scripts\Activate.ps1
```
#### Updating Dependencies
Once the environment is created and activated, you can install any libraries that's required for your project.
after you've installed the library you should create `requirements.txt` using this command.
```shell
$ pip freeze > requirements.txt
```
#### Deactivate environment
When environment is activated, you can exit the environment by using this command.
```shell
$ deactivate
```
### Github action
This template also include a github action scrip that when you publish a release it will automatically build Mac, Windows and Linux .tpp file and upload to the release. It basically go to each system and run the build.py that you've created. and publish the result.