https://github.com/kmaida/messageboard
A MEAN stack message board (forum) application with Auth0 centralized login and passwordless
https://github.com/kmaida/messageboard
angular auth0 authentication mean-stack nodejs passwordless
Last synced: 5 months ago
JSON representation
A MEAN stack message board (forum) application with Auth0 centralized login and passwordless
- Host: GitHub
- URL: https://github.com/kmaida/messageboard
- Owner: kmaida
- License: mit
- Created: 2017-10-24T17:57:22.000Z (over 8 years ago)
- Default Branch: master
- Last Pushed: 2025-10-08T10:32:14.000Z (9 months ago)
- Last Synced: 2025-10-08T12:26:19.916Z (9 months ago)
- Topics: angular, auth0, authentication, mean-stack, nodejs, passwordless
- Language: TypeScript
- Size: 2.7 MB
- Stars: 1
- Watchers: 0
- Forks: 2
- Open Issues: 42
-
Metadata Files:
- Readme: README.md
- License: LICENSE
Awesome Lists containing this project
README
# Message Board
MEAN stack message board (forum) application with Auth0 authentication and passwordless login.
## Dependencies
* [node.js](https://nodejs.org) with npm
* [Angular CLI](https://github.com/angular/angular-cli)
* [A free mLab account](https://mlab.com/)
* [A free Auth0 account](https://auth0.com/signup)
## Create an mLab Mongo Database
Once you have created a [free mLab account](https://mlab.com/signup), create a new database with mLab.
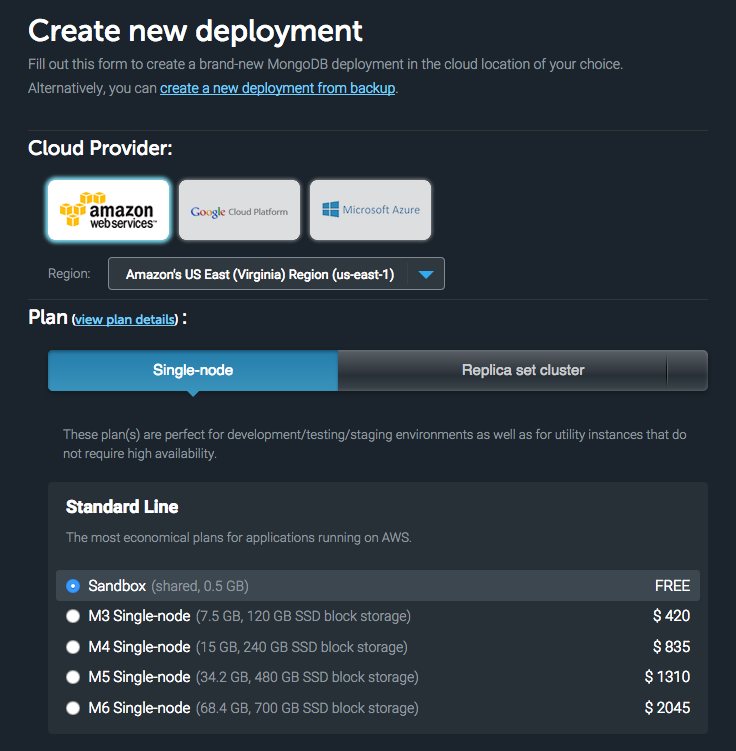
1. Log into [mLab](https://mlab.com). In **MongoDB Deployments**, click the "Create new" button.
2. Select your desired Cloud Provider and Region.
3. Change the Plan to **Single-node** and select the free "Sandbox" option.
4. Scroll down and give your database a name, like `mean`.
5. Click the "Create new MongoDB deployment" button.
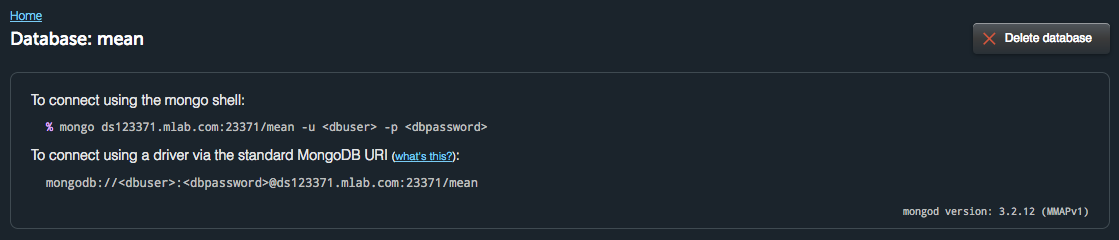
The new database can now be selected from our deployments. It should look something like this:

We now need to add a user in order to connect to our database. Click on the database to edit it.
1. Select the **Users** tab and click the "Add database user" button.
2. Enter a database username and password in the modal. These credentials will be needed to read and write to the database with Node.
3. Make a note of the database's MongoDB URI. This should be in the format: `mongodb://:@.mlab.com:/`.
Now we're ready to use our MongoDB database.
> **Note:** If you prefer, you can host MongoDB locally. [Follow these instructions](https://docs.mongodb.com/manual/installation/) to install MongoDB on your operating system.
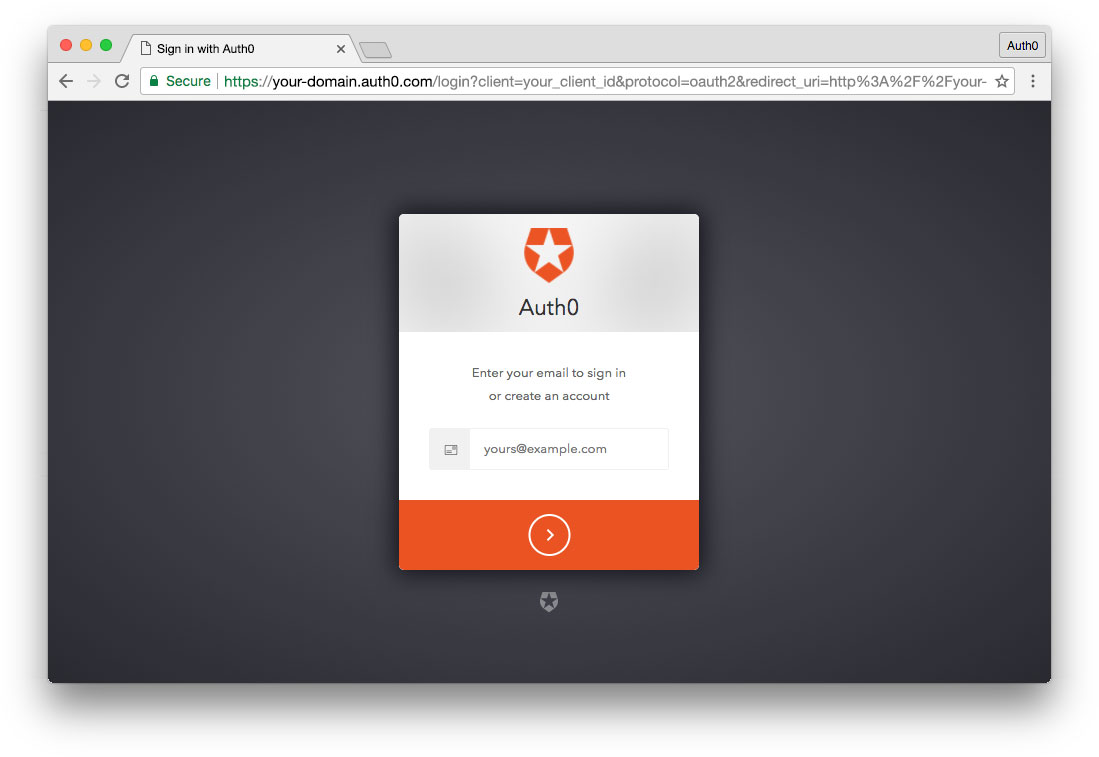
## Auth0 Centralized Login with Passwordless
Once you've signed up for a free Auth0 account, you can implement Auth0 authentication with centralized login and passwordless.
### Set Up an Auth0 Client App
1. Go to your [**Auth0 Dashboard**](https://manage.auth0.com/#/) and click the "[Create a New Client](https://manage.auth0.com/#/clients/create)" button.
2. Give your new app a **name**, select **Single Page Web Applications**, then click the "Create" button.
3. In the **Settings** for your new Auth0 Client app, add `http://localhost:4200/callback, http://localhost:8085/callback` to the **Allowed Callback URLs**.
4. Add `http://localhost:4200, http://localhost:8085` to the **Allowed Web Origins**.
5. Add `http://localhost:4200, http://localhost:8085` to the **Allowed Origins (CORS)**.
6. Make sure that **Use Auth0 instead of the IdP to do Single Sign On** is enabled.
7. At the bottom of the **Settings** section, click the "Show Advanced Settings" link. Choose the **OAuth** tab and verify that the **JsonWebToken Signature Algorithm** is set to `RS256`.
8. Click the "Save Changes" button.
### Set Up Auth0 Passwordless Login
1. Go to **Connections** -> [**Passwordless**](https://manage.auth0.com/#/connections/passwordless) and toggle on **Email**.
2. In the Email passwordless settings screen, add `{ "scope": "openid profile" }` to **Authentication Parameters**.
3. Click the "Save" button.
4. Click the **Apps** tab at the top of the window and find your newly-created Client. Toggle the switch **on**.
5. Click the "Save" button.
6. Go to [**Hosted Pages**](https://manage.auth0.com/#/login_page). Toggle on the **Customize Login Page** option. This will enable you to modify the provided template.
7. Using the **Default Templates** dropdown, switch to **Lock (Passwordless)**.
8. Click the "Save" button.
### Set Up an API in Auth0
Go to [**APIs**](https://manage.auth0.com/#/apis) in your Auth0 Dashboard and click on the "Create API" button. Enter a name for the API. Set the **Identifier** to `http://localhost:8085/api/`. The **Signing Algorithm** should be `RS256`.
## Installation
Clone this project and from the root, run the following command to install dependencies for the server and client-side:
```
$ npm install
```
1. Open the `server/config.js.sample` file. Replace `[AUTH0_DOMAIN]` with your Auth0 domain and replace `[MONGODB_URI]` with your mLab MongoDB URI. Then remove `.sample` from the file name.
2. Open the `src/app/auth/auth0-variables.ts.sample` file. Replace `[AUTH0_CLIENT]` and `[AUTH0_DOMAIN]` with your Auth0 Client ID and domain. Then remove `.sample` from the file name.
## Serving the project
### Development
* Start Node API server: `NODE_ENV=dev node server` from the root folder.
* Start Angular server: `ng serve` from the root folder.
The API will run on `localhost:8085` and the app will run on `localhost:4200`.
### Staging / Production
* Run `ng build` to compile the Angular project from the root folder.
* Start Node API and app server: `node server` from the root folder.
The app and API will both run on `localhost:8085`.
## License
This project is licensed under the MIT license. See the [LICENSE](LICENSE) file for more info.