https://github.com/knowm/xdropwizard
A skeleton DropWizard Web Application integrating several useful open source projects
https://github.com/knowm/xdropwizard
Last synced: about 1 year ago
JSON representation
A skeleton DropWizard Web Application integrating several useful open source projects
- Host: GitHub
- URL: https://github.com/knowm/xdropwizard
- Owner: knowm
- License: apache-2.0
- Created: 2013-03-23T09:50:16.000Z (over 13 years ago)
- Default Branch: master
- Last Pushed: 2025-02-21T12:57:02.000Z (over 1 year ago)
- Last Synced: 2025-03-29T08:11:06.465Z (over 1 year ago)
- Language: JavaScript
- Homepage:
- Size: 2.31 MB
- Stars: 114
- Watchers: 8
- Forks: 23
- Open Issues: 3
-
Metadata Files:
- Readme: README.md
- License: LICENSE
Awesome Lists containing this project
README
# XDropWizard
A jump-start [DropWizard](https://github.com/dropwizard/dropwizard) Web Application integrating and demonstrating several useful open source projects such as Yank, Sundial (a Quartz fork), Bower, Flot JS Charts, Angular-nvD3 JS Charts, Bootstrap, AngularJS, HSQLDB, XChart Bitmap Charts, JUnit, etc. Demonstrates how to serve static content, dynamic content loaded into Freemarker templates, using AJAX and more...
## Features
* [x] Uses Dropwizard for web application
* [x] Uses Bootstrap for looks
* [x] Uses AngularJS for MVC
* [x] Uses Sundial for Job scheduling
* [x] Uses Yank for databases
* [x] Uses XChart for Bitmap charts
* [x] Uses Flot for Javascript charts
* [x] Uses Angular-nvD3 for Javascript charts
* [x] Uses Freemarker for dynamic templating
* [x] Uses Bower for front end dependency management
* [x] Demonstrates working Dropwizard setup
* [x] Demonstrates Asynchronous Requests/Responses
* [x] Demonstrates Dropwizard tasks
* [x] Demonstrates Dropwizard healthchecks
* [x] Demonstrates Dropwizard Basic Authentication
* [x] Demonstrates Dropwizard building and deploying
* [x] Java 7 and up
* [x] Apache 2.0 license
## Banner Generator
If you want DropWizard to print out a banner in the console during app startup, you can add a file called `banner.txt` in `src/main/resources`. Use the following link to generate a banner:
http://www.webestools.com/ascii-text-generator-ascii-art-code-online-txt2ascii-text2ascii-maker-free-text-to-ascii-converter.html
## Running in Eclipse
Run `XDropWizardApplication` in Eclipse. Add a program arg: `server xdropwizard.yml`.
## Running in IntelliJ
Run `XDropWizardApplication` in IntelliJ. Add a program arg: `server xdropwizard.yml`.
### File `xdropwizard.yml` not found
You need to set the working directory to `XDropWizard` for the app in IntelliJ (Run ==> Edit Configurations...).
## Terminal
cd ~/path/to/project/XDropWizard
## Build
mvn clean package
## Run
$ java -jar target/xdropwizard.jar server xdropwizard.yml
## Visit Web App
## Test Basics
http://localhost:9090/service/hello-world
http://localhost:9090/admin/
http://localhost:9090/admin/healthcheck
## Run Tasks
curl -X POST http://localhost:9090/admin/tasks/gc
## Static Content
Serving static content such as images, html, css, javascript and binary files from you XDropWizard Webservice is possible in addition to the normal JSON resources
typical for a webservice. DropWizard names static content as "Assets" and all you need to do is place them on the classpath in a folder called `assets`. In our case
we simply add the `assets` folder to `src/main/resources` and Maven takes care of adding the folder and its contents to the classpath during the build.
Either your service or your static assets can be served from the root path, but not both. The latter is useful when using Dropwizard to back a Javascript application
as is the case with XDropWizard. To enable it, move your service to a sub-URL. Note that all webservice calls will now need `service` at the root of the URL. This only applies to the
non-admin port however.
http:
rootPath: /service/* # Default is /*
Then use an extended AssetsBundle constructor to serve resources in the assets folder from the root path. `index.htm` is served as the default page. You need to include the following
line of code in the `Service` class in the `initialize` method:
bootstrap.addBundle(new AssetsBundle("/assets/", "/"));
In order to keep the `assets` folder a bit organized, we can add subfolders to it. Our `assets` folder contains `img`, `js`, and `css` subfolders. Our `assets` folder also contains
a special-case file called `index.htm`. By default, DropWizard serves this as the default HTML page.
### Static Content Access
Finally, once DropWizard is running, you can access the static content via the following URLS:
http://localhost:9090
http://localhost:9090/img/favicon.png
http://localhost:9090/img/logo_60.png
http://localhost:9090/css/main.css
http://localhost:9090/sample.html
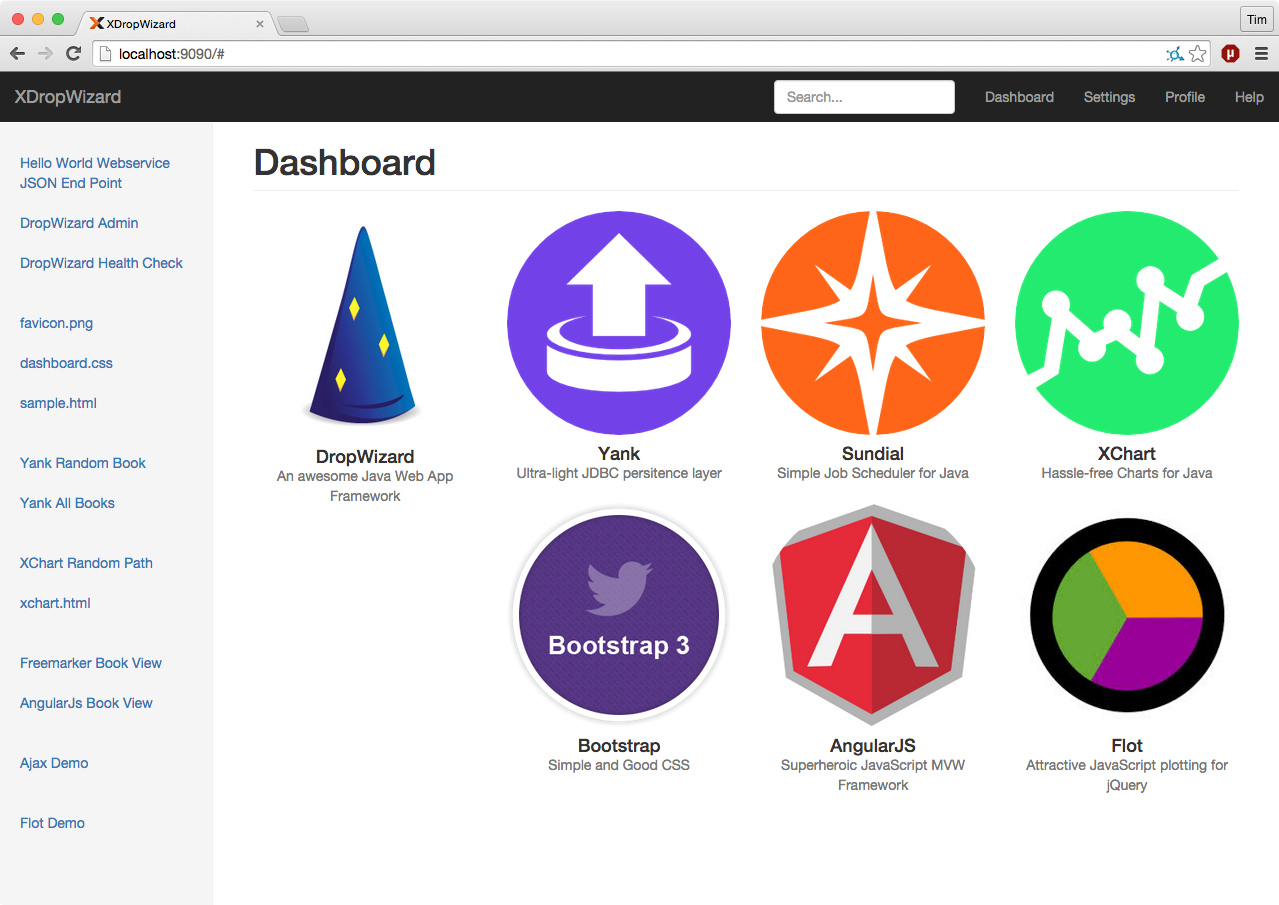
BTW, the HTML file `index.html` contains all the links referenced in this README file providing a nice overview of all the demonstrated functionality. If you run this
DropWizard application as described above, you should be able to click on all the links displayed on `index.html` at the following URL:
http://localhost:9090
### Another Option
Another approach is to serve all static content from a webserver such as Apache HTTP or nginx, placed in front of the DropWizard instance. This however has the disadvantage
of spreading your app's content over several places, and the configuration and maintenance is more complex. In certain cases it may make sense though. Gary Rowe blogged
about how it can be done with nginx [here](http://gary-rowe.com/agilestack/2013/02/13/an-nginx-config-file-for-dropwizard-with-static-content/).
## Sundial
Sundial is a lightweight Java job scheduling framework. Read all about it here: [https://github.com/timmolter/Sundial](https://github.com/timmolter/Sundial).
Integrating [Sundial](https://github.com/timmolter/Sundial) into a DropWizard instance requires minimal setup, and once it's all configured and running,
the scheduling and automatic running of jobs is straight forward and stable. For those not familiar with Sundial, it is a simplified fork of [Quartz](http://quartz-scheduler.org/)
developed by [Knowm](http://knowm.org/open-source/). A lot of the bloat and confusion of configuring Quartz was removed in creating Sundial and a convenient wrapper around jobs was added to enable
more modular job building and organization. Sundial creates a threadpool on application startup and uses it for background jobs.
Integration is made convenient with the [dropwizard-sundial project](https://github.com/timmolter/dropwizard-sundial).
## Adding the dropwizard-sundial dependency
Add the **dropwizard-sundial** library as a dependency to your `pom.xml` file:
```xml
org.knowm
dropwizard-sundial
4.0.0
```
## Integrate Sundial into you App
1. Add the Sundial Bundle in the initialize method.
```java
@Override
public void initialize(Bootstrap bootstrap) {
...
bootstrap.addBundle(new SundialBundle() {
@Override
public SundialConfiguration getSundialConfiguration(XDropWizardApplicationConfiguration configuration) {
return configuration.getSundialConfiguration();
}
});
}
```
2. Add `SundialConfiguration` to your configuration file.
```java
// Sundial
@Valid
@NotNull
public SundialConfiguration sundialConfiguration = new SundialConfiguration();
@JsonProperty("sundial")
public SundialConfiguration getSundialConfiguration() {
return sundialConfiguration;
}
```
## Create a Job Class
```java
public class SampleJob extends org.knowm.sundial.Job {
@Override
public void doRun() throws JobInterruptException {
// Do something interesting...
}
}
```
## ...with CronTrigger or SimpleTrigger Annotation
```java
@CronTrigger(cron = "0/5 * * * * ?")
```
```java
@SimpleTrigger(repeatInterval = 30, timeUnit = TimeUnit.SECONDS)
```
## Alternatively, Put an XML File Called jobs.xml on Classpath
```xml
SampleJob3
com.foo.bar.jobs.SampleJob3
true
SampleJob3-Trigger
SampleJob3
*/15 * * * * ?
SampleJob2
com.foo.bar.jobs.SampleJob2
MyParam
42
SampleJob2-Trigger
SampleJob2
5
5000
```
### SampleJob3.java
This job is slightly more complicated and it demonstrates two nice features of Sundial. First it logs the value for myParam which it gets from jobs.xml.
Second it uses a `JobAction` and passes it a parameter via the `JobContext`. Using `JobAction`s is a good way to reuse common job actions across many different
jobs, mixing and matching if desired. This keeps your jobs organized.
```java
public class SampleJob3 extends Job {
private final Logger logger = LoggerFactory.getLogger(SampleJob3.class);
@Override
public void doRun() throws JobInterruptException {
JobContext context = getJobContext();
String valueAsString = context.get("MyParam");
logger.info("valueAsString = " + valueAsString);
Integer valueAsInt = Integer.valueOf(valueAsString);
logger.info("valueAsInt = " + valueAsInt);
context.put("MyValue", new Integer(123));
new SampleJobAction().run();
}
}
```
In your `*.yml` DropWizard configuration file, you can easily set some helpful parameters to customize Sundial as DropWizard starts up, right from the config file:
```yml
sundial:
thread-pool-size: 5
shutdown-on-unload: true
start-delay-seconds: 0
start-scheduler-on-load: true
global-lock-on-load: false
annotated-jobs-package-name: com.foo.bar.jobs
```
### Sundial Asynchronous Control via HTTP
By defining some tasks and hooking them into DropWizard you can asynchronously trigger your jobs and/or put a global lock and unlock on the Sundial scheduler.
curl -X POST http://localhost:9090/admin/tasks/locksundialscheduler
curl -X POST http://localhost:9090/admin/tasks/unlocksundialscheduler
curl -X POST "http://localhost:9090/admin/tasks/startjob?JOB_NAME=MyJob"
curl -X POST "http://localhost:9090/admin/tasks/startjob?JOB_NAME=SampleJob3&MyParam=9999"
curl -X POST "http://localhost:9090/admin/tasks/stopjob?JOB_NAME=SampleJob3"
curl -X POST "http://localhost:9090/admin/tasks/removejob?JOB_NAME=SampleJob3"
curl -X POST "http://localhost:9090/admin/tasks/addjob?JOB_NAME=SampleJob3&JOB_CLASS=org.knowm.xdropwizard.jobs.SampleJob3&MyParam=888"
curl -X POST http://localhost:9090/admin/tasks/removejobtrigger?TRIGGER_NAME=SampleJob3-Trigger
curl -X POST "http://localhost:9090/admin/tasks/addcronjobtrigger?TRIGGER_NAME=SampleJob3-Trigger&JOB_NAME=SampleJob3&CRON_EXPRESSION=0/45%20*%20*%20*%20*%20?"
curl -X POST "http://localhost:9090/admin/tasks/addcronjobtrigger?TRIGGER_NAME=SampleJob3-Trigger&JOB_NAME=SampleJob3" --data-urlencode "CRON_EXPRESSION=0/45 * * * * ?"
**Note:** If you intend to asynchronously stop jobs, read this: The Job termination mechanism works by setting a flag that the Job should be terminated,
but it is up to the logic in the Job to decide at what point termination should occur. Therefore, in any long-running job that you anticipate the need to terminate,
put the method call checkTerminated() at an appropriate location.
### Inject Global Objects or Config Parameters into a Job
You may want access to a global object such as a REST client, and you don't want to have to reinstantiate that object every single time the job is run. It can be done quite easily by
putting the object in the ServletContext during app startup in the `run` method. Since Sundial is bound to the ServletContext's lifecycle, it has direct access to the ServletContext.
The ServletContext has a `String, Object` map for holding these global objects. The following code snippets show how to add an object to the ServletContext in the `run` method and how
to access it from a job.
```java
@Override
public void run(XDropWizardApplicationConfiguration configuration, Environment environment) throws Exception {
logger.info("running DropWizard!");
// Add object to ServletContext for accessing from Sundial Jobs
environment.getApplicationContext().setAttribute("MyKey", "MyObject");
...
}
```
```java
@CronTrigger(cron = "0/25 * * * * ?")
public class MyJob extends Job {
private final Logger logger = LoggerFactory.getLogger(MyJob.class);
@Override
public void doRun() throws JobInterruptException {
// pull object from ServletContext, which was added in the apllication's run method
String myObject = (String) SundialJobScheduler.getServletContext().getAttribute("MyKey");
logger.info("MyJob says: " + myObject);
}
}
```
## Yank
Yank is a very easy-to-use yet flexible Java persistence layer for JDBC-compatible databases build on top of
[org.apache.DBUtils](http://commons.apache.org/dbutils/). Usage is very simple: define DB connectivity properties, create a DAO and POJO class,
and execute queries.
Integrating Yank into DropWizard requires just a minimum of setup.
### DB.properties
The `DB.properties` file should be a familiar sight for people used to working with JDBC-compatible databases such as MySQL, HSQLDB, Oracle, and Postgres.
Put a file called `DB.properties` on your classpath. See `DB.properties` in `src/main/resources`. In this file, you define the properties needed to connect to your
database such as the JDBC driver class name, the user and password. Yank will load this file at startup and handle connecting to the database.
### SQL.properties (Optional)
Put a file called `SQL.properties` on your classpath. See `SQL.properties` in `src/main/resources`. The `SQL.properties` file is a place to centrally store your
SQL statements. There are a few advantages to this. First, all your statements are found at a single place so you can see tham all at once. Secondly, if you want
to switch your underlying database you'll need to rewrite all your SQL statements. If you have a `SQL.properties` file, you can just create a second one for the new
database and easily make the transition. Of course, you can write all your SQL statements in the Java DAO classes directly as well.
### Book.java
Yank requires that you have a single POJO for each table in your database. The POJO's fields should match the column names and data types of the matching table.
Add the getter and setters as well.
```java
public class Book {
private String title;
private String author;
private double price;
/** Pro-tip: In Eclipse, generate all getters and setters after defining class fields: Right-click --> Source --> Generate Getters and Setters... */
public String getTitle() {
return title;
}
public void setTitle(String title) {
this.title = title;
}
public String getAuthor() {
return author;
}
public void setAuthor(String author) {
this.author = author;
}
public double getPrice() {
return price;
}
public void setPrice(double price) {
this.price = price;
}
}
```
### BooksDAO.java
It is not required by Yank, but it really helps to organize your persistence layer code to have one DAO class for each table. The DAO class is just a collection
of public static methods that each interact with Yank's `DBProxy` class. Note that in some of the following methods, the SQL statements are written directly as a
String, while others come from the `SQL.properties` file on the classpath. The presence of the word `key` in the `DBProxy` method indicates that the SQL
statement is being fetched from the `SQL.properties`.
```java
public class BooksDAO {
public static int createBooksTable() {
String sqlKey = "BOOKS_CREATE_TABLE";
return DBProxy.executeSQLKey("myconnectionpoolname", sqlKey, null);
}
public static int insertBook(Book book) {
Object[] params = new Object[] { book.getTitle(), book.getAuthor(), book.getPrice() };
String SQL = "INSERT INTO BOOKS (TITLE, AUTHOR, PRICE) VALUES (?, ?, ?)";
return DBProxy.executeSQL("myconnectionpoolname", SQL, params);
}
public static List selectAllBooks() {
String SQL = "SELECT * FROM BOOKS";
return DBProxy.queryObjectListSQL("myconnectionpoolname", SQL, Book.class, null);
}
public static Book selectRandomBook() {
String sqlKey = "BOOKS_SELECT_RANDOM_BOOK";
return DBProxy.querySingleObjectSQLKey("myconnectionpoolname", sqlKey, Book.class, null);
}
}
```
### YankBookResource.java
In order to access objects from the database and return them as JSON, you need a resource class for it. It makes most sense to create a resource class for
each table in your database. Don't forget to add this resource in the `Service` class!
```java
@Path("book")
@Produces(MediaType.APPLICATION_JSON)
public class YankBookResource {
@GET
@Path("random")
public Book getRandomBook() {
return BooksDAO.selectRandomBook();
}
@GET
@Path("all")
public List getAllBooks() {
return BooksDAO.selectAllBooks();
}
}
```
### YankManager.java
`YankManager.java` is the class responsible for setting up `Yank` and it is hooked into DropWizard in the `Service` class by
including the following line of code:
```java
YankManager ym = new YankManager(configuration.getYankConfiguration()); // A DropWizard Managed Object
environment.manage(ym); // Assign the management of the object to the Service
environment.addResource(new YankBookResource());
```
In your `.yml` DropWizard configuration file, you can easily define the connection pools and SQL statement files that Yank uses:
```
yank:
-
dbPropsFileName: DB.properties
sqlPropsFileName: SQL.properties
-
poolName: mypool
dbPropsFileName: DB.properties
sqlPropsFileName: SQL.properties
```
### Yank Database Access
Finally, once DropWizard is running, you can access the JSON objects via the following URLS:
http://localhost:9090/service/book/random
http://localhost:9090/service/book/all
## XChart
[XChart](https://github.com/timmolter/XChart) is a light-weight and convenient library for plotting data. We use it in Dropwizard to dynamically create line,
scatter, and bar charts and to provide the resulting bitmaps (PNGs, JPGs, etc.) as URL endpoint resources.
There is no required setup or initialization as in the case with Sundial and Yank. You only need to create a resource for each chart you are providing.
### XChartResource.java
This example XChartResource class creates an XChart `QuickChart` and sends the image as a byte[] using `XChart`'s `BitmapEncoder` class. Don't forget to add this resource in the `Service` class!
```java
@Path("xchart")
public class XChartResource {
@GET
@Path("random.png")
@Produces("image/png")
public Response getRandomLineChart() throws IOException {
Chart chart = QuickChart.getChart("XChart Sample - Random Walk", "X", "Y", null, null, getRandomWalk(105));
return Response.ok().type("image/png").entity(BitmapEncoder.getPNGBytes(chart)).build();
}
private double[] getRandomWalk(int numPoints) {
double[] y = new double[numPoints];
for (int i = 1; i < y.length; i++) {
y[i] = y[i - 1] + Math.random() - .5;
}
return y;
}
}
```
### XChart Image Access
Finally, once DropWizard is running, you can access the XChart plots as PNGs via the following URL:
http://localhost:9090/service/xchart/random.png
http://localhost:9090/xchart.html
## Dynamic HTML Pages
Dynamic HTML pages in DropWizard are referred to as "Views". These are like dynamic web pages produced by php or jsp/Servlets. Before adding Views to DropWizard
, you need to include the following line of code in the `Service` class in the `initialize` method:
bootstrap.addBundle(new ViewBundle());
You'll also need to add the `dropwizard-views` dependency to the pom.xml file:
```xml
com.yammer.dropwizard
dropwizard-views
whatever
```
### View Resource
Just as we need a `Resource` class for JSON endpoints, a `Resource` class is needed for "Views" too.
```java
@Path("view/book")
@Produces(MediaType.TEXT_HTML)
public class ViewBookResource {
@GET
@Timed
@CacheControl(noCache = true)
public BookView bookView() {
return new BookView();
}
}
```
Don't forget to add this resource in the `Service` class!
### View Class
The view class provides both the freemaker template and the dynamic data for the page. Here a `Book` object is hardcoded,
but it could easily come from a database. Any URL parameters can be passed from the `Resource` to the `View` via its constructor.
```java
public class BookView extends View {
public BookView() {
super("ftl/book.ftl");
}
public Book getBook() {
Book book = new Book();
book.setTitle("Cryptonomicon");
book.setAuthor("Neal Stephenson");
book.setPrice(23.99);
return book;
}
}
```
### FTL - FreeMarker Template
`book.ftl` is the path of the template relative to the class name. If this class was `org.knowm.xdropwizard.views.PersonView`, Dropwizard
would then look for the file src/main/resources/org/knowm/xdropwizard/views/person.ftl.
```html
<#include "../includes/head.ftl">
<#include "../includes/header.ftl">
Book Title:${book.title}
Book Author:${book.author}
Book Price:${book.price}
<#include "../includes/footer.ftl">
<#include "../includes/cdn-scripts.ftl">
```
Notice the `#include` sections. This allows you to set up common page elements, thus avaoiding copy and pasting header, footer and script sections in all your FTLs.
### Book View Access
Since the view is a `Resource`, we need to include `service` in the URL:
http://localhost:9090/service/view/book
## AJAX
For pseudo-real-time updates to an HTML page, AJAX comes in handy. Adding AJAX to a web application requires 2 compnents:
1. an HTML page with a JQuery AJAX query
1. a backend JSON endpoint
### AJAX HTML page (ajax.html)
This page uses JQuery to fetch JSON, update contents of the `numberplaceholder` span, and repeat every one second.
```html
Sample AJAX Page
Sample AJAX HTML Page
This is a sample html page demonstrating AJAX.
Random Number from Server:
$(function() {
dataUpdate();
});
function dataUpdate() {
$.getJSON("/service/random", function(json) {
$('#numberplaceholder').html(json.number);
setTimeout('dataUpdate()', 1000);
}).error(function() {
console.log("errorfetching JSON asynchronously!");
});
}
```
### Backend JSON endpoint (RandomNumberResource.java)
```java
@Path("random")
@Produces(MediaType.APPLICATION_JSON)
public class RandomNumberResource {
@GET
public RandomNumber getRandom() {
return new RandomNumber();
}
}
```
### AJAX Page Access
http://localhost:9090/ajax.html
## Flot
[Flot](http://www.flotcharts.org/) is a pure JavaScript plotting library for jQuery, with a focus on simple usage, attractive looks and interactive features. It's
wonderful for web-based plots.
### jquery.flot.js
Integrating `flot` into a webapp requires adding the latest `javascript` file(s) from `flot`, which can be grabbed from their [GitHub page](https://github.com/flot/flot/releases).
We place the `jquery.flot.js` file into a `js` folder in `src/main.resources`. There are many extra `flot` js files used to add extra functionaity to flot.
### flot.html
There are just two main things needed to make a flot chart:
1. a link to `jquery.flot.js`
1. the `placeholder` div
```html
Sample Flot Page
Sample Flot HTML Page
This is a sample html page demonstrating Flot.
$(function() {
var d1 = [];
for (var i = 0; i < 14; i += 0.5) {
d1.push([i, Math.sin(i)]);
}
$.plot("#placeholder", [d1]);
});
```
## AngularJS
[AngularJS](https://angularjs.org/) is a Java-script-based thick client providing a model-view-controller framework for web applications.
Integrating `AngularJS` into a webapp requires adding some Javascript files to the generated HTML and the integration of Javascript acting as the controller (in MVC) between the view (HTML) and the model (the JSON webservice).
### books.html
```html
Sample AngularJS Page
Sample AngularJS Page
This is a sample html page demonstrating AngularJS.
```
### books_angular.js
```javascript
angular.module('sampleApp', [])
.controller('sampleAppController', ['$scope', '$http', function($scope, $http) {
$scope.books = [];
$http.get('/service/book/all').success(function(data) {
console.log(data);
$scope.books = data;
}).
error(function(data, status, headers, config) {
console.log(data);
});
}]);
```
The controller defines a dependency to the `$scope` and the `$http` module. An HTTP GET request to the `/service/book/all` endpoint is carried out with the get method. It returns a $promise object with a success and an error method. Once successful, the JSON data is assigned to $scope.books to make it available in the template in books.html. The 'ng-repeat' creates a multi-rowed table to match the data fetched from the backend.
## Bower
Bower is used to manage the front end dependencies including JS and CSS libs. It's like Maven, but for front end web technology. Dependencies are defined in `.../assets/bower.json`
### Install Bower
Read all about `bower` in this concise writeup:
npm install -g bower
### Install Front-end Dependencies
cd ~/path/to/XDropWizard/src/main/resources/assets
bower update
This will download and put the JS dependencies found in `.../assets/bower.json` into a folder called: `.../assets/bower_components`. You can then reference the JS files in your HTML. The `bower.json` allows to you set specific versions of the dependencies if you want to. Otherwise the `"*"` indicates to bower to download the latest version.
See `.../assets/books.html` on how to integrate the bower dependencies into an HTML document.
Note that normally you would add the `src/main/resources/assets/bower_components` to your `.gitignore` file and not check these dependencies into your source repository and you would run `bower update` to get those dependencies. For this project I left a lot of the bower-installed files in the repo so this app runs flawlessly out of the box.
## Angular-nvD3
[Angular-nvD3](https://github.com/krispo/angular-nvd3) is designed to make it easier to work with nvd3.js re-usable charting library. The Angular JS directive allows you to easily customize your charts via JSON API. Bower is used to pull in the necessary dependencies with the line: `"angular-nvd3": "latest"`.
The `angular-nvd3` project has a fundamental difference from the others in the base approach it is created. This directive provides a two-way binding mechanism for all chart options over the full nvd3 core as well as chart data. It allows you to interactively customize chart options or data from the controller on the fly via JSON.
Integrating `angular-nvd3` into your app requires a HTML page and a JS file. Here is the second example which pulls data from the webservice:
### nvd3-chart2.html
```html
Angular-nvD3 Line Chart 2
Sample Angular-nvD3 HTML Page
This is a sample html page demonstrating Angular-nvD3 with data fetched from server.
```
### nvd3-chart2.js
```javascript
var app = angular.module('plunker', ['nvd3']);
app.controller('MainCtrl', function($scope, $http) {
$scope.options = {
chart: {
type: 'lineChart',
height: 450,
margin : {
top: 20,
right: 20,
bottom: 40,
left: 55
},
x: function(d){ return d.x; },
y: function(d){ return d.y; },
xAxis: {
axisLabel: 'X'
},
yAxis: {
axisLabel: 'Y',
tickFormat: function(d){
return d3.format('.02f')(d);
},
axisLabelDistance: 30
},
callback: function(chart){
console.log("!!! lineChart callback !!!");
}
},
title: {
enable: true,
text: 'X vs. Y'
}
};
//////////////////////////////////////////////////////////////////////
// Chart Data //////////////////////////////////////////////////////////////
$scope.initChartData = function() {
$http.get('/service/nvd3data/chartdata').success(function(data) {
// console.log(data);
$scope.appChartData = [
convertToChartFormat(data.xAxisData, data.a, 'A'),
convertToChartFormat(data.xAxisData, data.b, 'B'),
convertToChartFormat(data.xAxisData, data.c, 'C'),
convertToChartFormat(data.xAxisData, data.d, 'D')
];
// console.log($scope.appChartData);
});
};
//////////////////////////////////////////////////////////////////////
});
function convertToChartFormat(xData, yData, seriesName){
var returnValue;
var convertedChartArray = [];
var i;
for (i = 0; i < xData.length; i++) {
convertedChartArray.push( {x: xData[i], y: yData[i]});
}
returnValue = {
key: seriesName,
values: convertedChartArray
}
return returnValue;
};
```
## Asynchronous Requests/Responses
For long running Asynchronous requests and responses, we can use Jersey's [Asynchronous Services and Clients](https://jersey.java.net/documentation/latest/async.html).
### Server Endpoint (`AsyncResource.java`)
```java
@Path("/async")
public class AsyncResource {
private static int numberOfSuccessResponses = 0;
private static int numberOfFailures = 0;
private static Throwable lastException = null;
@GET
public void asyncGetWithTimeout(@Suspended final AsyncResponse asyncResponse) {
asyncResponse.register(new CompletionCallback() {
@Override
public void onComplete(Throwable throwable) {
if (throwable == null) {
// no throwable - the processing ended successfully
// (response already written to the client)
numberOfSuccessResponses++;
} else {
numberOfFailures++;
lastException = throwable;
}
}
});
new Thread(new Runnable() {
@Override
public void run() {
String result = veryExpensiveOperation();
asyncResponse.resume(result);
}
private String veryExpensiveOperation() {
// ... very expensive operation
try {
Thread.sleep(5000);
} catch (InterruptedException e) {
e.printStackTrace();
}
return "Hello Async!";
}
}).start();
}
}
```
### Client (`AsyncTest.java`)
```java
public class AsyncTest {
public static void main(String[] args) throws InterruptedException, ExecutionException {
AsyncTest asyncTest = new AsyncTest();
asyncTest.go();
}
private void go() throws InterruptedException, ExecutionException {
Client client = ClientBuilder.newClient();
final Future entityFuture = client.target("http://localhost:9090/service/async").request().async().get(new InvocationCallback() {
@Override
public void completed(String response) {
System.out.println("Response entity '" + response + "' received.");
}
@Override
public void failed(Throwable throwable) {
System.out.println("Invocation failed.");
throwable.printStackTrace();
}
});
System.out.println(entityFuture.get());
}
}
```
## File Upload
To add file uploading capabilities to your webapp using DropWizard (and Jersey) there are a couple of preliminary steps you needs to take first:
1. Add `bootstrap.addBundle(new MultiPartBundle());` to your `initialize()` method in your `Application` class
1. Add the `dropwizard-forms` dependency to the `pom` file
### Resource (`FileUploadResource.java`)
```java
@Path("/file")
@Produces(MediaType.APPLICATION_JSON)
public class FileUploadResource {
private final Logger logger = LoggerFactory.getLogger(FileUploadResource.class);
@POST
@Path("/upload")
@Consumes(MediaType.MULTIPART_FORM_DATA)
public Response uploadFile(@FormDataParam("file") InputStream uploadedInputStream, @FormDataParam("file") FormDataContentDisposition fileDetail) {
String fileName = fileDetail.getFileName();
String output = "File received : " + fileName;
logger.info(output);
return Response.status(200).entity(output).build();
}
}
```
Finally, once DropWizard is running, you can post a file via a form the following URL:
http://localhost:9090/fileupload.html