https://github.com/krestaino/my-dash
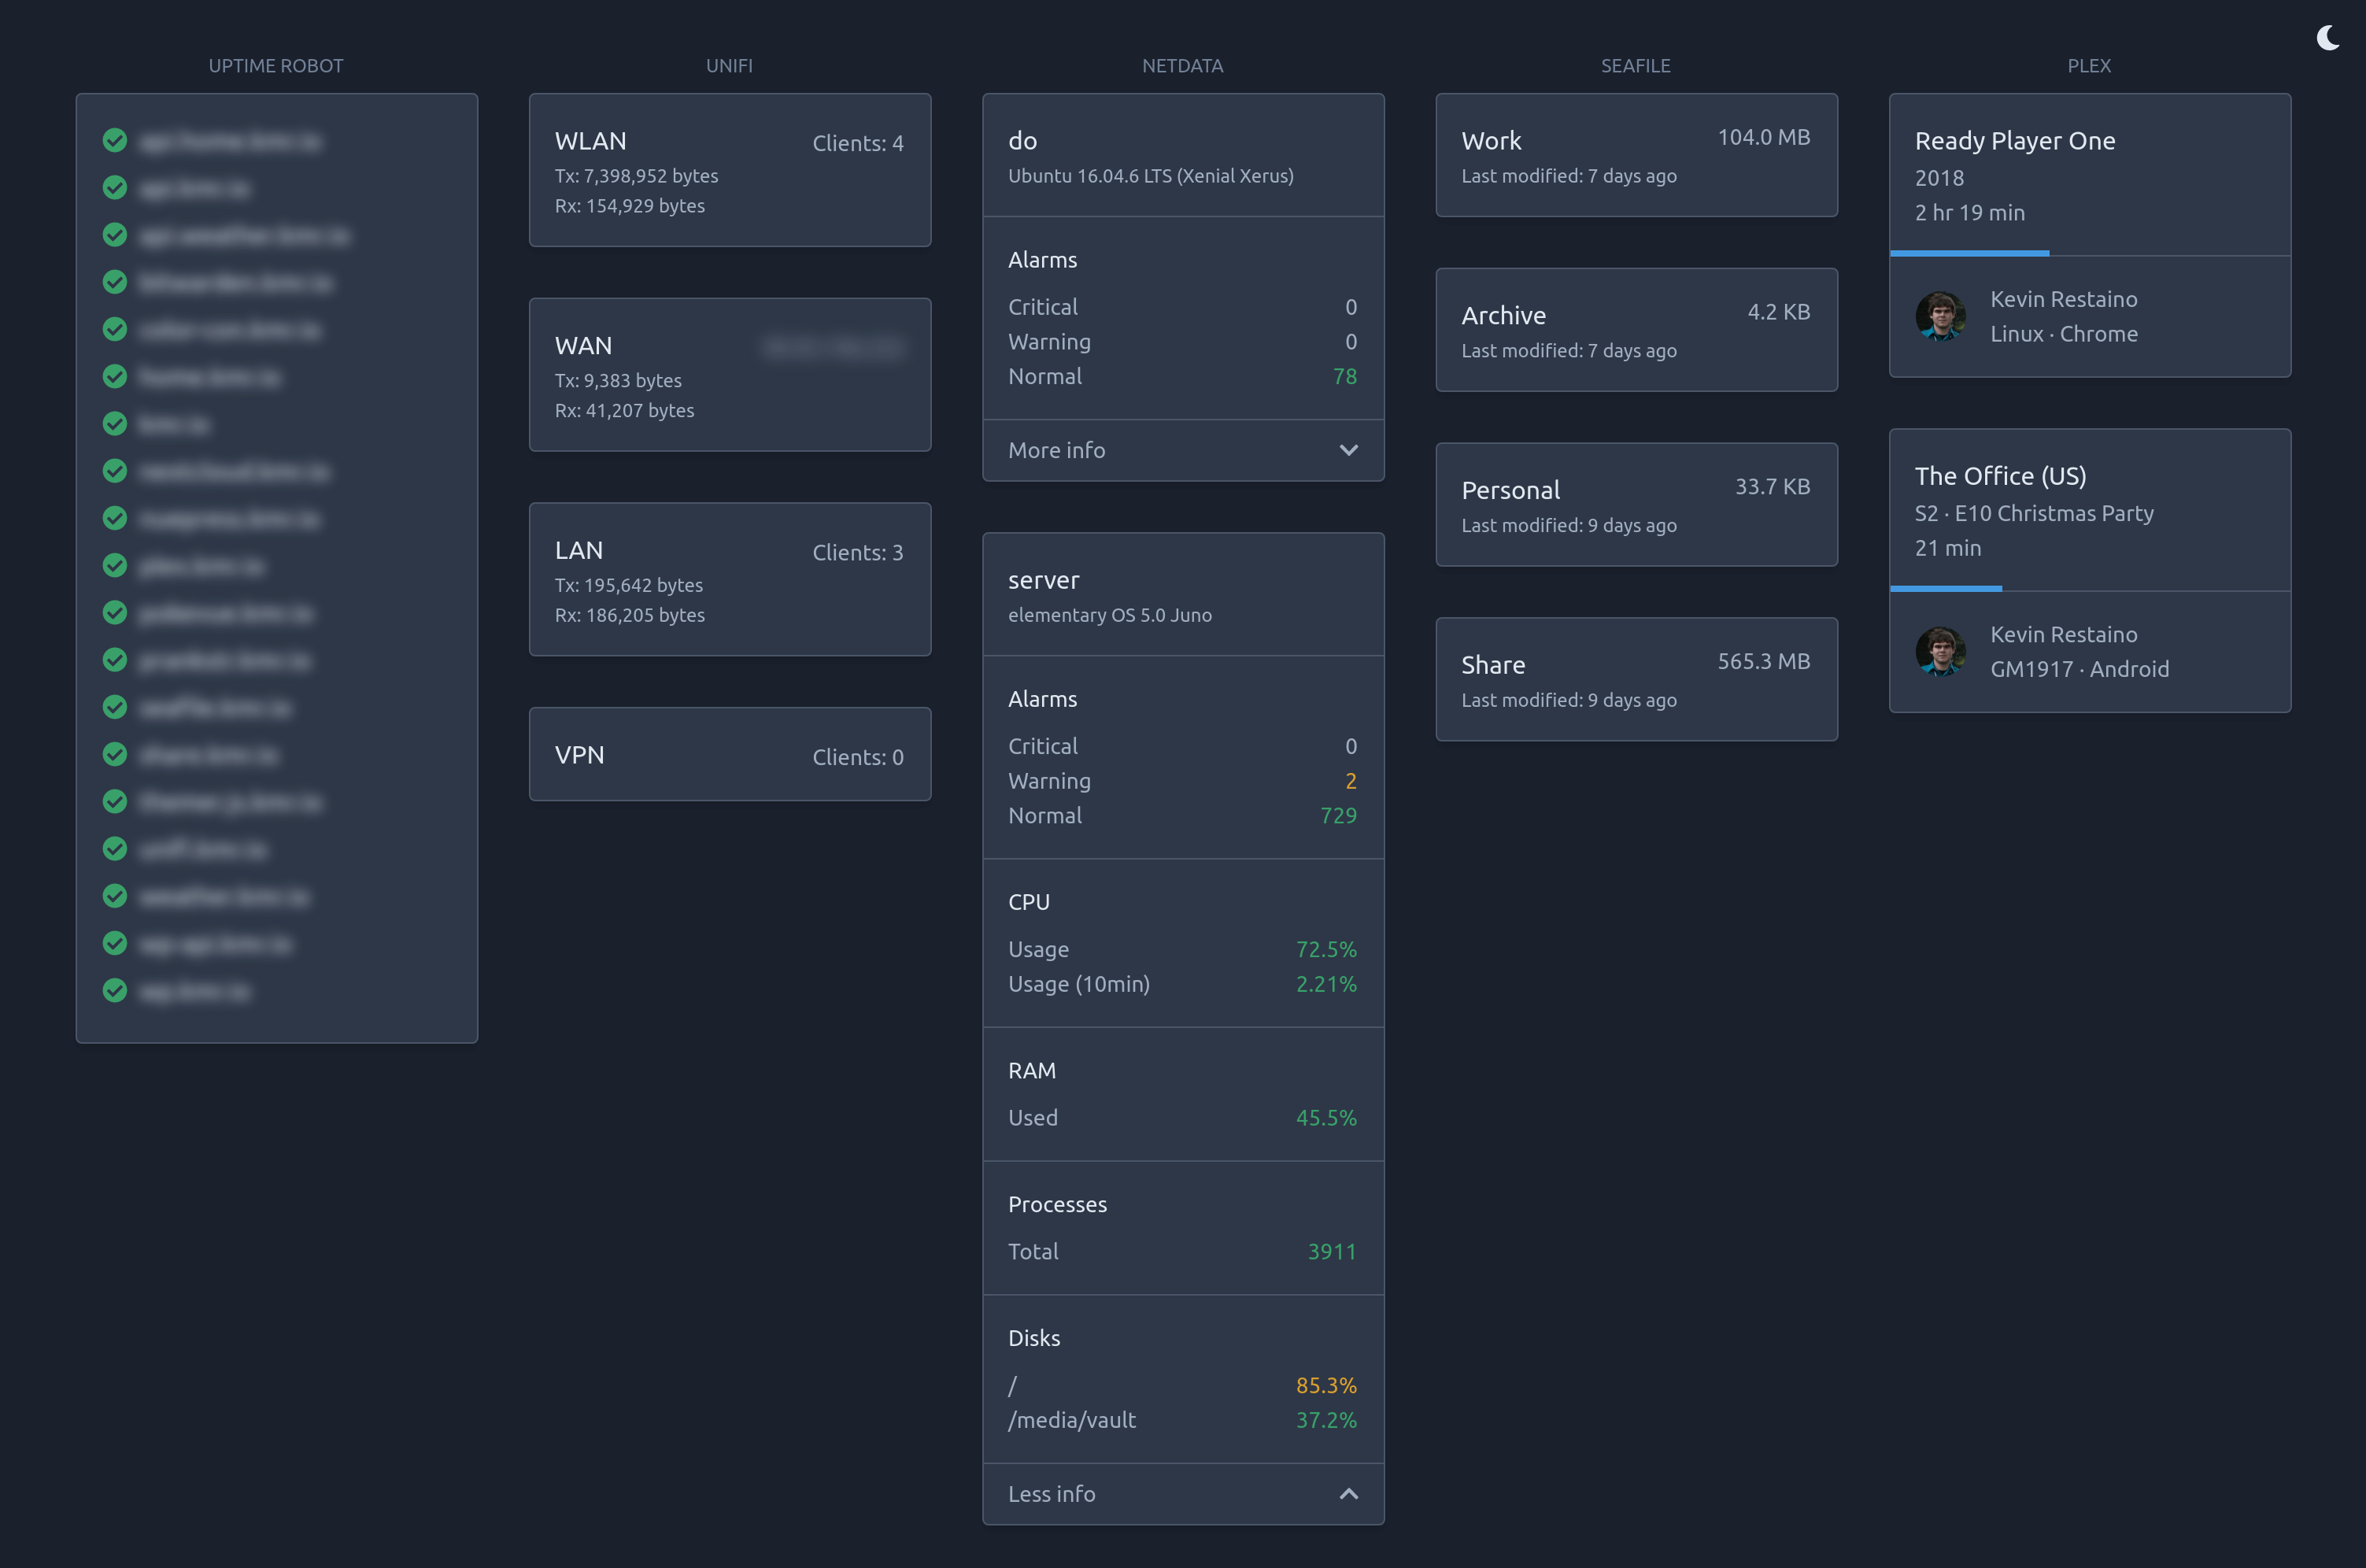
🔢 A developer friendly dashboard for monitoring your self-hosted services with a clean and modern UI.
https://github.com/krestaino/my-dash
dashboard docker docker-compose netdata nodejs plex react seafile tailwindcss unifi uptime-robot
Last synced: over 1 year ago
JSON representation
🔢 A developer friendly dashboard for monitoring your self-hosted services with a clean and modern UI.
- Host: GitHub
- URL: https://github.com/krestaino/my-dash
- Owner: krestaino
- License: mit
- Created: 2019-07-30T05:50:52.000Z (almost 7 years ago)
- Default Branch: master
- Last Pushed: 2023-01-07T04:17:36.000Z (over 3 years ago)
- Last Synced: 2025-03-24T11:45:51.199Z (over 1 year ago)
- Topics: dashboard, docker, docker-compose, netdata, nodejs, plex, react, seafile, tailwindcss, unifi, uptime-robot
- Language: JavaScript
- Homepage:
- Size: 2.88 MB
- Stars: 243
- Watchers: 5
- Forks: 15
- Open Issues: 20
-
Metadata Files:
- Readme: README.md
- Contributing: CONTRIBUTING.md
- License: LICENSE.md
- Code of conduct: CODE_OF_CONDUCT.md
Awesome Lists containing this project
README
# My Dash


## Requirements
- Node 10.x
- Yarn 1.x
## Quick Start
### Environmental Variables
First, create an `.env` file at the root of the project. Follow the template file at [.env.template](.env.template) as an example.
### Development
**Install dependencies**
```
$ yarn setup
```
**Start development servers**
```
$ yarn start
```
### Production
**Install dependencies**
```
$ yarn setup
```
**Build API and UI**
```
$ yarn build
```
**Serve API and UI**
```
$ yarn serve
```
**Note:** The API listens on http://localhost:3000 and the UI listens on http://localhost:4000. This is true for both development and production. Feel free to change these in the `.env` file.
## Docker
**Build and serve the API and UI**
```
$ docker-compose up -d
# or
$ yarn docker
```
**Rebuild and update the container after code changes**
```
$ docker-compose build --no-cache my-dash
$ docker-compose up -d
# or
$ yarn docker:build
```
## API
The API fetches data and contains all the credentials to the various services you want to monitor.
### Environmental Variables
**`API_KEY`**
This can be anything you want. The key is used by the UI as a form of authentication. Each request to the API contains this key as a parameter.
Upon first load of the UI, you will be prompted to enter this key. It is stored in `localStorage` so you don't need to enter it every time. If for some reason you need to update it, just delete the key using your browser's dev tools or by clearing the site data.
If the API rejects the key, the UI will automatically delete the invalid key in `localStorage` and ask you to reauthenticate.
**`UI_ORIGIN`**
`CORS` is also enabled on the API. For local development, this is `http://localhost:3000`, unless you changed the port number. For production environments, remember to set the correct origin as `http://localhost:3000` is probably not what you want.
## UI
The UI fetches data gathered by the API and renders the content. Styling is all handled by [Tailwind CSS](https://tailwindcss.com/), head over there to learn more about it.
### Environmental Variables
`REACT_APP_API_URL`
The URL of your API server. For local development, this is `http://localhost:4000`, unless you changed `API_PORT` in the `.env` file. For production environments, remember to set the correct URL as `http://localhost:4000` is probably not what you want.
## Adding your own services
I recommend you check out the two folders [api/src/routes](api/src/routes) and [ui/src/components/services](ui/src/components/services) to see how the existing services are implemented.
But as a _very_ brief walk-through:
1. Add endpoints and/or credentials to the `.env` file.
2. Create a new route in [api/src/routes](api/src/routes) with the name of your new service. All files in the routes folder are automatically imported.
3. Create a new component in the [ui/src/components/services](ui/src/components/services) folder and import it into the main services component at [ui/src/components/Services.js](ui/src/components/Services.js).
4. Render the data however you want.
## FAQ
### How do I get my Uptime Robot API key?
https://uptimerobot.com/api
### You want me to add my Unifi username and password, are you insane?
I agree, but we can mitigate the security vulnerability by creating a new `admin` with `Read Only` access.
Head over to `YOUR_UNIFI_URL/manage/site/default/settings/admins/list` and create a new admin with those limited privileges.
### Where are the Netdata API docs?
https://docs.netdata.cloud/web/api/
### How do I get my Seafile API token?
https://download.seafile.com/published/web-api/home.md
### How do I get my Plex API token?
Login to your Plex application, open up your dev tools and inspect any of the `XHR` requests. Look for the parameter `X-Plex-Token`.