https://github.com/levinunnink/html-form-to-notion
A guide with examples on how to submit HTML forms to Notion.
https://github.com/levinunnink/html-form-to-notion
forms guide html nextjs nextjs14 notion notion-api
Last synced: 8 months ago
JSON representation
A guide with examples on how to submit HTML forms to Notion.
- Host: GitHub
- URL: https://github.com/levinunnink/html-form-to-notion
- Owner: levinunnink
- License: mit
- Created: 2024-03-05T15:38:57.000Z (almost 2 years ago)
- Default Branch: master
- Last Pushed: 2024-03-06T16:20:34.000Z (almost 2 years ago)
- Last Synced: 2024-03-07T17:24:54.067Z (almost 2 years ago)
- Topics: forms, guide, html, nextjs, nextjs14, notion, notion-api
- Homepage: https://sheetmonkey.io/notion
- Size: 85 KB
- Stars: 3
- Watchers: 1
- Forks: 0
- Open Issues: 0
-
Metadata Files:
- Readme: README.md
Awesome Lists containing this project
README
          # Submit a HTML form to Notion

How to submit a simple HTML form to a Notion DB using only HTML and JavaScript / Node.js. A step by step guide with example source code.

This example shows how to set up a mailing list form that sends data to a Notion DB but you can use it for any sort of data.

**Contents**

1. [Set up your Notion integration](#1-set-up-your-notion-integration)

2. [Set up your Notion databse](#2-set-up-your-notion-database)

3. [Connect your integration to the databse](#3-connect-your-integration-to-the-database)

4. [Create your html form and backend](#4-create-your-html-form-and-backend)

5. [Running the examples](#running-the-examples)

6. [Issues](#issues)

## Guide

### 1. Set up your Notion integration


Go to the [Notion Integrations page](https://www.notion.so/my-integrations) and create a new integration for your workspace. Once you're done, copy the `Integration Secret` token.

Note: _You should not use this integration secret on the front end._

### 2. Set up your Notion Database


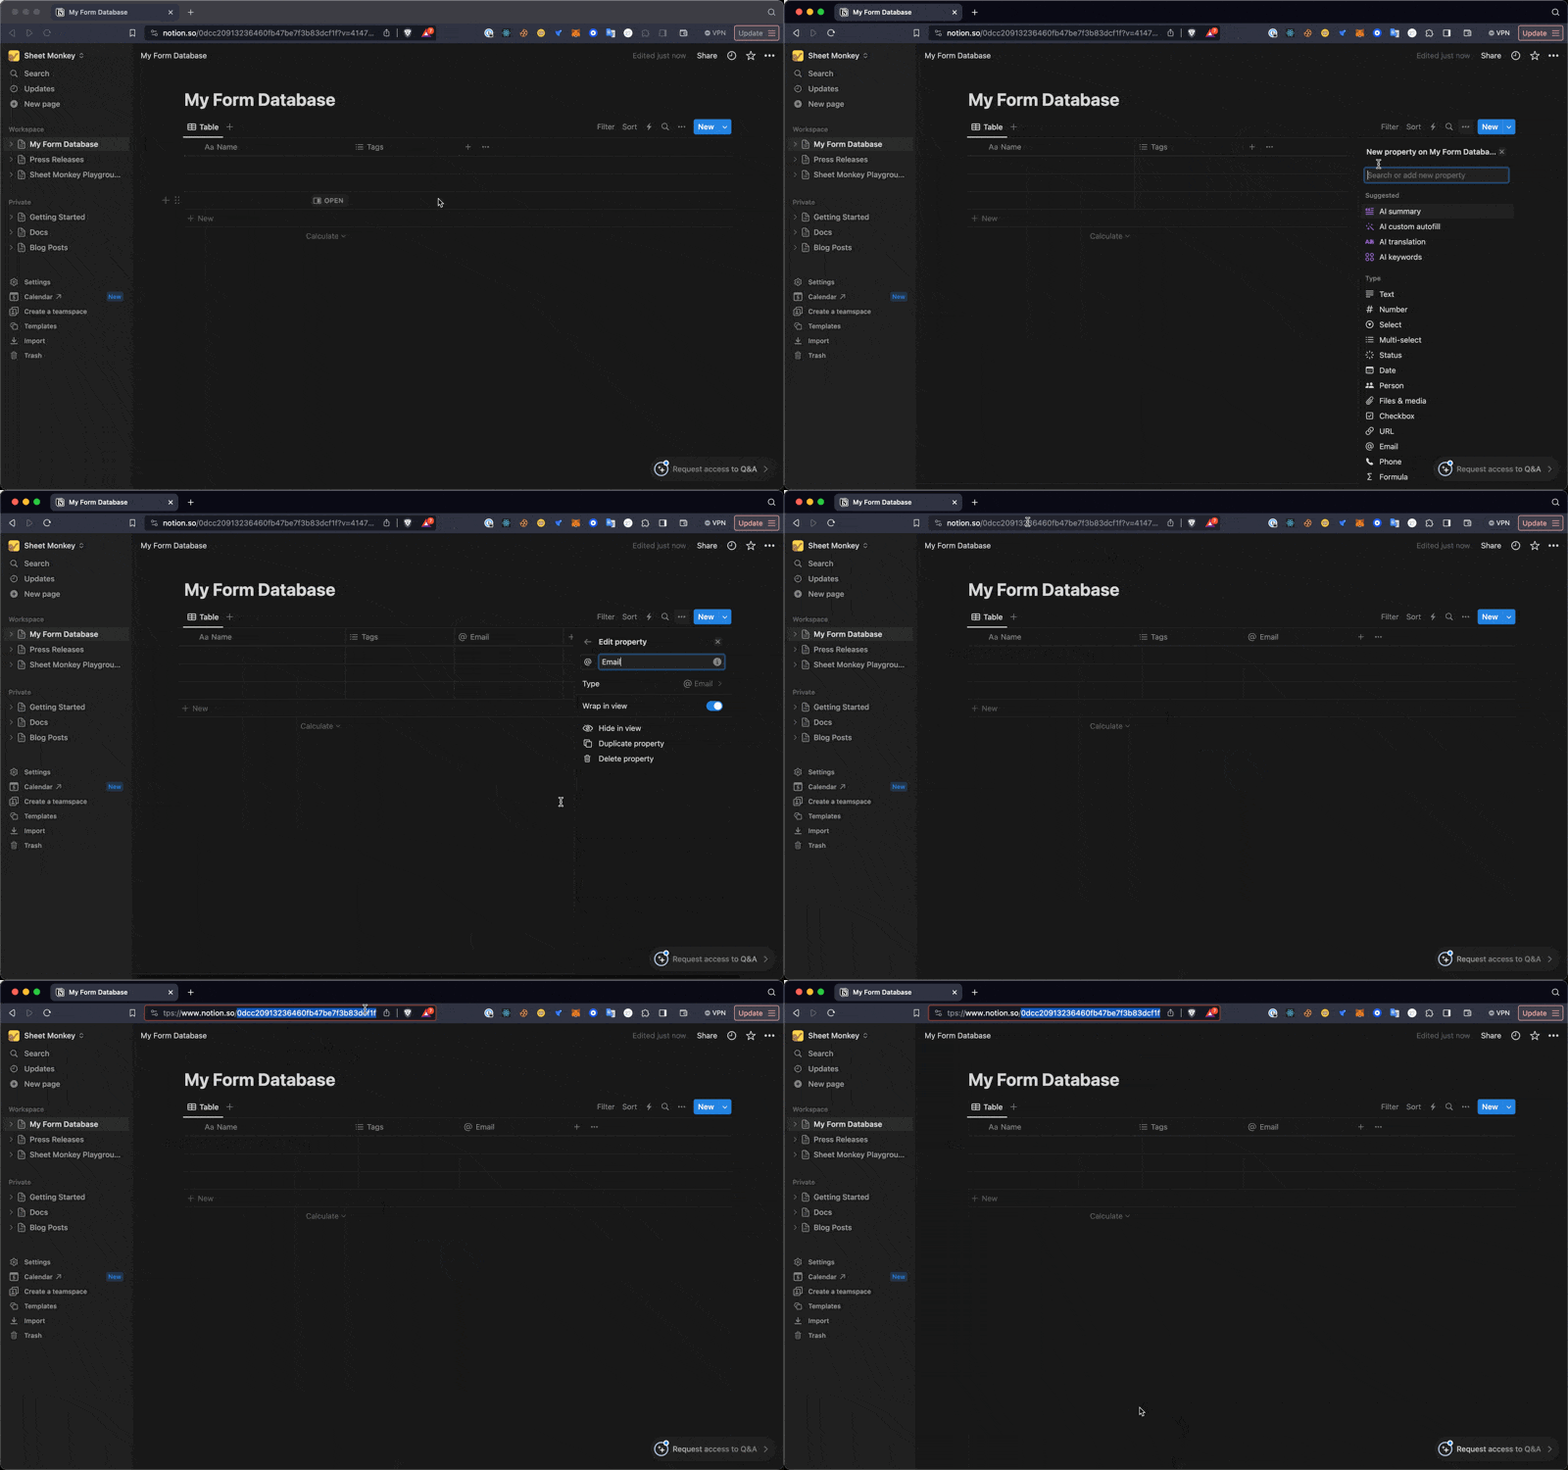
Create a Notion database to store the form submissions. Note the database ID from the URL. In this example we're creating a database with with two properties: `Name` and `Email`.

### 3. Connect your integration to the database


Don't miss this step. You need to give your Notion integration access to the new database. You can do this by following these steps:

1. Click on the DB menu in the top right corner ("...")

2. Select "Connect to" and select your integration from the list.

Your integration should appear beneath the "Connections" section on the menu now

### 4. Create your html form and backend

First create a file named `server.js` with the following content:

```javascript

const express = require('express');

const fetch = require('node-fetch');

const bodyParser = require('body-parser');

const app = express();

const PORT = 3000; // Choose an available port

app.use(bodyParser.json());

app.post('/submit-to-notion', async (req, res) => {

    try {

        const { name, email } = req.body;

        const notionDatabaseId = 'YOUR_NOTION_DB';

        const integrationToken = 'YOUR_NOTION_SECRET';

        const url = `https://api.notion.com/v1/pages`;

        const data = {

            parent: { database_id: notionDatabaseId },

            properties: {

                Name: { title: [{ text: { content: name } }] },

                Email: { email: email }

                // Add more properties based on your Notion database schema

            }

        };

       const result = await fetch(url, {

            method: 'POST',

            headers: {

                'Content-Type': 'application/json',

                'Authorization': `Bearer ${integrationToken}`,

                'Notion-Version': '2021-08-16'

            },

            body: JSON.stringify(data)

        });

        if(result.status !== 200) {

          const error = await result.json();

          console.error('Got error saving data', error);

          return res.status(500).json({ error: error.message });

        }

        res.status(200).json({ message: 'Data saved to Notion!' });

    } catch (error) {

        console.error(error);

        res.status(500).json({ error: 'Internal Server Error' });

    }

});

```

Here's a minimal HTML form that posts to the server we created.

```html


    Notion Form


        Name:


        Email:


        Submit


        const notionForm = document.getElementById('notionForm');


        notionForm.addEventListener('submit', async function (event) {

            event.preventDefault();

            const name = document.getElementById('name').value;

            const email = document.getElementById('email').value;

            // Call the backend script to save data to Notion

            await saveToNotion(name, email);

        });

        async function saveToNotion(name, email) {

            const url = 'http://localhost:3000/submit-to-notion'; // Update with your server URL

            await fetch(url, {

                method: 'POST',

                headers: {

                  'Content-Type': 'application/json',

                },

                body: JSON.stringify({ name, email })

            })

            .then(response => response.json())

            .then(data => {

                alert(data.message);

            })

            .catch(error => {

                console.error('Error:', error);

                alert('Failed to save data to Notion.');

            });

        }


```

Once this is done, you're good to go. Your form data should now be saved directly and securely into Notion each time you submit.


## Running the examples

### Basic Example

To run the example and test it yourself, follow these steps. Note, you will need Node v18+ installed to run the example.

```bash

% git clone https://github.com/levinunnink/html-form-to-notion.git

% cd html-form-to-notion/examples/basic

% npm i

% npm run start

```

For the example to work you will need to update the `server.js` with your `YOUR_NOTION_DB_ID` and `YOUR_NOTION_SECRET` values from the steps above.

Open `http://localhost:3000` to view the form.

### NextJS Example

To run the NextJS example, follow these steps.

```bash

% git clone https://github.com/levinunnink/html-form-to-notion.git

% cd html-form-to-notion/examples/nextjs

```

Create a `.env` file in the nextjs directory with the following values:

- `NOTION_DB_ID`: The ID of your Notion db.

- `NOTION_SECRET`: The secret token of your Notion Integraiton.

Then run

```bash

% npm i

% npm dev

```

## Issues?

If you want to submit your HTML forms to Notion without any backend, try a free service like [Notion Monkey](https://sheetmonkey.io/notion), which allows you to do submit forms to Notion without any backend code.

## Thanks

This example is inspired by these guides:

- [How to submit a nextjs form to Notion](https://sheetmonkey.io/blog/how-to-submit-a-nextjs-form-to-notion)