https://github.com/loginov-rocks/ubxgps
Arduino library for the fastest and simplest communication with u-blox GPS modules
https://github.com/loginov-rocks/ubxgps
arduino arduino-library gps ublox-gps ublox-gps-modules ubx ubx-gps-library ubx-packets
Last synced: 9 months ago
JSON representation
Arduino library for the fastest and simplest communication with u-blox GPS modules
- Host: GitHub
- URL: https://github.com/loginov-rocks/ubxgps
- Owner: loginov-rocks
- License: mit
- Created: 2016-05-26T14:07:55.000Z (over 9 years ago)
- Default Branch: main
- Last Pushed: 2024-08-16T19:08:47.000Z (over 1 year ago)
- Last Synced: 2025-04-13T05:13:42.268Z (9 months ago)
- Topics: arduino, arduino-library, gps, ublox-gps, ublox-gps-modules, ubx, ubx-gps-library, ubx-packets
- Language: C++
- Homepage: https://registry.platformio.org/libraries/loginov-rocks/UbxGps
- Size: 12.9 MB
- Stars: 145
- Watchers: 12
- Forks: 44
- Open Issues: 7
-
Metadata Files:
- Readme: README.md
- License: LICENSE
Awesome Lists containing this project
README
# UbxGps
[](https://registry.platformio.org/libraries/loginov-rocks/UbxGps)
[](https://github.com/loginov-rocks/UbxGps/actions/workflows/arduino-lint.yml)
[](https://github.com/loginov-rocks/UbxGps/actions/workflows/platformio-build.yml)
**This Arduino library was developed for the fastest and simplest communication with u-blox GPS modules**, which
support proprietary UBX protocol that is binary and therefore more compact than common NMEA. Main idea was to achieve real 10 Hz from NEO-7M and it was done. Huge thanks to **iforce2d** for a [tutorial video](https://youtu.be/TwhCX0c8Xe0) whose
code is laid in the basics of the library.
This library depends on GPS module configuration and can handle only one type of UBX packet at a time, which you can
choose during [GPS module configuration](#gps-module-configuration). UbxGps provides easy-to-use interface to all the
available data in accordance with the Protocol Specification that you can find in the
[u-blox](https://github.com/loginov-rocks/UbxGps/tree/main/docs/u-blox) directory. Also, full description of properties is
accessible in the source codes.
## Supported UBX Packet Types
UBX packet types supported by the library are listed below. Feel free to add other packets to the library, since the library
is designed to make new types as easy as it can be.
### UbxGpsNavPosecef.h
*NAV-POSECEF (Position Solution in ECEF):* iTOW, ecefX, ecefY, ecefZ, pAcc.
### UbxGpsNavPosllh.h
*NAV-POSLLH (Geodetic Position Solution):* iTOW, lon, lat, height, hMSL, hAcc, vAcc.
### UbxGpsNavPvt.h
*NAV-PVT (Navigation Position Velocity Time Solution):* iTOW, year, month, day, hour, min, sec, valid, tAcc, nano,
fixType, flags, reserved1, numSV, lon, lat, height, hMSL, hAcc, vAcc, velN, velE, velD, gSpeed, heading, sAcc,
headingAcc, pDOP, reserved2, reserved3.
### UbxGpsNavPvt8.h
Similar to [UbxGpsNavPvt.h](#ubxgpsnavpvth), but for u-blox NEO-8M.
### UbxGpsNavSol.h
*NAV-SOL (Navigation Solution Information):* iTOW, fTOW, week, gpsFix, flags, ecefX, ecefY, ecefZ, pAcc, ecefVX, ecefVY,
ecefVZ, sAcc, pDOP, reserved1, numSV, reserved2.
## Quick Start
Download `UbxGps` and place it to the Arduino libraries directory. Refer to
[Installing Libraries](https://docs.arduino.cc/software/ide-v1/tutorials/installing-libraries) for details.
Next step is configuring your GPS module properly, to find out how to do this check section
[GPS module configuration](#gps-module-configuration). Also, take a look at the
[Auto-configuration](https://github.com/loginov-rocks/UbxGps/blob/main/examples/Mega_AutoConfiguration.cpp)
sketch for the Arduino Mega boards to configure your GPS module automatically to get NAV-PVT messages with 100 ms
frequency and 115200 baudrate.
After that you can use included examples or play with the following simple sketch:
```cpp
#include "UbxGpsNavPvt.h"
UbxGpsNavPvt gps(Serial3);
void setup()
{
Serial.begin(9600);
gps.begin(9600);
}
void loop()
{
if (gps.ready())
{
Serial.print(gps.lon / 10000000.0, 7);
Serial.print(',');
Serial.print(gps.lat / 10000000.0, 7);
Serial.print(',');
Serial.print(gps.height / 1000.0, 3);
Serial.print(',');
Serial.println(gps.gSpeed * 0.0036, 5);
}
}
```
### Note For Uno Users
The library is designed to work with GPS module through a hardware serial port, but Uno has only one. It means that you
can configure GPS module, but the library will occupy serial port and you need to do something more to get the data from
it. For example: add an SD card to store the data, or transmit it through the Bluetooth or Ethernet. `SoftwareSerial`
can be used, but I can't guarantee it will work without bugs on a high frequency.
## GPS Module Configuration
### Step 1. Wiring
So we have an Arduino board and a GPS module. Wiring is pretty simple: `GND` to `GND`, `VCC` to `5V`, `TX` to `RX` and
`RX` to `TX`. Because Uno has only one TX/RX pair, we should connect GPS module `TX` to the `2` pin and `RX` to the
`3` pin and use `SoftwareSerial` library to communicate with the GPS. If you have something with more than one TX/RX pair
on the board you can use it, for example for Mega we can connect GPS `RX` to the `TX3` and `TX` to the `RX3`.

### Auto-configuration
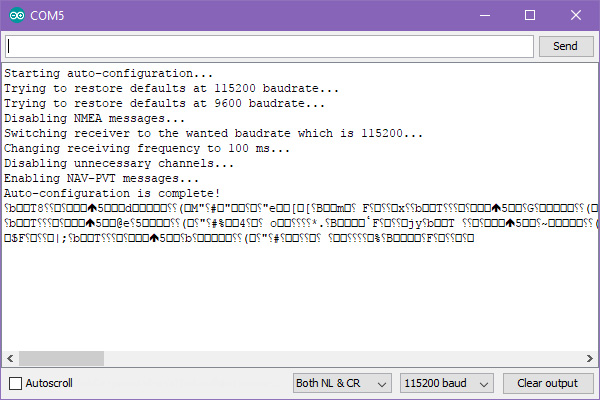
After wiring you can upload the
[Auto-configuration](https://github.com/loginov-rocks/UbxGps/blob/main/examples/Mega_AutoConfiguration.cpp)
sketch for the Arduino Mega boards to configure your GPS module automatically.
At the moment it configures the receiver to get NAV-PVT messages with 100 ms frequency and 115200 baudrate, but you can
change it according to your needs.
### Step 2. Serial Bridge
This step is optional and is only needed to [use u-center](#step-3-meet-u-center). If you don't want to do it, feel free to skip to
[Checks](#step-9-checks).
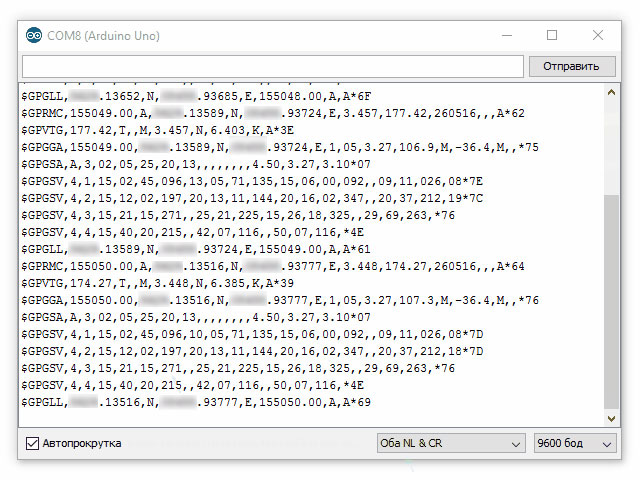
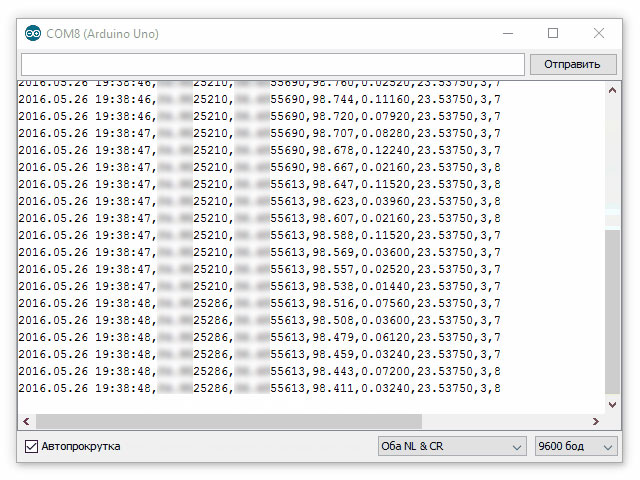
Let's make a bridge between the GPS module and the computer: upload [Uno_SerialBridge.cpp](https://github.com/loginov-rocks/UbxGps/blob/main/examples/Uno_SerialBridge.cpp) or [Mega_SerialBridge.cpp](https://github.com/loginov-rocks/UbxGps/blob/main/examples/Mega_SerialBridge.cpp) sketch
to the board, it allows us to communicate with GPS module directly from computer. Open *Serial Monitor*, and if your GPS
module is new or have default settings you will see something like on the picture below. If everything is OK, GPS will
send some data.
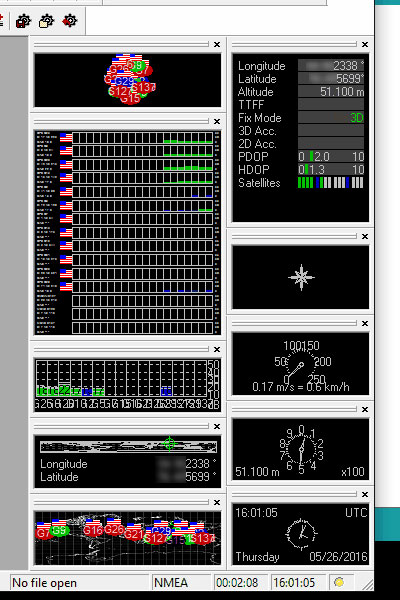
### Step 3. Meet u-center
For u-blox GPS module configuration we will use **u-center** program that you can find
[here](https://www.u-blox.com/en/product/u-center) (Windows only). It parses data from GPS module and provides useful tools to
work with it. Launch program, choose appropriate COM port and set baudrate, 9600 for default. It will start getting some
data.
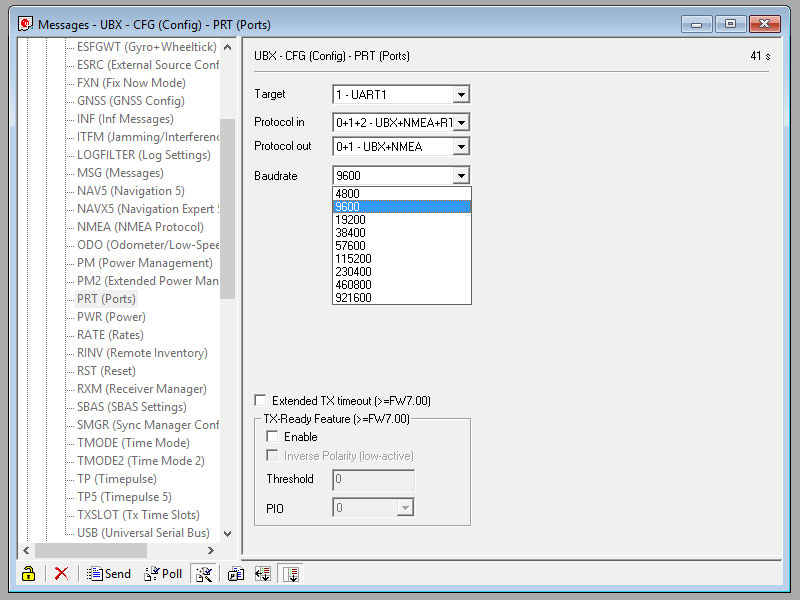
### Step 4. Change Baudrate (Optional)
If you have something with more than one TX/RX pair it will be useful to raise the baudrate of GPS module. It can helps
if you gonna work with high frequency like 5 or 10 Hz. Open *View — Messages View* window and find *UBX — CGF — PRT*
item. Set the baudrate to 115200 for example and click *Send* button at the bottom left corner.
Changing baudrate using `SoftwareSerial` library can cause errors!
GPS module will stops getting data, because our sketch works with old baudrate. Disconnect from COM port in u-center,
update `GPS_BAUDRATE` and `COMPUTER_BAUDRATE` if you want and uploads it to the board. Reconnect u-center and it should works!
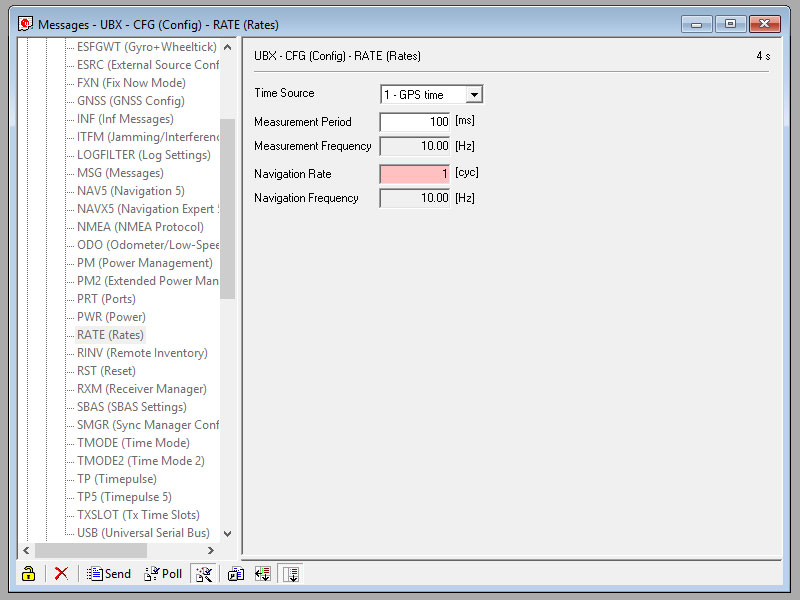
### Step 5. Change Update Frequency (Optional)
In *Messages View* in the *UBX — CFG — RATE* tab you can change *Measurement Period* to raise frequency of getting
data. I want to achieve 10 Hz, so I change *Measurement Period* to the 100 milliseconds and click *Send* button.
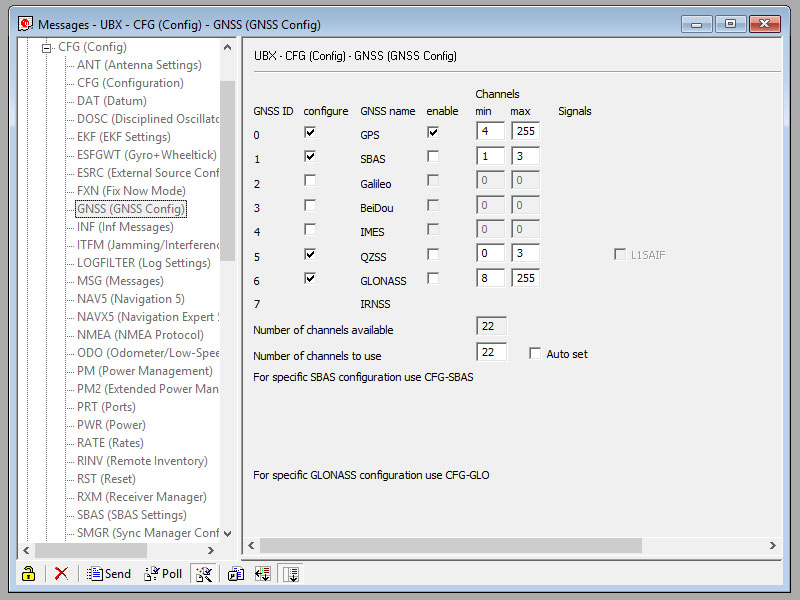
### Step 6. Disable Unnecessary Channels
To make GPS module life easier, we can disable unnecessary channels in the *UBX — CFG — GNSS* tab. We only need GPS,
so uncheck other channels at *enable* column. Again, click *Send* to save changes.
### Step 7. Choose Packet
UBX GPS library works with only one type of UBX packet, so we need to fully disable NMEA packets and enable one
of the UBX group. Open context menu on *Messages View — NMEA* and click *Disable Child Messages*. u-center will send
appropriate command to the GPS module and getting data will stops. If you're using `SoftwareSerial` it can takes a time
to get things right, try to click *Disable Child Messages* again if it not works.
Then, choose a UBX packet type you want to work with, for example *UBX — NAV — PVT*, open context menu on it and click
*Enable Message*, GPS module will start getting data again. Open *View — Packet Console* to see if everything is OK, it
should get one type of UBX packet with chosen frequency.
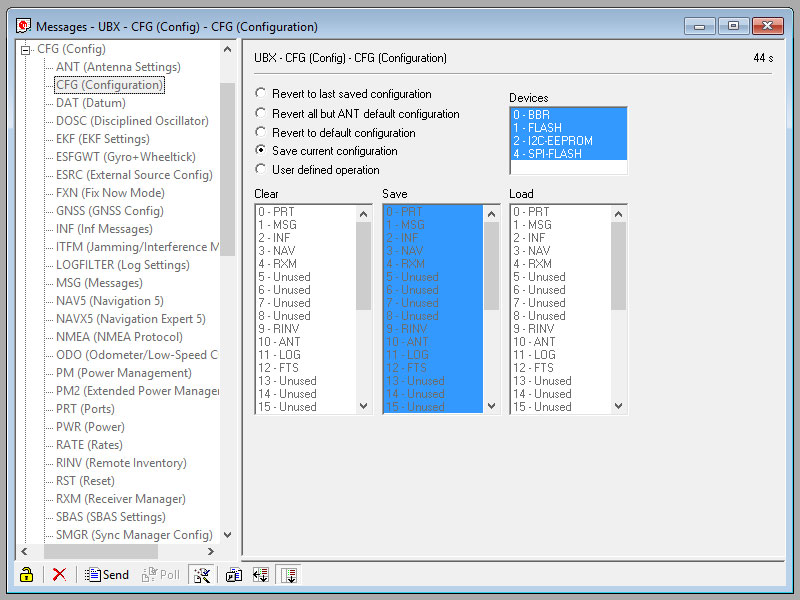
### Step 8. Save Configuration
Go to *UBX — CFG — CFG* and click *Send* to save current configuration.
**Important!** GPS module will remember what we've done, but sometimes it is not enough: GPS module can return to
factory settings after a long time without power, so check your battery on the GPS module.
### Step 9. Checks
Close u-center and open an example `NavPvt` sketch, check baudrate and upload it to the board. If everything is OK
you'll get desired data. **That's all Folks!**
More details about u-blox GPS module configuration are in ***Receiver Description** — Receiver Configuration* found in [u-blox](https://github.com/loginov-rocks/UbxGps/tree/main/docs/u-blox) directory.
## Compatible GPS Modules
* NEO-7M - tested
* NEO-8M - tested
* Other u-blox GPS modules supporting UBX protocol
Please create an issue to report if you tested **UbxGps** with other u-blox GPS modules. Thank you!
## Reference
* [u-blox Website](https://www.u-blox.com/en/)
* [u-center Download page](https://www.u-blox.com/en/product/u-center) (Windows only)