https://github.com/marktawa/medusa-next-shop-article
Article for an Ecommerce app built using Medusa and Next 14
https://github.com/marktawa/medusa-next-shop-article
ecommerce medusa nextjs webdev
Last synced: 9 months ago
JSON representation
Article for an Ecommerce app built using Medusa and Next 14
- Host: GitHub
- URL: https://github.com/marktawa/medusa-next-shop-article
- Owner: Marktawa
- Created: 2024-02-19T18:47:05.000Z (over 1 year ago)
- Default Branch: main
- Last Pushed: 2024-02-19T20:36:24.000Z (over 1 year ago)
- Last Synced: 2024-12-29T12:37:21.266Z (10 months ago)
- Topics: ecommerce, medusa, nextjs, webdev
- Homepage: https://github.com/Marktawa/medusa-next-shop
- Size: 981 KB
- Stars: 0
- Watchers: 1
- Forks: 0
- Open Issues: 0
-
Metadata Files:
- Readme: README.md
- Funding: .github/FUNDING.yml
Awesome Lists containing this project
README
# Build an Ecommerce Store from scratch using Medusa and Next 14

## Part 01: Setup and Installation
## Outline
- [Introduction](#introduction)
- [Prerequisites](#prerequisites)
- [Medusa Setup](#medusa-setup)
- [Next Setup](#sveltekit-setup)
- [Conclusion](#conclusion)
- [Resources](#resources)
- [Author](#author)
- [Sponsor](#sponsor)
## Introduction
In this tutorial, you will learn how to create an ecommerce website using Medusa as a commerce engine and Next 14 as the frontend framework.
This tutorial is split into a series of articles:
- [Part 01: Setup and Installation](github.com/Marktawa/medusa-next-shop-article)
- Part 02:
- Part 03:
- Part 04:
This tutorial is Part 01 of the series. It focuses on the set up and installation of the project.
## Prerequisites
To follow along with this tutorial you must have some knowledge of HTML, CSS, and JavaScript. Knowledge of Medusa and Next/React is helpful but not necessary.
In addition, you need the following tools installed on your machine:
- Node.js: the latest LTS version
- PostgreSQL
- yarn
## Medusa Setup
In this step you will install and set up the Medusa Server backend.
Open up your terminal and create a project folder to contain all the source code for the entire project. Name it `my-store`.
```bash
mkdir my-store
```
### Install Medusa CLI
In your terminal, inside the `my-store` folder run the following command to install the Medusa CLI. We will use it to install the Medusa server.
```bash
npm install @medusajs/medusa-cli -g
```
### Create a new Medusa project
```bash
medusa new my-medusa-store
```
You will be asked to specify your PostgreSQL database credentials. Choose "Skip database setup".
A new directory named `my-medusa-store` will be created to store the server files
### Configure Database
Access the PostgreSQL console to create a new user and database for the Medusa server.
```bash
sudo -u postgres psql
```
To create a new user named `medusa_admin` run this command:
```sql
CREATE USER medusa_admin WITH PASSWORD 'medusa_admin_password';
```
Now, create a new database named `medusa_db` and make `medusa_admin` the owner.
```sql
CREATE DATABASE medusa_db OWNER medusa_admin;
```
Last, grant all privileges to `medusa_admin` and exit the PostgreSQL console.
```sql
GRANT ALL PRIVILEGES ON DATABASE medusa_db TO medusa_admin;
```
```sql
exit
```
Add the connection string as the `DATABASE_URL` to your environment variables. Inside `my-medusa-store` create a `.env` file and add the following:
```
DATABASE_URL=postgres://medusa_admin:medusa_admin_password@localhost:5432/medusa_db
```
Run migrations and seed data to the database by running the following command:
```bash
medusa seed --seed-file="./data/seed.json"
```
### Start your Medusa backend
```bash
medusa develop
```
The Medusa server will start running on port `9000`.
Test your server:
```bash
curl localhost:9000/store/products
```
If it is working, you should see a list of products.
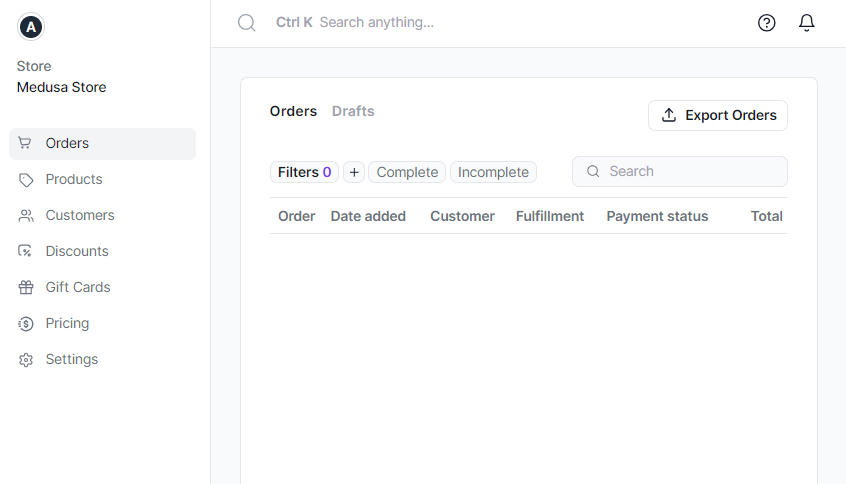
## Install and Serve Medusa Admin with the Backend
This section explains how to install the admin to be served with the Medusa Backend.
### Install the package
Inside `my-medusa-store` stop your Medusa server, `CTRL + C` and run the following command to install the Medusa Admin Dashboard.
```bash
npm install @medusajs/admin
```
Test your install by re-running your server.
```bash
medusa develop
```
Open up your browser and visit `localhost:7001` to see the Medusa Admin Dashboard. Use the Email `admin@medusa-test.com` and password `supersecret` to log in.
For now, that's it. Next, let's set up Next 14.
## Next 14 Setup
### Installation
Create a directory named `my-next-store` inside `my-store` and install the required packages to create a new Next app:
```bash
mkdir my-next-store
cd my-next-store
npm install next@latest react@latest react-dom@latest
```
Open your `package.json`` file and add the following scripts:
```json
{
"scripts": {
"dev": "next dev",
"build": "next build",
"start": "next start",
"lint": "next lint"
}
}
```
Create an `app` folder, then add a `layout.tsx` and `page.tsx` file.
Create a root layout inside `app/layout.tsx` with the required `` and `` tags:
```tsx
export default function RootLayout({
children,
}: {
children: React.ReactNode
}) {
return (
{children}
)
}
```
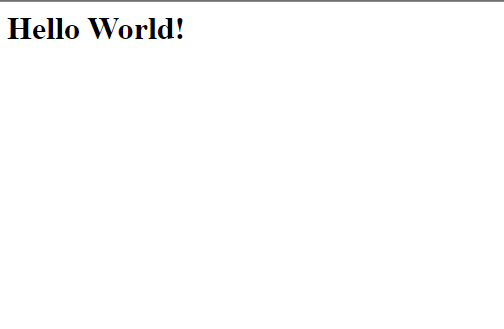
Finally, create a home page `app/page.tsx` with some initial content:
```tsx
export default function Page() {
return
Hello World!
}
```
### Run Development Server
Start the Next development server:
```bash
npm run dev
```
Visit [http://localhost:3000](http://localhost:3000) to view your application.
That's it for the Next 14 set up as well.
## Conclusion
This tutorial provided a step-by-step guide on setting up and installing Medusa as the backend commerce engine and Next.js 14 as the frontend framework. The main steps included:
1. Installing the Medusa CLI and creating a new Medusa project with a PostgreSQL database.
2. Configuring the database connection and seeding sample data.
3. Starting the Medusa backend server and testing it.
4. Installing the Medusa admin dashboard to manage the store.
5. Creating a new Next.js 14 project with the required setup.
6. Adding basic pages and layouts to the Next app.
7. Running the Next.js development server to see the initial home page.
With the backend Medusa server and frontend Next.js app now set up, future parts of this tutorial will focus on integrating the two to build out the full functionality of an ecommerce website.
## Resources
- [GitHub Repo](https://github.com/Marktawa/medusa-next-shop)
## Author
[Mark Munyaka](https://markmunyaka.com)
GitHub: [@Marktawa](https://github.com/Marktawa)
Twitter: [@McMunyaka](https://twitter.com/McMunyaka)
## Sponsor
Support my passion for sharing development knowledge by making a donation to my [**Buy Me a Coffee**](https://www.buymeacoffee.com/markmunyaka) account. Your contribution helps me create valuable content and resources. Thank you for your support!
[](https://www.buymeacoffee.com/markmunyaka)
[Buy Me A Coffee](https://www.buymeacoffee.com/markmunyaka)