https://github.com/maxime1992/angular-ngrx-starter
An opiniated Angular setup based on @angular/cli to kickstart an ngrx project
https://github.com/maxime1992/angular-ngrx-starter
angular angular-material-2 ngrx ngrx-effects ngrx-entity ngrx-store store-devtools
Last synced: 10 months ago
JSON representation
An opiniated Angular setup based on @angular/cli to kickstart an ngrx project
- Host: GitHub
- URL: https://github.com/maxime1992/angular-ngrx-starter
- Owner: maxime1992
- Created: 2017-05-12T21:35:17.000Z (about 9 years ago)
- Default Branch: master
- Last Pushed: 2018-03-25T13:00:55.000Z (over 8 years ago)
- Last Synced: 2025-05-11T22:37:22.862Z (about 1 year ago)
- Topics: angular, angular-material-2, ngrx, ngrx-effects, ngrx-entity, ngrx-store, store-devtools
- Language: TypeScript
- Homepage: https://maxime1992.github.io/angular-ngrx-starter/
- Size: 956 KB
- Stars: 66
- Watchers: 4
- Forks: 8
- Open Issues: 2
-
Metadata Files:
- Readme: README.md
Awesome Lists containing this project
README
# Angular Ngrx Starter
[](https://github.com/prettier/prettier)
*An opiniated Angular setup based on @angular/cli*
[Angular-Cli](https://github.com/angular/angular-cli) can help you start an Angular project very quickly.
But when you need a lot of external modules/libs and you've got to setup everything, everytime, it can be quite long and repetitive.
**This setup has the following modules already installed and configured :**
- Angular Material
- Material Design Icons
- Ng2 Translate
- Ngrx
- Store
- Effects
- StoreDevtools
If you don't know angular-cli, please read the doc.
I added one command to build the project as small as possible for production : `yarn run prod`.
If you're new to ngrx [store | effects], it might help you get started.
I've put a lot of comments and a folder called "pizzas" for demo/scaffolding.
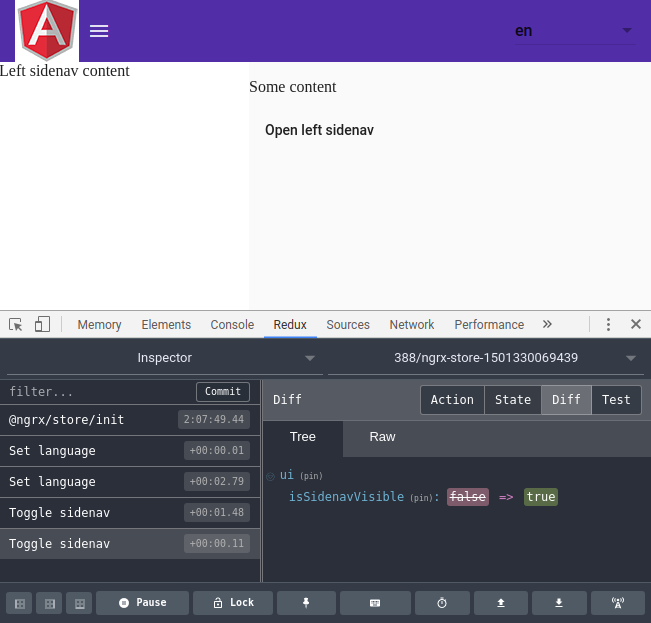
Don't forget to install and take a look to [Redux DevTools](https://chrome.google.com/webstore/detail/redux-devtools/lmhkpmbekcpmknklioeibfkpmmfibljd) for state debugging.
## Note on service-worker
The starter is pre-configured to generate a service-worker (thanks to angular-cli) and the only thing you need to do if you want your app to work offline, is to set `serviceWorker` to `true` in `.angular-cli.json`.
## Note on unit testing
The starter is pre-configured to use Chromium in headless mode. If you want to change that behavior, you can simply pass the browser of your choice in `karma.conf.js`, property `browsers`.
# Lint, format and IDE setup
## Prettier
Before we start digging into the architecture of this project, you have to know that *[Prettier](https://github.com/prettier/prettier)* is already setup and thus, you can format all your `.ts` and `.scss` by simply running `yarn run prettier:fix`. If you have a CI setup, you might want to run `yarn run prettier:check` to make sure every file is correctly formatted.
Also, a pre-commit hook has been setup and before you commit something, it'll check if all the file are well formatted. If you want to disable that behavior, remove `.git/hooks/pre-commit` and also the `precommit` key in `package.json`.
## Visual Studio Code
Of course, you can use your favorite editor/IDE. If you decide to use VSC, you might want to install [Angular Language Service](https://marketplace.visualstudio.com/items?itemName=Angular.ng-template). It'll give you autocompletion and type checking into your HTML templates.
What you need to know to start with this template :
*(all the code contains a lot of comments, so while reading the differents parts of this readme, I invite you to look the according files)*.
# Styles
## /src/styles.scss
This is just the main `scss` file where we can import the barrel from `/src/styles`. Indeed, the goal here is to avoid listing all our `scss` files into `/.angular-cli.json`, in `apps.styles`.
## /src/styles/_index.scss
This is the main `scss` barrel. In the styles folder, you might want to create other folders. If you do so, create a barrel `/src/styles/themes/_themes.scss` where you import all the themes you need.
## /src/styles/shared
Put everything not related to a given component, that you may want to share across your app.
### /src/styles/shared/_colors.scss
Thanks to material, you can define here your primary and accent colors. I've also added a `$color-palette` which might be useful if you need other colors. You'll see why in next section.
### /src/styles/shared/_utils.scss
Some utility classes. The main thing to notice here is the `@mixin generate-colors`. For every color you've listed in the `$color-palette`, it will generate the following css classes :
`color-#{$name}-x#{$index}`, `background-color-#{$name}-x#{$index}`, `border-color-#{$name}-x#{$index}` and `background-color-hover-#{$name}-x#{$index}:hover`. This way in your templates you can for example give a color to some text like that : `
some orange text
`.
You should take a look into the other classes too, just so you know they exists (eg `full-width`, `color-primary`, `color-accent`, `bold`, ...).
I am no expert in Material theming and I'm sure there are better solutions available. Feel free to make a PR or point to some good articles/documentation.
# Environments (build-time)
## /src/environments
By default, there are 2 environments : Dev and prod. This is from `@angular/cli`. Remember to always **import in your app the `environment.ts`**, not `environment.prod.ts`.
If you need to create others environments, create a file per environment and do not forget to list it in `/src/.angular-cli.json` / `apps.environments`.
Based on previous works, I've added some useful variables :
- `production` (from `@angular/cli`). You probably won't need it. The main use of this variable is to set angular to production mode or not (avoid the double cycle of change detection to make sure data haven't change. Useful only in dev mode)
- `urlBackend`: Use it whenever you want to make an HTTP call to your API
- `mock`: Wheter you want to use some mocks or fetch the real backend. To know more about that, take a look into `/src/app/core/core.module.ts` where we use dependency injection to either have the real service or the mocked one based on this env variable
- `httpDelay`: When you have `mock` set to true, it might be a good idea to simulate a small latency for your http requests (300~500ms)
- `hashLocationStrategy`: Set it to true if you want to have your URLs in the old school mode : `my-website/#/my/spa/routing`. By default set to false and thus your URLs won't have the `#` and will look like that : `my-website/my/spa/routing`
- `debug`: You might use this variable to print (or not) some debug information in your app. This is different than `production` variable because you might want to display some debug in production too (eg if you create another environment `e2e-prod` where you set `production` to true, so your E2E tests run the same environment that the final one but you want the debug output in case something goes wrong)
# Environments (dynamic, at runtime)
## /assets/runtime-environments
Sometimes, you might want to have dynamic environment variables, loaded at runtime.
The main idea behind that is to be able to load it from a server, either from a given API or a simple `.json` file. That way, you can avoid to compile your project multiple times for different environments.
How to use it: Add a `json` file per required environment in `/assets/runtime-environments`.
Then take a look into `/app/core/runtime-environment.service.ts`. It's a simple guard from where you can handle some logic to let the app know which `json` should be loaded. By default, it'll try to load `/src/assets/runtime-environments/runtime-environment.json`.
Then into the app, use the `RuntimeEnvironmentService` like that: `constructor(private runEnv: RuntimeEnvironmentService) {}`. And you'll be able to access your environment variable: `this.runEnv.environment`.
If you don't want that feature and keep your main route as fast as possible without being blocked while trying to fetch the `json` file, just turn that feature off into the build environment `/src/environments/environment*.ts` (set property `loadRuntimeEnvironment` to false).
**This feature has been turned off by default**.
# assets
## /src/assets
Folder where you can put all your static assets like pictures. There's also a `i18n` folder with one file per language. Indeed, this template includes `@ngx-translate` so you can easily have multi language support.
If you add a language file, to make it available in the UI you'll have to open `/src/app/core/core.module.ts` and add it to the `providers` list.
# Folder structure
## AppModule
In every app, you need a "main" module (CF `/src/main.ts`) so angular can bootstrap it. With `@angular/cli` (and in general), it's called `AppModule`. You'll find it here : `/src/app/app.module.ts`.
I try to keep this module as simple as possible because if we need to run angular in a different environment (universal on server side or even in a web-worker), we might have to create another file (eg `app.module.universal.ts` or `app.module.webworker.ts`) which doesn't import the `BrowserModule`. Then, in those files we would simply have to import our 3 modules : `CoreModule`, `SharedModule` and `AppRoutingModule`.
Keep it simple : Don't touch it.
## CoreModule
Everything you only want to import in your app only once. (It'll mainly be modules with providers). It's here that we load our (ngrx) store, the devTools, the translate module and our (ngrx) effects.
We'll also add our `providers` here for simplicity.
Into the `core` folder, you'll also find the `injection-tokens.ts`. It's where you can create your tokens.
## FeaturesModule
It's basically the folder where you'll put (nearly) all your code. With angular, your app will be splitted in (a lot of) components. I like to create a module (folder) per feature and if it's not something I'll re-use up to the tree of components, I nest it. For example, with an email application we could have :
```
|--src
|--app/
|--features/
|--login/
|--emails/
|--inbox/
|--newEmail/
|--contacts/
```
## SharedModule
Sometimes, you'll have [components|directives|interfaces|helpers|services|...] that you might want to share across the whole app. You should group them into this `SharedModule` under their common folder (components, directives, etc).
## Which one of those modules should I import and where ?
- `AppModule`: Shouldn't be imported anywhere else than `/src/main.ts`. It's done so, you don't have to worry about this one
- `FeaturesModule`: Already imported into `/src/app/app.routing.module.ts` and it's the only place where it should be
- `SharedModule`: **Import this module in every module you'll create deep down the tree of the `features` folder**. For example, `Material` is imported/exported into `SharedModule` and if you want to use anything from `Material`, just import it to the current module you're working on
If you have any questions about that setup, let me know by opening an issue and of course, if you see something that my be improved, feel free to make a pull request.