https://github.com/maxmacstn/arduino-motorized-dolly
DIY Motorize camera dolly control using Arduino
https://github.com/maxmacstn/arduino-motorized-dolly
ardiuno arduino-dolly camera cinematography
Last synced: 2 months ago
JSON representation
DIY Motorize camera dolly control using Arduino
- Host: GitHub
- URL: https://github.com/maxmacstn/arduino-motorized-dolly
- Owner: maxmacstn
- Created: 2018-03-09T08:43:31.000Z (about 7 years ago)
- Default Branch: master
- Last Pushed: 2019-07-23T15:57:43.000Z (almost 6 years ago)
- Last Synced: 2025-02-28T10:04:06.118Z (3 months ago)
- Topics: ardiuno, arduino-dolly, camera, cinematography
- Language: C++
- Homepage:
- Size: 2.79 MB
- Stars: 8
- Watchers: 2
- Forks: 2
- Open Issues: 0
-
Metadata Files:
- Readme: README.md
Awesome Lists containing this project
README
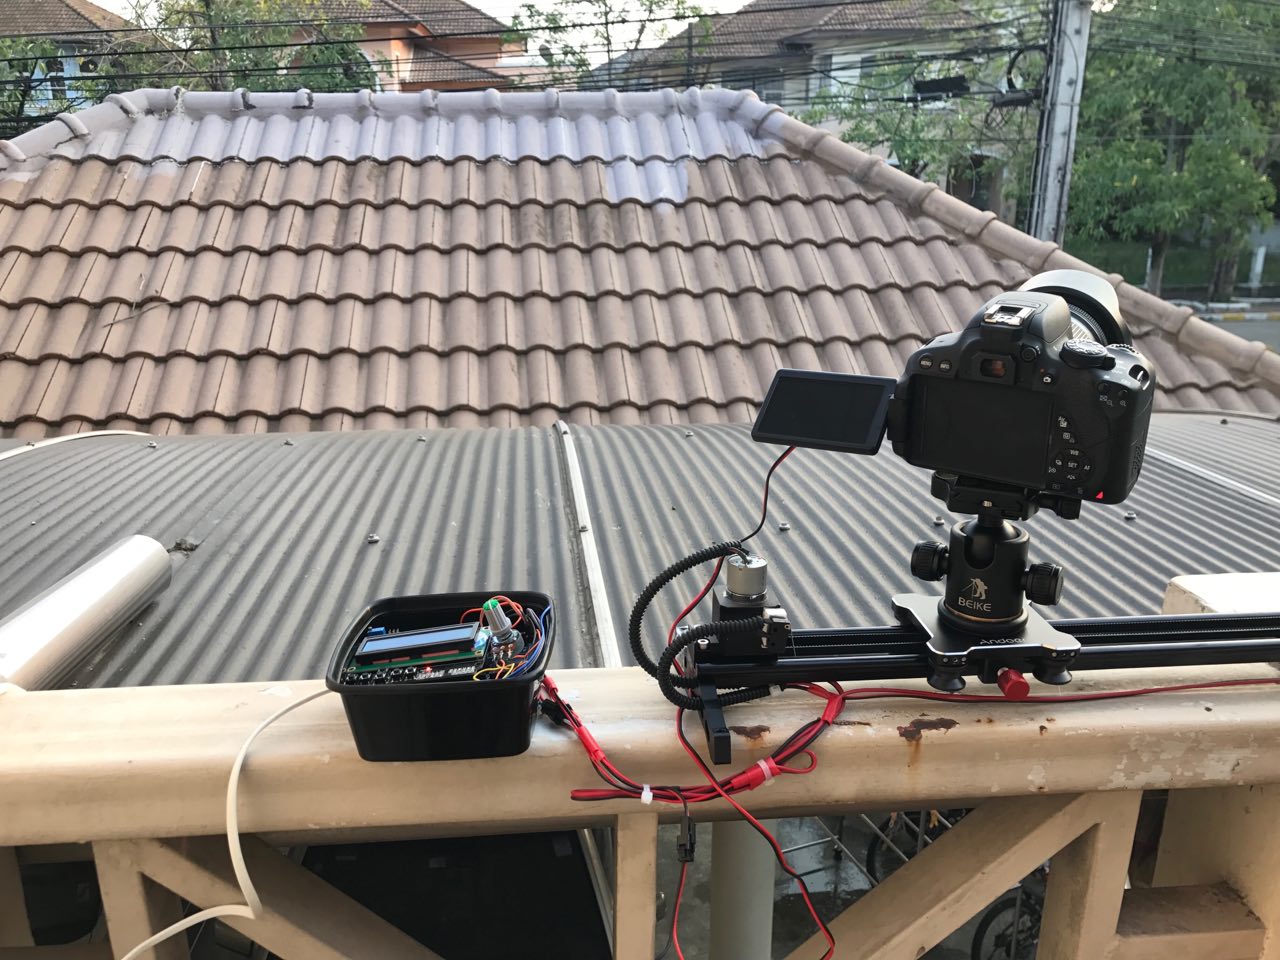
# Arduino-Motorized-Dolly
Convert generic camera dolly rail into controllable motorized dolly.
## Features
- 5v powerbank input (Portable!)
- Adjustable speed.
- Video mode (Continuous movement)
- TimeLapse mode with camera shutter trigger.
- Can be set Timelapse delay time (time for camera to save image between shot), Motor position (Left or right of the controller) and Time until display is going to dim. Those are available in Settings menu and the configuration will be stored in the EEPROM which means that configuration still remains after power lost.
## Main Components
1. Andoer 80cm / 32" 4 Bearings Camera Slider
2. Arduino Mega 2560
3. Gear motor 12v 50RPM
4. Arduino Modules
1. L298N H-Bridge motor driver
2. LCD Keypad shield
3. DC-to-DC Step Up XL6009
4. Limit switch ×2
5. Belt components
1. timing GT2 belt width 6mm
2. Timing Pulley 20 ฟัน 2GT
3. Pulley Wheel 20 ฟัน 2GT
4. Timing Belt Fixing Clamp 9*40mm
6. Shutter trigger components
1. NPN Transistor BC547
2. Resistor 1K Ω
3. 2.5mm female headphone jack
## Schematic
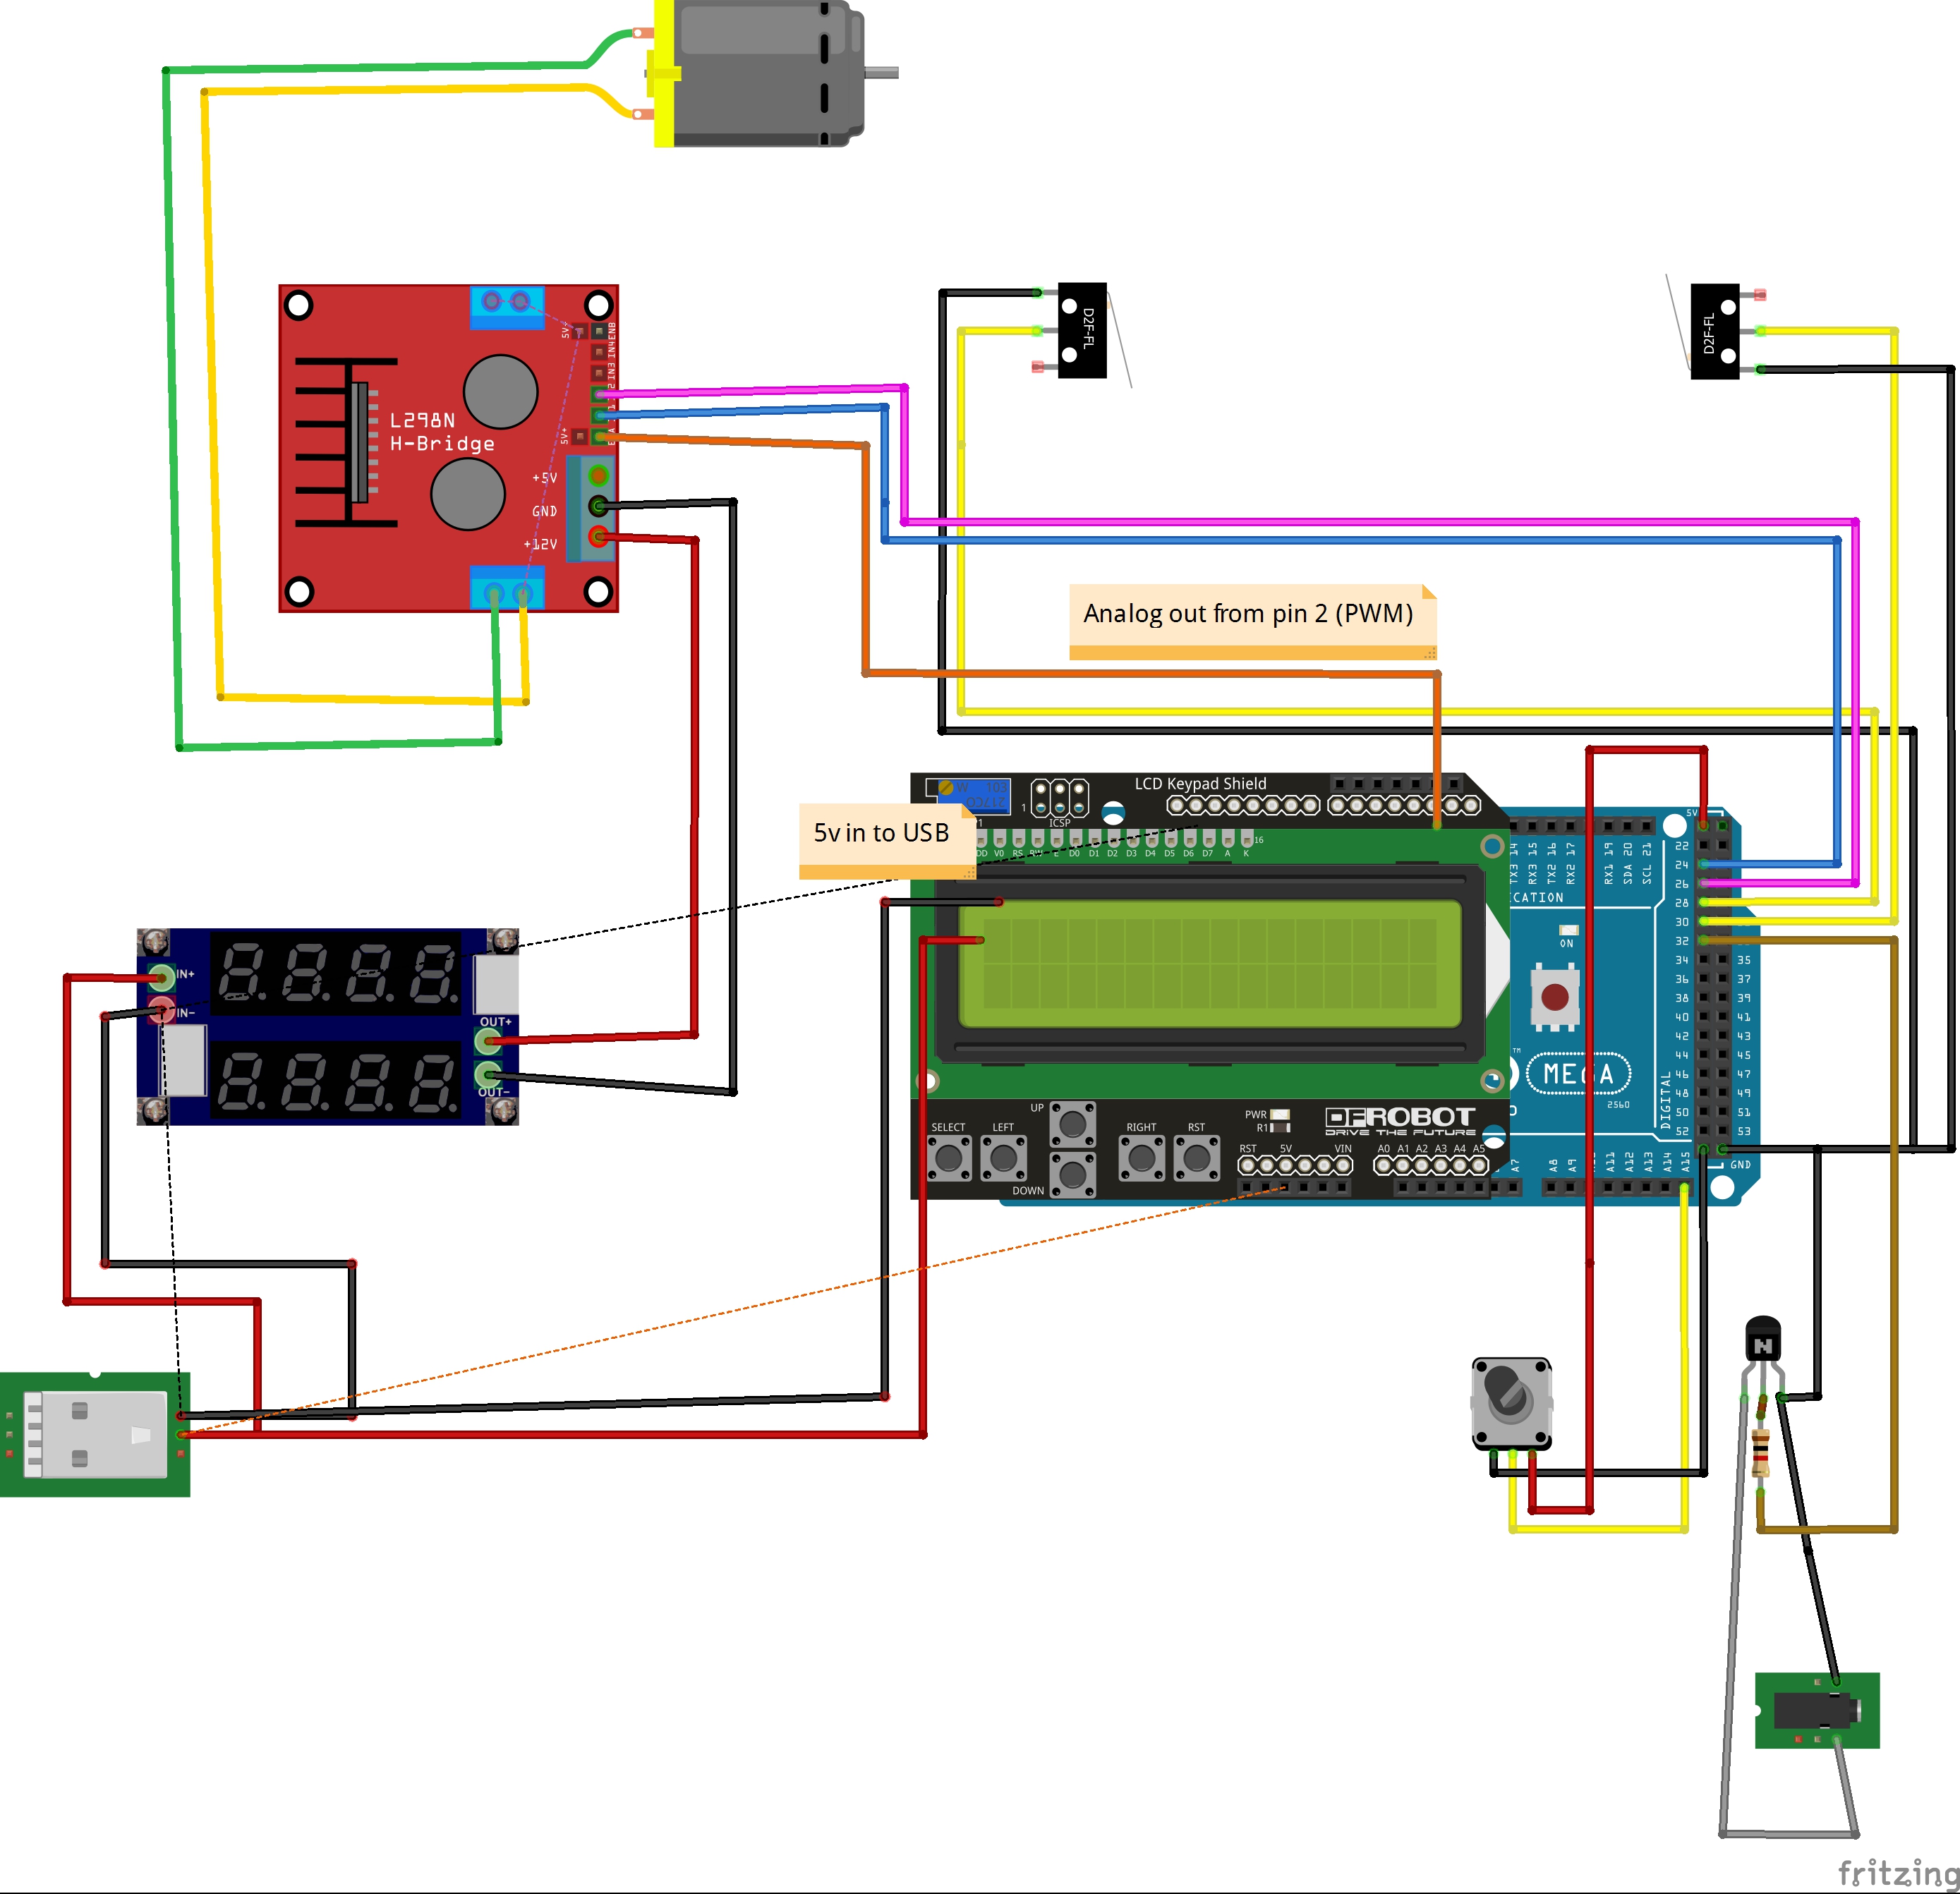
**Pins** (Pin number : variable name - Description)
- 2 : enA - PWM Motor control
- 24 : in1 - Motor rotational control 1
- 26 : in2 - Motor rotational control 2
- 28 : limSW_L - Left limit switch
- 30 : limSW_R - Right limit switch
- 32 : shutter - Camera shutter trigger pin
Those below pins are connected via LCD Keypad shield
- 0 : btnRIGHT
- 1 : btnUP
- 2 : btnDOWN
- 3 : btnLEFT
- 4 :btnSELECT
- 5 : btnNONE
- 10 : brightnessPin - PWM-controlled brightness of LCD Backlight
## Dependencies
- LiquidCrystal.h
- EEPROM.h
## Link
- [Youtube Link](https://youtu.be/vfO5Gkq3VD4)
- [Blog(Thai)](https://maxmacstn.wordpress.com/2018/03/09/dollyduino/)
## V.2 Update
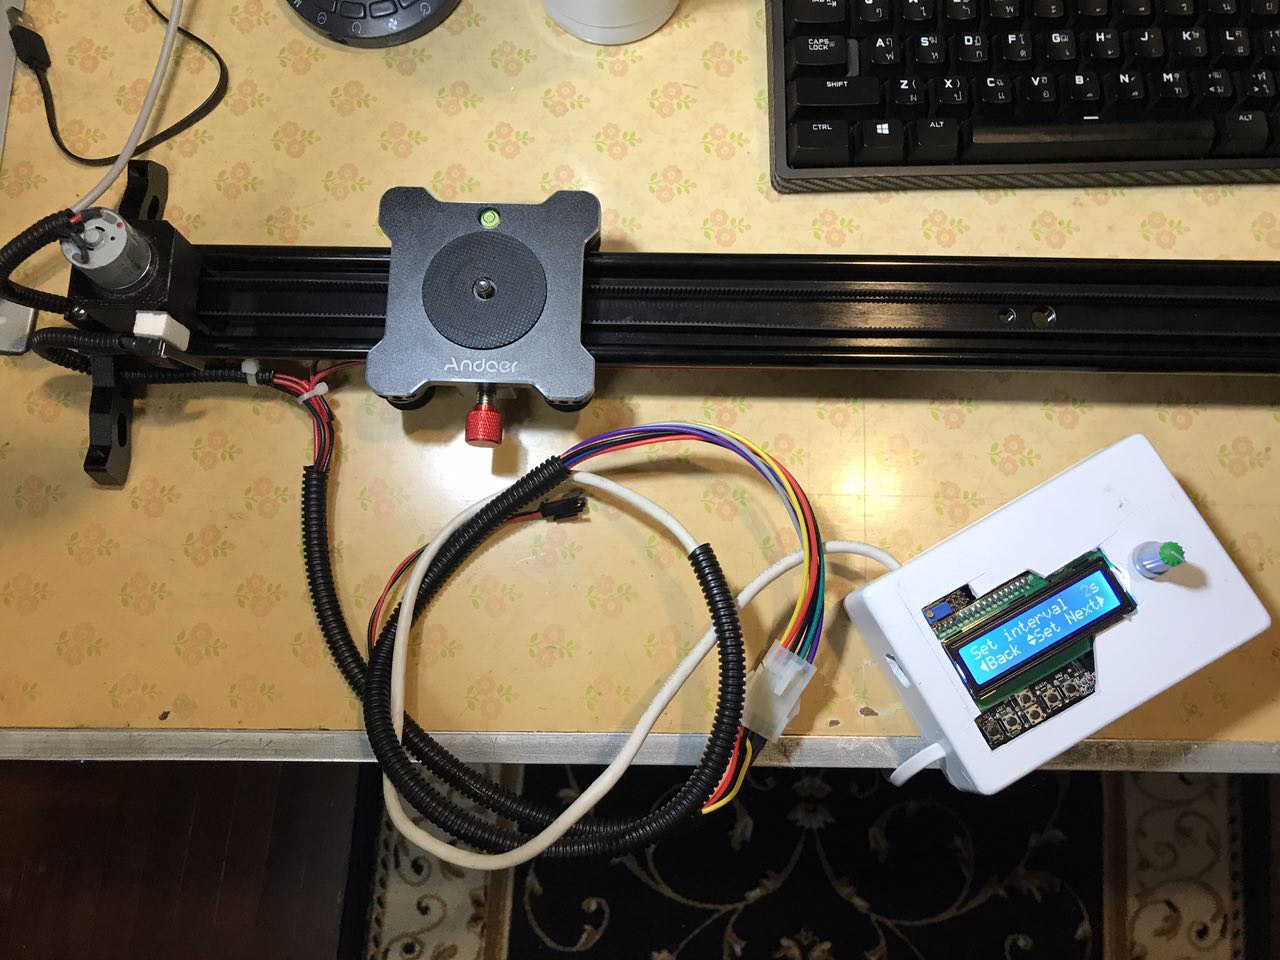
- New nice and tidy Arduino enclosure ([Box from FutureKit : Size FB-04](https://www.futurekit.com/product/25654/fb04))
You can see how all of the components are perfectly fit in that box from [here](https://github.com/maxmacstn/Arduino-Motorized-Dolly/blob/master/img/photo6221972234289915957.jpg)
- 9 Pins connector, really convenient!
- Software upgrade.