https://github.com/michael5r/mmm-nest-status
Display Nest Thermostat data on your MagicMirror. Supports multiple modes, sizes & views to get you exactly the look you want.
https://github.com/michael5r/mmm-nest-status
Last synced: 5 months ago
JSON representation
Display Nest Thermostat data on your MagicMirror. Supports multiple modes, sizes & views to get you exactly the look you want.
- Host: GitHub
- URL: https://github.com/michael5r/mmm-nest-status
- Owner: michael5r
- License: mit
- Created: 2018-12-04T21:23:47.000Z (over 6 years ago)
- Default Branch: master
- Last Pushed: 2022-05-05T17:59:56.000Z (almost 3 years ago)
- Last Synced: 2024-08-04T10:02:50.049Z (9 months ago)
- Language: JavaScript
- Homepage:
- Size: 121 KB
- Stars: 37
- Watchers: 8
- Forks: 7
- Open Issues: 4
-
Metadata Files:
- Readme: README.md
- License: LICENSE
Awesome Lists containing this project
- awesome-mmm - **MMM-Nest-Status**
README
# Module: mmm-nest-status
## A note about migrating from v1 to v2
Please note that v2.x of this module **only** supports the [Google Device Access API](https://developers.google.com/nest/device-access).
If you still have an old Nest developer account, you'll need to either migrate it to Google or use the [`1.4.3`](https://github.com/michael5r/mmm-nest-status/tree/1.4.3) version of this module.
Previous versions of this module were able to display Nest Protects as well as the thermostats - unfortunately, Google Device Access does not currently give you access to Nest Protects, so this functionality has (hopefully temporarily) been removed.
## About This Module
The `mmm-nest-status` module is a [MagicMirror](https://github.com/MichMich/MagicMirror) addon.
This module requires MagicMirror version `2.5` or later.
This module displays your [Nest](https://www.nest.com) thermostats on your Magic Mirror and supports multiple modes to get you exactly the views that you want.
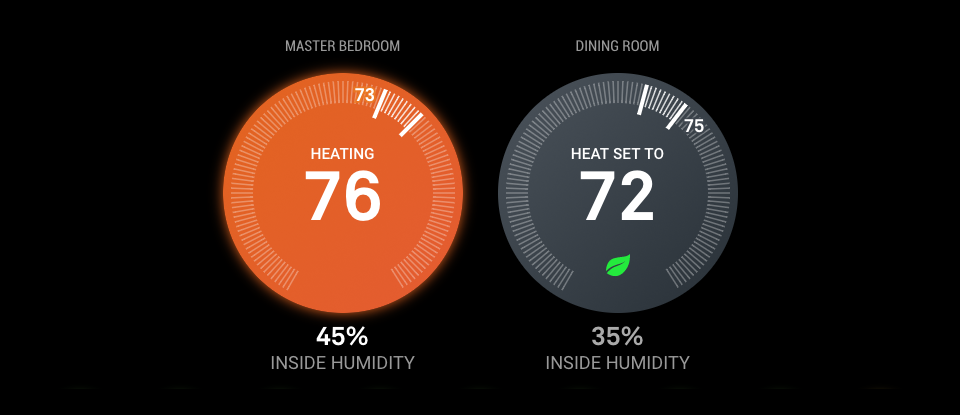
*An example showing multiple thermostats (using the large size & classic mode)*
## Key Features
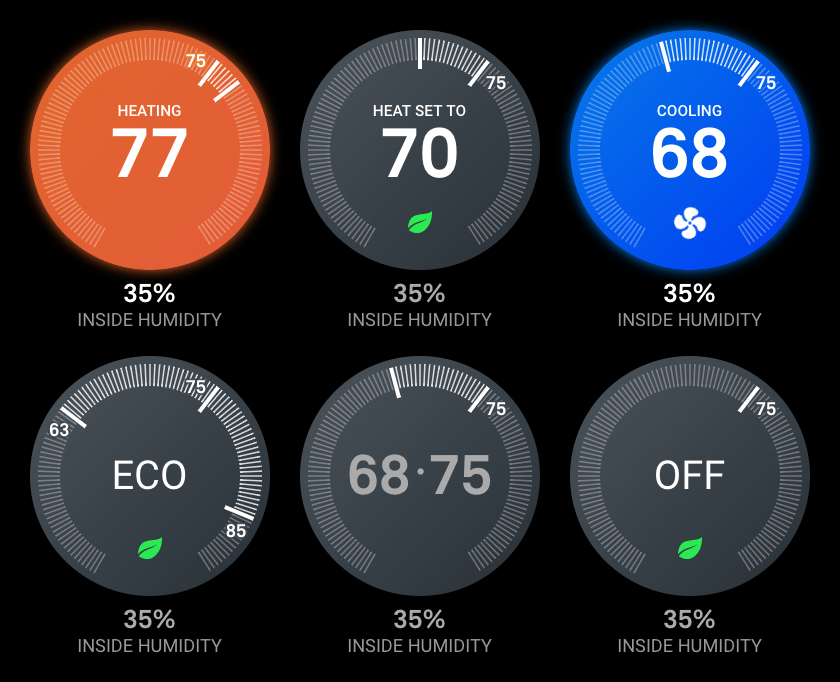
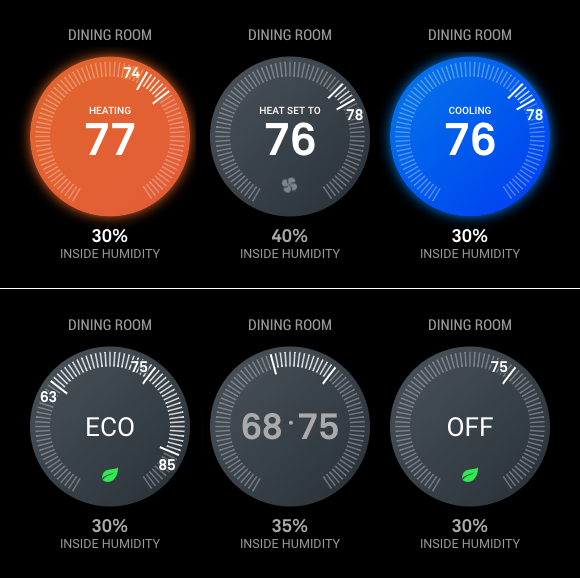
- all states for the Nest thermostat (including Eco mode, Away mode, leaf/fan icons, etc) in 2 different designs and 3 sizes
- 2 different modes - `grid` and `list` - allows you to easily customize your display
- choose to display all of your thermostats, or pick & choose which devices to show
- choose to display the name of the thermostat for easy identification
- only re-renders the devices when data has actually changed
## Table of Contents
- [Installing the module](#installing-the-module)
- [Using the module](#using-the-module)
- [General Configuration Options](#general-configuration-options)
- [Configuration Options specific to the Grid view](#configuration-options-specific-to-the-grid-view)
- [How To Get the Access Tokens & Keys](#how-to-get-the-access-tokens-and-keys)
- [How It Looks](#how-it-looks)
* [Grid view (Classic Mode)](#grid-view-classic-mode)
* [Grid view (Non-Classic Mode)](#grid-view-non-classic-mode)
* [List view](#list-view)
* [List view with ID](#list-view-with-id)
* [Minimal View](#minimal-view)
- [FAQ](#faq)
* [How do I use `thermostatsToShow`?](#how-do-i-use-thermostatstoshow)
* [I have a humidifier hooked up to my thermostat and on the Nest app, I can see a humidifying icon when it is running. Do you show this too?](#i-have-a-humidifier-hooked-up-to-my-thermostat-and-on-the-nest-app-i-can-see-a-humidifying-icon-when-it-is-running-do-you-show-this-too)
* [When I run this module, the fonts look different than your screenshots. Why is that?](#when-i-run-this-module-the-fonts-look-different-than-your-screenshots-why-is-that)
* [Does this module support touch or mouse interactions? Eg. can I change the temperature of my thermostat using this?](#does-this-module-support-touch-or-mouse-interactions-eg-can-i-change-the-temperature-of-my-thermostat-using-this)
* [I'm getting a "Device Access API rate limit has been exceeded"-error - what does it mean?](#im-getting-a-device-access-api-rate-limit-has-been-exceeded-error---what-does-it-mean)
* [How does the motionSleep setting work?](#how-does-the-motionsleep-setting-work)
- [Using Handlebars](#using-handlebars)
## Installing the module
1) Run `git clone https://github.com/michael5r/mmm-nest-status.git` from inside your `MagicMirror/modules` folder.
2. Enter the new `mmm-nest-status` directory and execute `npm install`.
## Using the module
To use this module, simply add it to the `modules` array in the MagicMirror `config/config.js` file:
```js
{
module: "mmm-nest-status",
position: "lower_third", // pick whichever position you want
config: {
clientId: "",
clientSecret: "",
refreshToken: "",
projectId: "",
displayType: "grid",
displayMode: "all",
thermostatsToShow: "all",
// ... and whatever else configuration options you want to use
}
},
```
This module uses the excellent [Handlebars](http://handlebarsjs.com) library to serve up precompiled templates for the various designs. If you're just using this module **as is**, you don't need to do anything - this module already comes with all the templates you need.
If, however, you wish to modify the HTML structure of the thermostats or smoke detectors, read the [Using Handlebars](#using-handlebars) guide at the bottom of this page.
## General Configuration Options
Option | Type | Default | Description
---------------------|------------------|-----------|-------------------------------------------------------
`clientId` | `string` | - | **This value is required for this module to work.**
`clientSecret` | `string` | - | **This value is required for this module to work.**
`refreshToken` | `string` | - | **This value is required for this module to work.**
`projectId` | `string` | - | **This value is required for this module to work.**
`displayType` | `string` | `grid` | One of: `grid`, `list`, [`list-id`](#list-view-with-id-thermostat--protect)
`thermostatsToShow` | `string`,`array` | `all` | One of: `all`, `first`, or an `array` with [device IDs](#list-view-with-id-thermostat--protect)
`units` | `string` | config.js | One of: `imperial` (fahrenheit), `metric` (celsius)
`updateInterval` | `int` | `120000` | Default is 2 minutes - Nest recommends updating no more than once pr. minute.
`initialLoadDelay` | `int` | `0` | How long to delay the initial load (in ms)
`motionSleep` | `boolean` | `false` | Suspend module when triggered by [MMM-PIR-Sensor](https://github.com/paviro/MMM-PIR-Sensor)
`motionSleepSeconds` | `int` | `300` | When motion is triggered, how long to wait before going to sleep. Default is 5 minutes.
`showDecimals` | `boolean` | `true` | Whether to show decimals on Thermostat values (eg. `24.5`). Only applies if `units` are set to `metric`.
**Note:** `units` get their default value from the MagicMirror `config.js` file. I'd strongly suggest adding the value in there instead of adding it in this module.
## Configuration Options specific to the Grid view
The following options only apply if your `displayType` has been set to `grid` - they have no effect on the list view:
Option | Type | Default | Description
---------------------|------------------|-----------|-------------------------------------------------------
`showNames` | `boolean` | `true` | Displays the device name above the device
`alignment` | `string` | `center` | One of: `left`, `center`, `right`
`thermostatSize` | `string` | `large` | One of: `small`, `medium`, `large`
`thermostatClassic` | `boolean` | `true` | [Classic view](#grid-view-thermostat-classic-mode) of the thermostat
## How To Get the Access Tokens and Keys
Compared to the old Nest developer API, working with Google Device Access to get your access tokens & keys is, well, to put it mildly, a fair bit more cumbersome.
In order for this module to work, you'll need 4 things:
- Google Cloud Platform OAuth 2.0 Client ID
- Google Cloud Platform OAuth 2.0 Client Secret
- Device Access Project ID
- Device Access Refresh Token
I've put together a document that tells you how to do this - [you can find it here](ACCESS_TOKENS.md).
## How It Looks
### Grid view (Classic Mode)
#### Large Size
With `showNames` set to `false`.
#### Medium Size
#### Small Size

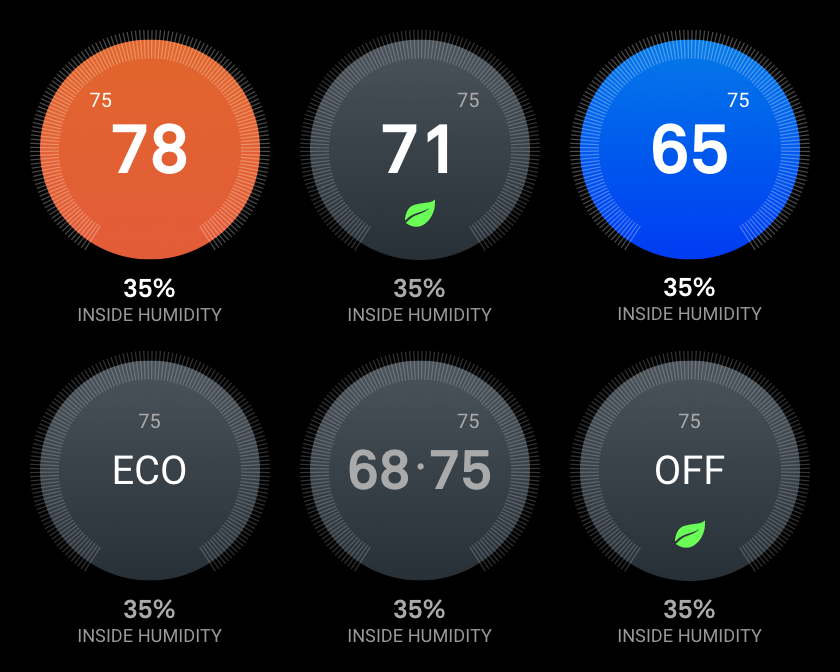
### Grid view (Non-Classic Mode)
The non-classic view is a bit more abstract and doesn't include quite as detailed information as the `classic` mode.
#### Large Size
With `showNames` set to `false`.
#### Medium Size
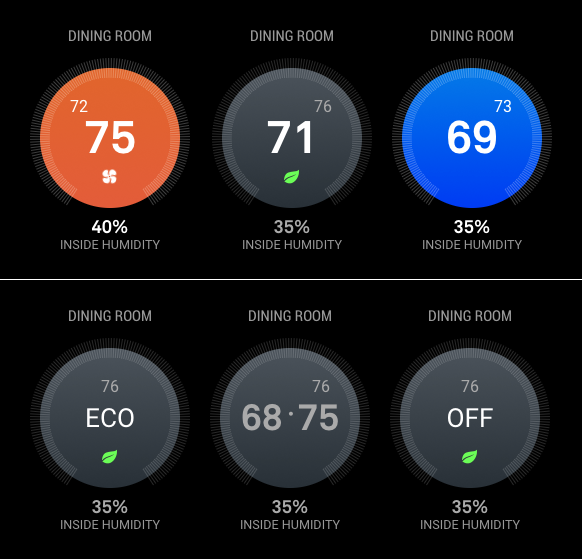
#### Small Size

### List view
If you prefer just looking at text, set the `displayType` to `list`:

All states show up in the list view as well:

### List view with ID
If the `displayType` is set to `list-id`, you get the list view but with IDs in front of every device:

You can use these IDs to specify which devices to show in `thermostatsToShow` and `protectsToShow`.
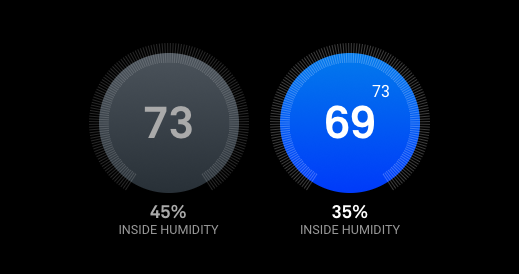
### Minimal View
For a very minimal & clean look, set `thermostatClassic` to `false` and `showNames` to `false`.
## FAQ
### How do I use `thermostatsToShow`?
It's simple - this configuration takes the following values:
- `all`: This is the default, it means that all thermostats will be displayed.
- `first`: Setting this value means that only the first thermostat in the list will be displayed.
- `array`: Each device has an ID (which can be seen by setting `displayType` to `list-id`), so by adding these IDs to an array, you can select exactly which devices you want to display.
In `config.js`:
```js
thermostatsToShow: [0,1,3],
```
This results in only the 3 thermostats above being displayed.
### I have a humidifier hooked up to my thermostat and on the Nest app, I can see a humidifying icon when it is running. Do you show this too?
No, unfortunately not - there's currently no way to get this information from the Device Acccess API. It only tells me that a fan is running, but doesn't distinguish between a fan and a humidifier.
### When I run this module, the fonts look different than your screenshots. Why is that?
Nest uses their own, proprietary font named `Akkurat` for all their devices. Seeing that this font isn't open source, I'm not able to include it with this module - if you want to use it, purchase a license and follow the instructions in the `mmm-nest-status.css` file to install.
If you don't own this font, this module will just fall back to using the standard `Roboto` font - don't worry, it still looks great.
### Does this module support touch or mouse interactions? Eg. can I change the temperature of my thermostat using this?
No, right now this module only displays information - it does not allow you to control your Nest devices.
### I'm getting a "Device Access API rate limit has been exceeded"-error - what does it mean?
Google applies data rate limits for accessing their API - if you get this error, it means your account has reached that limit and is now **temporarily** blocked from getting Device Access API data. When this happens, the module will automatically try to load data again after **10 minutes**.
There is, unfortunately, nothing you can do about this - you simply have to wait for their block to expire.
### How does the motionSleep setting work?
Setting the `motionSleep` setting to `true` makes this module continually listen for `USER_PRESENCE` notifications from the [MMM-PIR-Sensor](https://github.com/paviro/MMM-PIR-Sensor) module. Whenever a positive `USER_PRESENCE` notification is received, the module will reset a timer based on your `motionSleepSeconds` setting. When the timer reaches zero, the module will then do two things:
- temporarily stop pulling new data from Nest
- hide the mmm-nest-status module
You specify how long this timer should last by using the `motionSleepSeconds` setting - please note that this setting is in **seconds** (not ms).
This sleep mode will last till the next positive `USER_PRESENCE` notification is received, at which point the module will resume by immediately pulling new Nest data and then showing the mmm-nest-status module again.
This is a good option to enable if you're using a monitor that shows an ugly "no signal message" when the HDMI signal is lost and you've therefore turned off the `powerSaving` setting in the MMM-Pir-Sensor module.
## Using Handlebars
The Handlebars templates can all be found in the `templates` folder in the root of this module.
Before you do anything, if you don't have Handlebars installed, install it globally on your system:
```js
npm install handlebars -g
```
Make any changes you wish in the relevant `.hbs` files in the `templates` folder.
Once you're done, precompile all templates by running this in your terminal:
```js
handlebars /mmm-nest-status/templates/*.hbs -f /mmm-nest-status/mmm-nest-status-templates.js -m
```
Make sure you replace `` with the correct file path to your Magic Mirror `modules` folder.
If you have any problems, check out the [Handlebars](http://handlebarsjs.com/precompilation.html) documentation (or open an issue in this repo).