Ecosyste.ms: Awesome
An open API service indexing awesome lists of open source software.
https://github.com/michaelmang/o365-fe-interactive-dev-test
O365 FE Interactive Dev Test
https://github.com/michaelmang/o365-fe-interactive-dev-test
Last synced: about 1 month ago
JSON representation
O365 FE Interactive Dev Test
- Host: GitHub
- URL: https://github.com/michaelmang/o365-fe-interactive-dev-test
- Owner: michaelmang
- Created: 2019-05-13T21:00:52.000Z (almost 6 years ago)
- Default Branch: master
- Last Pushed: 2019-05-14T21:25:11.000Z (almost 6 years ago)
- Last Synced: 2024-11-17T01:12:26.094Z (3 months ago)
- Language: JavaScript
- Size: 293 KB
- Stars: 1
- Watchers: 1
- Forks: 0
- Open Issues: 0
-
Metadata Files:
- Readme: README.md
Awesome Lists containing this project
README
# O365 Front-End Interactive Dev Test
## Instructions
This repo contains a React application that allows you to convert currency exchange rates by utilizing the [exchange rates API](https://exchangeratesapi.io/). This application currently meets all of the following functional requirements:
- The user can choose a base currency and target currency. The currency choices are currently hardcoded in the UI
code.
- The user can also choose a date (to get the exchange rate for that particular date).
- When the user submits the form, it looks up the exchange rate and displays the result.
- The exchange rate information is retrieved from the API.
- The application handles a basic experience around API exceptions and unexpected error status, as well as invalid form inputs.
- The website runs in the latest version of Chrome and Firefox.
Please familiarize yourself with this code. During the interactive dev test, you will be tasked with extending a feature to this application. While prior absorbtion of the code is expected, there will be time during the session to ask questions.
## Interactive Dev Test Setup (Required)
For this test we will use [Visual Studio Code](https://code.visualstudio.com/)'s [Live Share Extension](https://marketplace.visualstudio.com/items?itemName=MS-vsliveshare.vsliveshare-pack&ssr=false) for live collaboration. We will be able share a workspace where we can all see what you type, highlight, etc, and you can see what we type as well. **Please make sure these are installed before the dev test starts.** The Live Share extension must be installed separately, it does not come with VS Code out of the box. As a side note, when working at Rackspace you can use whatever editor you like, but we're using VS Code here for the collaboration features.
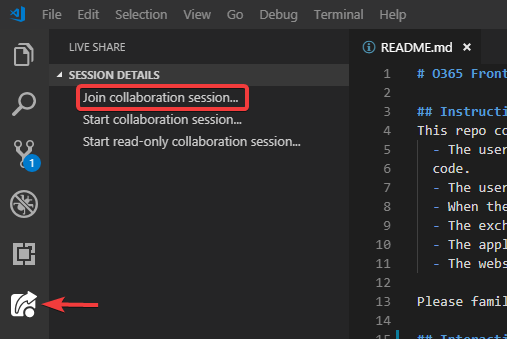
We will have our own copy of the code and we'll start the collaboration session. Then we will send a link for you to join the session. In order to join and collaborate, **you must be signed into VS Code** with either a GitHub or Microsoft account.

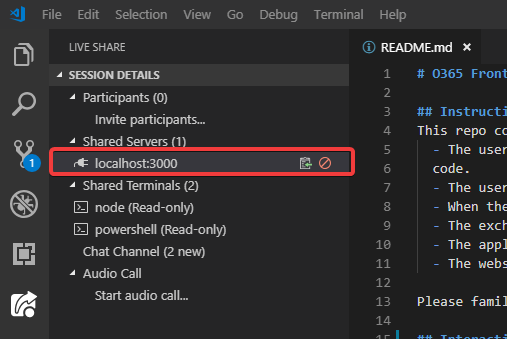
To reiterate, you should familiarize yourself with the code beforehand, but for the actual collaboration session you won't need the code open or running locally during the test. We will also share a browser window running the code over Zoom so we can all see the same thing. However, may be able to access the server we are running by clicking on `localhost` under `Shared Servers`. VS Code will tunnel requests to our running server on our port 3000 to a port on your machine in the 60000 range. This way, you will be able to see the running app yourself if you need to debug or troubleshoot it within the browser.

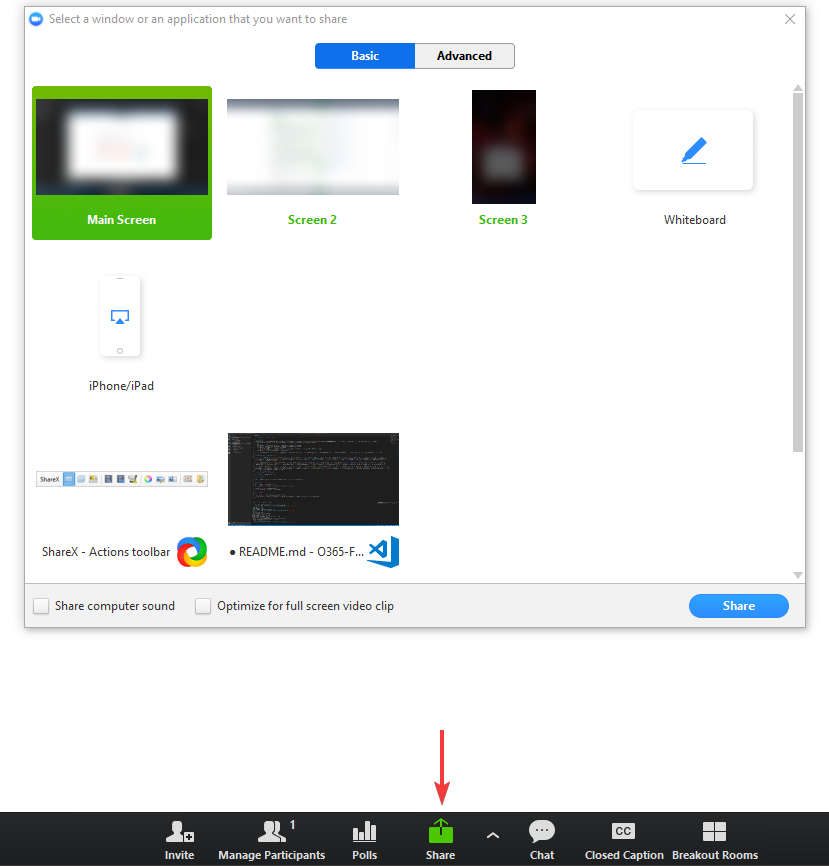
If you want to show us something on your side during the test, sharing _your_ browser instead of ours via Zoom is also an option. When screen sharing with Zoom, it may be best to share your screen - not an individual application or window.

## Running the Application Locally
In the project directory, you can run:
### `npm install`
Before running the app for the first time, remember to run `npm install` to pull in dependencies
### `npm start`
Runs the app in the development mode.
Open [http://localhost:3000](http://localhost:3000) to view it in the browser.
The page will reload if you make edits.
You will also see any lint errors in the console.
### `npm test`
Launches the test runner in the interactive watch mode.
See the section about [running tests](https://facebook.github.io/create-react-app/docs/running-tests) for more information.