https://github.com/mit-ccc/social-machines.github.io
LSM Jekyll Site
https://github.com/mit-ccc/social-machines.github.io
Last synced: 12 months ago
JSON representation
LSM Jekyll Site
- Host: GitHub
- URL: https://github.com/mit-ccc/social-machines.github.io
- Owner: mit-ccc
- License: other
- Created: 2017-08-11T19:39:28.000Z (almost 9 years ago)
- Default Branch: master
- Last Pushed: 2023-04-11T23:05:37.000Z (over 3 years ago)
- Last Synced: 2024-01-17T01:16:18.105Z (over 2 years ago)
- Language: HTML
- Homepage: https://socialmachines.org
- Size: 114 MB
- Stars: 3
- Watchers: 10
- Forks: 3
- Open Issues: 7
-
Metadata Files:
- Readme: README.md
- License: license.md
Awesome Lists containing this project
README
# Lab for Social Machines Jekyll Web Site
View the live site: https://social-machines.github.io/
---
# Getting Started
This website is created using [Jekyll](https://jekyllrb.com/), a static site generator. The general flow of editing the site is:
1. Clone the repository locally:
```
git clone git@github.com:social-machines/social-machines.github.io.git
```
2. Start a Jekyll server in the cloned directory:
```
bundle exec jekyll serve
```
This will allow you to see your local changes at http://localhost:4000 before you push them live. Every time you save a file, just refresh the page and Jekyll will have regenerated the site with the new changes.
3. Edit files locally as per the instructions below, save, and verify your changes are correct on your locally hosted version of the site.
4. Commit the changes you've made to the repository.
5. Push the changes you've made to GitHub. After a minute or two, refresh the live site to see your changes. If you do not see the changes after a few minutes, check [GitHub System Status](https://status.github.com/messages) to see if they are experiencing delays with builds.
**NOTE** Do not edit **any** files in the **_site** directory. These are auto-generated by Jekyll and will be overwritten. Pretend that folder does not exist.
# Editing Instructions
Here are instructions for doing various types of edits to the site.
**NOTE** Do not edit **any** files in the **_site** directory. These are auto-generated by Jekyll and will be overwritten. Pretend that folder does not exist.
## Add a publication
[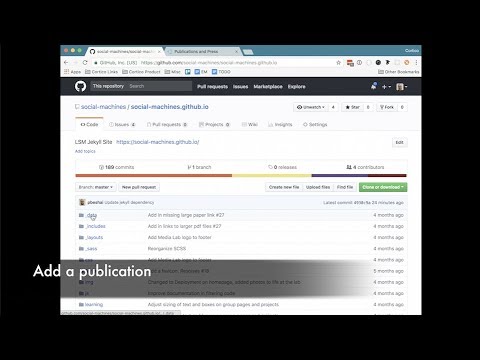 Watch video explanation](https://www.youtube.com/watch?v=NEDEVrn6MVQ)
All publication data is stored in **_data/publications.yml** and **_data/theses.yml** if it is a thesis. The contents of that file are used to populate the publications throughout the site, applying different filters based on attributes defined for each publication. For instance, the publications that show up on the [Media Analytics Publications page](https://social-machines.github.io/media-analytics/publications) are filtered to those with `group: media analytics`.
1. Open the file **_data/publications.yml**
1. Add an entry for the new publication at the top of the file (or ideally in sorted reverse chronological order).
An entry for a publication looks like the following:
```yaml
- citation: |
Soroush Vosoughi\*, Prashanth Vijayaraghavan\*, Ann Yuan, and Deb Roy. (2017). **Mapping Twitter Conversation Landscapes**. In Proceedings of the 11th International AAAI Conference on Weblogs and Social Media (ICWSM 2017). Montreal, Canada. \*Equal Contribution.
publication_year: 2017
pdf_file: http://lsm.media.mit.edu/papers/ICWSM-2017.pdf
group: media analytics
academic: true
tags:
- Machine Learning
- Social Networks
- Natural Language Processing
```
A few things to note:
- The `citation` field is written in Markdown, so asterisks will be interpretted accordingly. For equal contribution, make sure you escape the asterisk with a backslash: **\\\***. Titles should be marked in bold by surrounding them with two asterisks (e.g. \*\*My Paper Title\*\*).
- The `pdf_file` field is a URL and should point to http://lsm.media.mit.edu/papers/YOUR_PAPER_PDF.pdf. You'll need to upload your file to the paper hosting server for this URL to work, as described below in the "Uploading a paper" section.
- The `group` field indicates whether it will show up on the Media Analytics publications page (with value `media analytics`) or the Learning page (with value `learning`)
- The `academic` field indicates whether the paper is academic (e.g. a conference or journal paper) or not (e.g. a blog post, or a news article)
- The `tags` field contains a list of tags that can be used to filter the paper. Currently the list of tags to choose from is:
- Machine Learning
- Robotics
- Cognitive Science
- Learning
- Natural Language Processing
- Social Networks
- Visualization
If you think there should be a new tag added, discuss with others first.
### Uploading a paper
We have a separate place where we are storing all our papers since they can be quite large especially when videos are embedded in them. The box was setup for us by NECSYS and is available at **lsm.media.mit.edu**. To upload a paper, you'll need to connect to the server over SMB. If you're not on campus, you'll need to be on the Media Lab VPN ([instructions to connect to VPN](http://wiki.media.mit.edu/view/Necsys/HowToVPN)).
The following instructions explain how to upload a paper to the SMB server on a Mac.
Open **Finder** and select **Go -> Connect to Server...** from the menu bar (or press Cmd+K)

Enter **smb://lsm.media.mit.edu** as the Server Address. Optionally click the **+** to save it as a favorite. Click **Connect**.

Click **Connect** when prompted about connecting.

Enter your Kerberos login information. You do not need to add an email address, just use your username. Then click **Connect** to continue.

Scroll to select **lsm.media.mit.edu** as the volume you'd like to mount (or type "lsm" to quickly get to it).

This opens up a finder window to the mounted SMB server. The **papers** directory is where you should put your PDF file.


That paper is now available to be read at http://lsm.media.mit.edu/papers/a_paper.pdf. Use that URL as the value for `pdf_file` in your citation entry.
## Add a project
Projects are currently very limited in their presentation on the site. They are comprised solely of a title, an image, the group they are under, and a link to the project page on [the Media Lab site](https://www.media.mit.edu/groups/social-machines/projects/). The project data is stored in **_data/projects.yml**.
1. Open the file **_data/projects.yml**
1. Add the entry for the new project to the top of the file.
An entry for a project looks like the following:
```yaml
- title: "FlipFeed"
image: https://dam-prod.media.mit.edu/thumb/2017/01/18/1_Mk6xr17.jpg.800x800.jpg
url: https://www.media.mit.edu/projects/flipfeed/overview/
group: media analytics
```
The idea is to save students work from reproducing content for projects everywhere, we can just re-use the title and images required for the Media Lab's site.
Things to note
- The `group` field should be one of `media analytics` or `learning`.
## Add a person
The people data is all stored in **_data/people.yml**.
1. Open the file **_data/people.yml**
1. Add the entry for the new person to the top of the file.
An entry for a person looks like the following:
```yaml
- name: Lisa Conn
title: Graduate Researcher
type: student
image: http://excedrin.media.mit.edu/socialmachines/wp-content/uploads/sites/27/2014/07/IMG_4998-e1454462435442.jpg
groups:
- media analytics
- cortico
alumni: true
```
Things to note
- The `groups` field should contain any of `media analytics`, `learning`, or `cortico`.
- Set `alumni: true` when a person leaves the lab. It's okay if this field is not there at all (this implies it is false).
- The `type` field should be one of: leadership, faculty, staff, visitor, postdoc, student, cortico
- The order in which people show up on the team pages is determined by a variable called `people_order` on the pages themselves. See **learning/people.md** for an example.
## Add an image to the Life at the Lab image gallery
Say we want to add the image **tim-cook-deb.jpg** to the image gallery.
1. Add the image file to the **img/** directory.
1. Edit **life-at-the-lab.md** and add to the `images:` list `- ../img/tim-cook-deb.jpg`:
```yaml
layout: image-gallery
title: Life at the Lab
description: This page will be pretty soon.
images:
- ../img/CASM-offsite.jpg
- ../img/group-walk-mit.jpg
- ../img/tim-cook.jpg
- ../img/tim-cook-deb.jpg
```
Note that the order of the images in the `images:` list is how they will display on the site.
## Edit the front page
The content of the front page is stored in **index.html**. This is one of the few files that is written in HTML instead of Markdown.
## Edit copy on the Media Analytics page
The Media Analytics landing page can be edited via the Markdown file at **media-analytics/index.md**.
## Edit copy on the Learning page
The Learning landing page can be edited via the Markdown file at **learning/index.md**.
## Edit copy on the Cortico page
The Cortico page can be edited via the Markdown file at **cortico.md**.
## Edit copy on the Admissions page
The Admissions page can be edited via the Markdown file at **admissions.md**.
## Edit page layouts
All of the different types of pages specify which layouts they use in their front matter. To edit how those layouts are rendered, explore the files in **_layouts/** and the modular components in **_includes/**.
## Modify the main navigation items
Edit the entries in **_data/nav.yml**. The order in the file matches the order seen on the site.
## Modifying the Filterable List logic used for Publications
The code for the filterable lists seen on the publications pages is stored in **js/filterable-list.js**. The live version uses a transpiled version of it in **js/filterable-list.min.js**. After making any desired changes, you can recompile the js by running the build script in the root directory called **build.sh**.