https://github.com/mlava/json-webhooks
https://github.com/mlava/json-webhooks
Last synced: about 1 month ago
JSON representation
- Host: GitHub
- URL: https://github.com/mlava/json-webhooks
- Owner: mlava
- Created: 2022-08-04T03:01:00.000Z (almost 4 years ago)
- Default Branch: main
- Last Pushed: 2024-02-27T02:15:20.000Z (over 2 years ago)
- Last Synced: 2024-02-28T02:50:01.383Z (over 2 years ago)
- Language: JavaScript
- Size: 24.4 KB
- Stars: 2
- Watchers: 1
- Forks: 0
- Open Issues: 2
-
Metadata Files:
- Readme: README.md
Awesome Lists containing this project
README
This extension allows you to export data from Roam Research to a webhook. This can allow connection with services such as Zapier, IFTTT, Make, Pipedream and Konnectzit.
**Features:**
- Send a block and its children as structured JSON to up to 10 webhook endpoints
- Assign a friendly label to each webhook — labelled webhooks appear in the Command Palette as "JSON to Webhook: My Label" rather than by number
- Optionally apply a confirmation tag to the parent block on success (e.g. #sent)
- Configurable delimiter for key:value parsing
- Supports Zapier, IFTTT, Make, Pipedream, Konnectzit, and any generic webhook endpoint
- **Chief of Staff integration:** Exposes `jw_get_config` and `jw_send` via the Extension Tools API, allowing Chief of Staff to query webhook configuration and trigger sends programmatically
If you nest child block data beneath a parent, click into the parent block and then trigger this extension via the Command Palette. Commands are listed as "JSON to Webhook: [label]" if you've assigned a label, or "JSON to Webhook #1", "#2", etc. if not. It will read the parent and child block data and format it to send to the defined webhook.
Note that you need to have set up whichever service you're using in advance - stepwise instructions are below.
- lunch with John
- Date: tomorrow
- Time: 1230 pm
- Location: Rialto Towers
This clip shows how to use the data structure above to make a calendar entry: https://www.loom.com/share/ead9d2d129994cad9c00261925e7ac6d
- ## Configuration:
- ### Zapier:
- In Zapier, create a new Zap using the Webhooks by Zapier trigger.
- 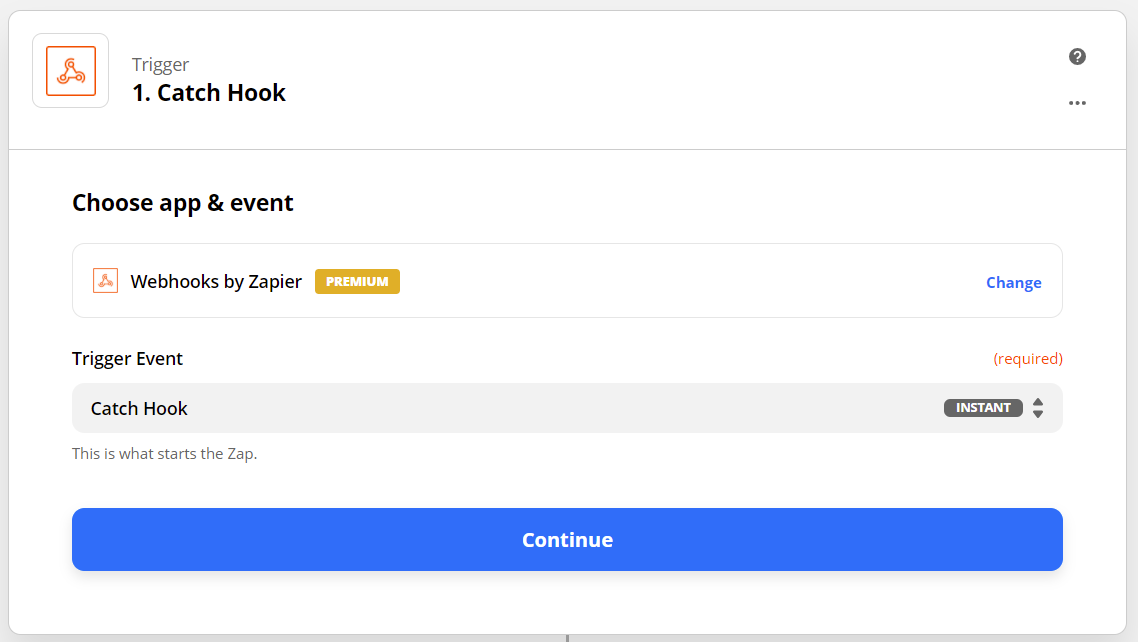
- Click Continue button
- Copy the Custom Webhook URL, leave all other options alone and click Continue again
- Paste the Webhook URL in the Roam Depot settings for this extension
- Go back to Zapier and click Test Trigger button
- You should see something like this:
- 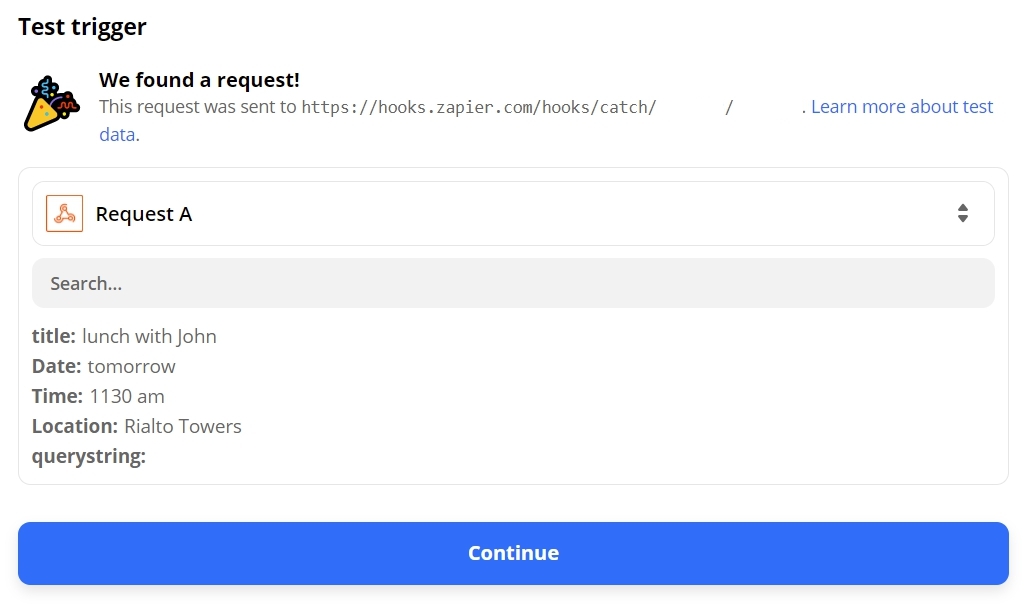
- Now, click Continue and choose what you want to do with the data... 🎉
- ### IFTTT:
- Although IFTT __can__ receive webhooks, there are limits in both the number and type of data that can be sent and processed. Unlike Zapier, Integromat and Pipedream, IFTT can only accept pre-defined webhook events with three json values.
- You need to define the name of the webhook you want to call - go to [Choose a trigger - IFTTT](https://ifttt.com/create) and choose Add, then select Webhook.
- Select Receive a web request and you will be asked to name the event.
- Then, continue through the usual process of creating an IFTTT applet.
- Once you have finished, go to your [Webhooks works better with IFTTT](https://ifttt.com/maker_webhooks) page and click on Documentation
- Under Make a POST or GET web request to: you will see a url like:
- `https://maker.ifttt.com/trigger/{event}/with/key/`
- The {event} string is the name of the event you entered earlier. Type it in the {event} box to reveal the full url.
- Copy this url and place it in the Roam Depot settings panel.
- For this script, the parent block will be sent as value1, and the first two child blocks will be sent as value2 and value3. Unlike the other services like Zapier, you can't define the key and are stuck with value1 etc.
- Use value1, value2 and value3 in your IFTTT applet and enjoy! 🎉
- ### Integromat / Make:
- The process for Integromat is quite similar to that for Zapier
- Create a new scenario
- Select Webhooks and whatever app to which you want to send the data
- In the scenario, Add Custom webhook
- 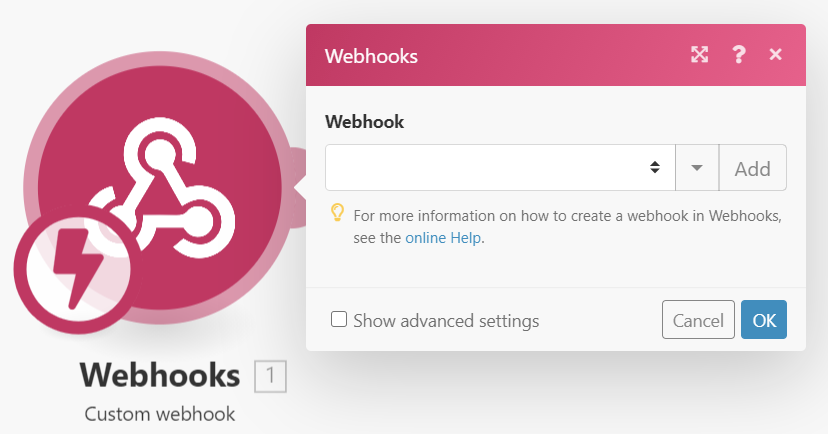
- Click the Add button to create a new webhook
- Enter a webhook name and click Save. The Webhook item will generate a URL.
- Place the Webhook URL in the Roam Depot settings panel
- Click into the example item below, 'lunch with John', at the end (after 'John')
- Trigger the extension via the Command Palette
- Go back to Integromat. Your webhook should receive the data and offer to parse it for you.
- Connect another app and enjoy sending it your data! 🎉
- ### Pipedream:
- Go to Sources, click New and select HTTP/Webhook
- Choose New Requests (Payload Only)
- Enter a Name and click Create Source
- You will be shown a box with a header __Your endpoint is__
- Place the Webhook URL in the Roam Depot settings panel
- Click into the example item below, 'lunch with John', at the end (after 'John')
- Trigger the extension via the Command Palette
- In the left-sided panel a new event will appear. Click on the timestamp header and the information to the right will show the event data.
- Click the Create Workflow button to connect your data to another app and enjoy! 🎉
- ### Konnectzit:
- Click on the button 'Create Konnectz'
- From Integrated Apps, drag the icon for Webhook onto the working area
- Copy the Webhook URL and then click on the button 'Capture Webhook Response'
- Place the Webhook URL in the Roam Depot settings panel
- Click into the example item below, 'lunch with John', at the end (after 'John')
- Trigger the extension via the Command Palette
- In Konnectzit, the data you sent to your Webhook should appear. Connect your Webhook to other apps and Save and then Publish your workflow. 🎉
- ### Choice of Delimiter:
- Choose which delimiter you wish to use to separate the child block key:value pairs.
- For example, you could use Date: Tomorrow which uses : as the delimiter
- The script will then send a key:value pair of key "Date" and value "Tomorrow" in the json data
- You could choose any sequence of characters, like ;: or even just ,
- e.g.
- Date: Tomorrow
- Date;: Tomorrow
- Date, Tomorrow
- The extension will strip leading and trailing spaces so it will still appear as "Date" and "Tomorrow" in the data sent to the webhook
- Enter your preferred delimiter in the Roam Depot settings panel
- You might choose to have some simple text fields without a delimiter. In this case, they will be sent as a key:value pair of "string__n__":"__string of text__"
- You can mix and match with some child blocks having simple text and others having delimited text.
- Note: for IFTTT your text will be sent as "value__n__":"__string of text__"
- Finally, you don't have to use child blocks. If you trigger the command in a block without children it will simply send a single key:value pair of "parentText" and the text in the block as the value.