https://github.com/mnvoh/cameratokeyboard
Camera to keyboard: A computer vision typing experiment that allows you to use your camera as a keyboard (early stage).
https://github.com/mnvoh/cameratokeyboard
computer-vision machine-learning python virtual-hardware virtual-keyboard
Last synced: 4 months ago
JSON representation
Camera to keyboard: A computer vision typing experiment that allows you to use your camera as a keyboard (early stage).
- Host: GitHub
- URL: https://github.com/mnvoh/cameratokeyboard
- Owner: mnvoh
- License: other
- Created: 2024-03-15T14:49:06.000Z (over 2 years ago)
- Default Branch: main
- Last Pushed: 2024-04-03T11:36:42.000Z (over 2 years ago)
- Last Synced: 2026-01-04T08:39:19.244Z (7 months ago)
- Topics: computer-vision, machine-learning, python, virtual-hardware, virtual-keyboard
- Language: Python
- Homepage:
- Size: 38 MB
- Stars: 37
- Watchers: 1
- Forks: 5
- Open Issues: 0
-
Metadata Files:
- Readme: README.md
- Changelog: CHANGELOG.md
- Contributing: docs/CONTRIBUTING.md
- License: LICENSE-dataset.md
- Code of conduct: docs/CODE_OF_CONDUCT.md
- Codeowners: .github/CODEOWNERS
- Security: docs/SECURITY.md
Awesome Lists containing this project
README
Camera to Keyboard


[](https://github.com/mnvoh/cameratokeyboard/actions)

[](https://www.gnu.org/licenses/gpl-3.0)
⭐ Star it, make it visible, make it better!
Camera To Keyboard is a python desktop application that allows you to type without a keyboard
and with just a camera, or at least that's the plan.
> [!NOTE]
> Currently the accuracy leaves much to be desired, so it's a PoC and a long way from
> having optimal accuracy. But hopefully with your support it'll get there.
Some of its possible applications, if desirable accuracy is achieved include:
- In cell phones, just put your phone down in front of you and type
- in VR/AR
- Or print your own keyboard design on a big mouse mat!
## Table of Content
- [Installation](#installation)
- [Training](#training)
- [App Guide](#app-guide)
- [Usage](#usage)
- [Contributing](#contributing)
- [Roadmap](#roadmap)
- [Security](#security)
- [License](#license)
- [Authors & Contributors](#authors--contributors)
- [Support](#support)
## Installation
> [!IMPORTANT]
> To use GPU, you have to install compatible versions of CUDA and torch.
>
> Check out [Get Started Locally](https://pytorch.org/get-started/locally/) for more information.
### Using PIP
Run the following command to install the package from PyPI:
```bash
python -m pip install --upgrade c2k
```
Run the project with:
```bash
python -m c2k
```
### Using Git
1. Clone the repository
```bash
git clone https://github.com/mnvoh/cameratokeyboard.git
```
2. Create a virtualenv and install the requirements
```bash
cd cameratokeyboard
python -m venv .venv
source .venv/bin/activate
pip install -r requirements.txt
```
3. Run the app. If you have more than one video input device, specify it:
```bash
python c2k.py -i 1 # or 0, or 2, or ...
```
## Training
⭐ The model is trained using ultralytics and YOLOv8.
If you have added additional images to the dataset or just want to retrain the model
with different parameters, here's how you do it. But before jumping in, I should mention
2 things:
First, all the modules in `cameratokeyboard/model` are deprecated. One of the very first
steps in the roadmap is to establish a descent pipeline (most probably Roboflow).
Secondly, here's how the training works:
1. The images are picked up from `/raw_dataset`. This directory has a flat 1-level
structure containing all `.jpg` images and `.txt` labels.
2. The images are paritioned into `train`, `test` and `val` splits. You can customize
the ratios with arguments (See Usage)
3. The images in the train split are augmented. The augmentation strategies are defined
in `cameratokeyboard/config.py`. You can mix and match the implemented augmenters.
Having said all that, here's how to train the model
1. Train it:
```bash
python c2k.py train
```
That's it, no second steps. The newly trained model (`best.pt`) is moved to
`cameratokeyboard/model.pt`, replacing the existing one.
## App Guide
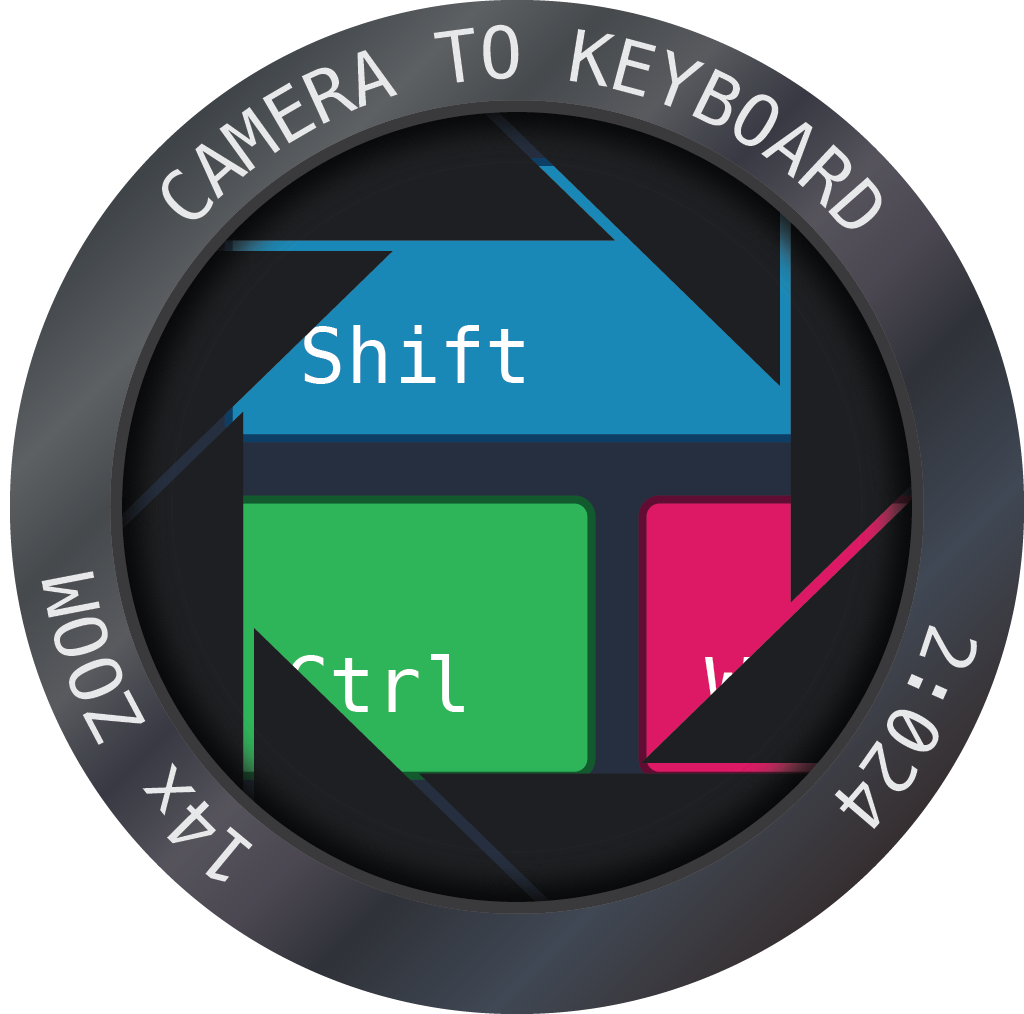
This app relies on 4 markers (aka control points) to determine the boundries of the keyboard.
So first off, print the following image on paper. Print on an A4 paper, it's the same size
as an actual keyboard.
> [!TIP]
> The algorithm only needs the markers and everything else is irrelevant to it, you could
> even just draw the markers yoruself using a marker! (pun probably intended, undecided as of now).
> But you, as a user, are most probably gonna need to know where the keys are.

At the moment, the interface is really simple, just a text box and a preview of what's
going on.
#### The Text Box
Whatever you type will show up here.
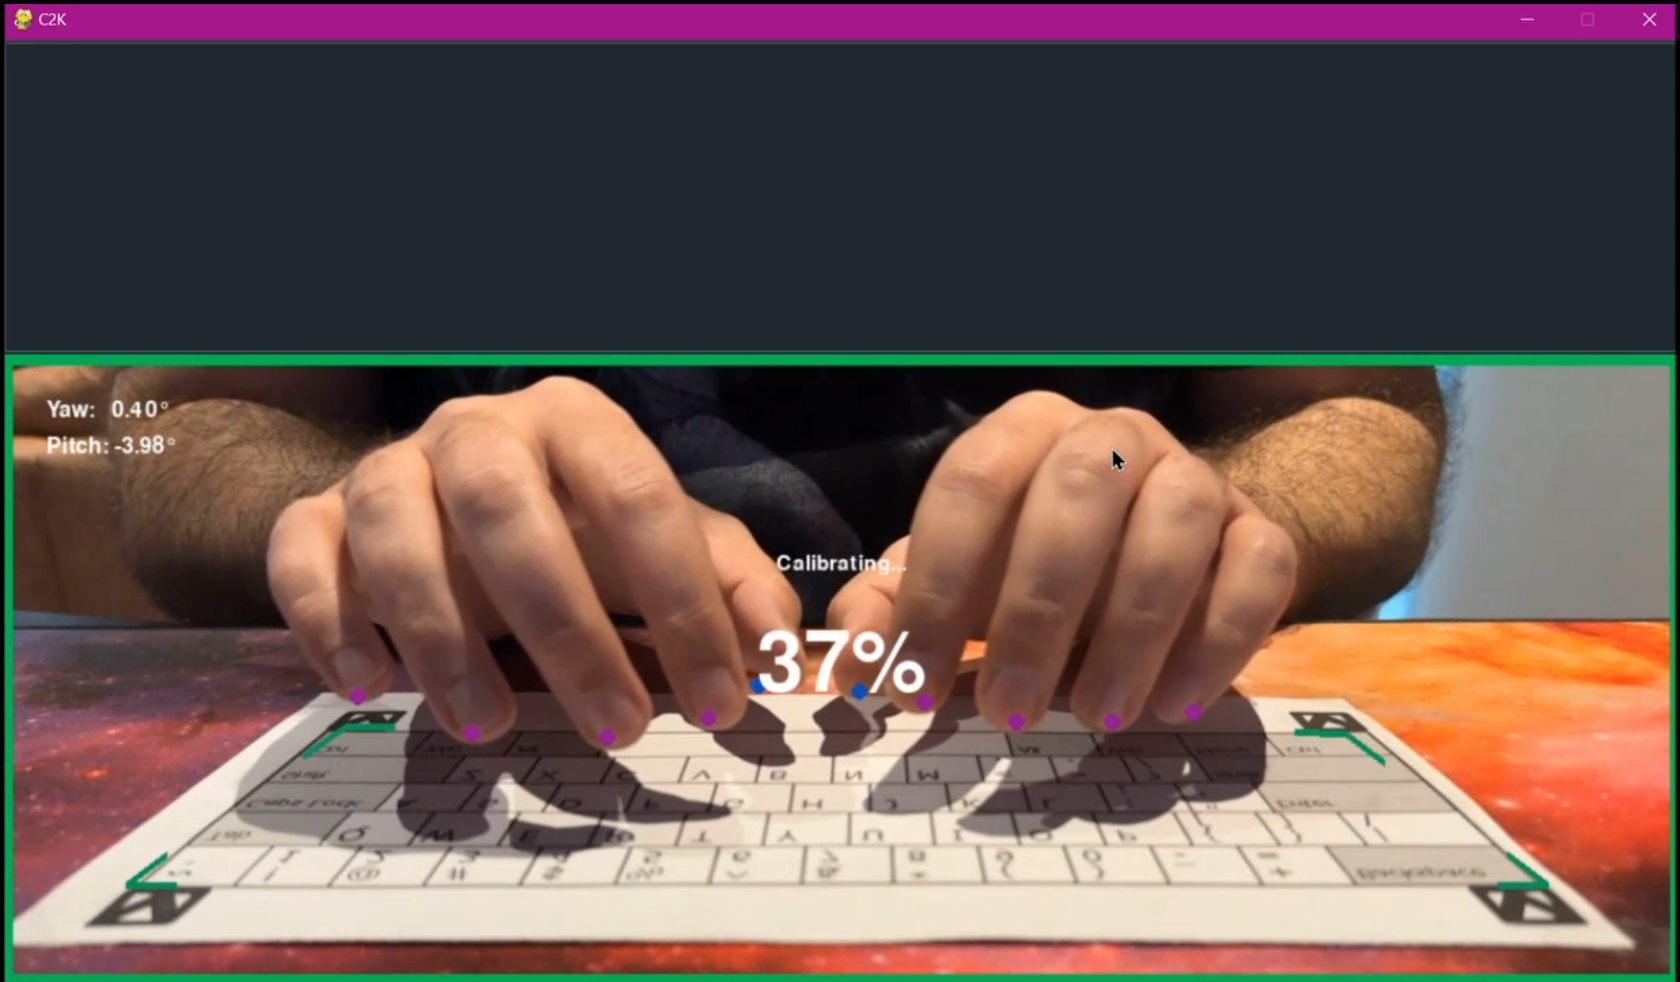
#### The Preview
Shows the current frame along with the detections made. Some important things to note:
1. At the top left corner you'll see your camera's yaw and pitch angles. Yaw is pretty
accurate (or at least accurate enough), try to keep that as close to 0 as possible. Pitch
however doesn't seem to be accurate at all (working on fixing this as well). So try to adjust
your camera's pitch to get the best results.
2. There's a color coded border around the preview.
- Gray ⬛ (let's pretend this is gray): Initializing, most probably you'll never see this.
- Red 🟥: Some or all markers are missing.
- Orange 🟧: Some or all fingers are missing.
- Yellow 🟨: One or both thumbs are missing.
- Green 🟩: Everything's A-OK. All objects have been successfully detected.
3. And finally the detected fingers and markers
## Usage
> [!IMPORTANT]
> If you are using WSL, you cannot access your webcam in that environment. A
> workaround is to use this [Kernel](https://github.com/PINTO0309/wsl2_linux_kernel_usbcam_enable_conf)
> but I have not used it and will not take responsibility for any consequences if you decide to
> use it. Just run the app in Powershell, ez pz.
```
usage: c2k.py [-h] [-e TRAINING_EPOCHS] [-ts WIDTH HEIGHT] [-b TRAINING_BATCH] [-rp RAW_DATASET_PATH]
[-dp DATASET_PATH] [-sp TRAIN TEST VAL] [-sr TRAIN TEST VAL] [-ie IMAGE_EXTENSION] [-p MODEL_PATH]
[-r WIDTH HEIGHT] [-f APP_FPS] [-i VIDEO_INPUT_DEVICE] [-d PROCESSING_DEVICE]
[-mc MARKERS_MIN_CONFIDENCE] [-fc FINGERS_MIN_CONFIDENCE] [-tc THUMBS_MIN_CONFIDENCE]
[-s KEY_DOWN_SENSITIVITY] [-rd REPEATING_KEYS_DELAY]
[{train}]
Camera To Keyboard
positional arguments:
{train} Specify the command to execute. Omit to run the main app.
options:
-h, --help show this help message and exit
-e TRAINING_EPOCHS, --training_epochs TRAINING_EPOCHS
Specify the number of training epochs. Default: 40
-ts WIDTH HEIGHT, --training_image_size WIDTH HEIGHT
The dimensions of the training images. Default: 640 640
-b TRAINING_BATCH, --training_batch TRAINING_BATCH
The batch size for training. Default: -1 (automatic)
-rp RAW_DATASET_PATH, --raw_dataset_path RAW_DATASET_PATH
The path to the raw dataset. Default: raw_dataset
-dp DATASET_PATH, --dataset_path DATASET_PATH
The path to the partitioned and augmented dataset. Default: ../datasets/c2k
-sp TRAIN TEST VAL, --split_paths TRAIN TEST VAL
The paths to the train, test and validation datasets. Default: train test val
-sr TRAIN TEST VAL, --split_ratios TRAIN TEST VAL
The ratios for the train, test and validation datasets. Default: 0.7 0.15 0.15
-ie IMAGE_EXTENSION, --image_extension IMAGE_EXTENSION
The extension of the images in the dataset. Default: jpg
-p MODEL_PATH, --model_path MODEL_PATH
The path to the model. Default: cameratokeyboard/model.pt
-r WIDTH HEIGHT, --resolution WIDTH HEIGHT
The resolution of the images taken from the camera. Default: 1280 720
-f APP_FPS, --app_fps APP_FPS
The refresh rate of the app. Default: 30
-i VIDEO_INPUT_DEVICE, --video_input_device VIDEO_INPUT_DEVICE
The device number of the input camera. Default: 0
-d PROCESSING_DEVICE, --processing_device PROCESSING_DEVICE
The device index to use for training and inference or enter 'cpu' to use CPU. Default: 0.
-mc MARKERS_MIN_CONFIDENCE, --markers_min_confidence MARKERS_MIN_CONFIDENCE
The minimum confidence for the markers. Default: 0.3
-fc FINGERS_MIN_CONFIDENCE, --fingers_min_confidence FINGERS_MIN_CONFIDENCE
The minimum confidence for the fingers. Default: 0.3
-tc THUMBS_MIN_CONFIDENCE, --thumbs_min_confidence THUMBS_MIN_CONFIDENCE
The minimum confidence for the thumbs. Default: 0.3
-s KEY_DOWN_SENSITIVITY, --key_down_sensitivity KEY_DOWN_SENSITIVITY
The sensitivity for the key down action. Default: 0.75
-rd REPEATING_KEYS_DELAY, --repeating_keys_delay REPEATING_KEYS_DELAY
The delay for repeating keys. Default: 0.4
```
## Contributing
Please visit [CONTRIBUTING](docs/CONTRIBUTING.md) for more info.
## Roadmap
- [x] **Improve the tests**
- [x] Establish an actual ML pipeline
- [ ] Improve the detection accuracy of down fingers
- [ ] Improve the dataset
- [ ] Implement the recognition of modifier key presses
- [ ] Train the model to recognize hand gestures for:
- [ ] Running calibration
- [ ] Resetting the marker positions
- [ ] Once a desirable accuracy has been obtained, implement a virtual keyboard driver or
accessibility APIs (basically by any means necessary)
- [ ] Create a settings view/page to make app settings (currently `config.py`) modifiable
at runtime.
## Security
Camera to Keyboard follows good security practices, but 100% security cannot be assured.
Camera to Keyboard is provided **"as is"** without any **warranty**. Use at your own risk.
_For more information and to report security issues, please refer to our [security documentation](docs/SECURITY.md)._
## License
This project's code is licensed under the **GNU General Public License v3**.
See [LICENSE](LICENSE.md) for more information.
The dataset and its derivatives (such as the trained model) are licensed under **CC BY-NC-SA 4.0**. See [LICENSE-dataset](LICENSE-dataset.md)
## Authors & contributors
The original setup of this repository is by [mnvoh](https://github.com/mnvoh).
For a full list of all authors and contributors, see [the contributors page](https://github.com/mnvoh/cameratokeyboard/contributors).
## Support
Please feel free to use any of these channels to ask for help or report bugs and security
vulnerabilities:
1. Github Issues to report issues, bugs, feature requests, etc
2. Github Discussions to ask questions, troubleshoot your installation, ...
3. Discord Server