https://github.com/mongodb-developer/kotlin-driver-quick-start
https://github.com/mongodb-developer/kotlin-driver-quick-start
Last synced: about 1 year ago
JSON representation
- Host: GitHub
- URL: https://github.com/mongodb-developer/kotlin-driver-quick-start
- Owner: mongodb-developer
- License: apache-2.0
- Created: 2023-06-06T13:32:48.000Z (about 3 years ago)
- Default Branch: main
- Last Pushed: 2023-06-28T12:44:36.000Z (about 3 years ago)
- Last Synced: 2025-03-28T00:06:33.480Z (over 1 year ago)
- Language: Kotlin
- Size: 114 KB
- Stars: 11
- Watchers: 1
- Forks: 3
- Open Issues: 1
-
Metadata Files:
- Readme: Readme.md
- License: LICENSE
Awesome Lists containing this project
README
# Getting Started With the MongoDB Kotlin Driver
> This is an introductory article on how to build an application in Kotlin using [MongoDB Atlas](https://www.mongodb.com/atlas/database) and
> the [MongoDB Kotlin driver](https://github.com/mongodb-developer/kotlin-driver-quick-start), the latest addition to our list of official drivers.
> Together, we'll build a CRUD application that covers the basics of how to use MongoDB as a database, while leveraging the benefits of Kotlin as a
> programming language, like data classes, coroutines, and flow.
## Prerequisites
This is a getting-started article. Therefore, not much is needed as a prerequisite, but familiarity with Kotlin as a programming language will be
helpful.
Also, we need an [Atlas account](https://www.mongodb.com/cloud/atlas/register), which is free forever. Create an account if you haven't got one. This
provides MongoDB as a cloud database and much more. Later in this tutorial, we'll use this account to create a new cluster, load a dataset, and
eventually query against it.
In general, MongoDB is an open-source, cross-platform, and distributed document database that allows building apps with flexible schema. In case you
are not familiar with it or would like a quick recap, I recommend exploring
the [MongoDB Jumpstart series](https://www.youtube.com/watch?v=RGfFpQF0NpE&list=PL4RCxklHWZ9v2lcat4oEVGQhZg6r4IQGV) to get familiar with MongoDB and
its various services in under 10 minutes. Or if you prefer to read, then you can follow
our [guide](https://www.mongodb.com/docs/atlas/getting-started/).
And last, to aid our development activities, we will be using [Jetbrains IntelliJ IDEA (Community Edition)](https://www.jetbrains.com/idea/download/),
which has default support for the Kotlin language.
## MongoDB Kotlin driver vs MongoDB Realm Kotlin SDK
Before we start, I would like to touch base on [Realm Kotlin SDK](https://www.mongodb.com/docs/realm/sdk/kotlin/), one of the SDKs used to create
client-side mobile applications using the MongoDB ecosystem. It shouldn't be confused with
the [MongoDB Kotlin driver](https://www.mongodb.com/docs/drivers/kotlin/coroutine/current/) for server-side programming.
The [MongoDB Kotlin driver](https://www.mongodb.com/docs/drivers/kotlin/coroutine/current/), a language driver, enables you to seamlessly interact
with [Atlas](https://www.mongodb.com/atlas/database), a cloud database, with the benefits of the Kotlin language paradigm. It's appropriate to create
backend apps, scripts, etc.
To make learning more meaningful and practical, we'll be building a CRUD application. Feel free to check out our
[Github repo](https://github.com/mongodb-developer/kotlin-driver-quick-start) if you would like to follow along together. So, without further ado,
let's get started.
## Create a project
To create the project, we can use the project wizard, which can be found under the `File` menu options. Then, select `New`, followed by `Project`.
This will open the `New Project` screen, as shown below, then update the project and language to Kotlin.

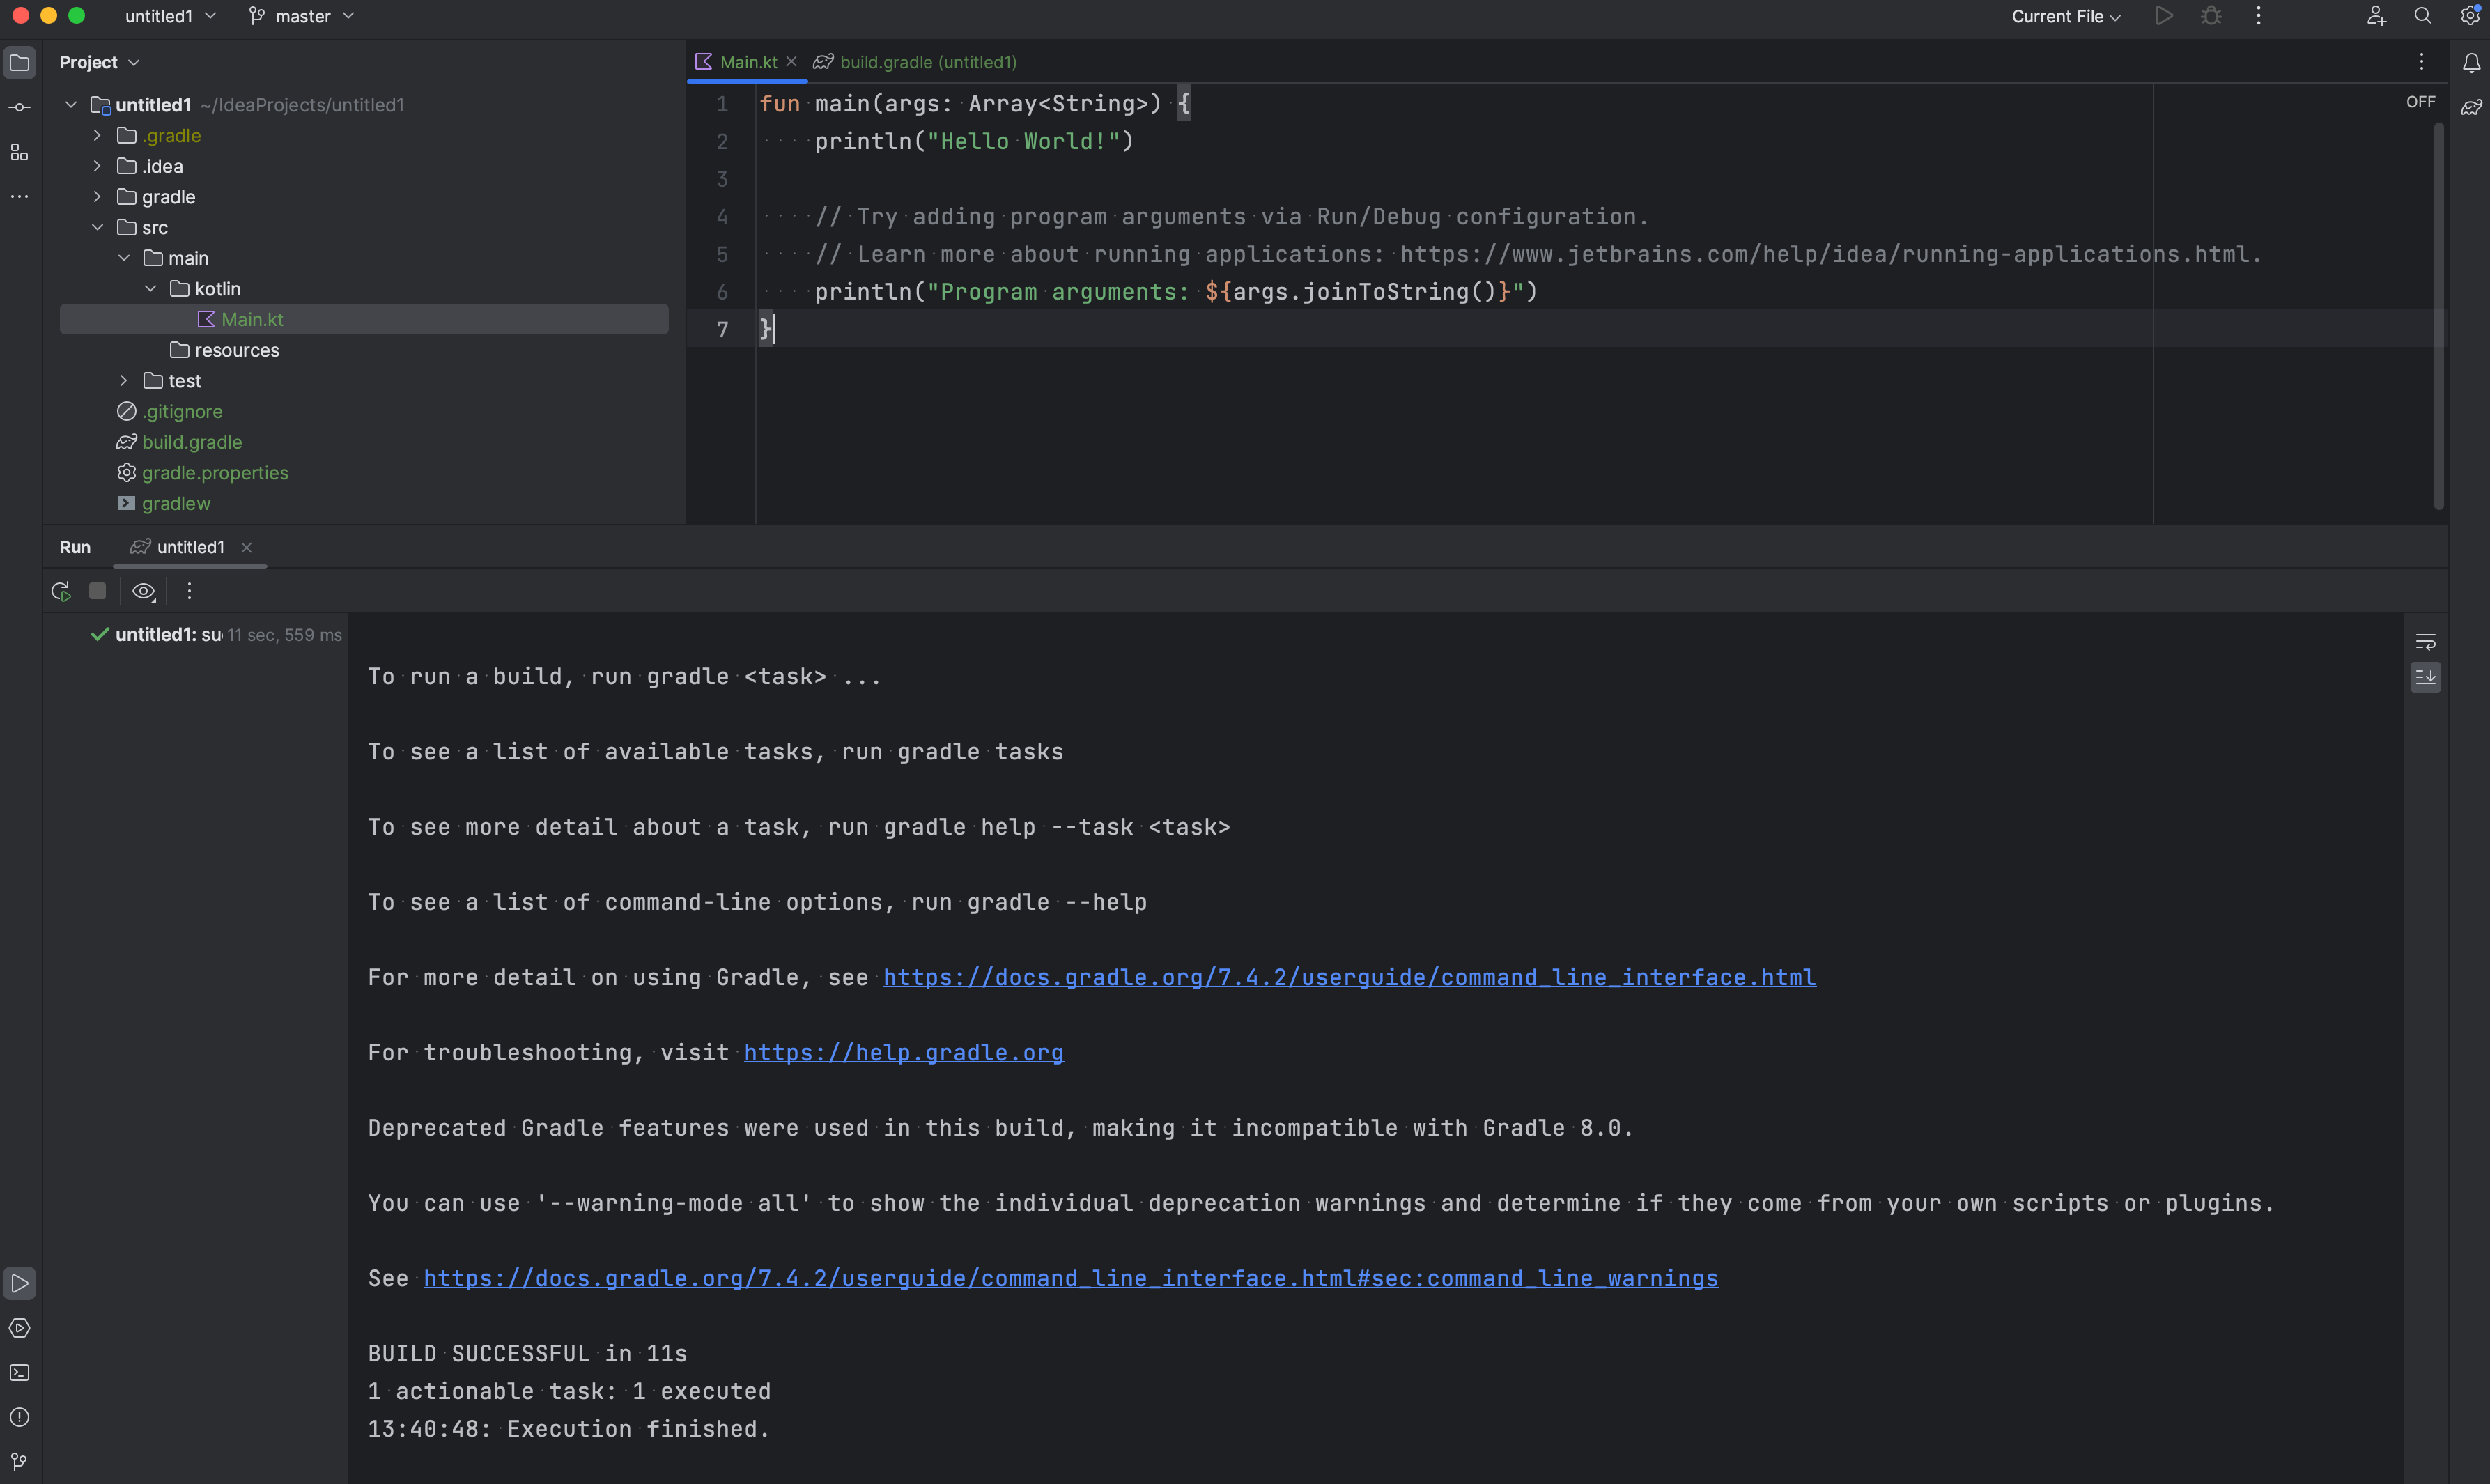
After the initial Gradle sync, our project is ready to run. So, let's give it a try using the run icon in the menu bar, or simply press CTRL + R on
Mac. Currently, our project won't do much apart from printing `Hello World!` and arguments supplied, but the `BUILD SUCCESSFUL` message in the run
console is what we're looking for, which tells us that our project setup is complete.
Now, the next step is to add the Kotlin driver to our project, which allows us to interact
with [MongoDB Atlas](https://www.mongodb.com/atlas/database).
## Adding the MongoDB Kotlin driver
Adding the driver to the project is simple and straightforward. Just update the `dependencies` block with the Kotlin driver dependency in the build
file — i.e., `build.gradle`.
```groovy
dependencies {
// Kotlin coroutine dependency
implementation("org.jetbrains.kotlinx:kotlinx-coroutines-core:1.6.4")
// MongoDB Kotlin driver dependency
implementation("org.mongodb:mongodb-driver-kotlin-coroutine:4.10.1")
}
```
And now, we are ready to connect with [MongoDB Atlas](https://www.mongodb.com/atlas/database) using the Kotlin driver.
## Connecting to the database
To connect with the database, we first need the `Connection URI` that can be found by pressing `connect to cluster` in
our [Atlas account](https://www.mongodb.com/cloud/atlas/register), as shown below.
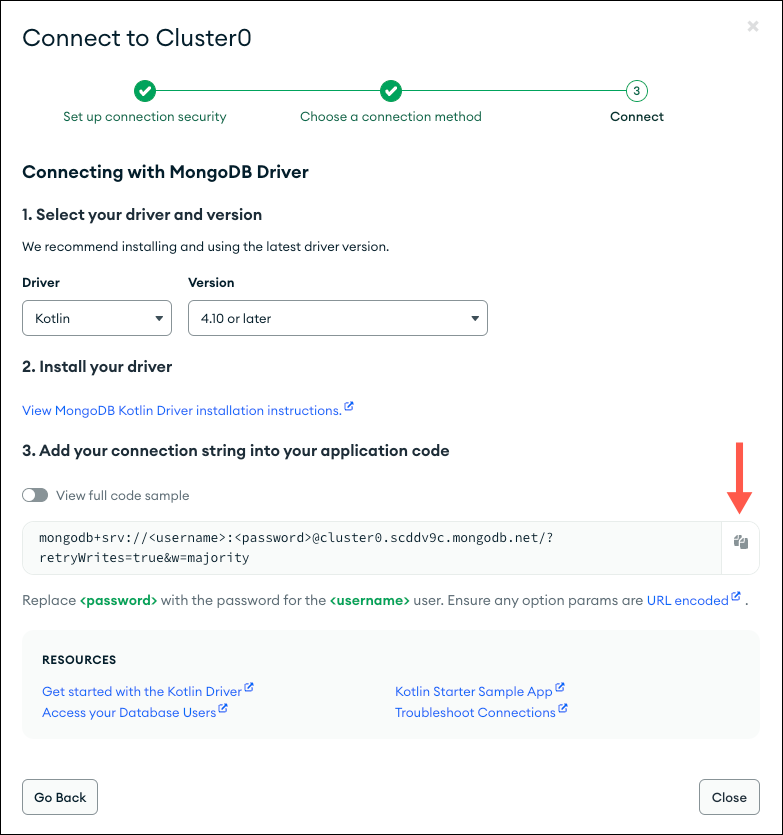
For more details, you can also refer to our [documentation](https://www.mongodb.com/docs/guides/atlas/connection-string/).
With the connection URI available, the next step is to create a Kotlin file. `Setup.kt` is where we write the code for connecting
to [MongoDB Atlas](https://www.mongodb.com/atlas/database).

Connection with our database can be split into two steps. First, we create a MongoClient instance using `Connection URI`.
```kotlin
val connectionString = "mongodb+srv://:@cluster0.sq3aiau.mongodb.net/?retryWrites=true&w=majority"
val client = MongoClient.create(connectionString = connectString)
```
And second, use client to connect with the database, `sample_restaurants`, which is a sample dataset for
restaurants. A [sample dataset](https://www.mongodb.com/docs/atlas/sample-data/) is a great way to explore the platform and build a more realistic POC
to validate your ideas. To learn how to seed your first Atlas database with sample
data, [visit the docs](https://www.mongodb.com/docs/atlas/sample-data/).
```kotlin
val databaseName = "sample_restaurants"
val db: MongoDatabase = client.getDatabase(databaseName = databaseName)
```
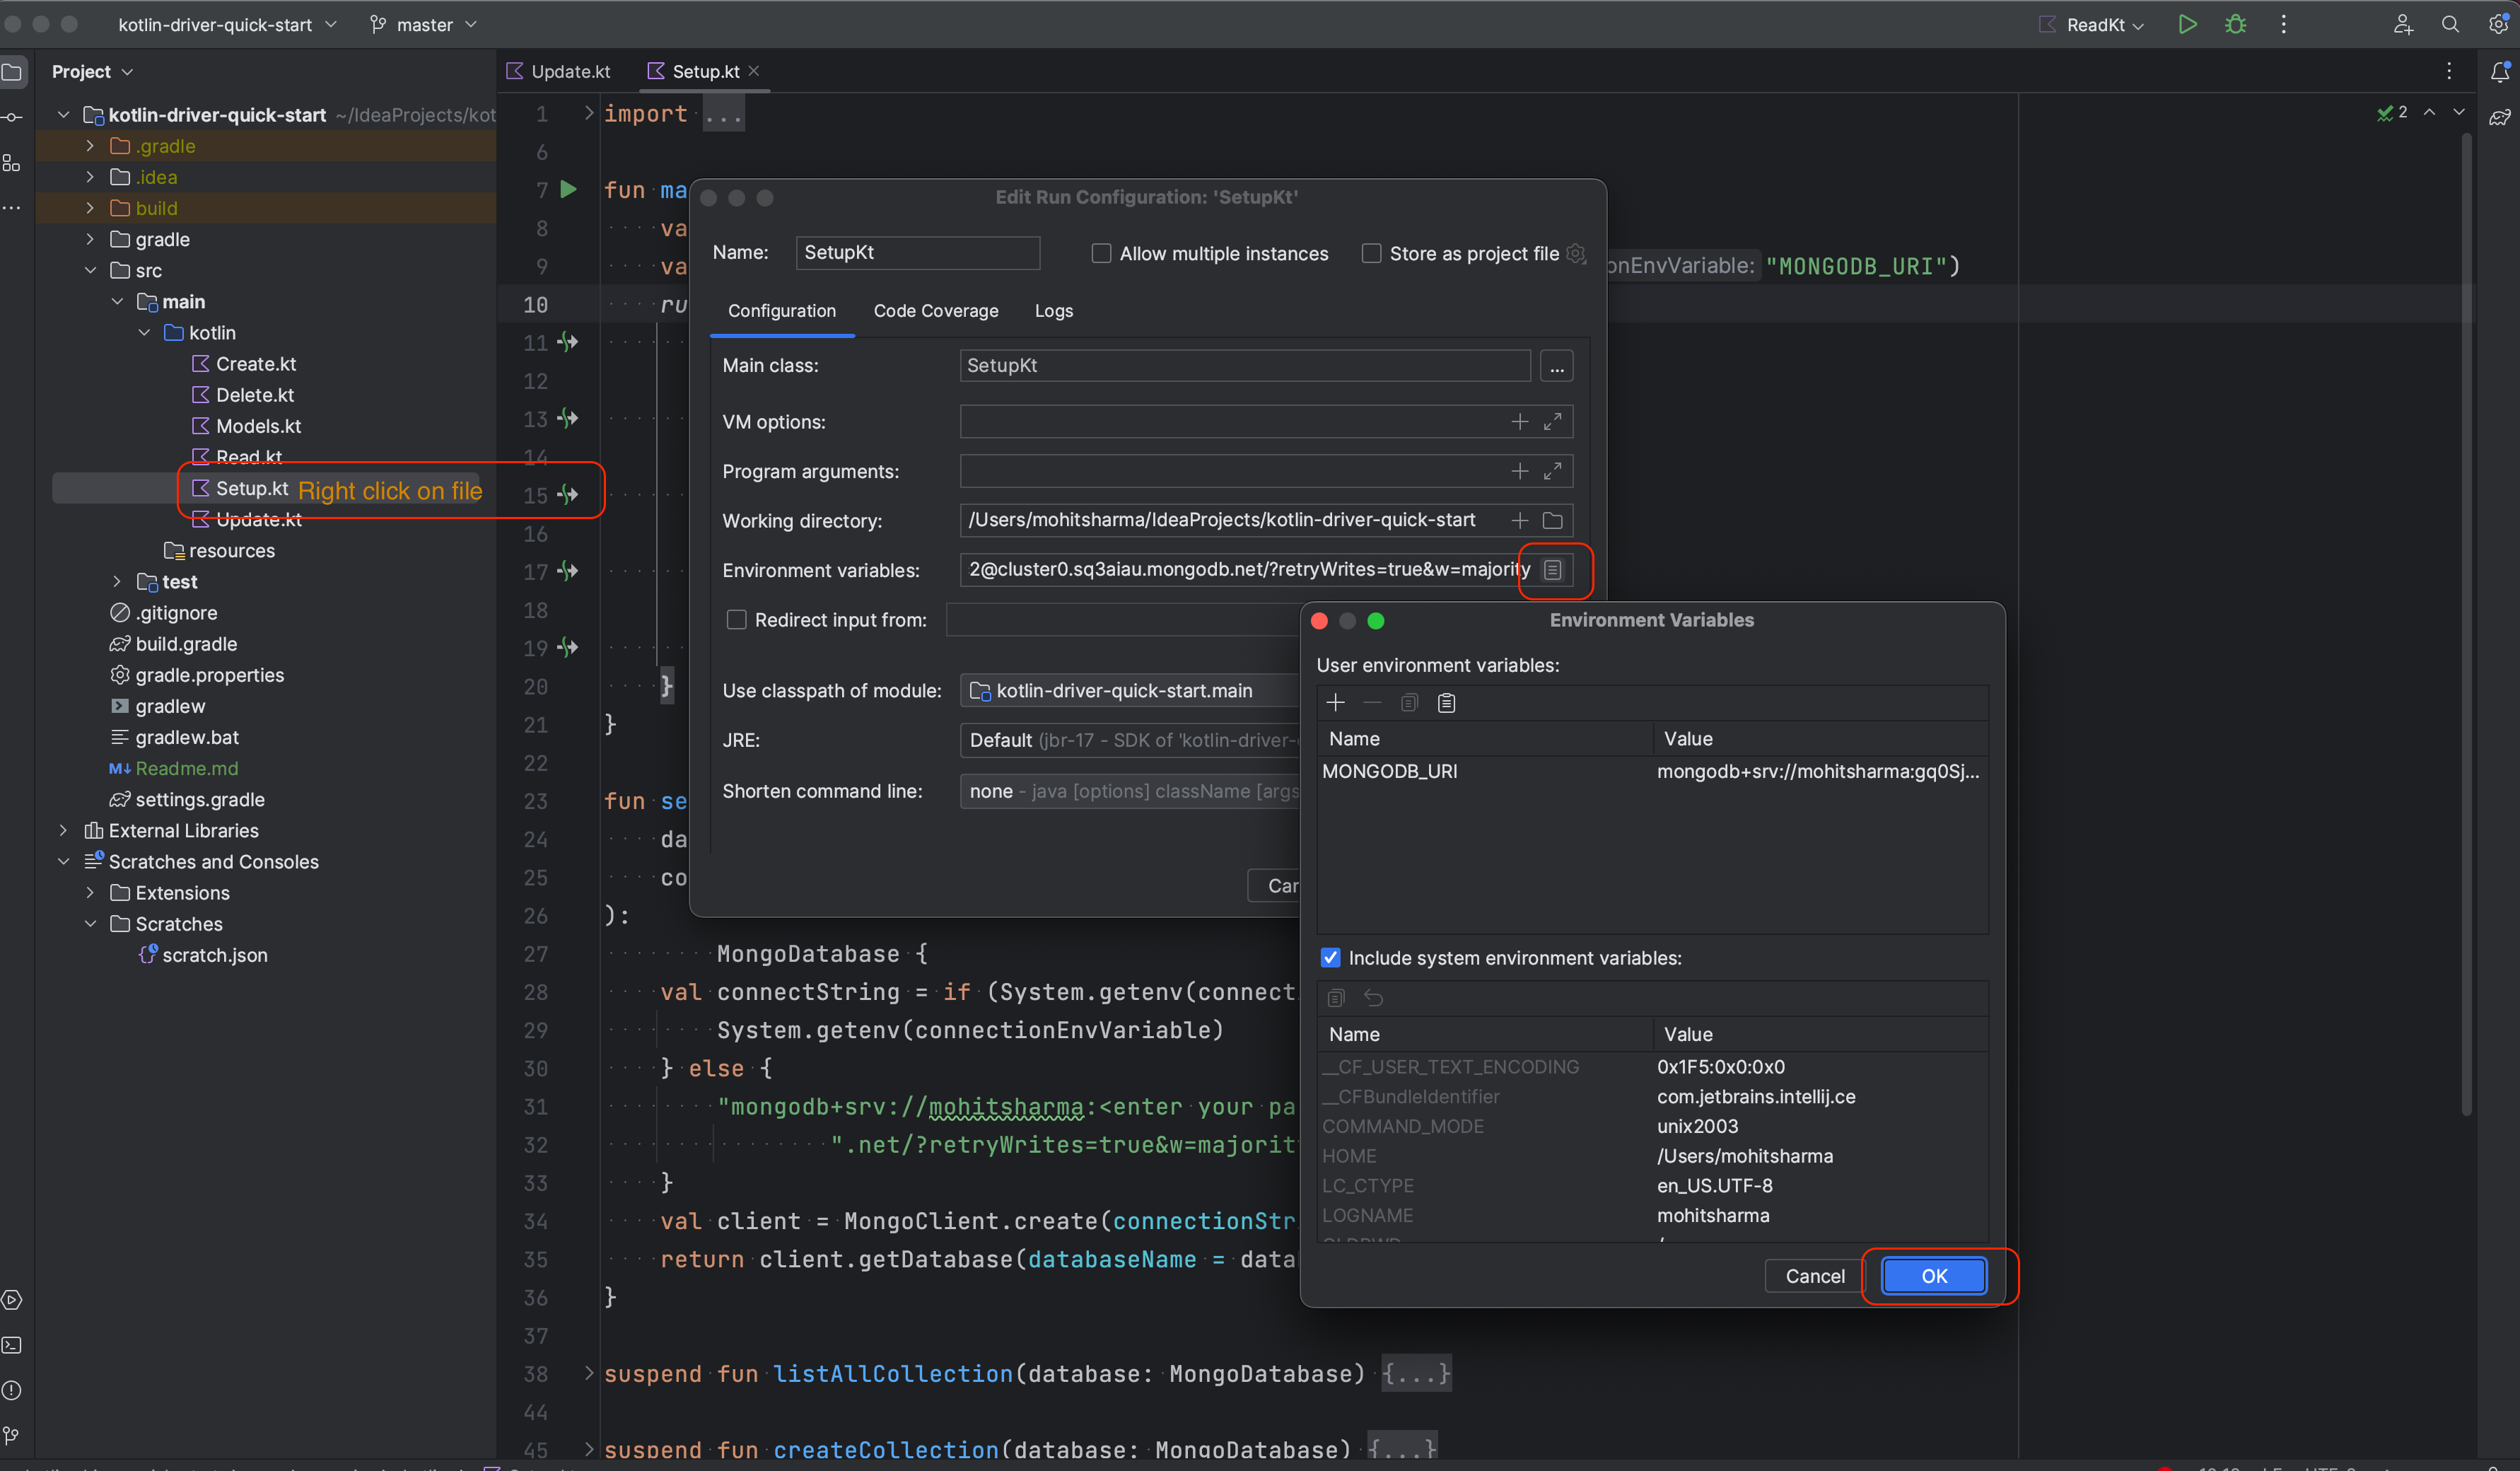
Hardcoding `connectionString` isn't a good approach and can lead to security risks or an inability to provide role-based access. To avoid such issues
and follow the best practices, we will be using environment variables. Other common approaches are the use of Vault, build configuration variables,
and CI/CD environment variables.
To add environment variables, use `Modify run configuration`, which can be found by right-clicking on the file.
Together with code to access the environment variable, our final code looks like this.
```kotlin
suspend fun setupConnection(
databaseName: String = "sample_restaurants",
connectionEnvVariable: String = "MONGODB_URI"
): MongoDatabase? {
val connectString = if (System.getenv(connectionEnvVariable) != null) {
System.getenv(connectionEnvVariable)
} else {
"mongodb+srv://:@cluster0.sq3aiau.mongodb.net/?retryWrites=true&w=majority"
}
val client = MongoClient.create(connectionString = connectString)
val database = client.getDatabase(databaseName = databaseName)
return try {
// Send a ping to confirm a successful connection
val command = Document("ping", BsonInt64(1))
database.runCommand(command)
println("Pinged your deployment. You successfully connected to MongoDB!")
database
} catch (me: MongoException) {
System.err.println(me)
null
}
}
```
> In the code snippet above, we still have the ability to use a hardcoded string. This is only done for demo purposes, allowing you to use a
> connection URI directly for ease and to run this via any online editor. But it is strongly recommended to avoid hardcoding a connection URI.
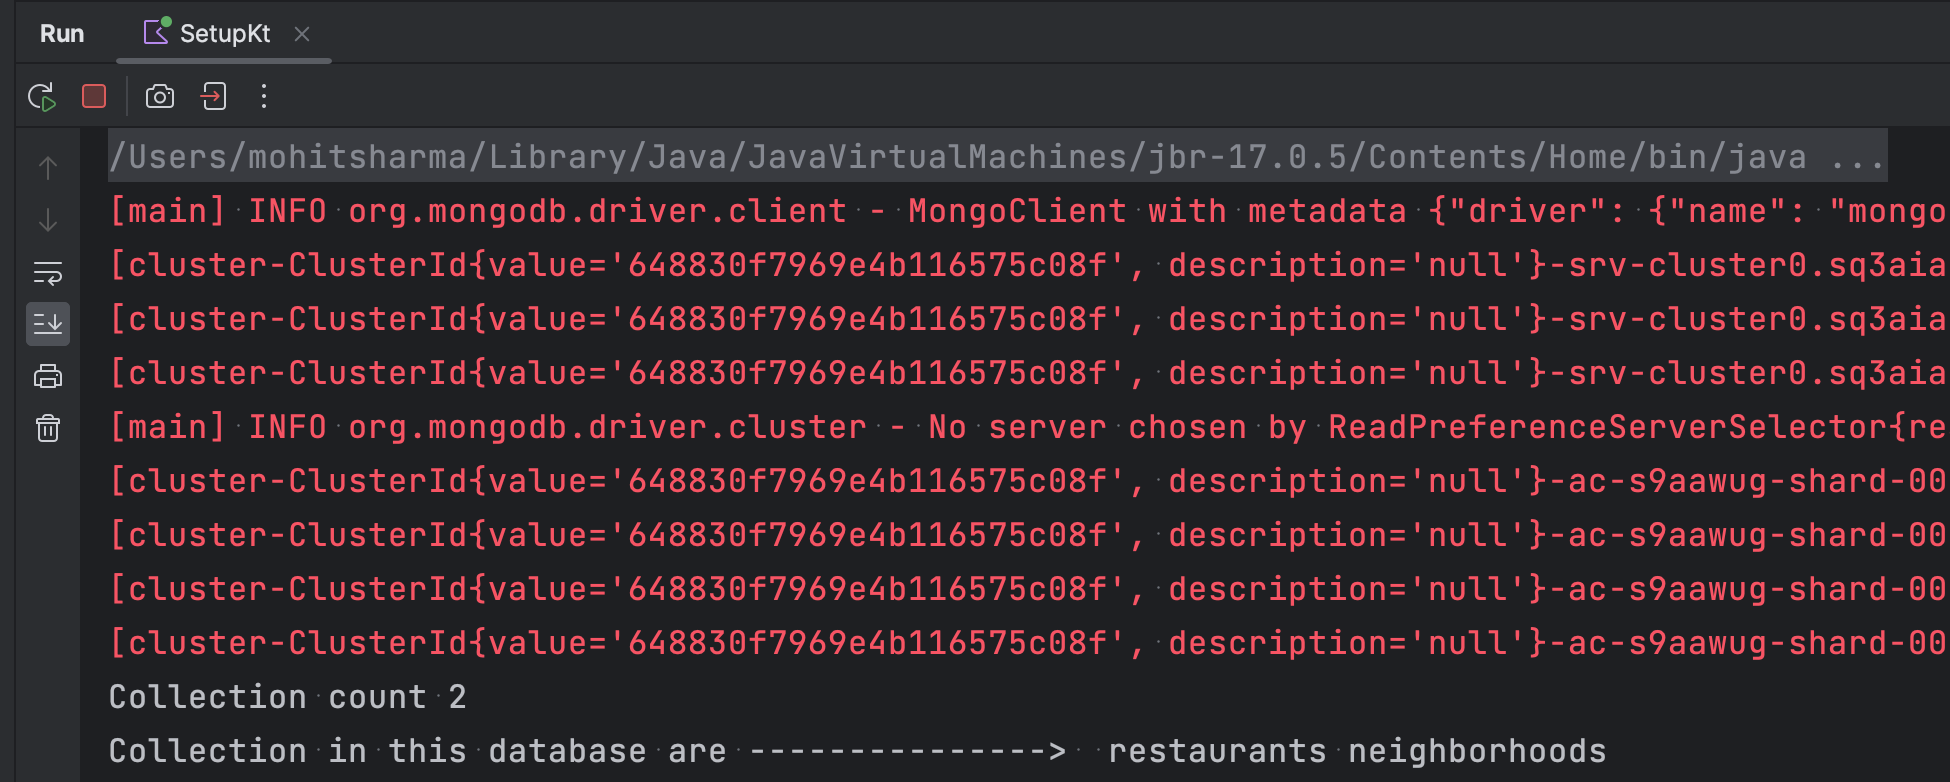
With the `setupConnection` function ready, let's test it and query the database for the collection count and name.
```kotlin
suspend fun listAllCollection(database: MongoDatabase) {
val count = database.listCollectionNames().count()
println("Collection count $count")
print("Collection in this database are -----------> ")
database.listCollectionNames().collect { print(" $it") }
}
```
Upon running that code, our output looks like this:
By now, you may have noticed that we are using the `suspend` keyword with `listAllCollection()`. `listCollectionNames()` is an asynchronous function
as it interacts with the database and therefore would ideally run on a different thread. And since the MongoDB Kotlin driver
supports [Coroutines](https://kotlinlang.org/docs/coroutines-guide.html), the
native [Kotlin asynchronous language paradigm](https://kotlinlang.org/docs/async-programming.html), we can benefit from it by using `suspend`
functions.
Similarly, to drop collections, we use the `suspend` function.
```kotlin
suspend fun dropCollection(database: MongoDatabase) {
database.getCollection(collectionName = "restaurants").drop()
}
```
With this complete, we are all set to start working on our CRUD application. So to start with, we need to create a `data` class that represents
restaurant information that our app saves into the database.
```kotlin
data class Restaurant(
@BsonId
val id: ObjectId,
val address: Address,
val borough: String,
val cuisine: String,
val grades: List,
val name: String,
@BsonProperty("restaurant_id")
val restaurantId: String
)
data class Address(
val building: String,
val street: String,
val zipcode: String,
val coord: List
)
data class Grade(
val date: LocalDateTime,
val grade: String,
val score: Int
)
```
In the above code snippet, we used two annotations:
1. `@BsonId`, which represents the unique identity or `_id` of a document.
2. `@BsonProperty`, which creates an alias for keys in the document — for example, `restaurantId` represents `restaurant_id`.
> Note: Our `Restaurant` data class here is an exact replica of a restaurant document in the sample dataset, but a few fields can be skipped or marked
> as optional — e.g., `grades` and `address` — while maintaining the ability to perform CRUD operations. We are able to do so, as MongoDB’s document
> model allows flexible schema for our data.
## Create
With all the heavy lifting done (10 lines of code for connecting), adding a new document to the database is really simple and can be done with one
line of code using `insertOne`. So, let's create a new file called `Create.kt`, which will contain all the create operations.
```kotlin
suspend fun addItem(database: MongoDatabase) {
val collection = database.getCollection(collectionName = "restaurants")
val item = Restaurant(
id = ObjectId(),
address = Address(
building = "Building", street = "street", zipcode = "zipcode", coord =
listOf(Random.nextDouble(), Random.nextDouble())
),
borough = "borough",
cuisine = "cuisine",
grades = listOf(
Grade(
date = LocalDateTime.now(),
grade = "A",
score = Random.nextInt()
)
),
name = "name",
restaurantId = "restaurantId"
)
collection.insertOne(item).also {
println("Item added with id - ${it.insertedId}")
}
}
```
When we run it, the output on the console is:

> Again, don't forget to add an environment variable again for this file, if you had trouble while running it.
If we want to add multiple documents to the collection, we can use `insertMany`, which is recommended over running `insertOne` in a loop.
```kotlin
suspend fun addItems(database: MongoDatabase) {
val collection = database.getCollection(collectionName = "restaurants")
val newRestaurants = collection.find().first().run {
listOf(
this.copy(
id = ObjectId(), name = "Insert Many Restaurant first", restaurantId = Random
.nextInt().toString()
),
this.copy(
id = ObjectId(), name = "Insert Many Restaurant second", restaurantId = Random
.nextInt().toString()
)
)
}
collection.insertMany(newRestaurants).also {
println("Total items added ${it.insertedIds.size}")
}
}
```
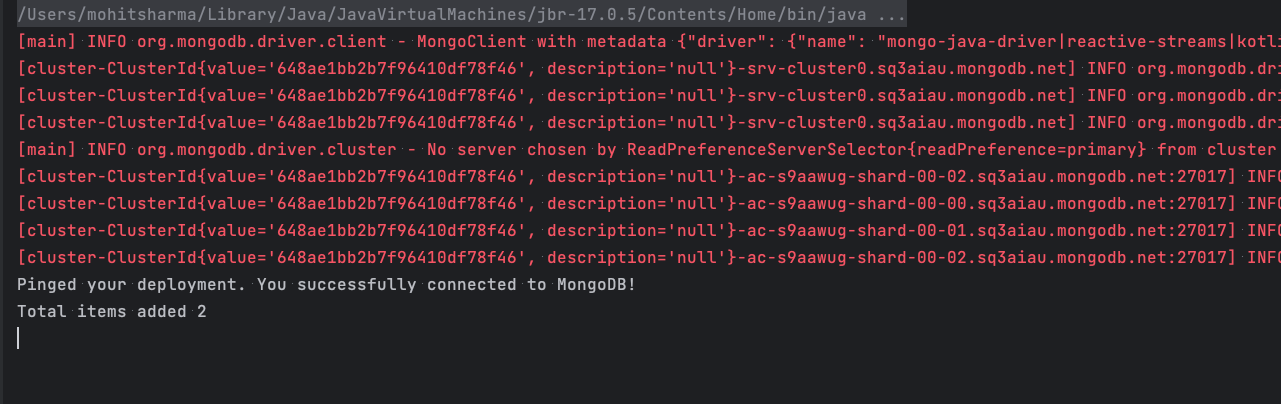
With these outputs on the console, we can say that the data has been added successfully.
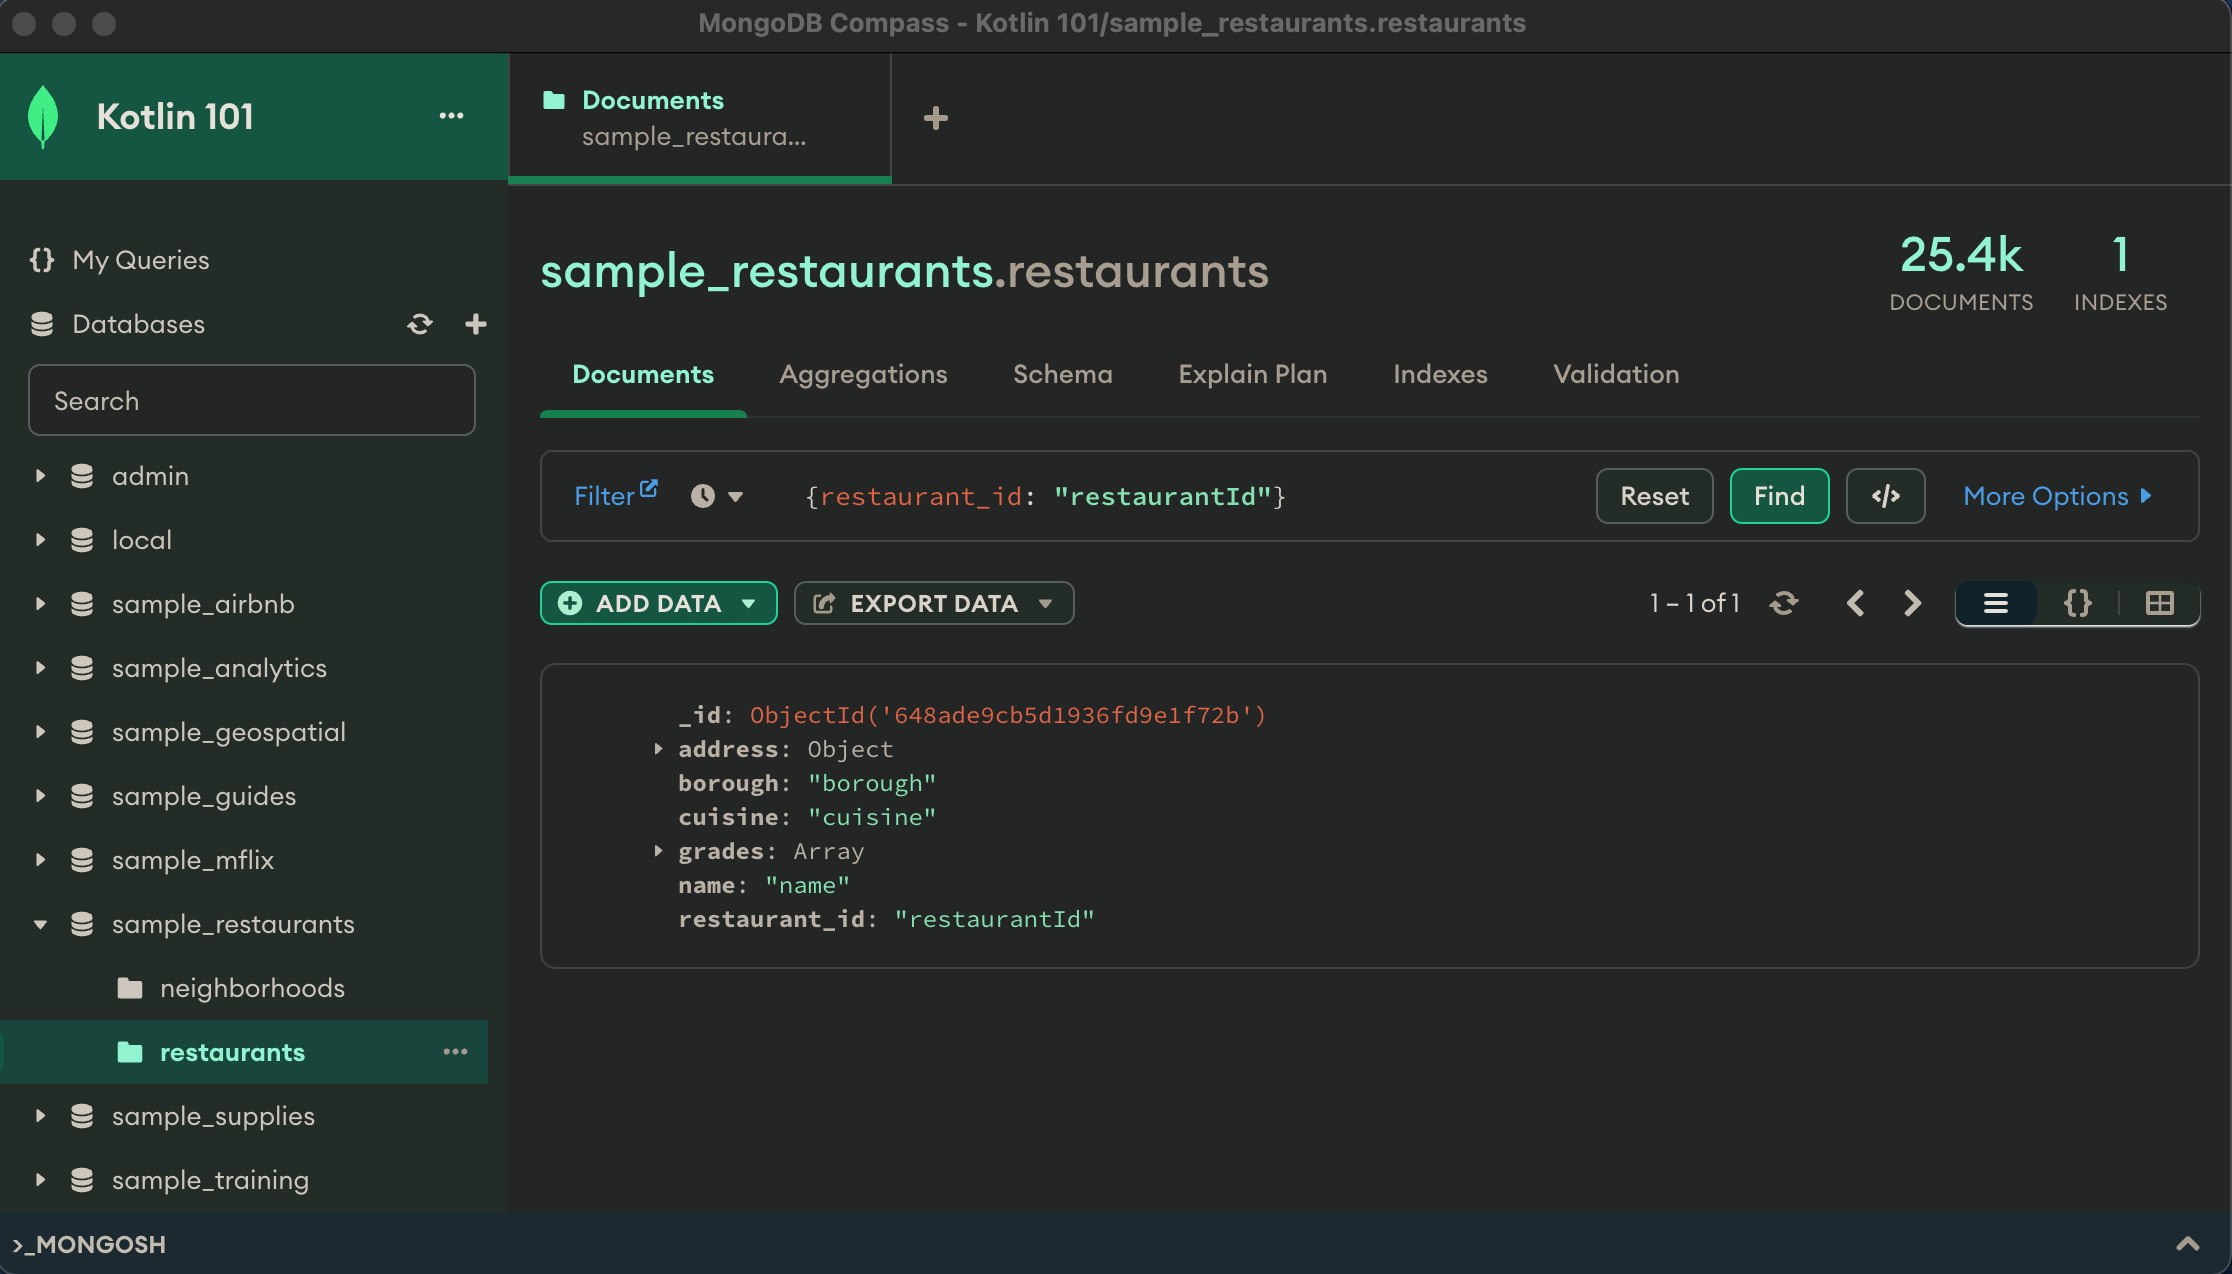
But what if we want to see the object in the database? One way is with a read operation, which we would do shortly or
use [MongoDB Compass](https://www.mongodb.com/products/compass) to view the information.
[MongoDB Compass](https://www.mongodb.com/products/compass) is a free, interactive GUI tool for querying, optimizing, and analyzing the MongoDB data
from your system. To get started, [download](https://www.mongodb.com/try/download/shell) the tool and use the `connectionString` to connect with the
database.
## Read
To read the information from the database, we can use the `find` operator. Let's begin by reading any document.
```kotlin
val collection = database.getCollection(collectionName = "restaurants")
collection.find().limit(1).collect {
println(it)
}
```
The `find` operator returns a list of results, but since we are only interested in a single document, we can use the `limit` operator in conjunction
to limit our result set. In this case, it would be a single document.
If we extend this further and want to read a specific document, we can add filter parameters over the top of it:
```kotlin
val queryParams = Filters
.and(
listOf(
eq("cuisine", "American"),
eq("borough", "Queens")
)
)
```
Or, we can use any of the operators from our [list](https://www.mongodb.com/docs/manual/reference/operator/query/). The final code looks like this.
```kotlin
suspend fun readSpecificDocument(database: MongoDatabase) {
val collection = database.getCollection(collectionName = "restaurants")
val queryParams = Filters
.and(
listOf(
eq("cuisine", "American"),
eq("borough", "Queens")
)
)
collection
.find(queryParams)
.limit(2)
.collect {
println(it)
}
}
```
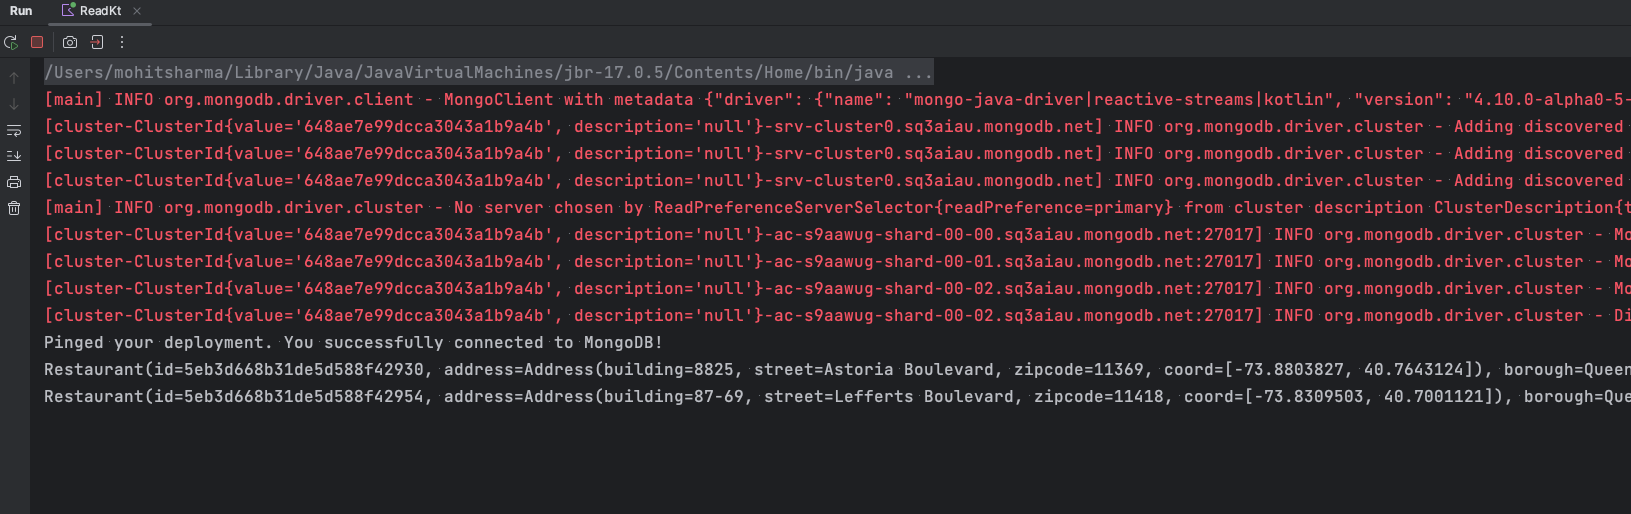
For the output, we see this:
> Don't forget to add the environment variable again for this file, if you had trouble while running it.
Another practical use case that comes with a read operation is how to add pagination to the results. This can be done with the `limit` and `offset`
operators.
```kotlin
suspend fun readWithPaging(database: MongoDatabase, offset: Int, pageSize: Int) {
val collection = database.getCollection(collectionName = "restaurants")
val queryParams = Filters
.and(
listOf(
eq(Restaurant::cuisine.name, "American"),
eq(Restaurant::borough.name, "Queens")
)
)
collection
.find(queryParams)
.limit(pageSize)
.skip(offset)
.collect {
println(it)
}
}
```
But with this approach, often, the query response time increases with value of the `offset`. To overcome this, we can benefit by creating an `Index`,
as shown below.
```kotlin
val collection = database.getCollection(collectionName = "restaurants")
val options = IndexOptions().apply {
this.name("restaurant_id_index")
this.background(true)
}
collection.createIndex(
keys = Indexes.ascending("restaurant_id"),
options = options
)
```
## Update
Now, let's discuss how to edit/update an existing document. Again, let's quickly create a new Kotlin file, `Update.Kt`.
In general, there are two ways of updating any document:
* Perform an **update** operation, which allows us to update specific fields of the matching documents without impacting the other fields.
* Perform a **replace** operation to replace the matching document with the new document.
For this exercise, we'll use the document we created earlier with the create operation `{restaurant_id: "restaurantId"}` and update
the `restaurant_id` with a more realistic value. Let's split this into two sub-tasks for clarity.
First, using `Filters`, we query to filter the document, similar to the read operation earlier.
```kotlin
val collection = db.getCollection("restaurants")
val queryParam = Filters.eq("restaurant_id", "restaurantId")
```
Then, we can set the `restaurant_id` with a random integer value using `Updates`.
```kotlin
val updateParams = Updates.set("restaurant_id", Random.nextInt().toString())
```
And finally, we use `updateOne` to update the document in an atomic operation.
```kotlin
collection.updateOne(filter = queryParam, update = updateParams).also {
println("Total docs modified ${it.matchedCount} and fields modified ${it.modifiedCount}")
}
```
In the above example, we were already aware of which document we wanted to update — the restaurant with an id `restauratantId` — but there could be a
few use cases where that might not be the situation. In such cases, we would first look up the document and then update it. `findOneAndUpdate` can be
handy. It allows you to combine both of these processes into an atomic operation, unlocking additional performance.
Another variation of the same could be updating multiple documents with one call. `updateMany` is useful for such use cases — for example, if we want
to update the `cuisine` of all restaurants to your favourite type of cuisine and `borough` to Brooklyn.
```kotlin
suspend fun updateMultipleDocuments(db: MongoDatabase) {
val collection = db.getCollection("restaurants")
val queryParam = Filters.eq(Restaurant::cuisine.name, "Chinese")
val updateParams = Updates.combine(
Updates.set(Restaurant::cuisine.name, "Indian"),
Updates.set(Restaurant::borough.name, "Brooklyn")
)
collection.updateMany(filter = queryParam, update = updateParams).also {
println("Total docs matched ${it.matchedCount} and modified ${it.modifiedCount}")
}
}
```
In these examples, we used `set` and `combine` with `Updates`. But there are many more types of update operator to explore that allow us to do many
intuitive operations, like set the currentDate or timestamp, increase or decrease the value of the field, and so on. To learn more about the different
types of update operators you can perform with Kotlin and MongoDB, refer to
our [docs](https://mongodb.github.io/mongo-java-driver/4.9/apidocs/mongodb-driver-core/com/mongodb/client/model/Updates.html).
## Delete
Now, let's explore one final CRUD operation: delete. We'll start by exploring how to delete a single document. To do this, we'll
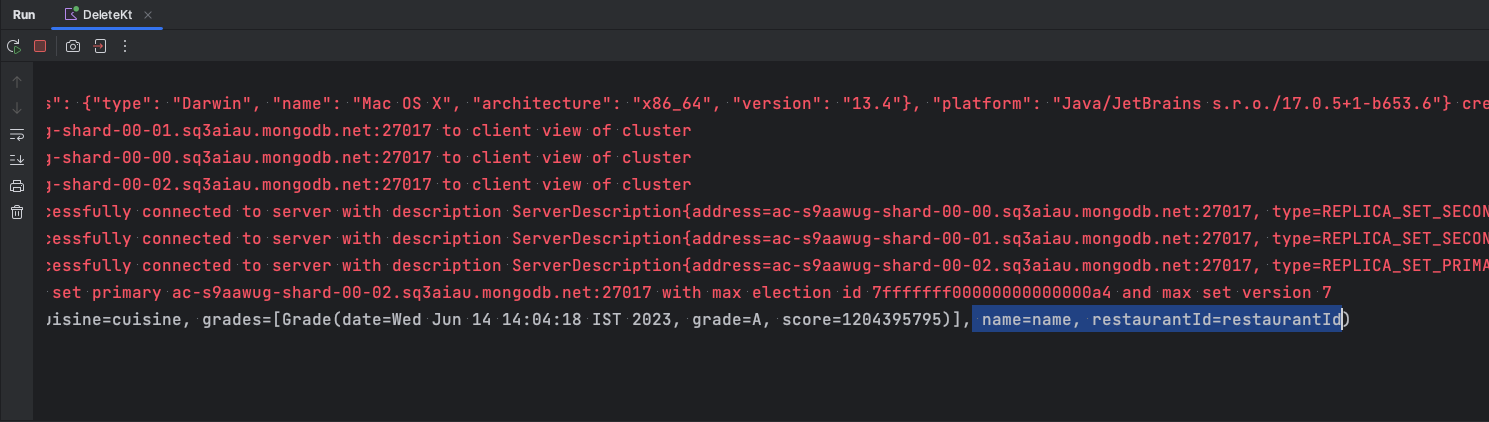
use `findOneAndDelete` instead of `deleteOne`. As an added benefit, this also returns the deleted document as output. In our example, we delete the
restaurant:
```kotlin
val collection = db.getCollection(collectionName = "restaurants")
val queryParams = Filters.eq("restaurant_id", "restaurantId")
collection.findOneAndDelete(filter = queryParams).also {
it?.let {
println(it)
}
}
```
To delete multiple documents, we can use `deleteMany`. We can, for example, use this to delete all the data we created earlier with our create
operation.
```kotlin
suspend fun deleteRestaurants(db: MongoDatabase) {
val collection = db.getCollection(collectionName = "restaurants")
val queryParams = Filters.or(
listOf(
Filters.regex(Restaurant::name.name, Pattern.compile("^Insert")),
Filters.regex("restaurant_id", Pattern.compile("^restaurant"))
)
)
collection.deleteMany(filter = queryParams).also {
println("Document deleted : ${it.deletedCount}")
}
}
```
## Summary
Congratulations! You now know how to set up your first Kotlin application with MongoDB and perform CRUD operations. The complete source code of the
app can be found on [GitHub](https://github.com/mongodb-developer/kotlin-driver-quick-start).
If you have any feedback on your experience working with the MongoDB Kotlin driver, please submit a comment in our
user [feedback portal](https://feedback.mongodb.com/) or reach out to me on Twitter: [@codeWithMohit](https://twitter.com/codeWithMohit).