https://github.com/mongoose-os-apps/aws-iot-heater
https://github.com/mongoose-os-apps/aws-iot-heater
Last synced: about 2 months ago
JSON representation
- Host: GitHub
- URL: https://github.com/mongoose-os-apps/aws-iot-heater
- Owner: mongoose-os-apps
- License: other
- Created: 2017-07-13T08:33:24.000Z (almost 8 years ago)
- Default Branch: master
- Last Pushed: 2020-08-20T19:02:42.000Z (almost 5 years ago)
- Last Synced: 2025-04-18T06:51:22.017Z (about 2 months ago)
- Language: JavaScript
- Size: 74.2 KB
- Stars: 27
- Watchers: 8
- Forks: 5
- Open Issues: 3
-
Metadata Files:
- Readme: README.md
- License: LICENSE
Awesome Lists containing this project
- awesome-mongoose-os - aws-iot-heater
README
# AWS IoT Smart Heater
This is a "Smart Heater" example: the heater device reports current
temperature, responds to the status requests and to the heater on/off command.
[](https://www.youtube.com/watch?v=QZPxkN_K_NI)
## Prerequisites
- Hardware: ESP8266 NodeMCU
- Amazon AWS account
- Amazon's `aws` management tool (see https://aws.amazon.com/cli)
- `mos` management tool installed
(see [mos installation guide](https://mongoose-os.com/software.html))
## Architecture

The data flow is as follows:
- A device uses I2C temperature sensor and sends data to the AWS IoT periodically
- An AWS IoT rule intercepts temperature data and stores it into the DynamoDB table
- A device gets synchronised with its AWS IoT shadow
- A frontend with OAuth is running on AWS S3, talking to the device shadow
to either get the device state, or set the device state (turn it on/off)
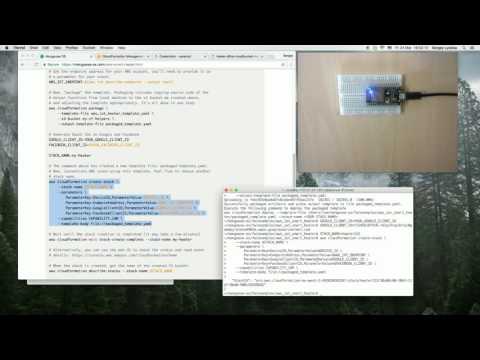
## Build instructions (Mac/Linux)
First of all, you'll need to create Google and/or Facebook OAuth2 Client,
so that users will be able to login into the heater application.
For Google: visit [Google Cloud Console](https://console.cloud.google.com/apis/credentials),
click Create credentials -> OAuth client ID -> Web application,
and enter some name, e.g. "AWS Heater", and click "Create".
It will show your client ID and secret; copy client ID, you'll need it soon.
And don't close the tab for now: when your stack is instantiated,
you'll need to get back here and enter the Authorized JavaScript origin.
For Facebook: visit [Facebook Apps](https://developers.facebook.com/apps),
click "Add a New App", enter some name, like, "My Heater", pick a category,
click "Create App ID". When the app creation is done, you'll see the app
dashboard. Don't close the tab for now: when your stack is instantiated,
you'll need to get back here and enter the Website URL.
```bash
git clone https://github.com/mongoose-os-apps/aws-iot-heater # Clone repo
cd aws-iot-heater
mos flash aws-esp8266 # Install Mongoose OS
DEVICE_ID=$(mos config-get device.id) # Get device ID
mos put fs/init.js # Copy init.js on the device
mos config-set mqtt.enable=true # Enable MQTT
mos wifi WIFI_SSID WIFI_PASSWORD # Setup WiFi
mos aws-iot-setup --aws-iot-policy=mos-default # Provision on AWS IoT
npm --prefix helpers/cloudformation-helpers install helpers/cloudformation-helpers
# We'll also need to create a separate S3 bucket for helper functions:
aws s3 mb s3://my-cf-helpers
# Get the endpoint address for your AWS account, you'll need to provide it as
# a parameter for your stack:
AWS_IOT_ENDPOINT=$(aws iot describe-endpoint --output text)
# Now, "package" the template. Packaging includes copying source code of the
# helper functions from local machine to the s3 bucket we created above,
# and adjusting the template appropriately. It's all done in one step:
aws cloudformation package \
--template-file aws_iot_heater_template.yaml \
--s3-bucket my-cf-helpers \
--output-template-file packaged_template.yaml
# Generate Oauth IDs on Google and Facebook
GOOGLE_CLIENT_ID=YOUR_GOOGLE_CLIENT_ID
FACEBOOK_CLIENT_ID=YOUR_FACEBOOK_CLIENT_ID
STACK_NAME=my-heater
# The command above has created a new template file: packaged-template.yaml.
# Now, instantiate AWS stack using this template. Feel free to choose another
# stack name.
aws cloudformation create-stack \
--stack-name $STACK_NAME \
--parameters \
ParameterKey=DeviceID,ParameterValue=$DEVICE_ID \
ParameterKey=EndpointAddress,ParameterValue=$AWS_IOT_ENDPOINT \
ParameterKey=GoogleClientID,ParameterValue=$GOOGLE_CLIENT_ID \
ParameterKey=FacebookClientID,ParameterValue=$FACEBOOK_CLIENT_ID \
--capabilities CAPABILITY_IAM \
--template-body file://packaged_template.yaml
# Wait until the stack creation is completed (it may take a few minutes).
aws cloudformation wait stack-create-complete --stack-name my-heater
# Alternatively, you can use the web UI to check the status and read event
# details: https://console.aws.amazon.com/cloudformation/home
# When the stack is created, get the name of the created S3 bucket:
aws cloudformation describe-stacks --stack-name $STACK_NAME
# look for the following:
# ...
# {
# "Description": "Name of the newly created S3 bucket",
# "OutputKey": "S3BucketName",
# "OutputValue": "S3_BUCKET_NAME"
# },
# {
# "Description": "URL of the s3 bucket",
# "OutputKey": "S3BucketWebsite",
# "OutputValue": "APP_URL"
# }
# ...
S3_BUCKET_NAME=GENERATED_S3_BUCKET_NAME
APP_URL=GENERATED_APP_URL
# $S3_BUCKET_NAME is the name of the bucket, and $APP_URL is the URL at
# which your files can be accessed.
#
# Copy the actual value of "$APP_URL", and then enter it in the Google and/or
# Facebook app settings: For Google: go back to the Google Console, and add the
# URL as an Authorized JavaScript origin. For Facebook: go back to the app's
# dashboard, click "Settings" in the sidebar, then click "Add Platform" at the
# bottom, select "Website", and enter Site URL.
#
# Then, copy the actual value of "$S3_BUCKET_NAME" (from the describe-stacks
# output), and use it to put two files on the S3 bucket:
aws s3 cp bucket/index.html s3://$S3_BUCKET_NAME --acl public-read
aws s3 cp bucket/index.js s3://$S3_BUCKET_NAME --acl public-read
# Download two files of Cognito SDK, and also put them on the S3 bucket:
curl -O https://raw.githubusercontent.com/aws/amazon-cognito-identity-js/master/dist/aws-cognito-sdk.min.js
curl -O https://raw.githubusercontent.com/aws/amazon-cognito-identity-js/master/dist/amazon-cognito-identity.min.js
aws s3 cp aws-cognito-sdk.min.js s3://$S3_BUCKET_NAME --acl public-read
aws s3 cp amazon-cognito-identity.min.js s3://$S3_BUCKET_NAME --acl public-read
# Now, navigate to the index page of your app $APP_URL.
```
You'll see latest graph of the temperature reported from the device, current
heater status (on/off), and the switch. Switching the heater is possible only
for authenticated and authorized users; click "Sign in with Google".
NOTE: if it complains about mismatched redirect URI, just wait a couple of
minutes: the settings in Google Console might need some time to take effect.
If you try to switch the heater status, you'll get the message saying that you
are not authorized to do that. Now, you need to authorize your user to manage
heater.
For that, navigate to the [AWS Cognito console](https://console.aws.amazon.com/cognito/home), click "Manage Federated
Identities", select "identity_pool_for_DEVICE_ID", click "Edit identity pool",
expand "Authentication providers", click on the "Google+" tab, and in the
section "Authenticated role selection" change "Use default role" to "Choose role
with rules". Here, you can use whatever rule you want. For example, in order to
authorize some particular user, you can specify Claim: "email", match type:
"Equals", value: "[email protected]", and pick a role "my-heater-
myHeaterAdminRole-XXXXXXXX".
After that, you can sign out from your heater app, sign in back, and switching
the heater should result in the state being changed.