https://github.com/muhfalihr/pygdtelebot
PyGDTelebot is a versatile Telegram bot meticulously crafted in Python programming language, designed to streamline the process of sharing media content from Instagram to Telegram. This bot offers users a unique experience by simplifying the interaction between Instagram and Telegram.
https://github.com/muhfalihr/pygdtelebot
instagram-api python3 scraping scrapping-python telegram-bot telegram-bot-api
Last synced: 10 months ago
JSON representation
PyGDTelebot is a versatile Telegram bot meticulously crafted in Python programming language, designed to streamline the process of sharing media content from Instagram to Telegram. This bot offers users a unique experience by simplifying the interaction between Instagram and Telegram.
- Host: GitHub
- URL: https://github.com/muhfalihr/pygdtelebot
- Owner: muhfalihr
- License: mit
- Created: 2024-02-01T10:01:33.000Z (over 2 years ago)
- Default Branch: master
- Last Pushed: 2024-03-13T05:11:32.000Z (over 2 years ago)
- Last Synced: 2025-04-06T11:13:16.925Z (about 1 year ago)
- Topics: instagram-api, python3, scraping, scrapping-python, telegram-bot, telegram-bot-api
- Language: Python
- Homepage:
- Size: 94.7 KB
- Stars: 0
- Watchers: 1
- Forks: 0
- Open Issues: 0
-
Metadata Files:
- Readme: README.md
- License: LICENSE
Awesome Lists containing this project
README
# PyGDTelebot

## Description
**PyGDTelebot** is a versatile Telegram bot meticulously crafted in Python programming language, designed to streamline the process of sharing media content from Instagram to Telegram. This bot offers users a unique experience by simplifying the interaction between Instagram and Telegram, making it both easy and swift.
The primary features of PyGDTelebot revolve around the seamless delivery of photos and videos from Instagram posts. Users can effortlessly send links to their desired Instagram posts, and the bot will automatically fetch the relevant media, sending it directly to the user's Telegram chat.
Key highlights of PyGDTelebot include:
1. **User-Friendly Interface:** A simple user interface ensures that users can interact with the bot effortlessly, without encountering any complexities.
2. **Dual Media Delivery Functionality:** PyGDTelebot supports the transmission of both photos and videos, allowing users to share visual content with their Telegram contacts.
3. **Swift Processing:** Thanks to the use of the Python programming language, the bot offers fast and responsive performance in fetching and delivering media from Instagram.
4. **Security and Privacy:** PyGDTelebot is designed with a focus on user security and privacy. No personal data is stored or shared without explicit permission.
5. **Clear Documentation:** PyGDTelebot comes equipped with comprehensive documentation, facilitating users in understanding how to use the bot and leverage its provided features.
With PyGDTelebot, users can experience the convenience and speed of sharing media content from Instagram to Telegram, creating a more enjoyable and efficient content-sharing experience.
## Requirements
- **Python**
Already installed Python with version 3.10.12. See the [Installation and Setting up Python](https://github.com/muhfalihr/PyGDTelebot/tree/master?tab=readme-ov-file#installation-of-python-31012).
- **Telebot (Telegram Bot)**
Already have a telegram bot. If you don't have one, you can follow the [steps for creating a Telegram Bot](https://github.com/muhfalihr/PyGDTelebot/tree/master?tab=readme-ov-file#create-a-telegram-bot).
- **Crontab**
Create a crontab to run the script every time it is used without having to execute it every time in the terminal console. See the steps [create Cron Job](https://github.com/muhfalihr/PyGDTelebot/tree/master?tab=readme-ov-file#create-crontab)
## Clone the repository to your directory
```sh
# Change Directory
cd /path/to/yourdirectory
# Install gh
sudo apt install gh
# Auth gh
gh auth login
# Clonig Repository
gh repo clone muhfalihr/PyGDTelebot
# Change Directory
cd PyGDTelebot/
```
## Installation of Python 3.10.12
- Install Python version 3.
```sh
apt install python3
```
- Instal Virtual environment for Python version 3.
```sh
apt install python3-venv
```
- Create a Python virtual environment using the venv module.
```sh
python3 -m venv .venv/my-venv
```
- Install the python package according to the requirements.txt file.
```sh
.venv/my-venv/bin/pip install -r requirements.txt
```
## How to use ?
1. You need to give execute permission to the Python file. Use the following command in terminal or command prompt:
```sh
chmod +x pgdbot
```
2. Create an _.env_ file and enter the values as follows:
```.env
TELEBOT_TOKEN=YOUR-TOKEN-TELEBOT
IG_COOKIE='YOUR-TWITTER-COOKIE'
```
3. [Create and run Crontab](https://github.com/muhfalihr/PyGDTelebot/tree/master?tab=readme-ov-file#create-crontab).
## Create a Telegram Bot
- How to Get Your Bot Token
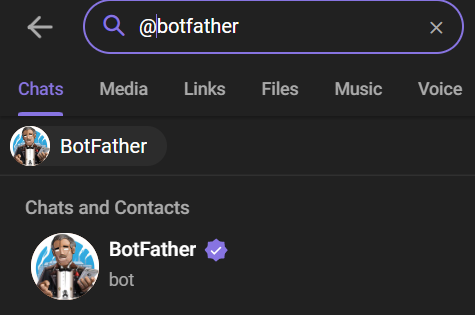
To set up a new bot, you will need to talk to BotFather. No, he’s not a person – he’s also a bot, and he's the boss of all the Telegram bots.
1. Search for **_@botfather_** in Telegram.
2. Start a conversation with BotFather by clicking on the Start button.

3. Type _/newbot_, and follow the prompts to set up a new bot. The BotFather will give you a token that you will use to authenticate your bot and grant it access to the Telegram API.

**Note**: Make sure you store the token securely. Anyone with your token access can easily manipulate your bot.
- For more details, see the [freeCodeCamp website](https://www.freecodecamp.org/news/how-to-create-a-telegram-bot-using-python/).
## Create Crontab
- Check Crontab Contents
Use the command to view the contents of the crontab:
```sh
cat /etc/crontab
```
This will display the contents of the system crontab. Make sure that no errors appear and that the crontab contains the appropriate entries.
- Create Crontab
If a crontab has not been created for that user, you can try creating one with the command:
```sh
crontab -e -u [username]
```
or
```sh
export VISUAL=nano; crontab -e
```
Replace `[username]` with the appropriate username. Then select number 1 for the crontab file editor.
- Add Cron Entry
Each line in the crontab represents a scheduled job. The general format is:
```sh
m h dom mon dow command
```
- `m`: Minutes (0 - 59)
- `h`: Hour (0 - 23)
- `dom`: Date of month (1 - 31)
- `mon`: Month (1 - 12)
- `dow`: Day of the week (0 - 6, 0 = Sunday)
- `command`: The command or script to run
Usage example for running a Python script:
```
* * * * * /path/to/PyGDTelebot/pgdbot
```
This means that the `prc` script will be run every minute, every hour, every month, each month, and every day of the week.
- Save and Exit
Save changes and exit the editor.
- In the `nano editor`, press _Ctrl + X_, then follow the instructions to save.
- In `vim`, press _Esc_, then type _:wq_ and press _Enter_.
- Check Access Rights
Make sure that the user in question has access rights to use crontab. Check if the user belongs to the `crontab` group:
```sh
grep cron /etc/group
```
If there are no problems, the user should usually be able to use crontab.
- Cron Job Verification
To ensure the cron job has been added, use the following command:
```sh
crontab -l
```
This will display all active cron entries.
If you get the message "no crontab for [username]" when running `crontab -l`, it means there is no crontab configured for that user.
- Restart Crontab
```sh
systemctl restart cron.service
```
- Start Crontab
```sh
systemctl start cron.service
```
- Stop Crontab
```sh
systemctl start cron.service
```
## License
The PyGDTelebot project is licensed by [MIT License](https://github.com/muhfalihr/PyGDTelebot/blob/master/LICENSE).